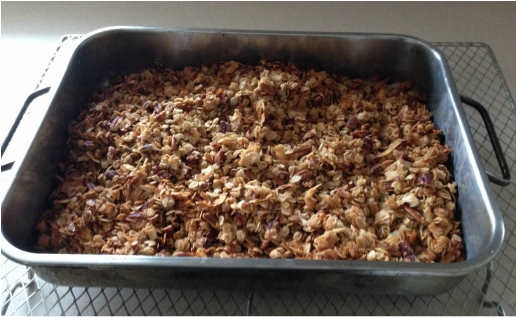
 I hope everyone is enjoying a wonderful weekend with some sunny weather! I just wanted to share this super easy granola recipe with you, it is so easy that there is no reason to buy granola and so tasty that you will have snackers attacking it right out of the oven! It is one of my treasured family recipes, no kidding it's in my "book" and if it is there it's good, but you will have to try it to see if it makes the cut for you and I believe it will!  my special recipe book where I put all my favourites You will need:
How to make it: Pre heat your oven to 350 degrees Mix all ingredients together well and pour into a 13 x 18" pan and stir occasionally while it is cooking for about 35-45 minutes. It should be golden brown. Allow to cool, stir occasionally and store in an air tight container. It is so simple to make, makes a large quantity all at once and has all natural ingredients. You never know what is in granola that is purchased at the store. Preservatives? 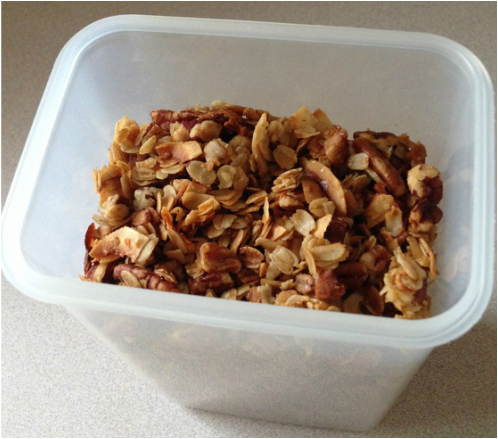 Simple goodness and great with cereal, fruit or yogurt. 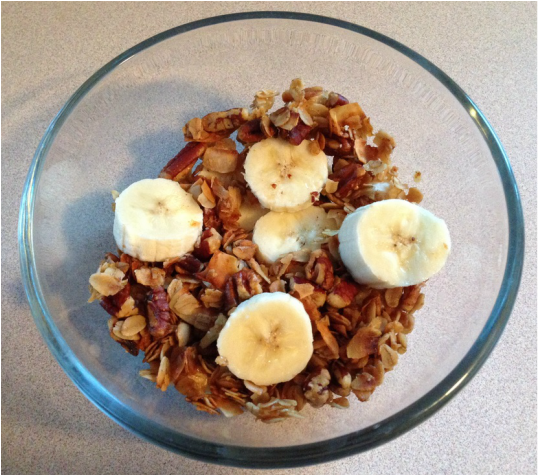 Happy Sunday!☀️😊
0 Comments
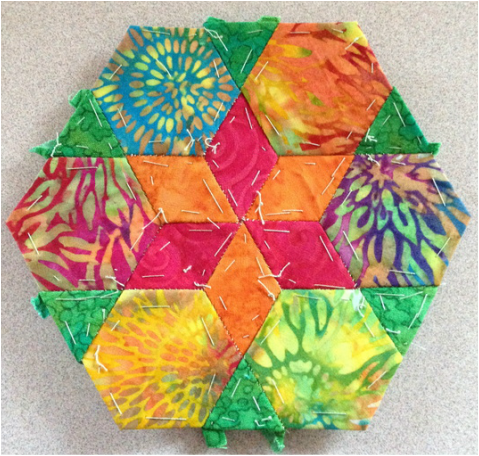 Block # 15 Lorna- So bright and spring like! Hi everyone, the above is my most recent block - "Lorna" the hexagons are made from one beautiful batik! I know it looks like 6 different fabrics, but it is only one. The diamonds and triangles are made from individual fabrics. I was thinking about sun shine and warmer weather when I made it. ☀️ This of course is from the book below and if you click on the book below you can find out where to get it, if you wish to join our quilt along or just enjoy this great book. 15 down, 37 more to go, but that is not overwhelming as they are fun to make! 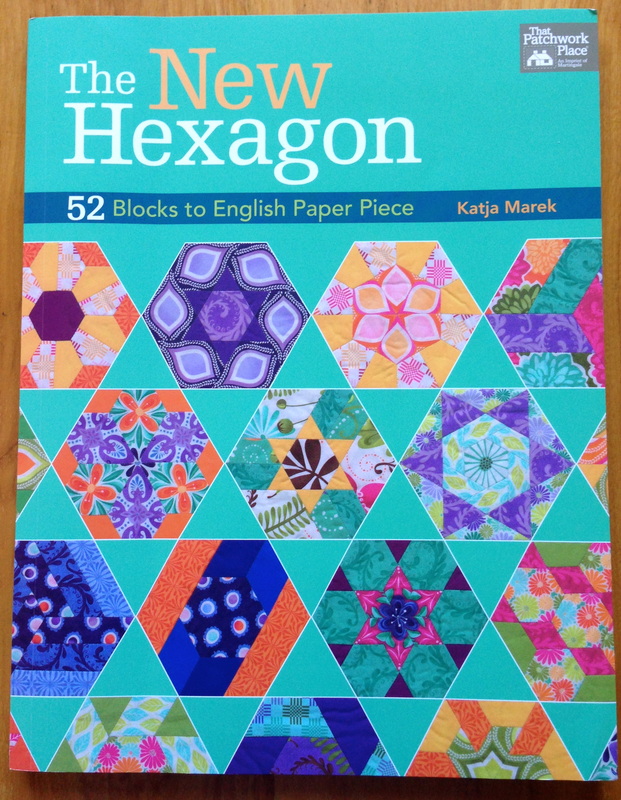 See the inaugural post with information about this quilt along here
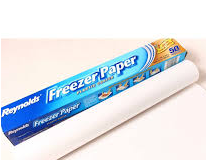
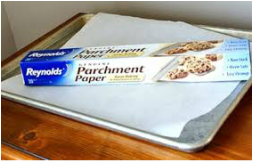
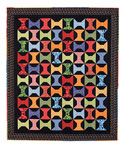
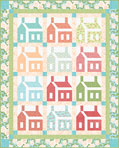
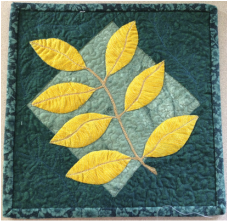
Happy Wednesday !❤️ 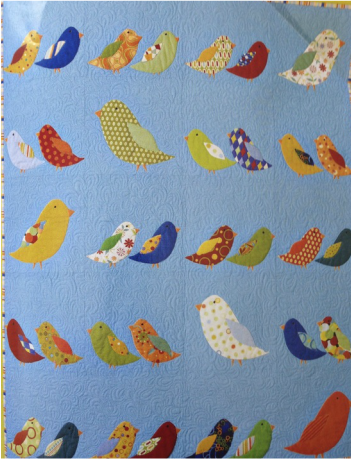 Kevin Kosbab Designer- Birds of a Feather from Feed Dog Designs I found this quilt in the magazine I purchased some time ago "Make It Modern" Better Homes and Garden Jan 2013. The designer is Kevin Kosbab of Feed Dog Designs. I have wanted to do something with it since I got the magazine because it's adorable, cheerful, springlike and colourful and there is lots of quilting space. I also wanted to share with you my method for appliqués to avoid my directional issues with reversing designs for fusible appliqué...... and I use freezer paper. I am making a personal project with the birds but you could use any appliqué design. Your main tools will be Reynolds white Freezer Paper, a sharpie marker, fabric, parchment paper, an iron and Fusible Web
How Make Appliques with Freezer and Parchment Paper 1) Trace your appliqué design using a piece of freezer paper (on the dull/matte side) and a permanent marker, the way it is shown facing you. Cut it out roughly 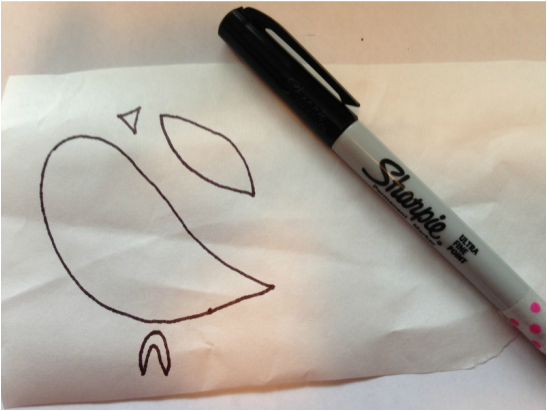 Draw the design on the matte side of freezer paper 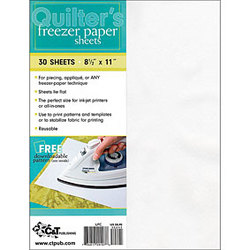 ***You could also print it out onto computer sized freezer paper, if you have a design from the computer and use freezer paper sheets available at Connecting Threads- How cool is that!- click on the image to the left to obtain these if needed/wanted!*** 3) Iron the freezer paper design to the right side of the fabric (wax side of Freezer Paper to the right side of fabric) - Believe me it will stick only temporarily and not leave a residue! 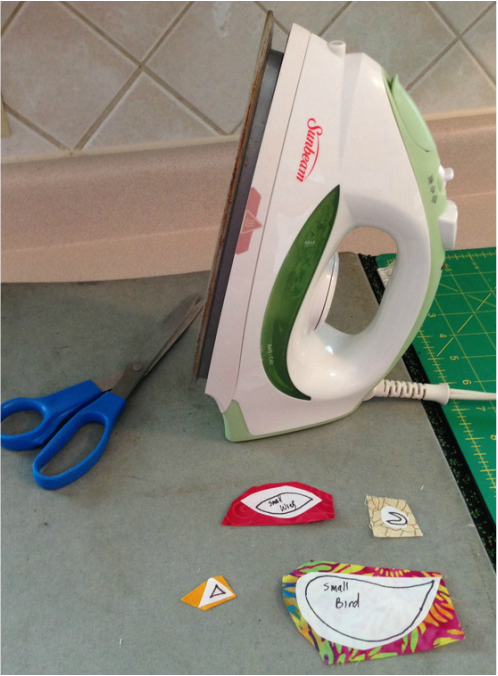 Freezer paper ironed wax side down to right side of fabric 4)Press the fusible web to the wrong side of the fabric 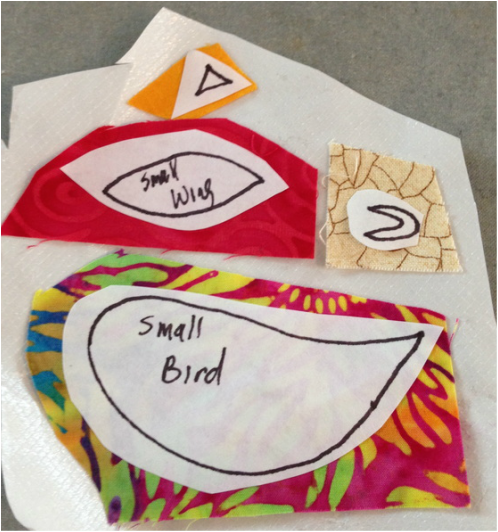 Appliques placed on fusible web wrong side down to the fusible web 5) Cut your appliqué out on the sharpie marker line, remove your freezer paper * You can use this same design over and over, just iron it to fabric with wax side to right side of new fabric, no need to draw your design over and over!* 6) Satin stitch, blanket stitch or appliqué stitch as desired to a background fabric. About Parchment Paper: -You may wish to lay a clean piece of parchment paper between your iron and your appliqué surface to protect your iron -You can build your appliqués on parchment paper -Parchment paper is a great tool in place of a silicone/lead pressing sheet (and it's a lot cheaper!) and fusible web will not stick to it and it will protect your iron as it has a non stick silicone treated finish... not just for cookies anymore! 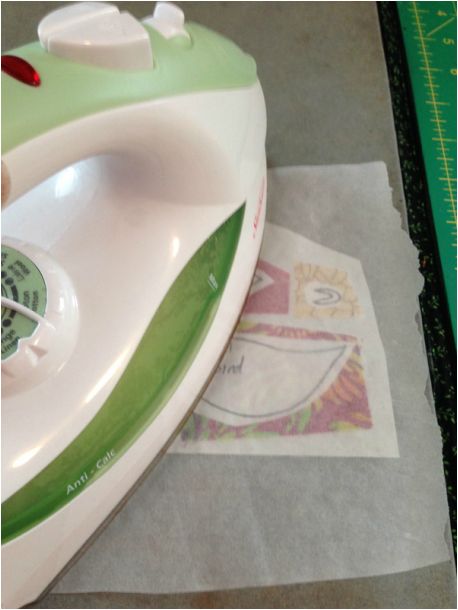 Place parchment paper over your appliqués while ironing to protect your iron from fusible web glue 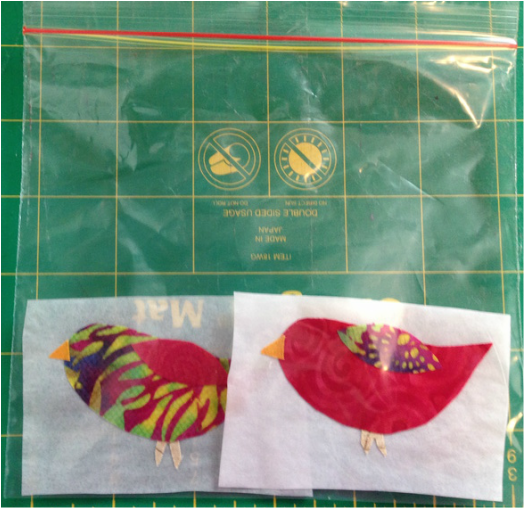 appliqués built on parchment paper and placed in a zip lock bag for future use 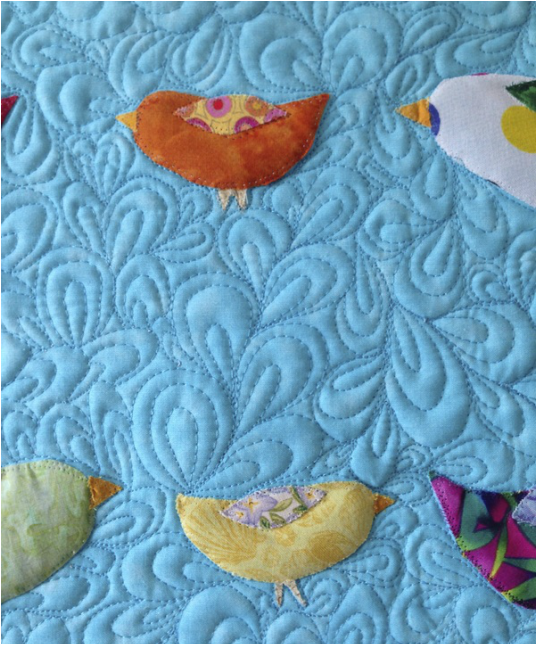 A close up of my appliqués and quilting 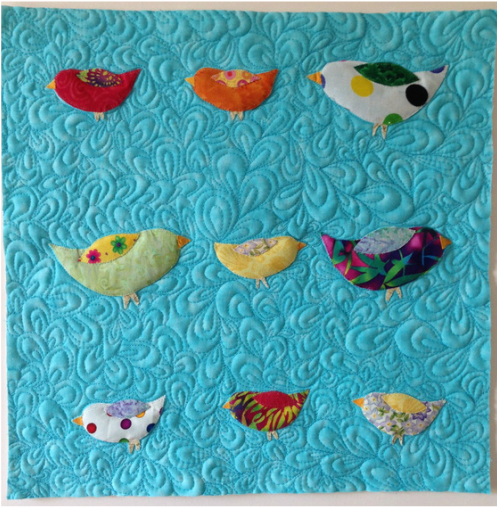 My little "quilt" 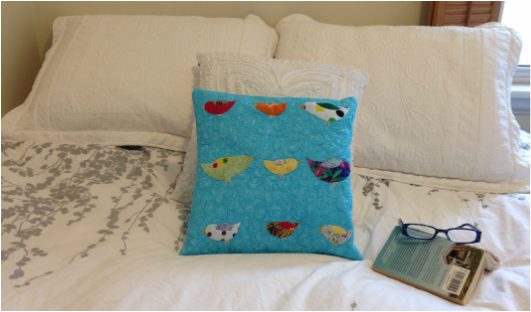 I actually made it into a pillow for my guest room! Happy Tuesday, I hope your week is going well! 🌷  FYI everyone, Connecting Threads has been sending out emails with the slogan "52 weeks of Free Exclusive Patterns". So...... I went to their website to see what it is all about and there are absolutely free wonderful patterns to download including the ones below. Click here to look at the free patterns and simply download them to your computer and use at a later date.
Each week this year they will be introducing a new free pattern, you cannot get better than free and be inspired weekly. So mark your calendar to remember to check back often.
They also currently have a vast array of quilting colouring books at 20 to 35% off! Check them out if you are interested. Have a great week everyone and Happy Monday!😊  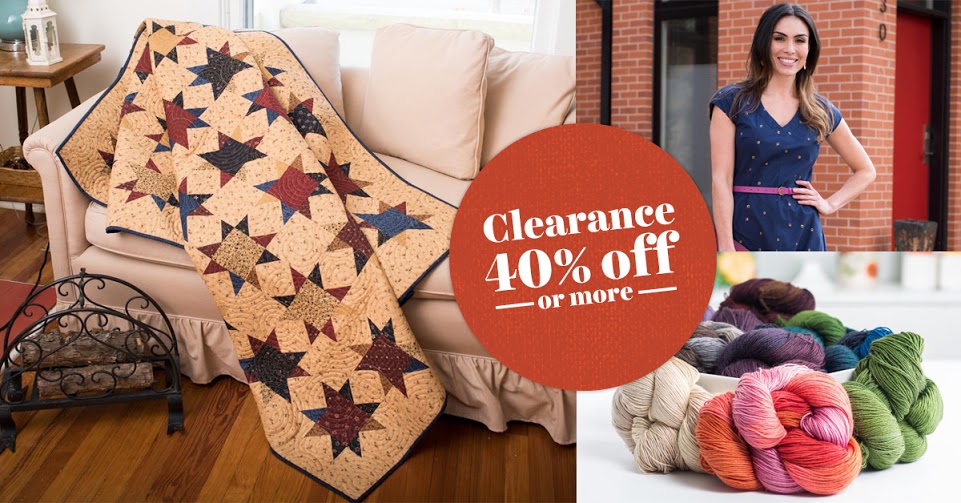 April 7-10 ONLY!
No time to tiptoe around the tulips (that is if they ever pop up! lol) Craftsy is having a clearance sale! You'll find craft project kits and supplies from your favorite brands and designers, discounted at least 40%. Stock up for spring, and get ready to pack a picnic basket full of inspiration! Click here to access sale items 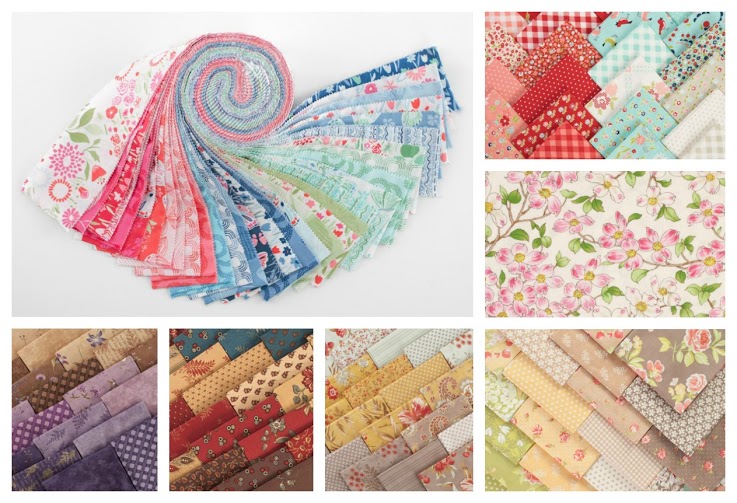 Need some motivation for new spring projects? How about some "moda-vation?"
For seven days, Craftsy is giving away different Moda fabric yardage every day. Giveaway begins (April 4) 4/3 @12:30am MDT and ends (April 9) 4/9 @11:59pm MDT, open to residents of U.S. and Canada only. Click here to get more info and free fabric 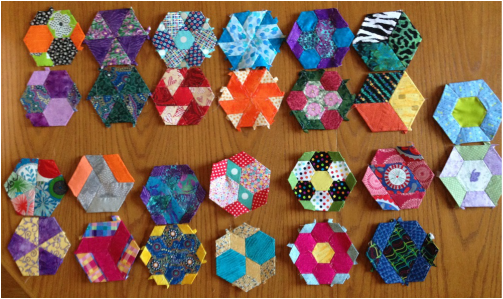
The work is growing!
I visited with my sister over the weekend and she has also taken on the Hexagon Quilt Along challenge and both her blocks and my blocks are shown above. From the top row 1 is Alison's blocks, row 2 is mine, row 3 is Alison's and row 4 are mine. To me they look like the ends sliced off of old fashioned Christmas candy. Only 2 individual's works and it is so diverse!
I cannot wait to see everyone's blocks, please send in your pictures when you get a moment This weeks block is "Willa" and it's block # 14 for 2016, it is shown below: 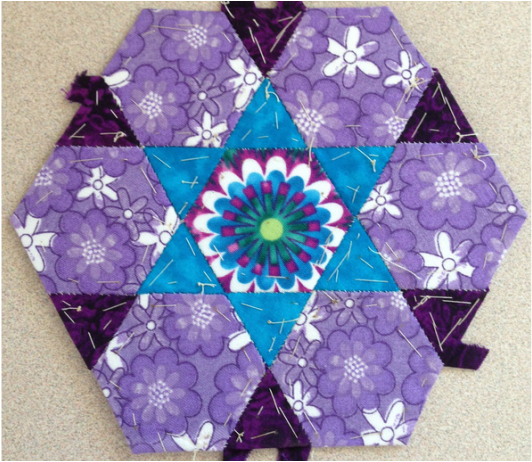
Willa -block # 14
Want more info about this challenge and when it started?
Click here for info
I know I was supposed to post this tomorrow, but decided to get ahead of myself, I hope you are having a great week! ❤️
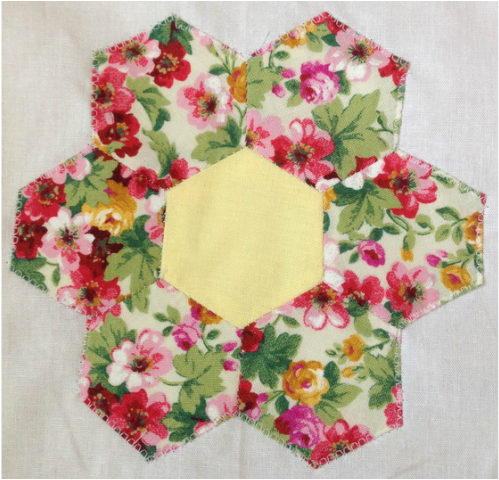
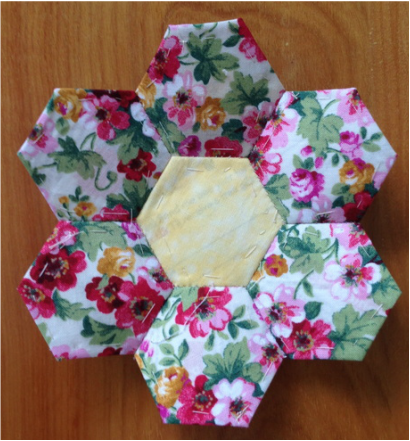
Classic "grandmothers flower" english paper pieced quilt block
As my blog followers know, I do a feature every wednesday on work with English Paper Piecing and I had someone ask me recently how to do it.
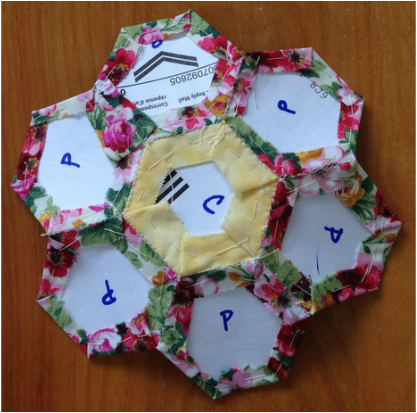
I assumed wrongly that everyone knows how to do it! So today I am sharing how to do EPP (english paper piecing) and sharing with you some resources that are very helpful to make these effectively. I hope if you try it, you become as addicted to making EPP pieces as much as I am!!! I know at least one person in my life who claims that I am the one at fault for their EPP addiction. Yeah! it's a good thing. It's a fantastic past time and it makes you feel productive while sitting for long car rides, watching TV, waiting at appointments, watching children's activities etc. My sister also claims that doing EPP stops her from thinking about snacking as well and I am sure we could all benefit from this "side effect". It's also a great small scrap buster! I am sure I have made hundreds of EPP pieces and I hope you will too❤️ How to start: 1) Assemble some card stock or the subscription cards out of magazines as shown below (they are the perfect weight for hexi papers): 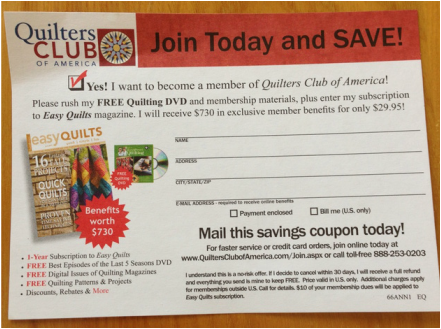
reuse and recycle these subscription cards
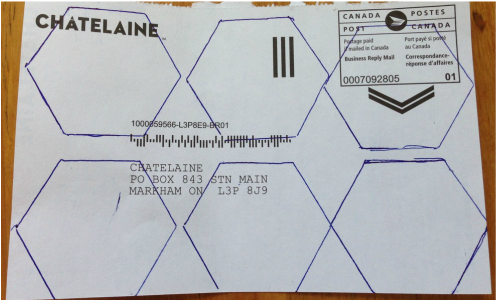
2) Print off hexi shapes from "images" in google of "free english paper piecing hexagon templates" or from free sites on the internet that provide EPP shapes or get them from a book. Trace the shape onto the back of your card stock (I cut out one shape to trace it). To make a "grandmothers flower" you will need 7 hexagons (any sized as long as all 7 are equal sized to make your flower, large or small). Draw them out accurately using a thin line pen or architectural pencil
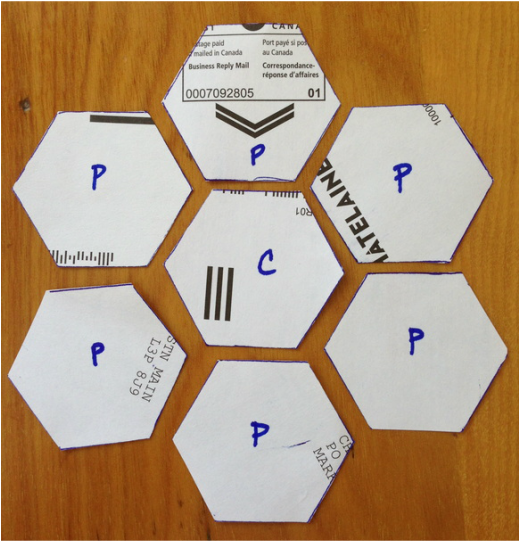
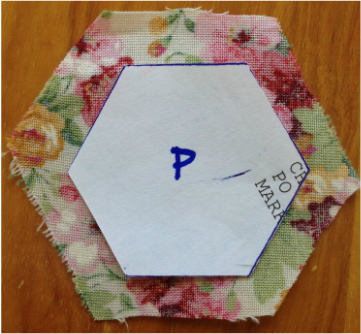
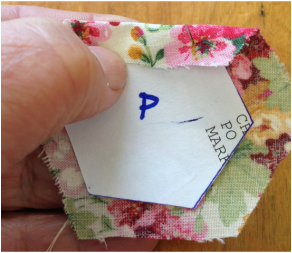
3) Cut out your hexi papers accurately, mark your centre with a "C" and your petal with a "P" especially if the centre and the petals are a different colour.
4) Cut out fabric 1/4" all the way around bigger than each hexi paper shape
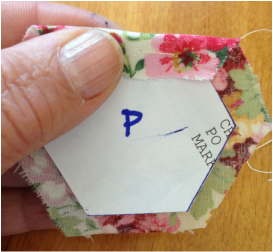
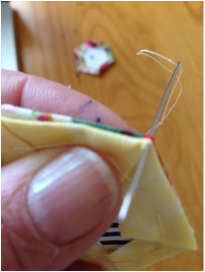
5) Wrong side facing you, use a household (basic sewing) needle & generic, neutral coloured sewing thread and fold the fabric tight against the edge and baste all edges. (be careful to keep 1/4" seam allowance all the way around as you fold and baste). Fold down at corners as you go, use a large basting stitch - these basting stitches will be removed later. Tie a knot and cut off the thread when you are finished. You are basically sculpting the fabric to fit the shape of the hexi fabric
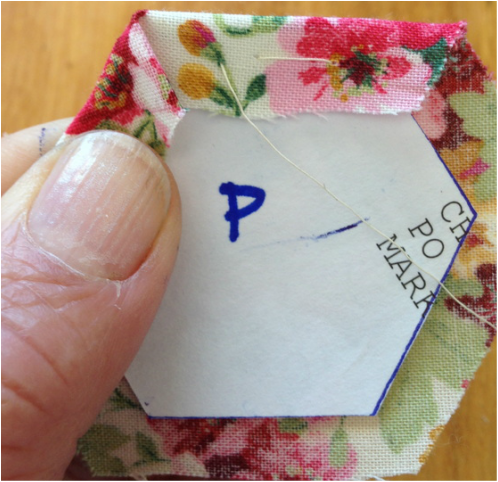
fold the next edge and corner
Baste along the edge and over the corner fold, it helps to keep your corners snug and sharp
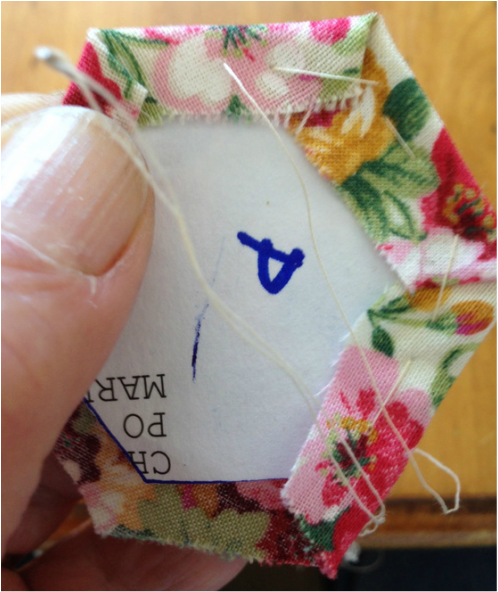
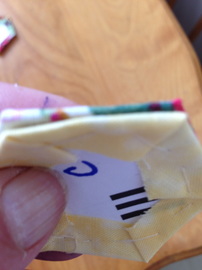
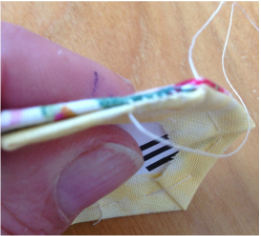
keep basting until it looks like this on the wrong side
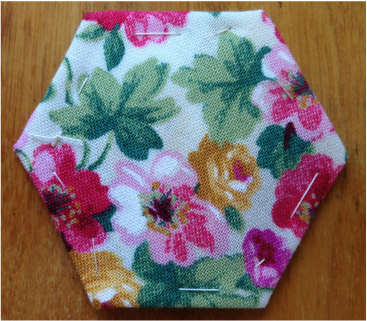
and it looks like this on the right side
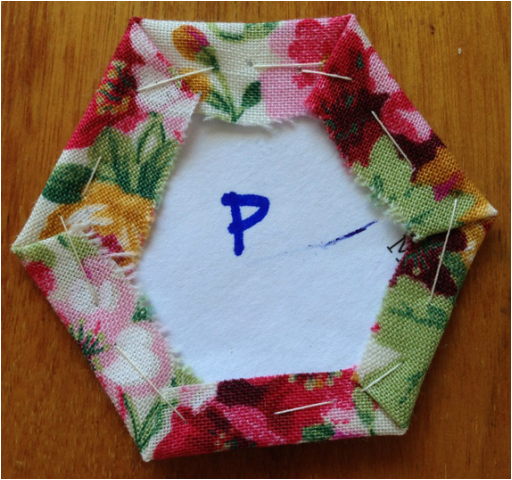
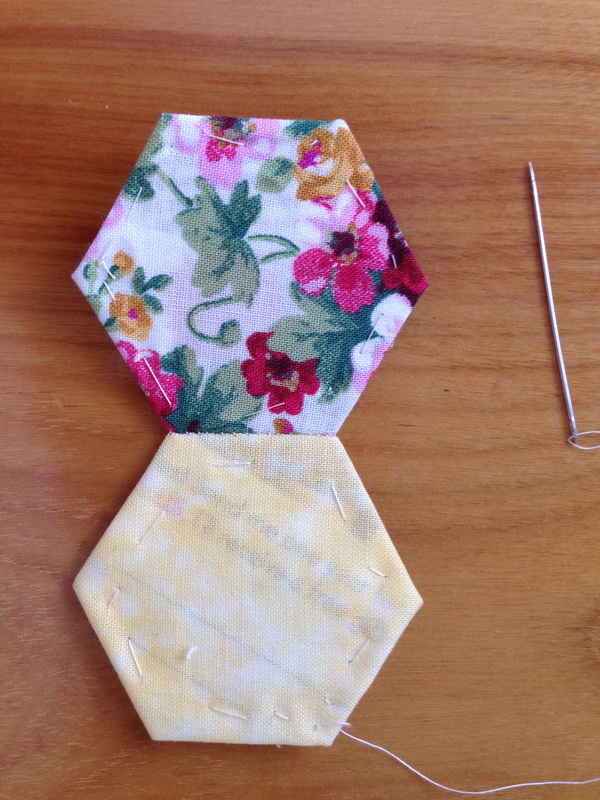
6) Make 5 more petals and one centre ( I like to see the centre a different colour)
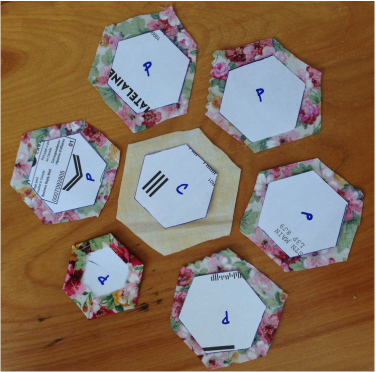
paper and fabric all prepared for basting
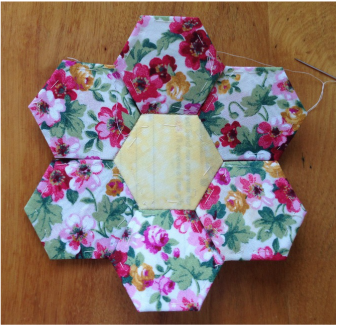
7) You will now be slip stitching your petals to your centre right sides together
8) slip stitch a petal to each side of the center right sides together until it looks like this:
9) Hold sides of each petal right sides with the one next to it and slip stitch
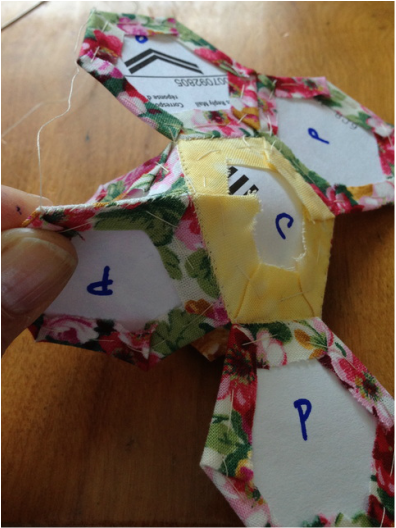
10) Once all petals are slip stitched, it will look like this:
Front Side
Back side
11) Press your flower and decide if you are joining it with more EPP or appliquéing it onto a background
NOTE: a) If appliquéing it onto a background, press flat with a hot iron, remove basting stitches (NOT THE SLIP STITCHING) and pop out the papers and press again it is now ready to appliqué. b) If piecing with more EPP, do not remove basting stitches until all pieces are joined with another. Never remove slip stitching as this is what holds your piecing together. This tutorial is just to get you thinking about EPP. I recommend a wonderful book with all EPP shapes is "All Points Patchwork" by Dianne Gilleland, this I would personally consider a bible of EPP. It contains many shapes beyond hexagon with print outs available for 11 different geometric shapes, lots of small projects, wonderful modern ideas for EPP, how to piece together EPP shapes and fantastic illustrated instruction. If you want to get serious about EPP, I highly recommend this book. This is what is looks like: 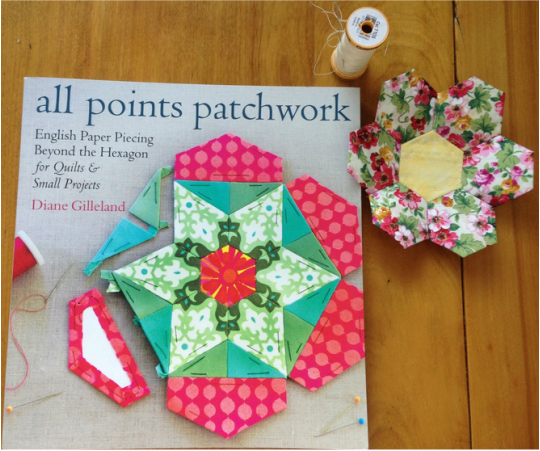
You can get it if you like by clicking here
or click on the amazon link below:
Happy Tuesday Everyone, I hope you enjoyed this tutorial and that you will attempt this technique. Please send us your pictures when you try it!
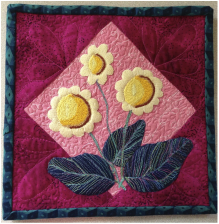
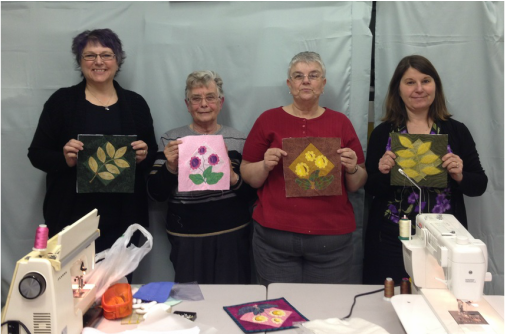 The "Thread Painters" Carla, Rika, Nora and Linda I taught a class that I call "Explore Thread Painting" at Hummingbird Sewing Center in Barrie this past Saturday and these ladies produced very nice work! In the class, we were working with very small and fairly simple designs utilizing basic machine fusible appliqué and then exploring what it would look like to add some thread painted lines with decorative threads and threads to match the appliqués. These ladies had all taken my free motion quilting class, so they were ready to give a more controlled technique a try and they excelled!! This just in.... Nora sent me a pic of her finished quilt below, already thread painted, quilted and bound. Not only did she get it done quick, she did a beautiful job! Thanks for sharing Nora! 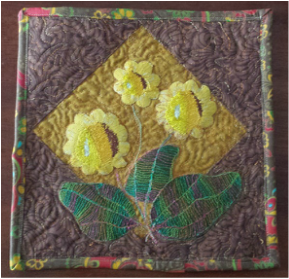 Nora's "Button Flowers" If anyone else in the class gets their project completed, simply email it to me and I will be happy to share your work. Everyone's work is always inspiring to others! This class is what I would consider a beginner/foundational thread painting class and I am working on an intermediate class right now - stay tuned to see the samples and class description for this class in the very near future ❤️
Want to take a thread painting class?, check out the details of my classes on my teaching page and have a look at the website for Hummingbird Sewing Center here or use my contact page to ask me where I may be teaching it in the near future. Happy Monday everyone! We had a snow storm in Waterloo last evening and it is snowing right now, but I am optimistic that spring is right around the corner. Maybe the rest of the week will shine and let the flowers pop!☀️🌿🌸 |
Follow Me:
Welcome!Hi I'm Robin and I am a professional long arm quilter, pattern designer and teacher. I am passionate about all things quilty!  
  Categories
All

Sponsors
This blog contains affiliate links. This means that we endorse products.
We do receive rewards for these endorsements and this helps to keep this site alive and well. We support products which we believe are the best quality and to inspire your creativity! |

 RSS Feed