Welcome To Quiltingintheloft.com

|
Happy New Year and Happy January! I am writing this post at the request of a friend nearby who saw my pouch sitting about in my studio and she said: "Why don't you do a blog post on that?" This is for you Joan! I am sure everyone will find it useful and lets face it totes, bags, pouches.... you can never have enough as they are so useful! It also just happens to be that time of the year to get organized and these little totes are very helpful. 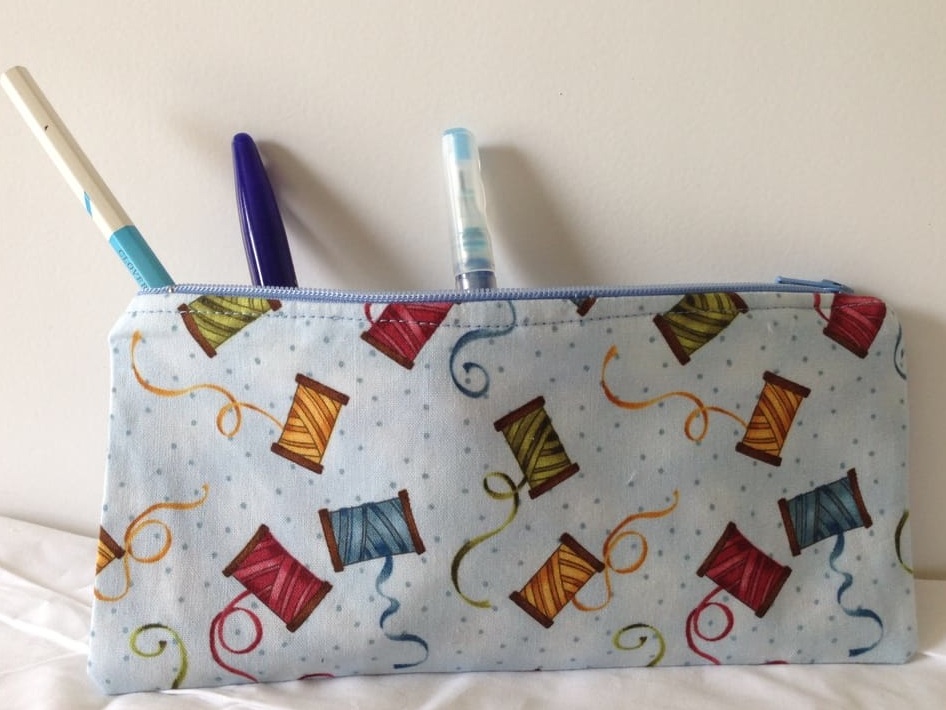 What you will need: 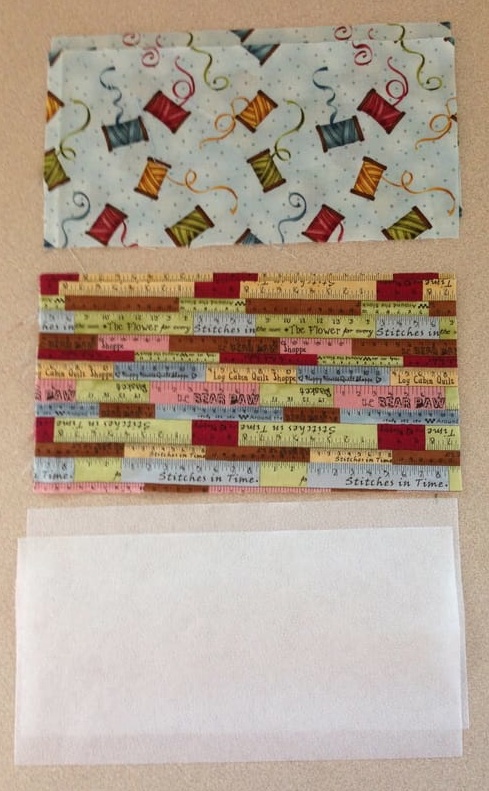 2 pieces of lining fabric, 2 pieces of outside (main) fabric and 2 pieces of fusible lightweight interfacing Note: your fabric can be any size you wish, pencil case sized, make up bag or a simple tissue tote size. You choose. You will also need...... 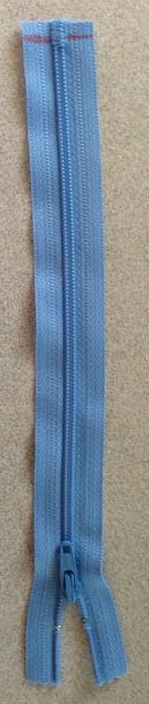 A zipper slightly larger than the length of the opening of your pouch Also required: A zipper foot Thread to match An iron Sewing Machine Scissors How to make it:
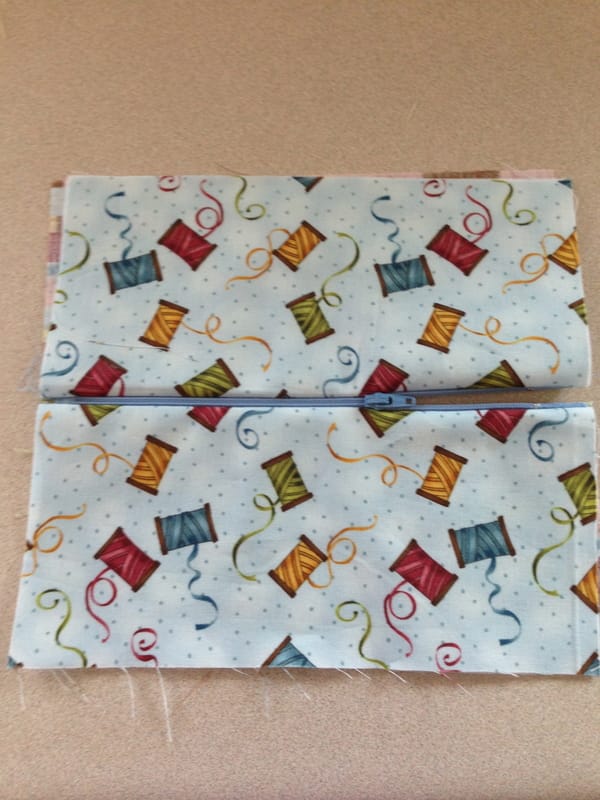
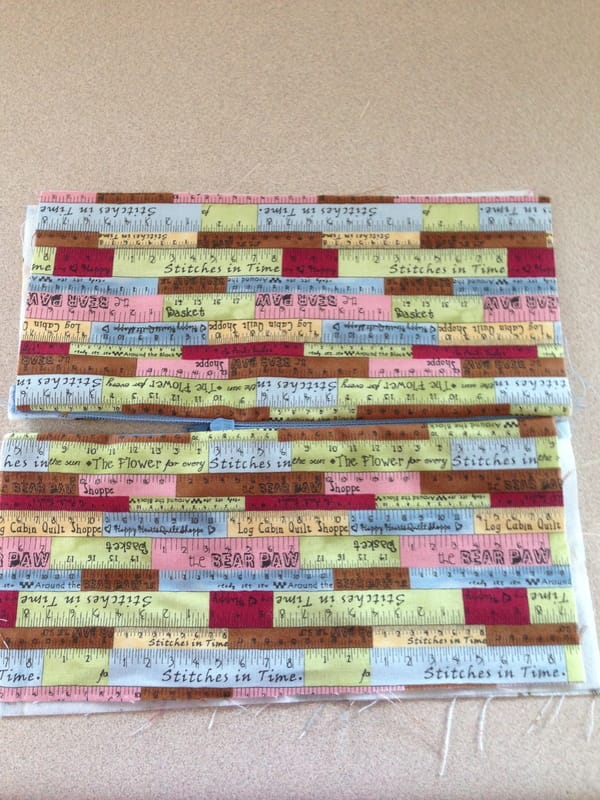
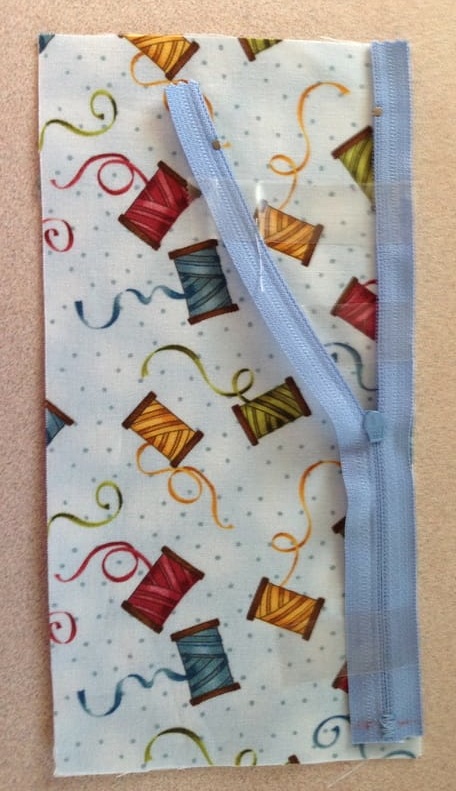 3. Lay the right side of the other main fabric on the other right side of the zipper and sew it with a zipper foot 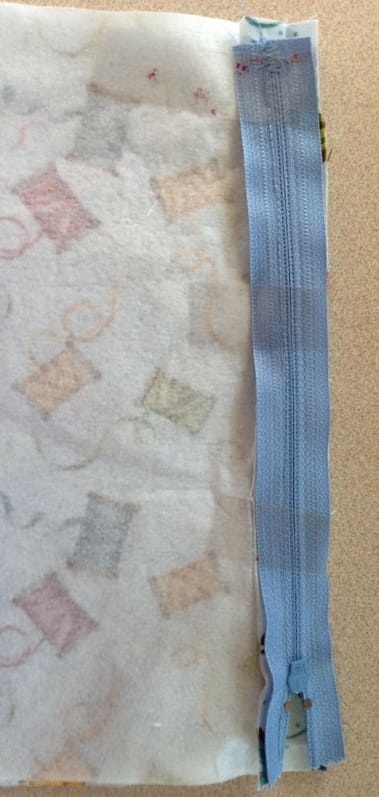 hard to see in the photo but one edge of the zipper is stitched and the other edge is temporarily taped ready for sewing with the zipper foot, Right side of the fabric against the right side of the zipper 4. Flip the whole project over and place the right side of the lining flush with the wrong side of the zipper and tape or pin in place. Sew on the previously sewn line with a zipper foot. 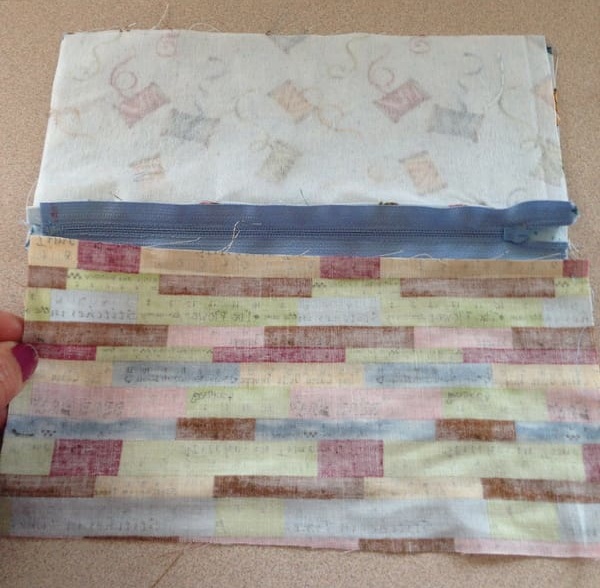 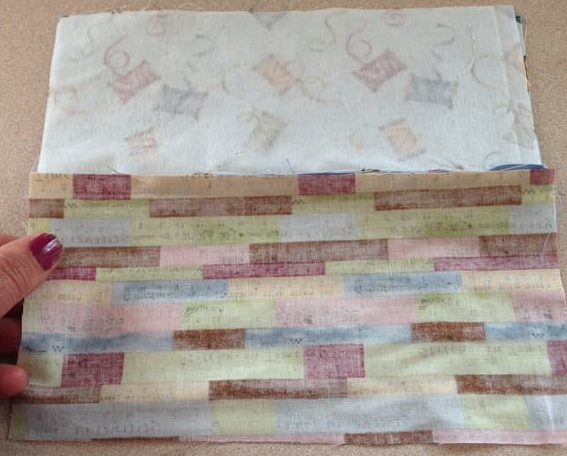 right side of the lining now sewn to the wrong side of the zipper on the same line as for the outside (main) fabric 5. Do the same as in 4 with the other right side of lining fabric on the other wrong side of the zipper. 6. Trim your zipper if necessary and make a new zipper stop by zigzagging over the zipper end. Zigzag stitch all raw edges. 7. Press the lining and main fabric away from the zipper so that they look like the pictures below, trim all edges so your project is now square: 8. With your zipper open, line up the project with right sides (main fabric to main fabric and lining to lining together) and sew down the sides and bottom with a ¼” seam allowance. Zig Zag stitch your raw edges if you like. Your opening for turning will be your open zipper. 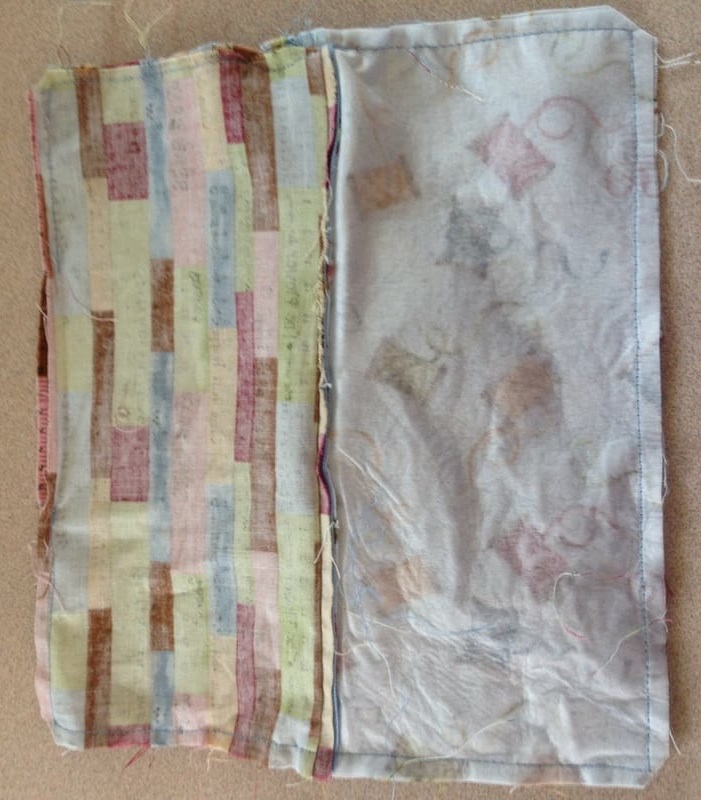 Showing back side of the pouch 9. Turn your project to the right side through the zipper, tuck your lining inside the zipper. 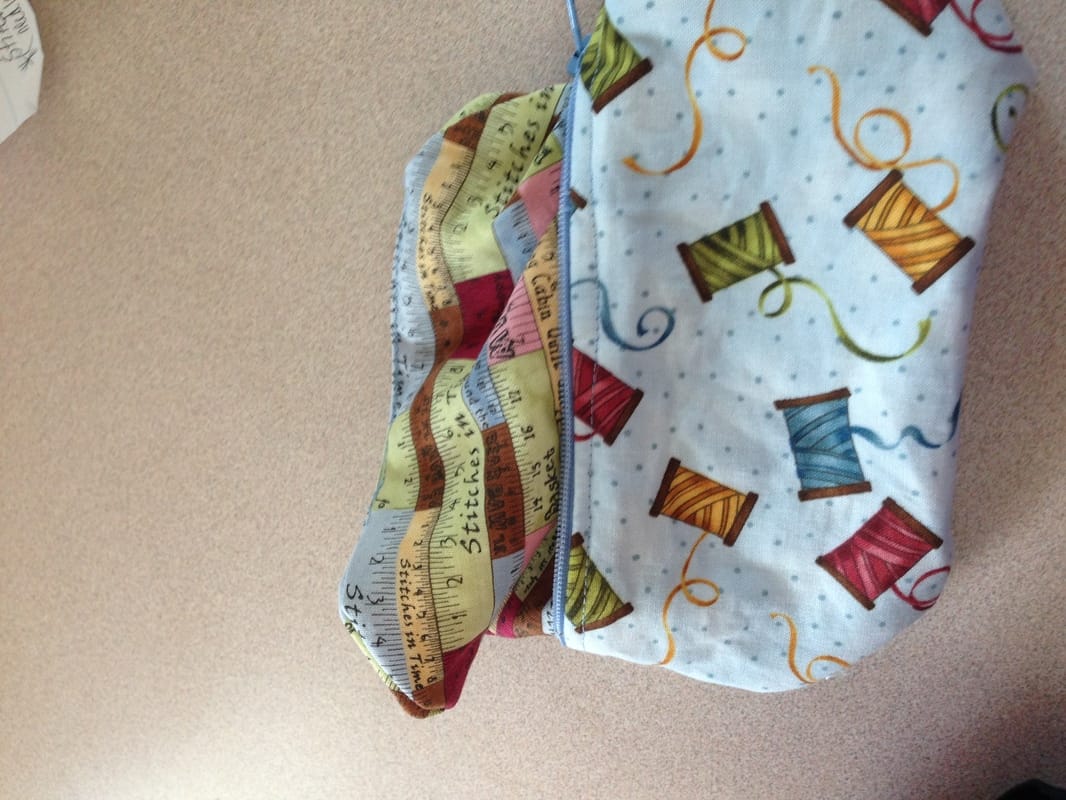 Top Stitch 1/4" from the top edge of the zipper all the way around once your pouch is turned. 10. Admire your efforts! Store pencils, pens, quilt markers, scissors, makeup, nail polish, toiletries art supplies etc. 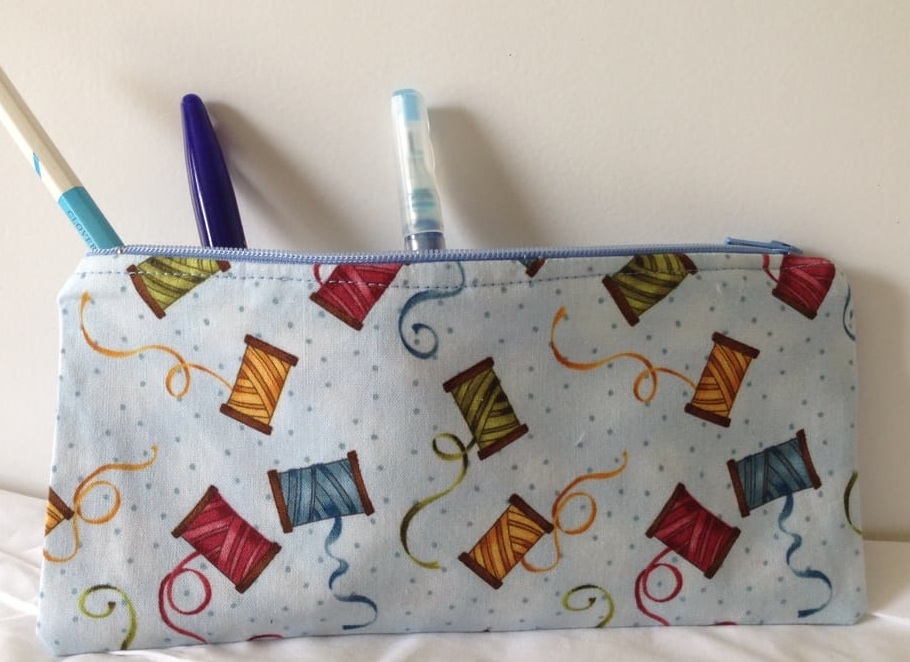 Get a head start on Christmas and gift giving in 2017 and make many of these handy pouches!!
Happy Tuesday, I hope the rainy weather (here in Waterloo, Ontario) is not affecting your creativity! 😊
0 Comments
Need a hostess gift? There is no time left for an elaborate project? Christmas is coming upon us rapidly. Yikes! The below project is super easy, a very useful gift and it will cost you very little. 4 wee coasters and a nice candle votive wrapped in basket wrap. 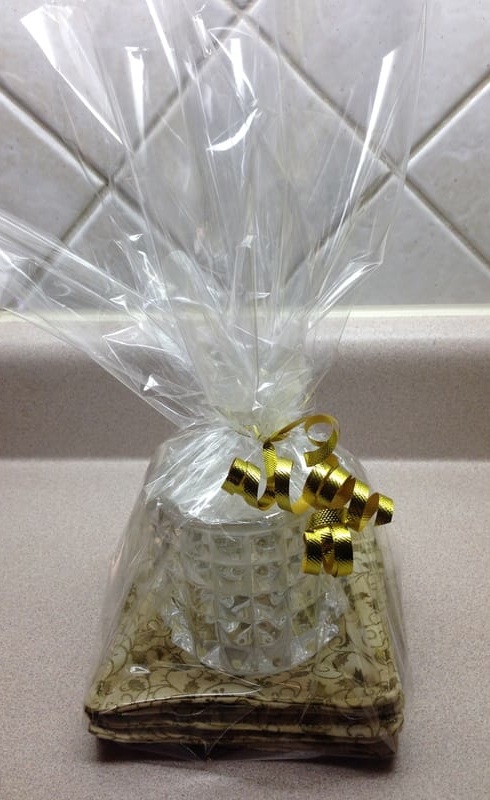 Votive Candle and Coaster Set All you need is: Scraps of Batting 4.5 x 4.5 Scraps of Fabric 4.5 x 4.5" square (8 of them for 4 coasters) A piece of card board 3.75 x 3.75" square One small votive candle holder ( I got mine at a gift shop for $3.00) One small votive candle (to match your fabric) Basket wrap Curling Ribbon A sewing machine Thread to match your fabric Scissors 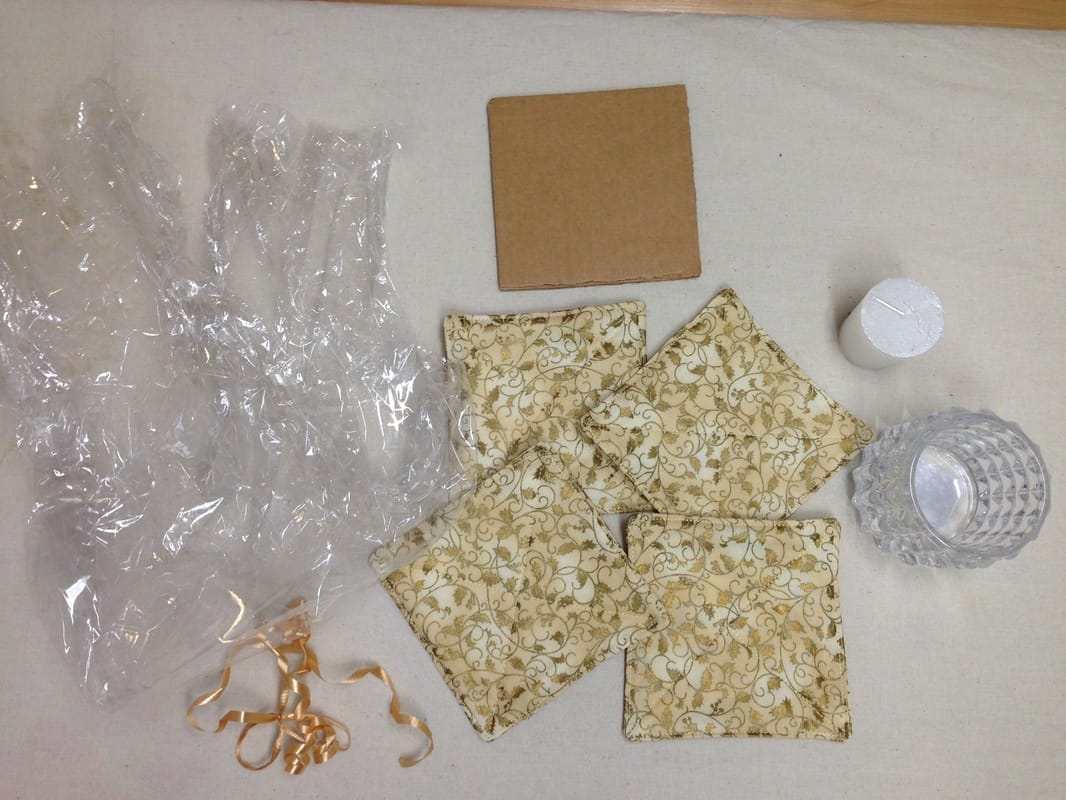 What you will need How to make them: 1. Make Littte Quilt Sandwiches: Lay batting down on a hard surface, lay fabric on top of the batting with the top fabric and backing fabric right sides together on top of the batting 2. Sew 1/4" around the perimeter of your quilt sandwich, leaving a 1.5" opening for turning. 3. Clip corners and turn your coaster to the right side. 4. Press and top stitch 1/8" from the edge to close your opening and make your square look finished. You can also quilt in the center if you like. 5. Make 3 more 6. Pile all 4 coasters on top of your card board neatly and place a votive candle holder and candle on top (this will support your votive candle) 7. Wrap with basket wrap and secure with curling ribbon 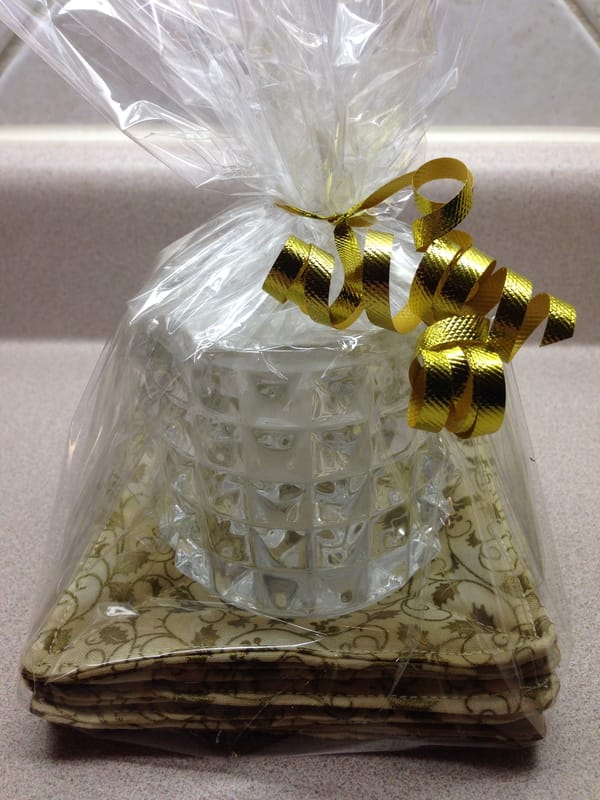 Voila! A very useful and pretty hostess gift made in the "Nick" of time!
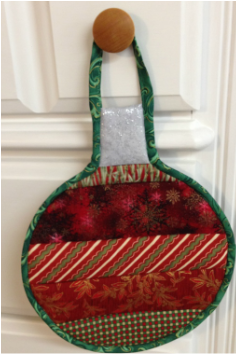
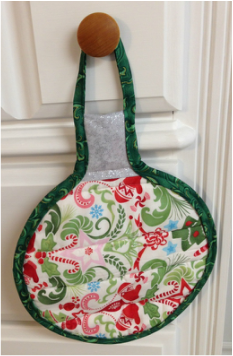
Happy Tuesday! Merry Christmas Preparations!🌲 This super easy "ornament" shaped hot pad makes an affordable gift for all the cooks on your list this Christmas! 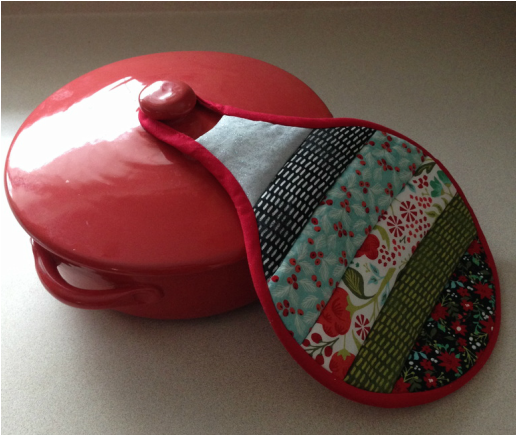 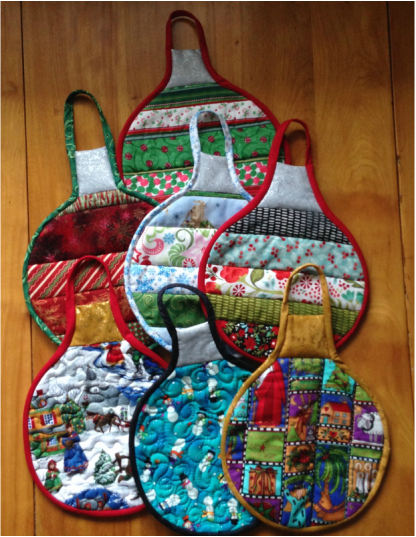 I got a little carried away making these because they are quick and easy to finish in time for last minute gift giving At this time of the year we all have the Christmas parties to go to, last minute gifts to give to hostesses, teachers, neighbours, hair stylest etc. This project is perfect because: 1) It takes very little time to make 2) It takes very little fabric 3) It provides immediate gratification 4) It is reversible 5) It is very practical and ..... 6) It is a holiday oriented project by virtue of the fact that it looks like a Christmas ornament. If you are an experienced sewist, this is a half hour project. If you are a beginner and have an hour to spare, that's all the time it will take to finish one! The more you make, the faster you get it done!! 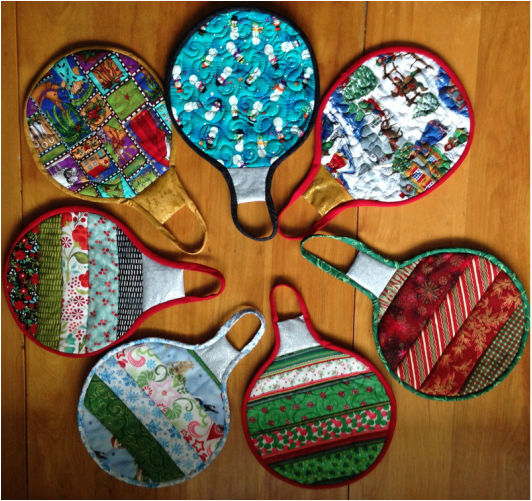 Front of the "ornament hot pads" 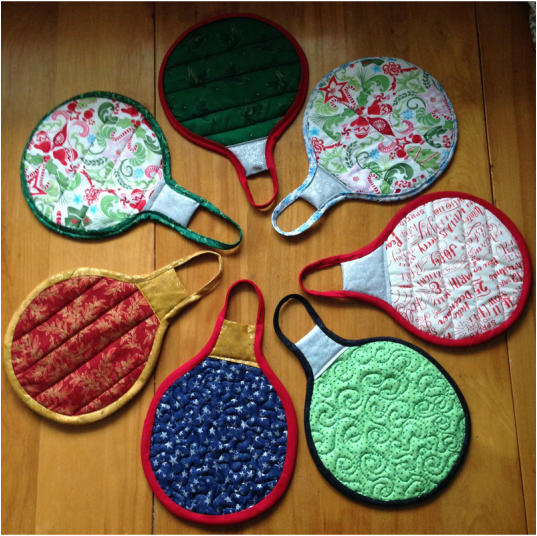 Reverse Side! How to Make a Christmas Ornament Hot Pad: You will need:
1) Sandwich your backing wrong side up with the batting and insulbright on top facing towards you (you can baste this sandwich with pins or 505 basting spray if you wish) 2) Press layers together with an iron 3) If adding strips audition your layout 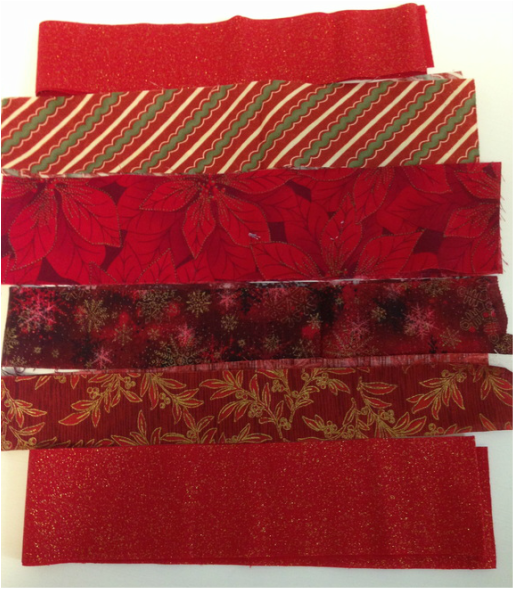 auditioning 4) Lay #1 strip 2" down from the top edge of your quilt sandwich right side facing up, lay #2 strip on top of #1 right sides together with top edge matching, quilt through all layers 1/4" . (For experienced sewists- you are strip quilting as you go the entire 10 x 11" piece leaving a 2" space at one end) 5) Press # 2 strip up and away from #1, continue with the rest of the strips until the rest of the 11" length is filled with strips of fabric *** You can also use just an entire piece of Christmas fabric that is 10 x 11" if you do not want a striped ornament*** 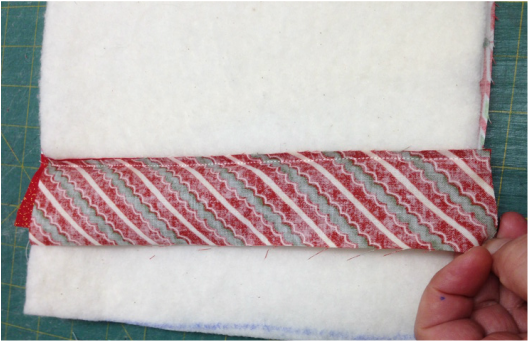 Lay strips on top of each other, quilt through all layers 1/4" from the top as described in 4) above 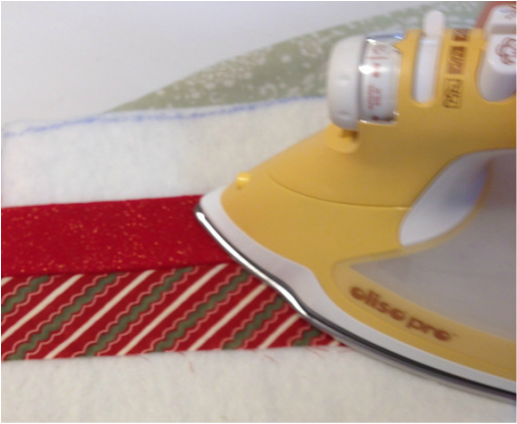 Press away from the previous strip as described in 5) 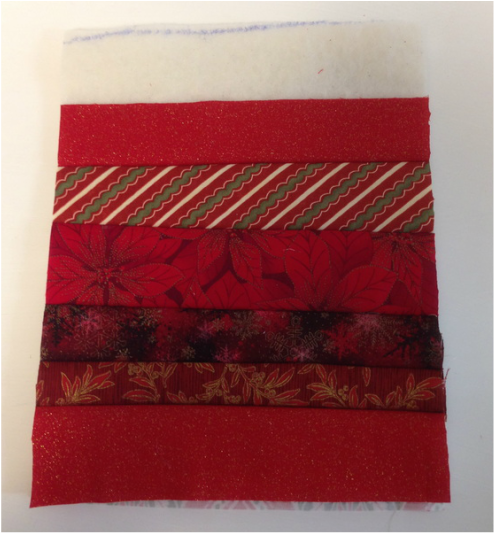 Your striped ornament quilt as you go fabric should look like this 6) Add the silver or gold ornament hanger fabric by first ironing one 3 1/2" edge under towards the wrong side 1/4". Lay the raw edge of the non ironed side flush with the top strip right sides together and sew with a 1/4" seam allowance through all layers as you did all the other coloured strips. 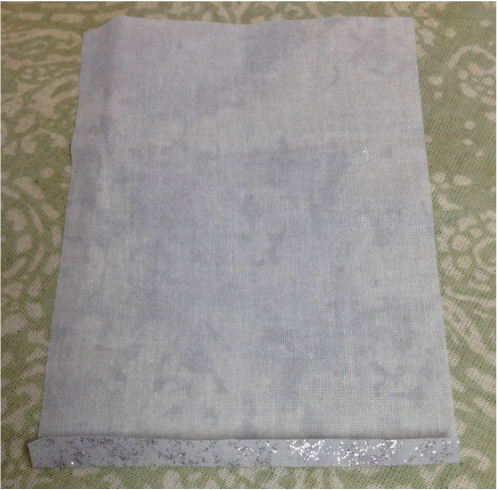 one short edge pressed 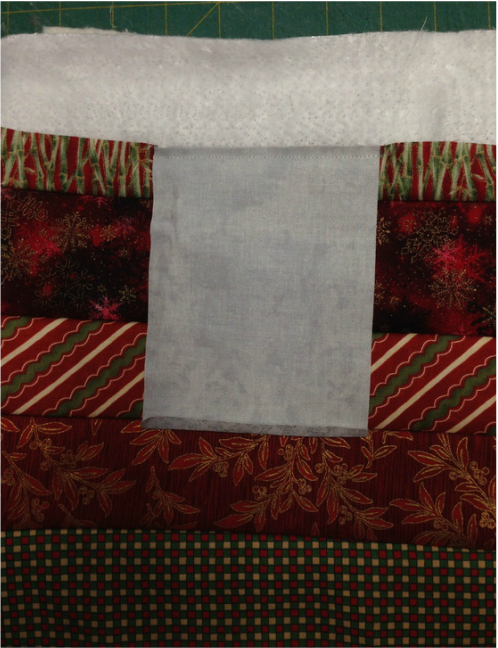 Sew through all layers with a 1/4" seam allowance and centred on the top strip flush with the edge 7) Press towards the top and away from all the other strips 8) Fold this silver/gold fabric over the remaining batting and tug on the fabric so that the folded edge lays beyond the sewing line on the back that you created in 6). Pin along the pressed edge to hold in place and sew through all layers, stitch in the ditch from the front seam on the silver/gold fabric seam you just created. (you should catch the pressed edge all the way along to secure) 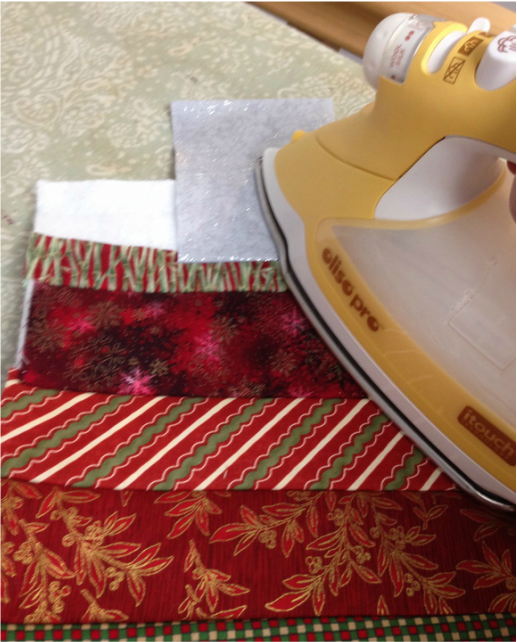 Press away from your stops and wrap around the batting to the back of your project as described in 8) 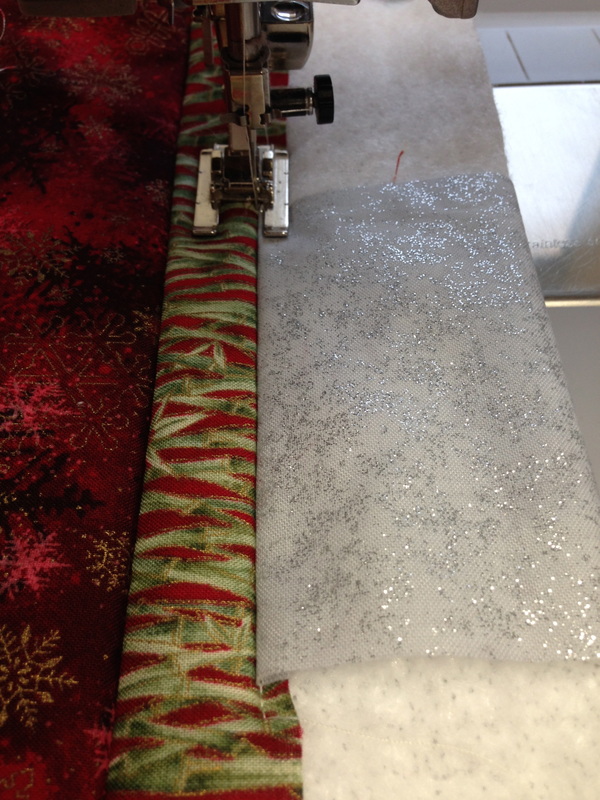 Stitch in the ditch catching the pressed fabric on the back 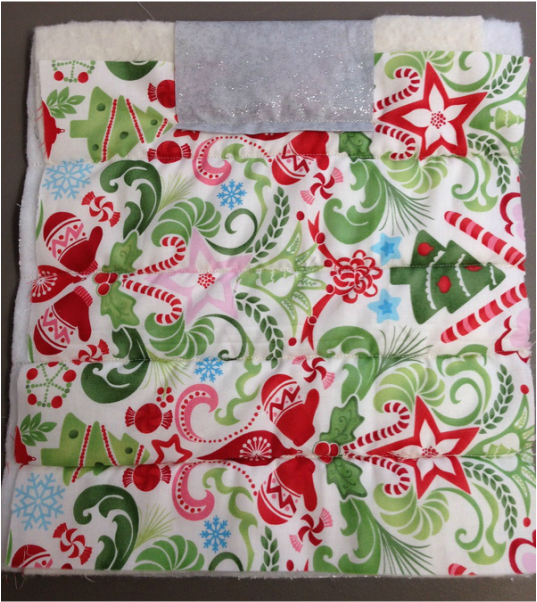 The back of your project should look like this 9) Using the free pattern PDF pattern download found here (also found in the Free PDF pattern download section of the "SHOP" tab above) Trace out your ornament shape using a frixion or erasible fabric pen and start cutting it out thoough all layers 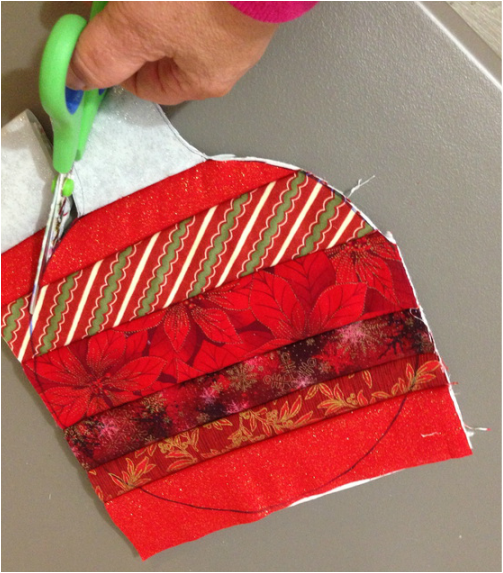 This is what it should look like now! 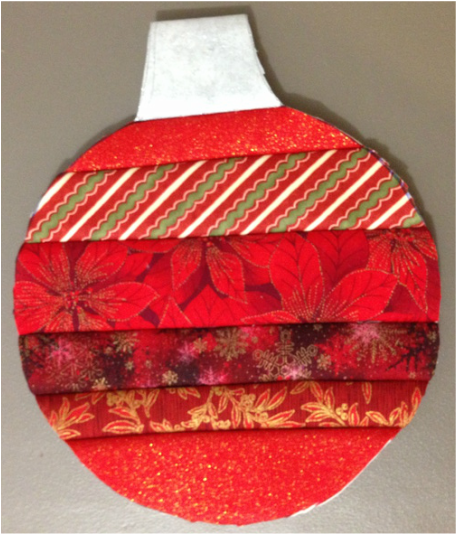 10) It is time to bind your project now. Bind as you would a quilt starting with the bias binding sewn to the right side of your bulb and sew slowly to allow for the curve and a 1/4" seam allowance, sewing and stopping at the top of your silver fabric. Tack a few stitches back and forth. 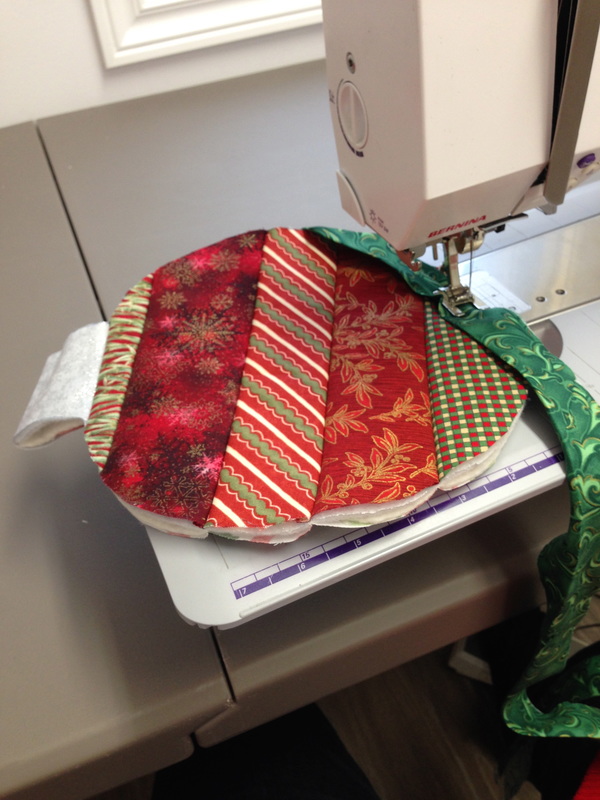 starting to sew on the binding 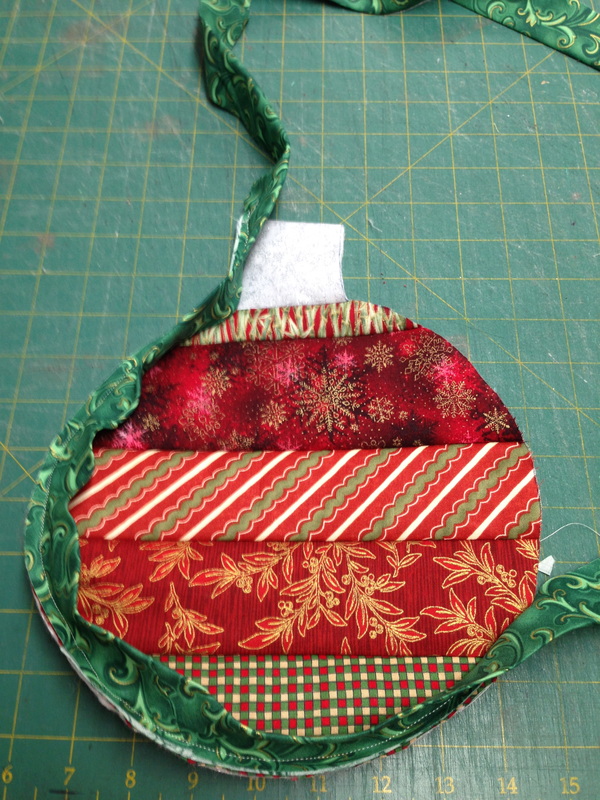 stop at the top of the silver fabric and tack stitch back and forth 11) You now need to make a 6" loop for the top of your ornament (also useful to hang on a nob or hook in your kitchen) To make this loop with your right side of your project facing you and the binding folded edge tucked towards the back of your fabric, you will fold the raw edge of the binding toward the center of the binding for 6" beyond the top of the grey fabric and press. See photo below. 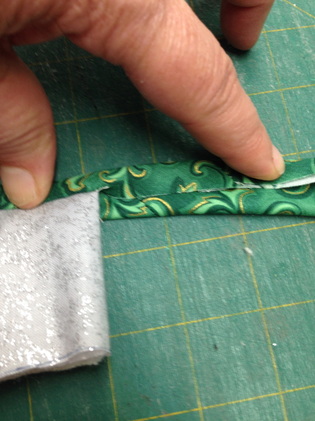 First fold of the loop 12. Fold again to create a finished edge that looks like the photo below, fold and press for 6" 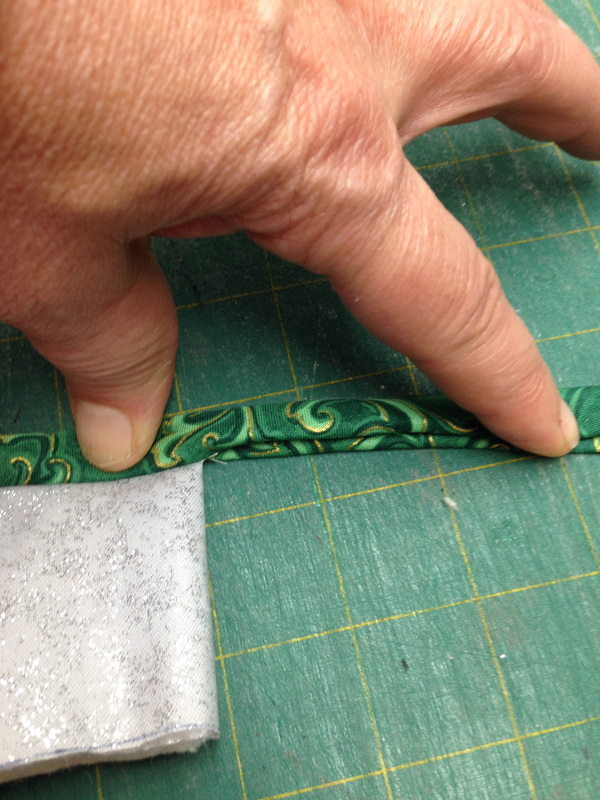 Second fold of the loop 13) Pin and top stitch the loop close to the edge with matching thread, stopping at the 6" mark 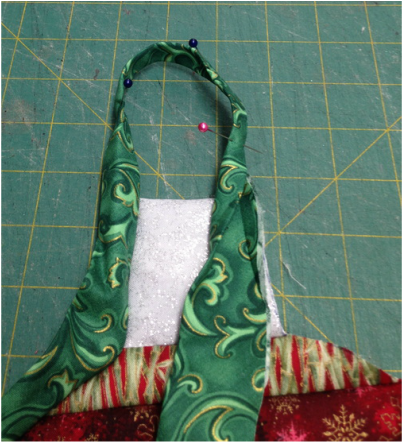 Pinning the loop after it's pressed 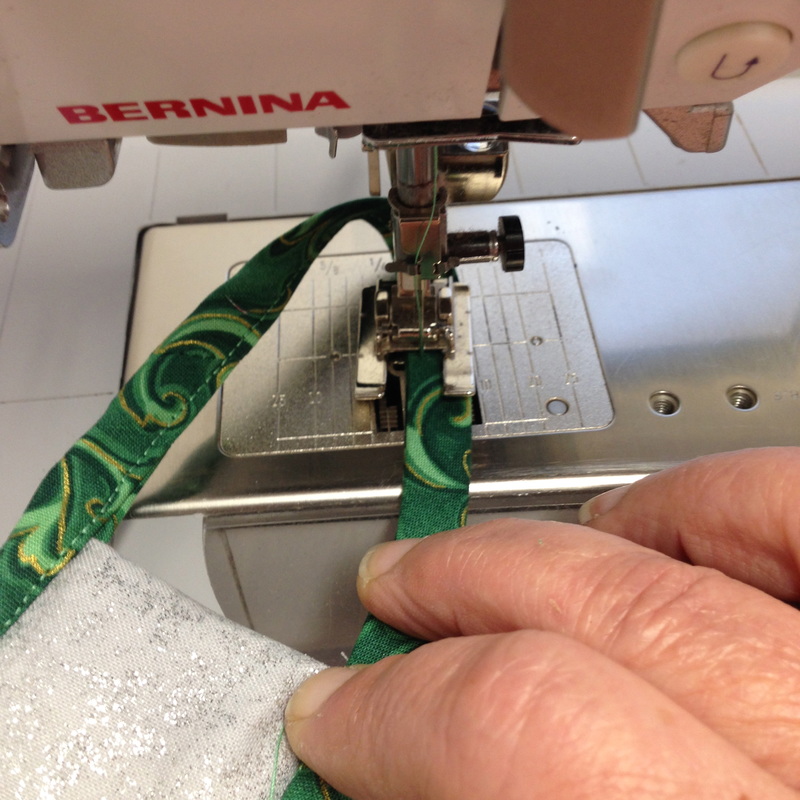 Top stitching the loop 14) Resume the sewing of your binding onto the other side of your silver section making sure the fabric is not twisted and laying the raw edge of the binding against the right side edge of your project. Finish of your binding as you would on a quilt. 15) Wrap the folded edge of your binding to the back and sew by hand or machine as you wish to complete your binding and......TA DA! Admire your efforts!
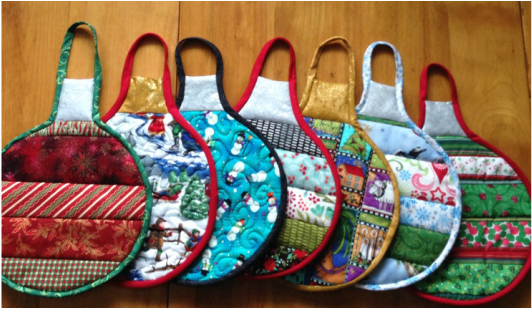 Make lots of them! 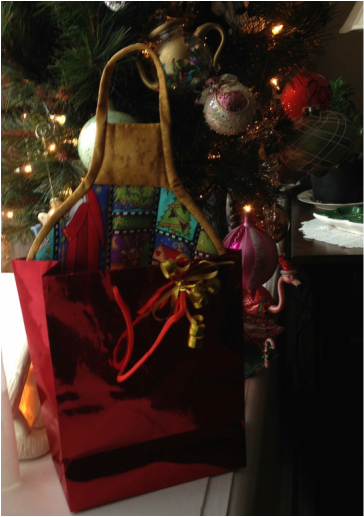 So pretty under the tree. Add some homemade goodies and you have a very nice, inexpensive gift! Happy Tuesday, Happy Christmas Sewing!🌲🌲🌲
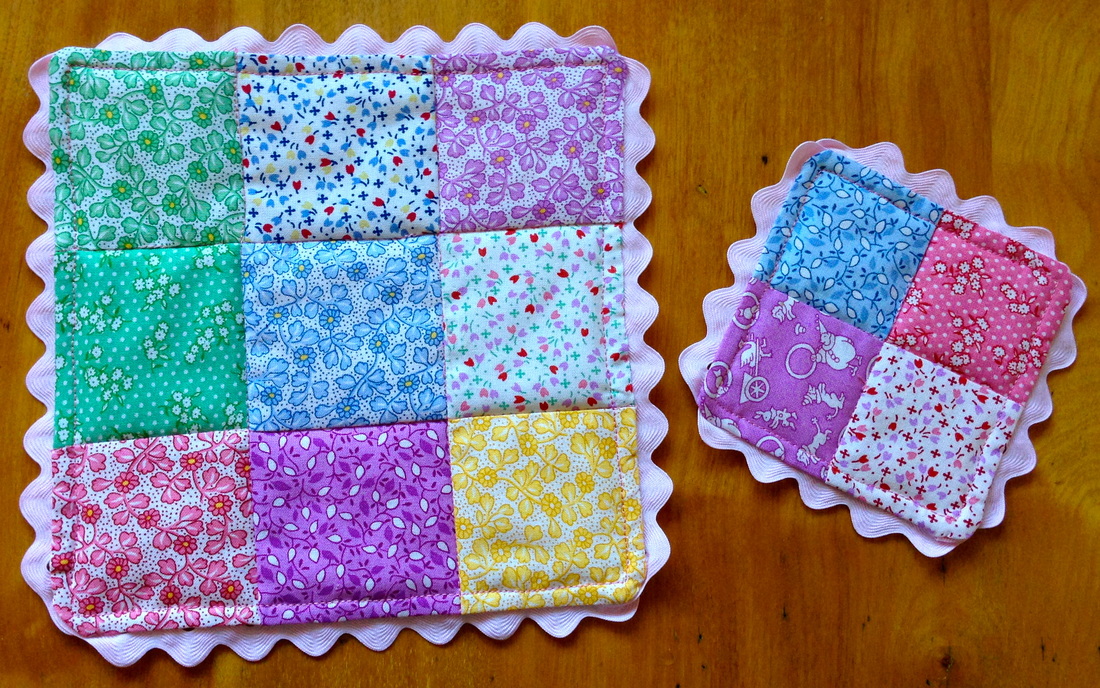
You can make these 2 little easy rick rack projects with 9- 3" squares for the mug rug and 4 -2.5" squares for the matching coaster and some coordinating 1/2" rick rack of course.
Step 1-Sew the mug rug in a 9 patch formation as shown below and the coaster in a 4 patch formation. 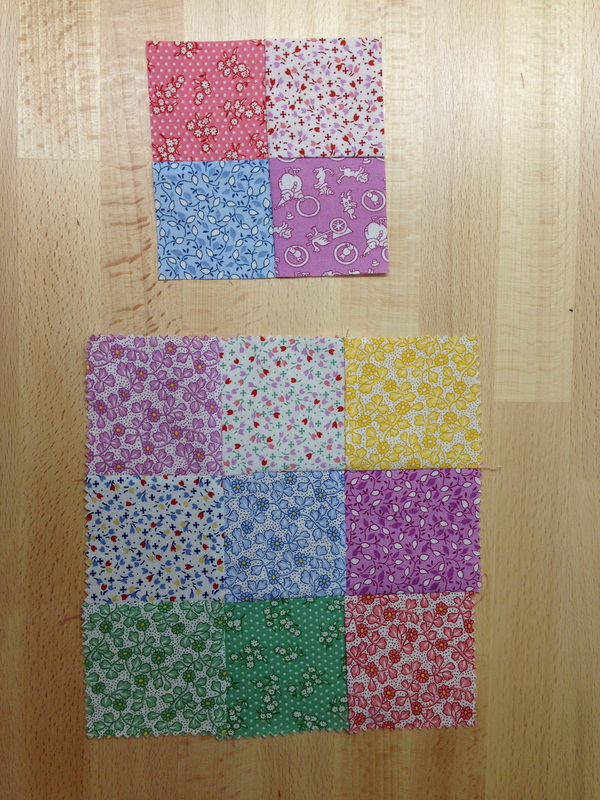
Why make a mug rug?
Because it holds both the tea and the cookies! You could make one for Santa! Is there a better reason? 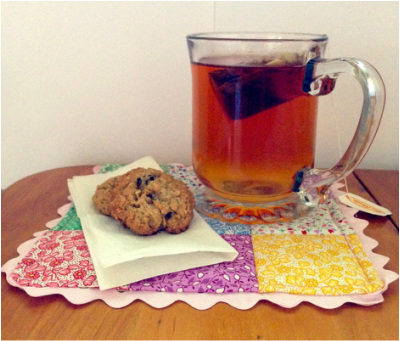
Step 2- Place the rick rack right side down to the right side of your 4 patch and 9 patch & pin exactly as shown below with the "mountain tops" (convex) part of the rick rack just touching the edge of the fabric:
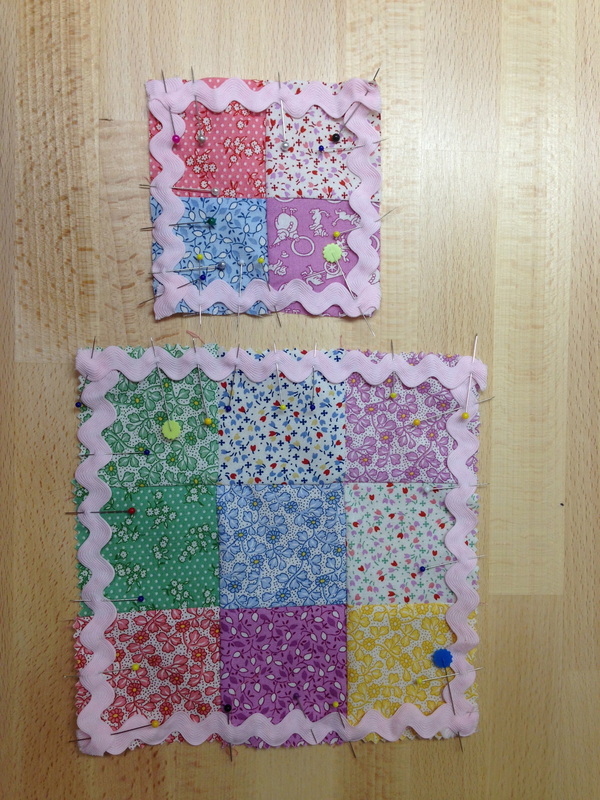
Step 3-Baste the rick rack very close to the edge of the fabric. See below:
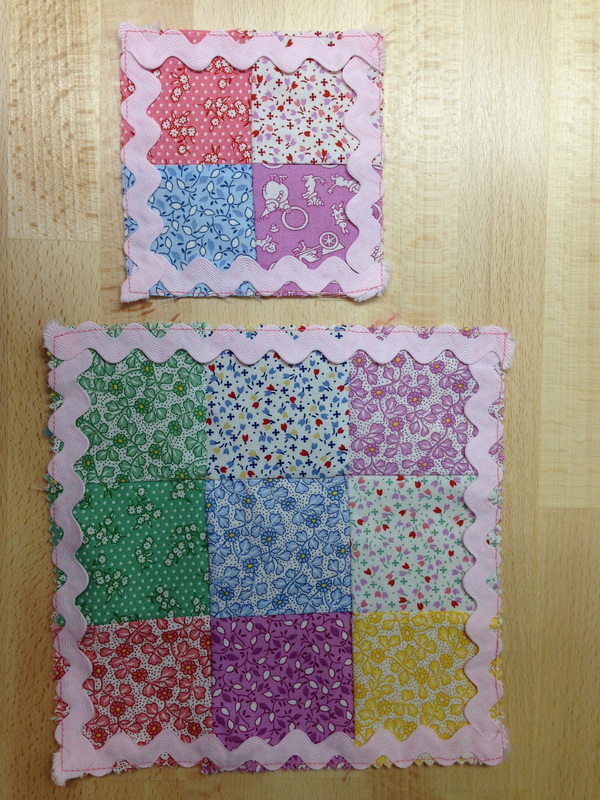
Step 4- Cut out a backing fabric and batting the backing the same size as both your coaster and mug rug and lay the backing and batting right side against the tops as shown below and sew with a scant 1/4" seam allowance. Leave an opening of about 1.5" on the coaster and 3" on the mug rug
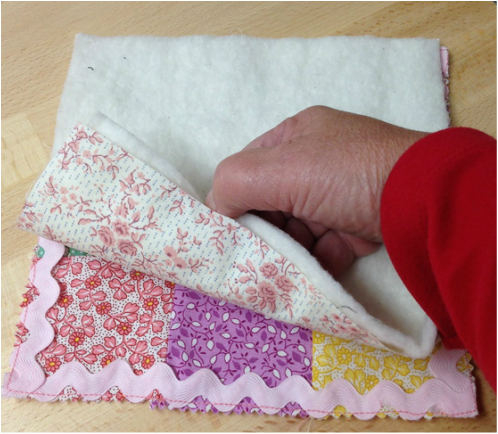
Step 5- Clip corners and turn to the right side and baste the openings close. Step 6- Press and top stitch 1/4" from the right side edge.
Admire your efforts! 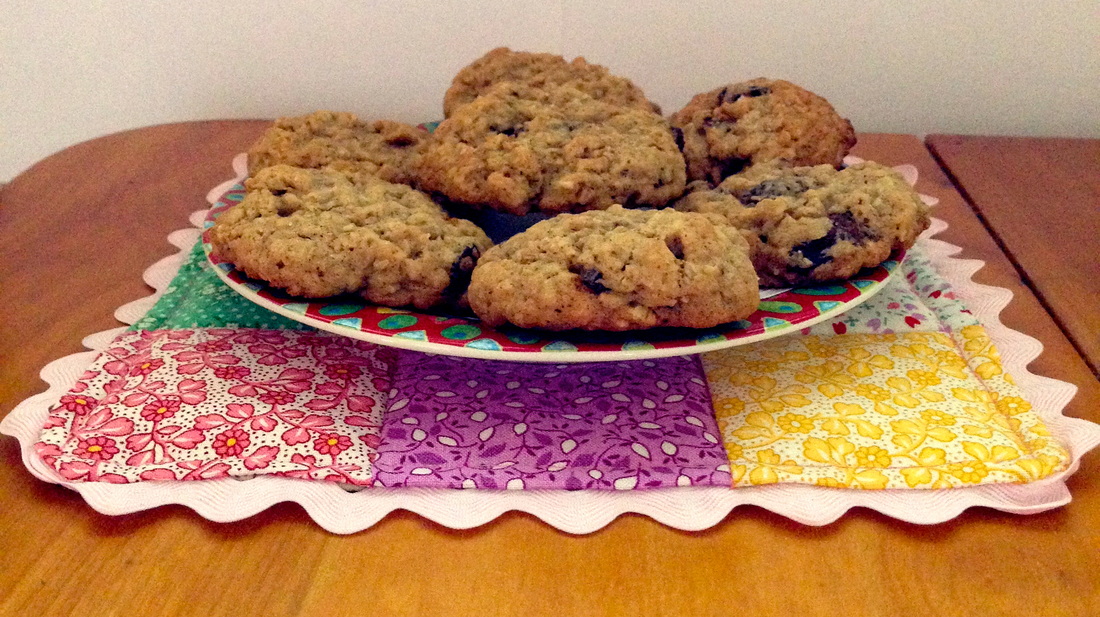
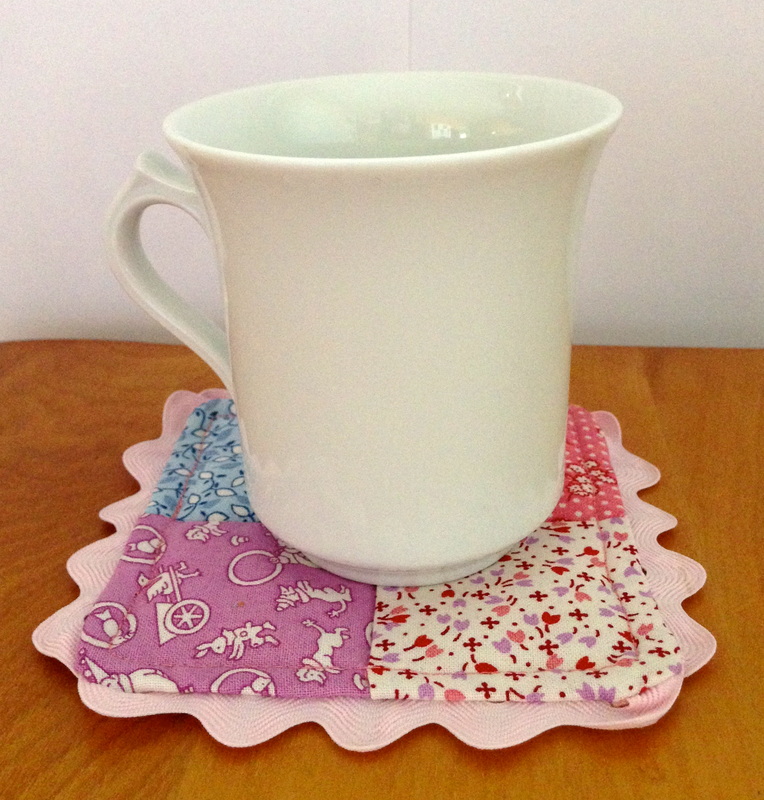
Suggestion: Make multiples of these and invite some friends over for a cookie exchange (any time of the year!) and these would make nice surprise gifts.
and.... while you have your sewing machine out make some "pie" - see below from blog post 7/19/2016 It's Time For Pie! Tool & Technique Tuesday Pie Potholder - yet another rick rack project!
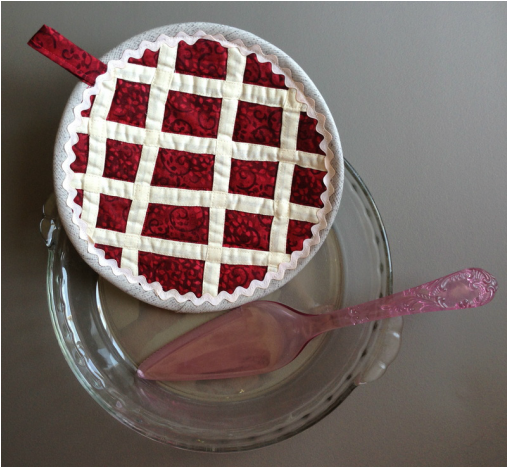
PS. I used Hobbs Heirloom Batting because it lays nice and flat, especially on small projects and you could also use Fusible Hobbs Heirloom
Explore your creative side today and have a great Tuesday!
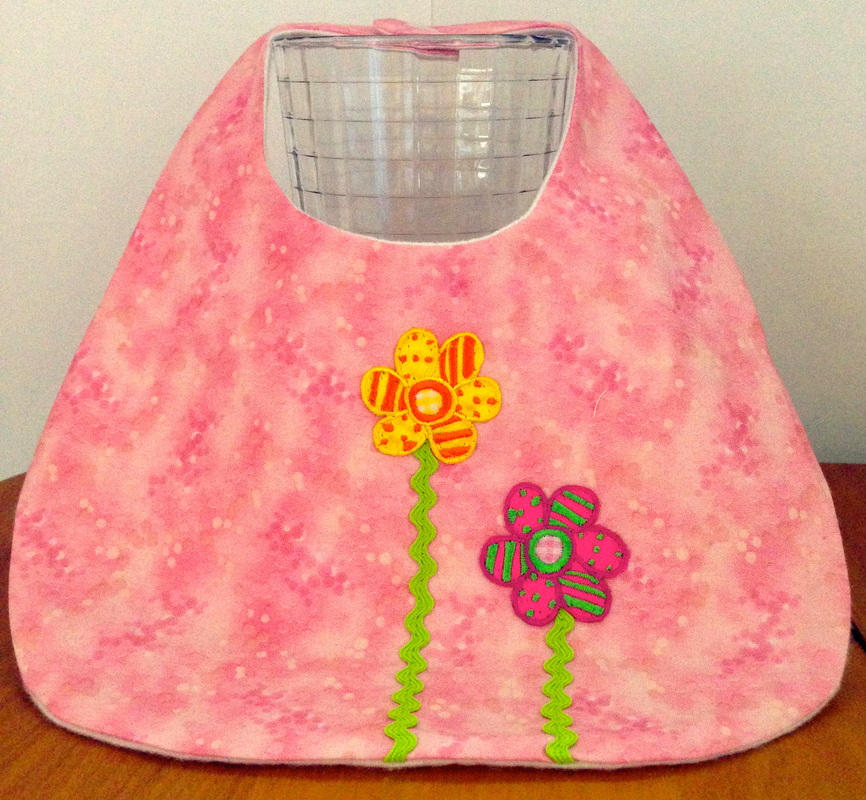 We are at it again with rick rack, doesn't it make the stems cute? Can you see rick rack used on other projects with flowers? This is a simple bib lined with white flannel ( sewn up real quick), a snap added at the back of the neck. I added purchased floral embroideries appliquéd (with monofilament thread) to the bib and rick rack sewn down to make some fun stems! If you would like the pattern for the bib, feel free to use our contact tab at the top of this blog post to ask for it via email and we will be happy to send it out to you. Another great use of rick rack! 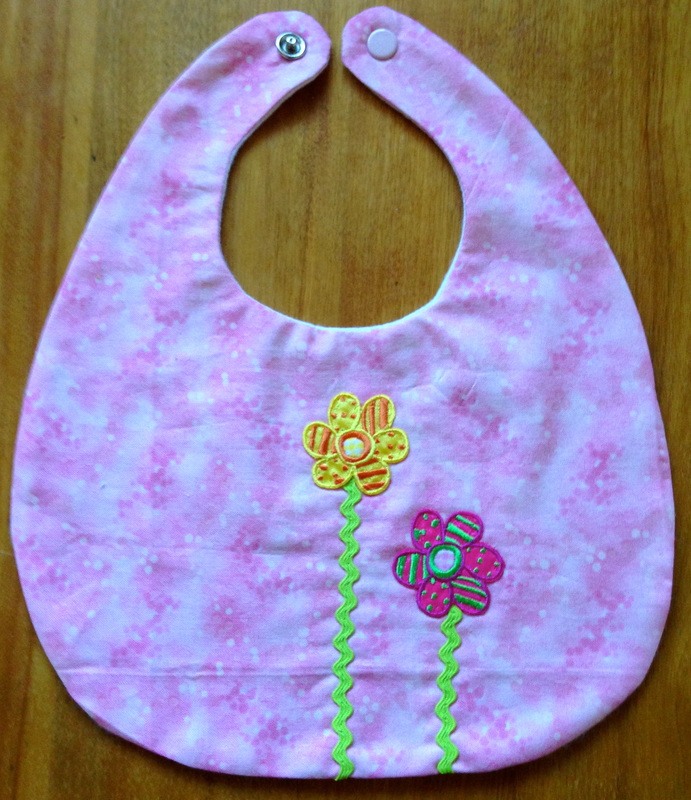 ALSO........Check out the blog post about "Sniffle Monsters" entitled FREE TUTORIAL - Tissue Holder Stocking Stuffers for Young and ahem..... not so old! from November 21. 2015 here and see images below. It is a great time of the year to make these little guys for stocking stuffers or craft show items. 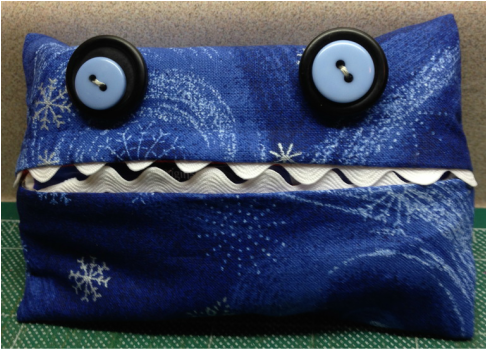 Remember this free sniffle monster tutorial -posted 11/21/2015 on this blog? 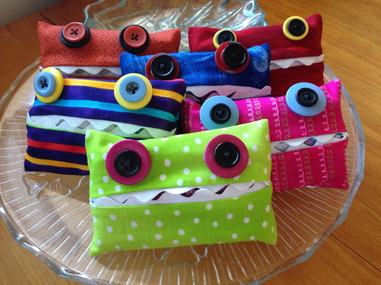 The ideas for rick rack are limitless!
Happy Tuesday ❤️ 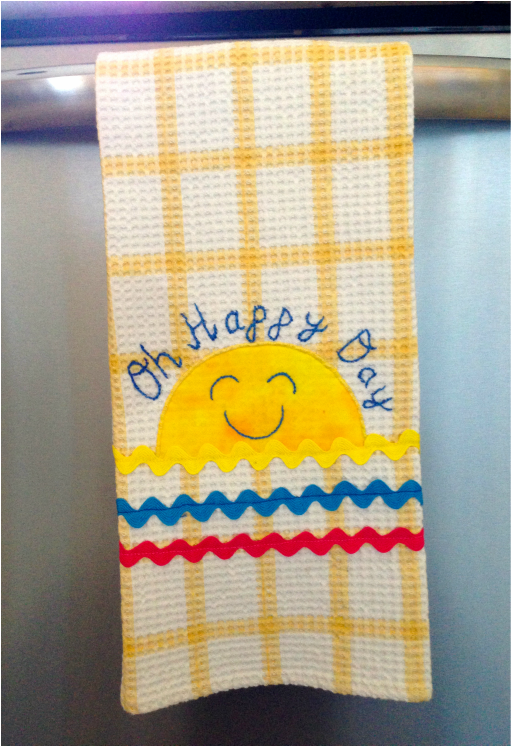 Oh Happy Day-a Free Pattern Download it from our shop! 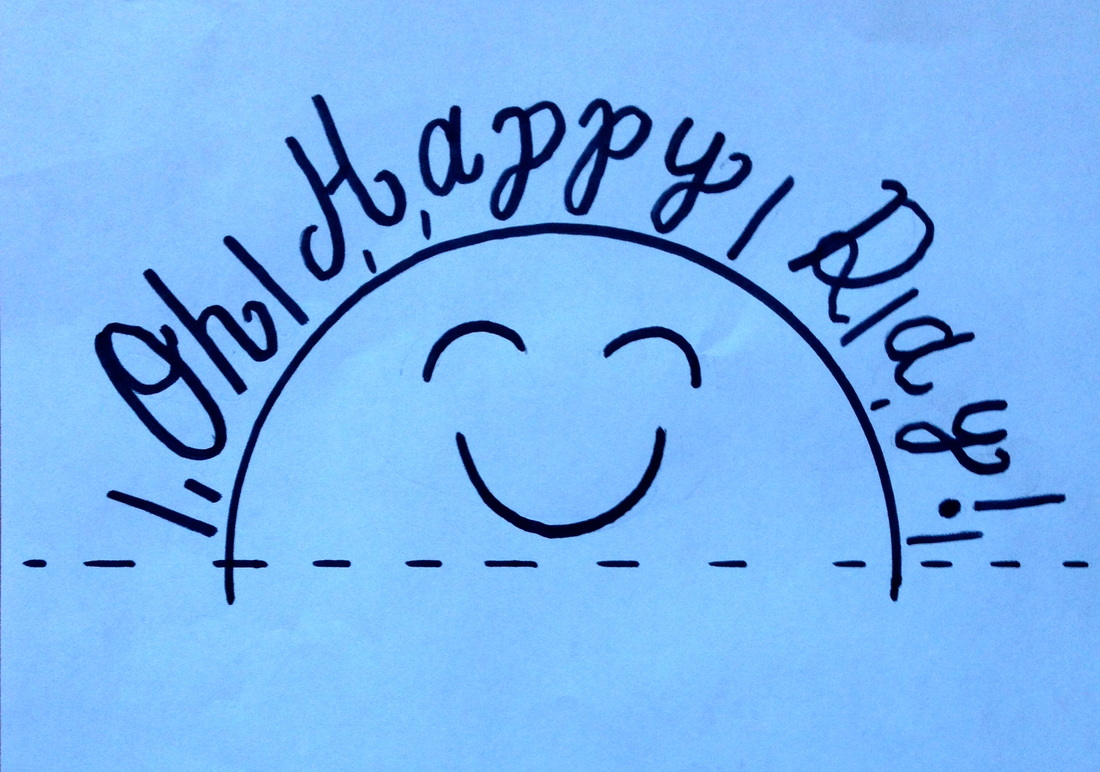 The above is a graphic I recently designed on a cool, sunny, fall day. I was apparently feeling happy! A sunny day in November kinda makes you feel that way! I have included it as a free graphic in our shop. Download it by clicking here: Oh Happy Day! Tea Towel This pattern continues my theme of using ric rac on sewing/quilting projects. The ric rac above provides a fun horizon line for Mr. Sunshine. I was at a local fabric store recently and someone mentioned that the always sew their "trims" including ric rac by hand? I am here to tell you, you can sew ric rac by machine easily and it will stay on your project more firmly if you do sew it by machine. It is especially good to sew on by machine with a frequent use item such as a tea towel which will be washed often. How to make "Oh Happy Day":
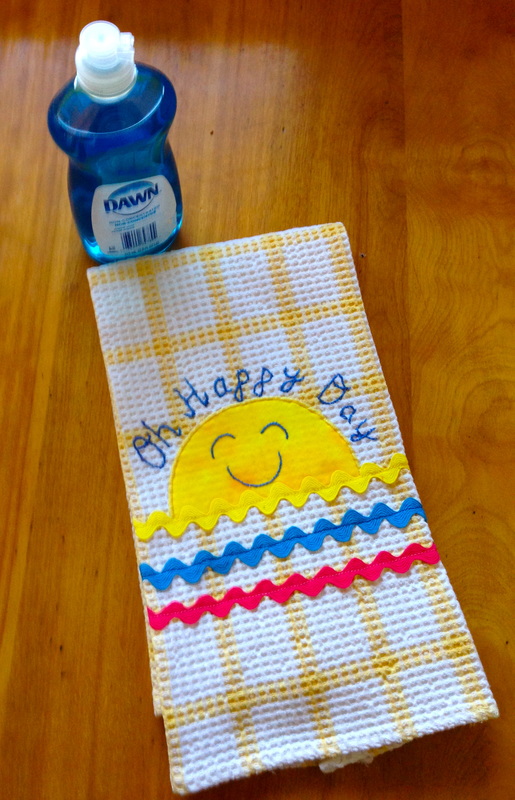 The other most important products used with this project? 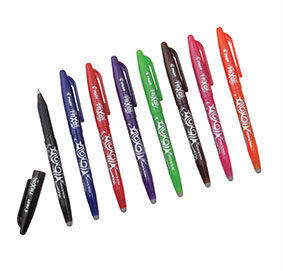 & 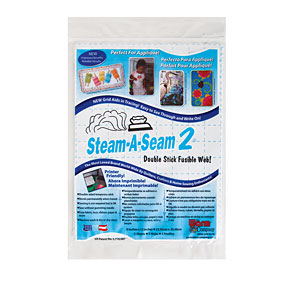 Happy Tuesday, have a great day!
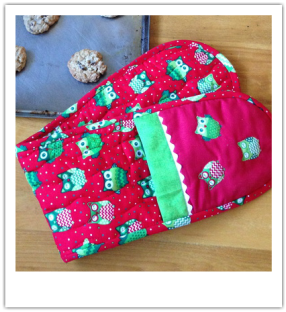 Double ended oven mitts trimmed with ric rac! Double ended oven mitts trimmed with ric rac! Over the next few weeks I will be sharing with you projects which are oriented to gift giving, getting ready for the holiday season and utilizing ric rac as a trim. You are probably thinking, ric rac is a bit too retro? I think it's fun to incorporate this trim on projects! That's my story and I am sticking to it!! It is a trim that can appear modern and fun or vintage... you choose. The story of ric rac (also spelled rickrack & ricrac) goes back to the 1800's. Ric rac has been described as a flat narrow zig zag shaped braided trim used for clothing and curtains. Before the popularity and availability of sewing machines and sergers it was used to conveniently finish the edges of fabric. This trim became popular and peaked in use in the 1970's, at the time of "Little House in the Prairie" and likely as I surmise, along with the increased use of the home sewing machine. Any way I cut it, ha ha pardon the pun! I like it for the following reasons:
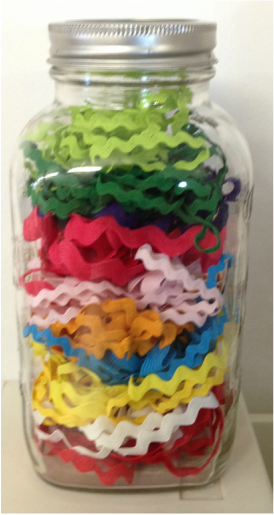 My jar of ric rac, a great way to store it Now on to the project at hand...... Double Ended Oven Mitts, so handy to hang conveniently on your oven. No need to hide these beauties away! A great gift for the chef/baker in your family or keep to use for your kitchen! I am keeping mine, I need it for upcoming Christmas decor and baking. 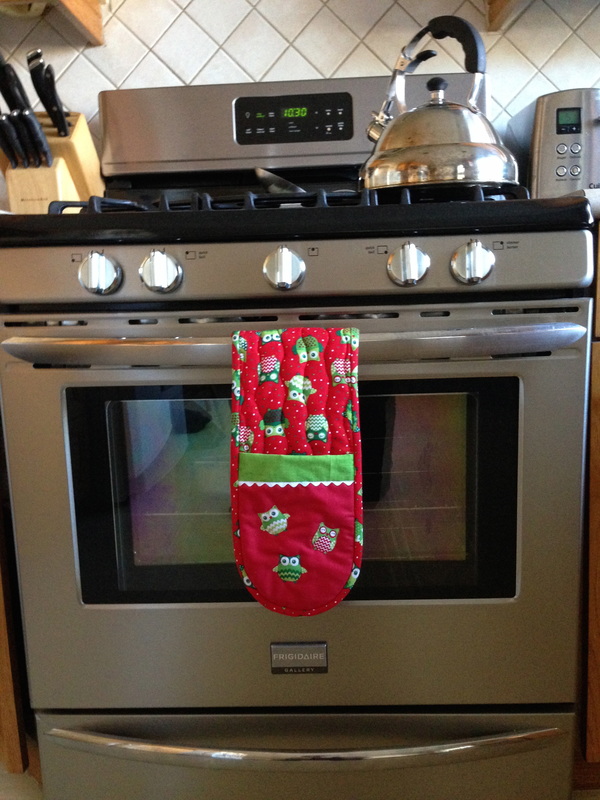 Project #1 with Ric Rac, Double Ended Oven Mitts What you will need:
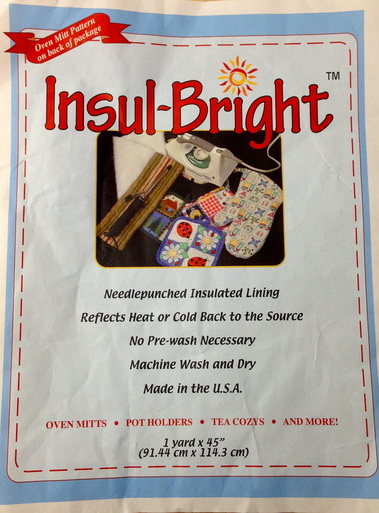 This is what I used with a layer of batting How to make your double ended oven mitts:
mitten front rounded areas. 5. Baste at the edge of 2 of the mitten fronts, the 2 pieces of ric rac to the straight edge of the mitten. See below: 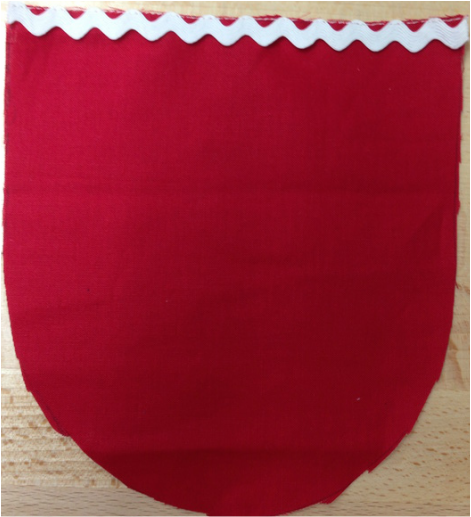 6. Attach the trim piece (3 x7") right side down to the ric rac and sew with a 1/8" seam allowance 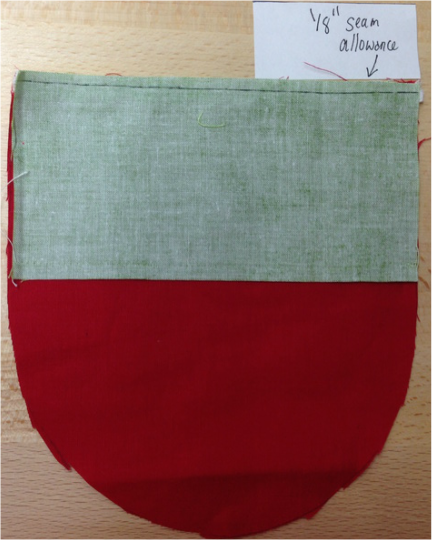 7. Repeat for the other pocket as in 6 above. 8. Sew the back of the front pocket to the other side of the trim (green) as shown below (right sides together). Make 2 of these 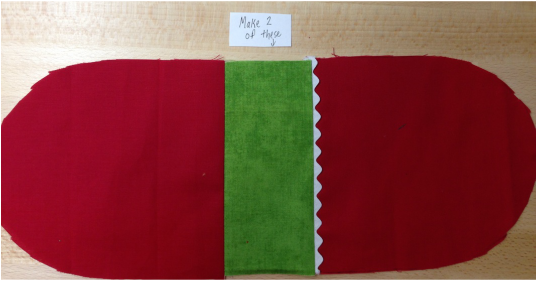 9. Applique or embellish if you wish now on the ric rac side of the front pocket. See below: I cut out some owls, fused them with fusible web and used invisible thread to appliqué them. 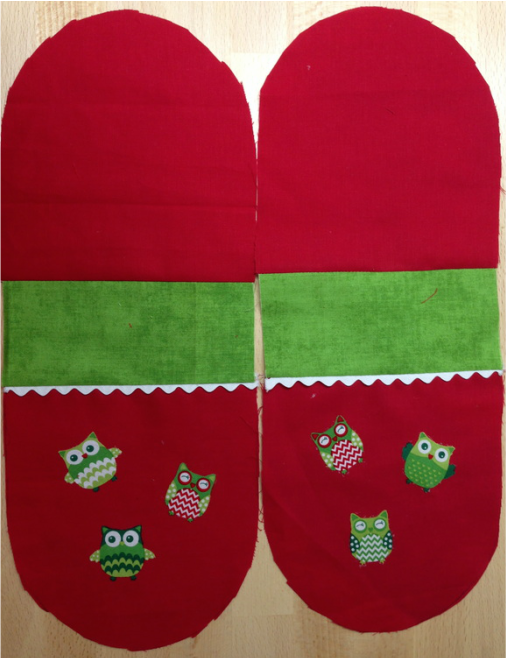 10. Fold your mitten fronts over the 7 x 8 1/4" pieces of batting. (Batting sandwiched on the inside of the mitten) Trim if necessary. Stitch in the seam ditch between the trim and the ric rac and sew all around the outside edge of the pocket to hold together- 1/8" in from the edge. Repeat for the second pocket. 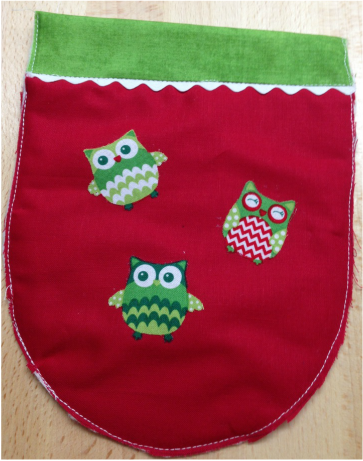 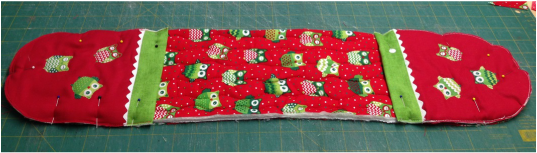 Pin all around pocket edge 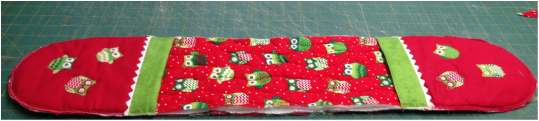 Sew with a 1/4" seam allowance all around pocket edge 12. Bind with pre-prepared bias, 2 1/2 double fold binding using a 1/4" seam allowance. Bind as you would a quilt! See below: 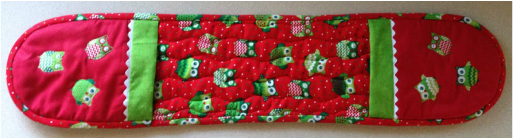 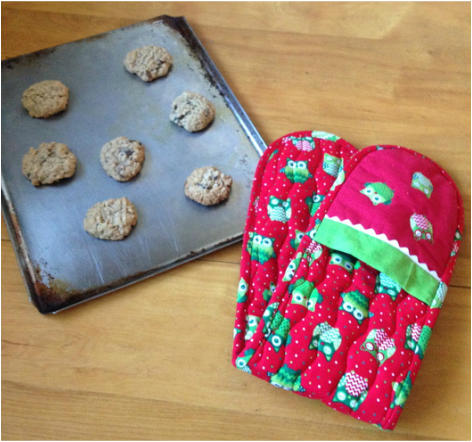 You are now ready to put your double sided oven mitts to great use or save them for someone special this Christmas.
Doesn't that ric rac look adorable!! Happy Baking and Happy Tuesday! 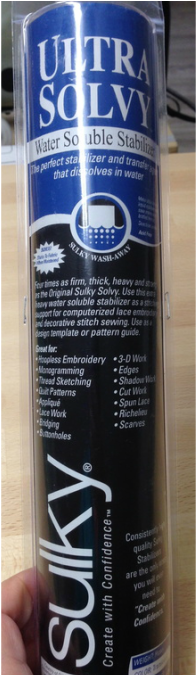
The Ultra Solvy by Sulky above is wonderful! I have been using it to create stand along thread painting for My Thread Painted Floral Arts Quilts and I just have to share with you that this is a miracle product. It would also be great for lace making, digitized embroidery and any needle work application that is free motion and stand alone.
It is great because it is thick and sturdy and does not allow for any puckering especially if you add a hoop to your technique. It also comes in 12" rolls! Which is a great with if you are doing larger embroideries, lace work or custom original stand alone thread painting. 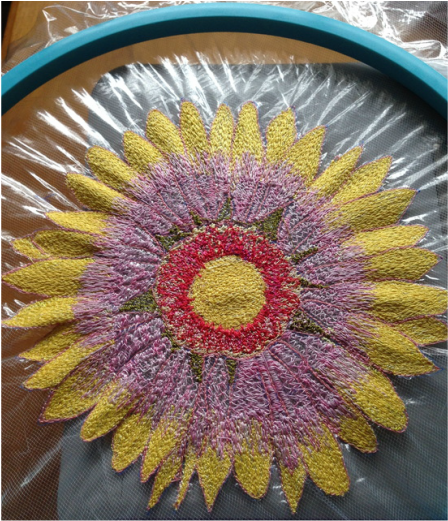
Thread Painted Gaillardia in progress using Ultra Solvy by Sulky!
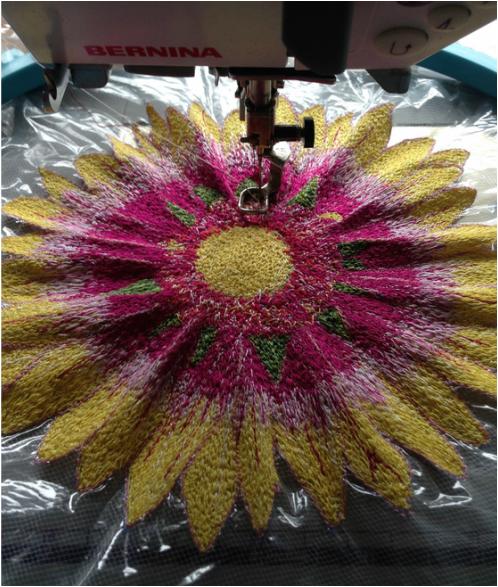
Almost done with Sulky Ultra Solvy!
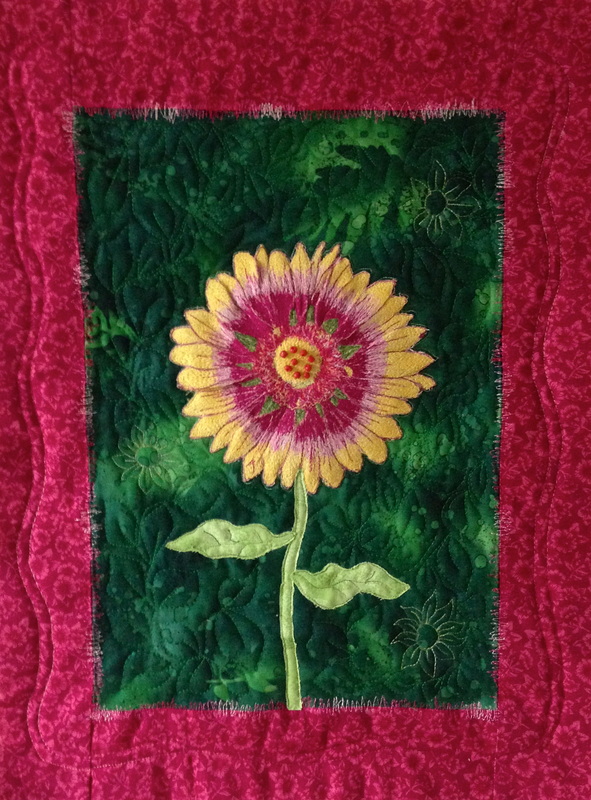
The finished Gaillardia Flower Quilt The original pattern is available in our shop!
The Ultra Solvy does take a while to dissolve so after your thread painted or embroidered work is done, I do recommend soaking it over night in water and rinse a few times with warm water. As they say on the package "create with confidence" and yes you can with this wonderful product.
If you want to look into purchasing it please check it out below:
Have a great Tuesday!❤️
Are you looking for a quilt to piece in a weekend? You have found it, this is it! It can be done!! 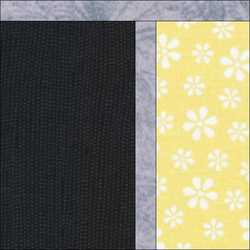 Block 1: Make this super easy block, make more and flip the blocks to make a really interesting quilt!! ***This is layer cake friendly, read on to see more*** My quilt (shown below) is from a yellow, grey and black modern layer cake collection of fabric with 42- 10" pieces. All 42 pieces were used with no waste and you will also need a coordinating sashing fabric (mine was grey). I also used fabric in black for a wide (5") outside border to make it a queen sized quilt. Cutting instructions for one block: Cut the top grey strip 2 1/2" x 11 1/2", Cut the middle grey piece 2 1/2" x 10", Cut the yellow piece 4"x10" and the black piece 6 x 10" (alternate your colour combinations and sizes). So if you have a 10 x10 layer cake piece, you are making one cut at the 4" mark. 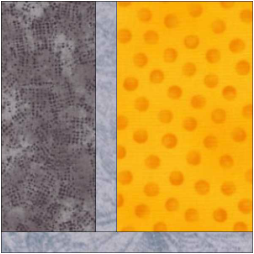 Block 2: This is the same block just flipped so the grey sashing is at the bottom. To make a quilt, sew 21 of each block (they are 12" finished sized blocks) and alternate block 1 and block 2 in rows until you have a quilt like the one I made below - there are 6 blocks across and 7 down: 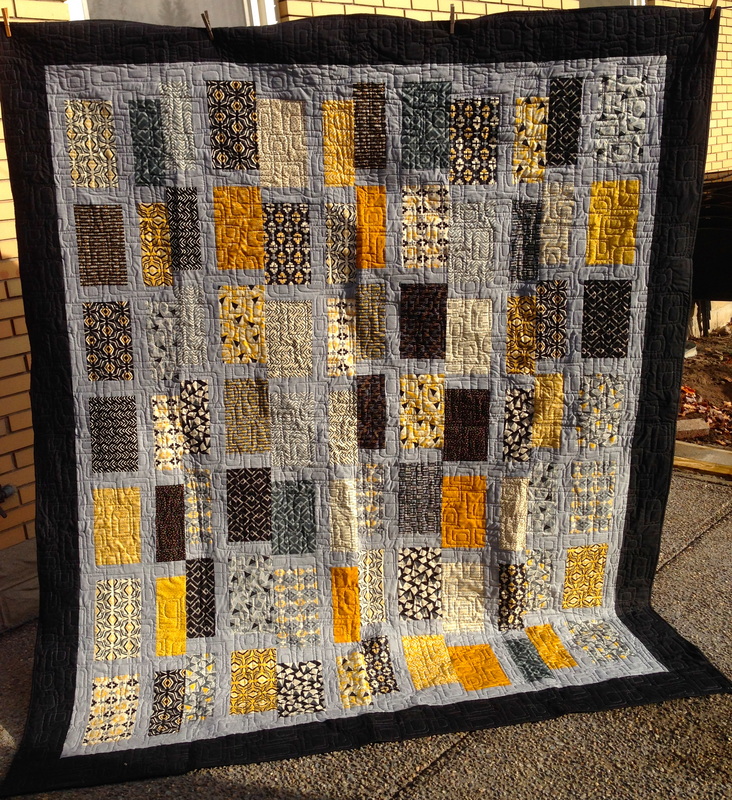 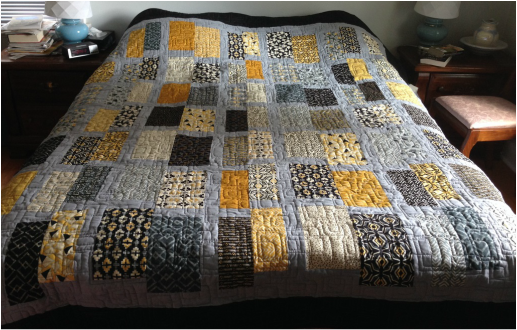 The part of the quilt that includes the blocks measures approximately 69 x 83.5 and then a 2" inside border was added (grey) to make the blocks look like they are floating. A 5" outside border (black) was also added. The final measurement of my quilt is 81 x 95.5 and it fits my queen sized bed nicely. If you like more overhang on your bed, simply make your borders bigger. 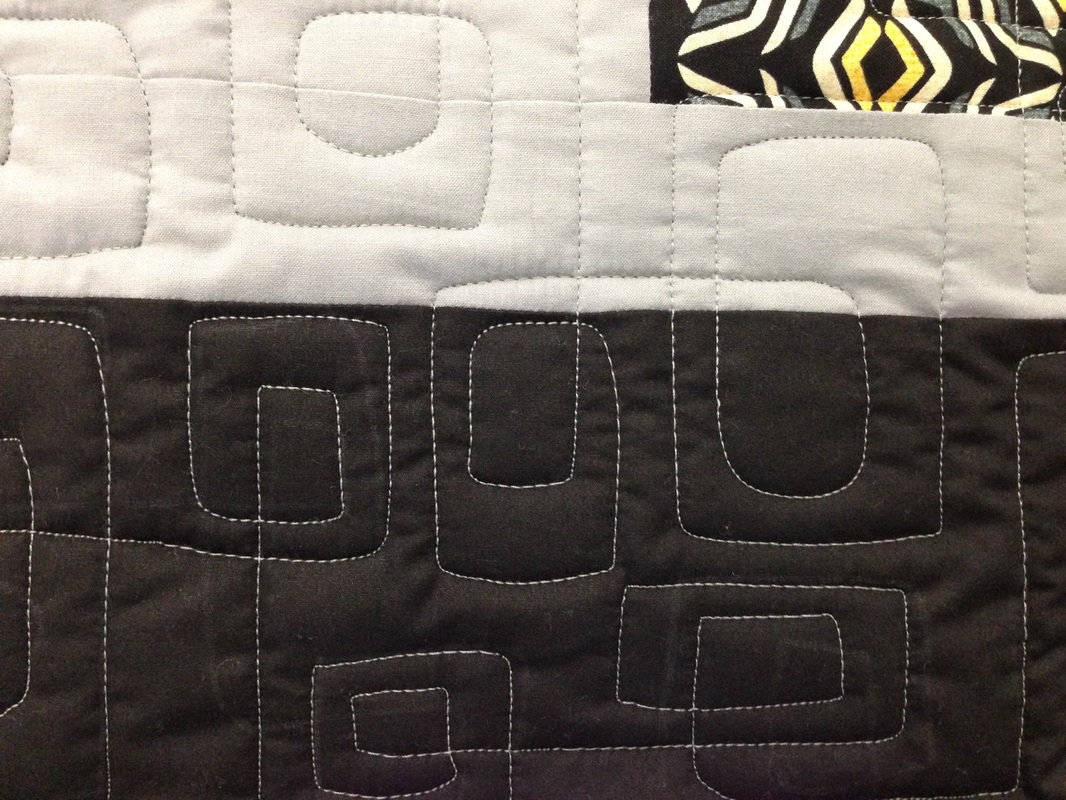 A close up look at the modern quilting to go with the modern fabric If you have a layer cake or a collection of fabric, I challenge you to make this easy quilt. With the holiday season coming, it just may be a quick but effective quilt to make for your family this season! If you try this, please send photos, we are happy to share your work on this blog. Also, feel free to contact us with any questions by clicking on the more tab above and clicking on contact. Happy Sewing and Happy November! 👍 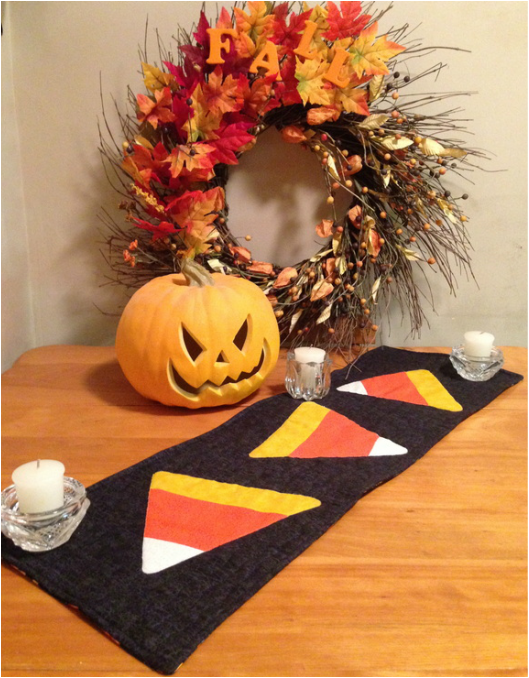
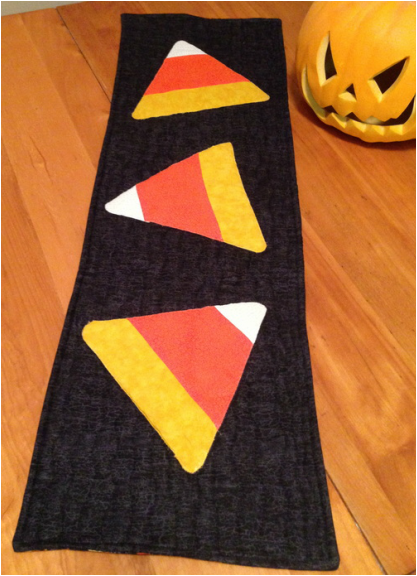
Candy Corn Table Runner/Candle Mat
You can make this baby in 4 hours tops! This was my Sunday project to get me into the spirit of Halloween!
I used a 60 degree ruler and it was a great time to revisit the use of this wonderful ruler which is really very versatile! What you will need:
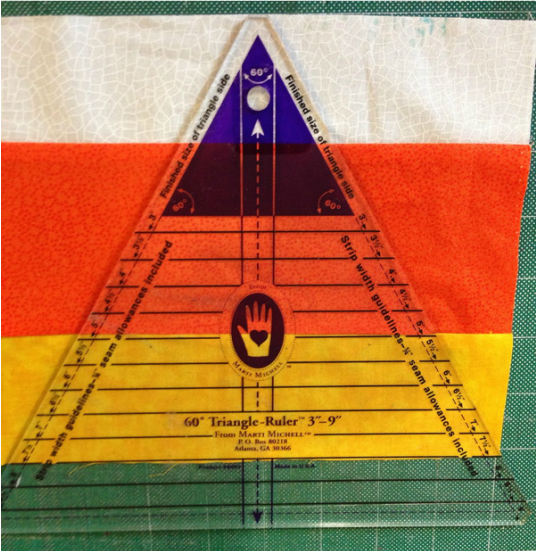
Want to get the ruler? You can get it by clicking on the link below:
How to make it:
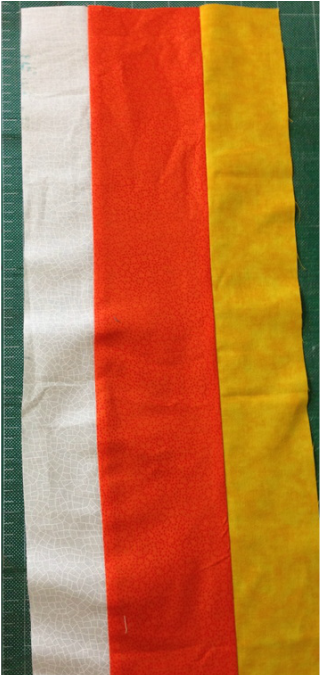
Step 1
2. Cut 3 with the narrowest point white (this is what candy corn looks like). You can cut alternate triangles and use them on another project with narrowest tip yellow (to save on fabric). Scroll down to see what I did with alternate triangles
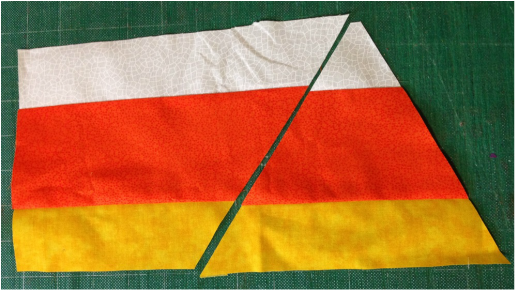
Step 2- Cut 3
3. Mark and cut the corners of each candy corn to round them.
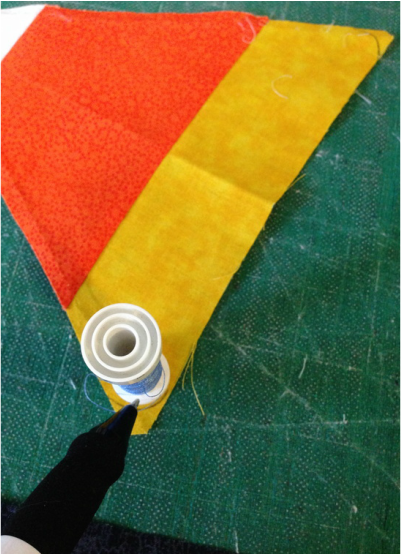
Step 3
All 3 candy corn should look like this once trimmed in the corners:
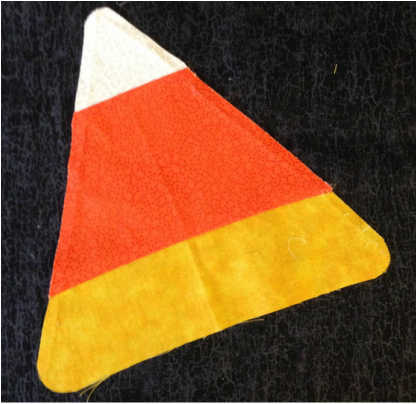
4. Using fusible web or fabric glue, adhere your candy corn to the black backing fabric. Use a small zig zag and invisible thread to sew the edges down and appliqué the candy corns to your background. Tip: use a stabilizer adhered to the wrong side of the background to avoid puckers when using the zig zag stitch
5. Lay your batting down on a hard surface and then your backing right side facing you placed on top of the batting. Place your table runner top, right side down onto the right side of the backing fabric (you have your quilt sandwich now). Pin through all layers on the edge and sew 1/4" from the edge all around the table runner. *Leave a 3" gap for turning*
6. Clip all 4 corners and turn your project to the right side. Press to turn your gap edges in evenly and hand sew your gap closed.
7. Quilt 1/4-1/2" from the edge all the way around on the top and free motion quilt around the candy corn and fairly densely in the background so that your table runner lays flat.
Your project is complete! Enjoy!!
An alternate project is below (think about this in different colours too!)
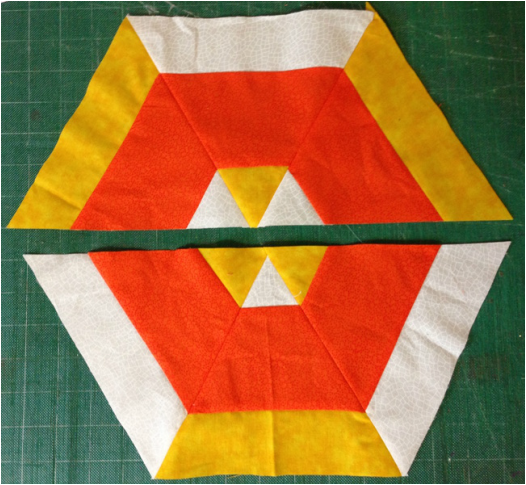
Do I have you thinking? I sure hope so!
I hope you have a Happy Halloween! |
Follow Me:
Welcome!Hi I'm Robin and I am a professional long arm quilter, pattern designer and teacher. I am passionate about all things quilty!  
  Categories
All

Sponsors
This blog contains affiliate links. This means that we endorse products.
We do receive rewards for these endorsements and this helps to keep this site alive and well. We support products which we believe are the best quality and to inspire your creativity! |
 RSS Feed