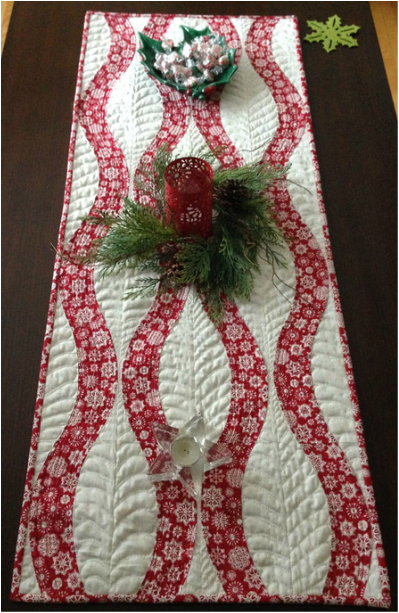
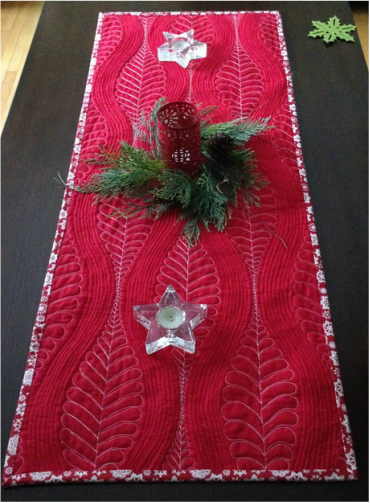
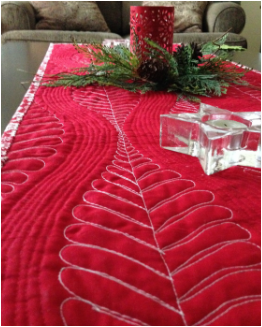
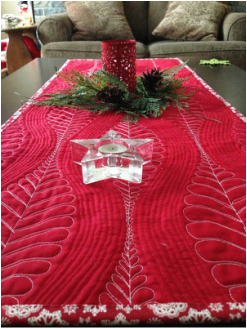
 I know this is a repeat performance of the "Sew Kind of Wonderful" curved piecing block made into a table runner, but I finally got it quilted! I can now display it in my home over the holidays and share how I quilted it with my blog followers. I Love how it turned out! I highly recommend the book below as the pattern is a modified version of "urban pods" from this book. It was easy to put together and easy to quilt once I had the feather designed. You can get this book at www.connectingthreads.com they have it on sale right now for $17.60 USD (23% off!). Wonderful book!!! 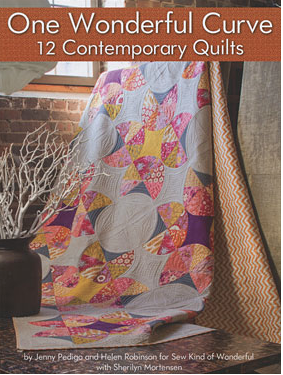 Some more pics: 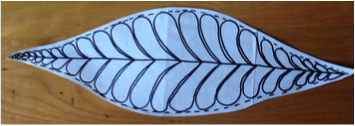 Feather drawing designed for quilting the oval shapes in the background 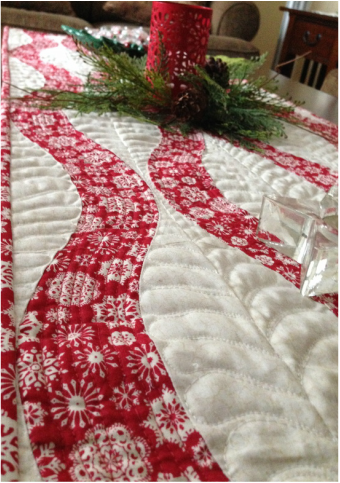 Close up of the quilting
 Only 2 more sleeps! Happy Wednesday!!
0 Comments
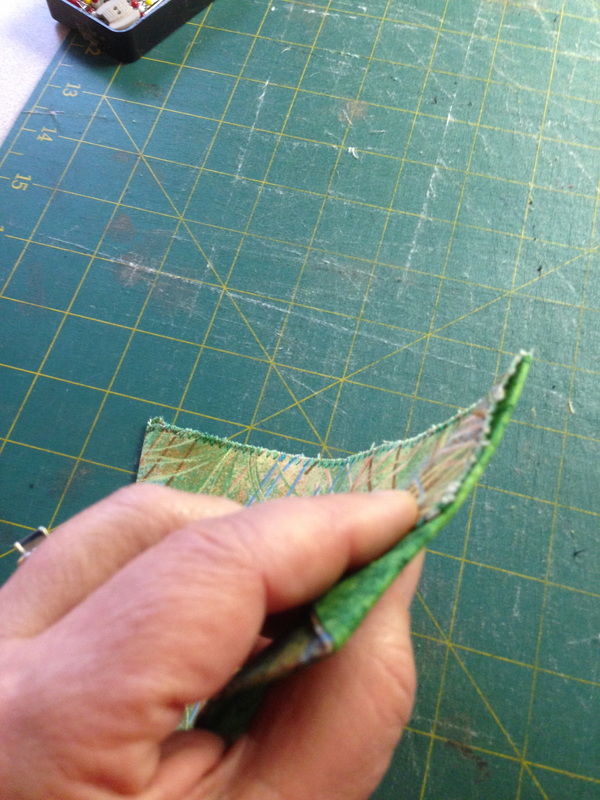
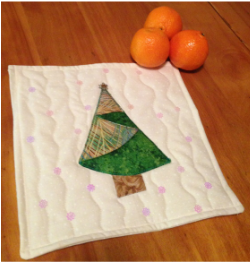
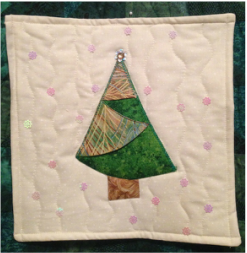
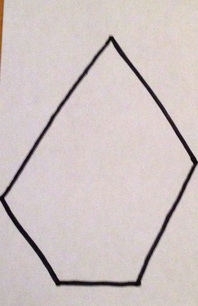
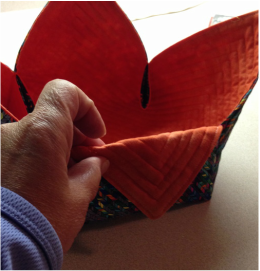
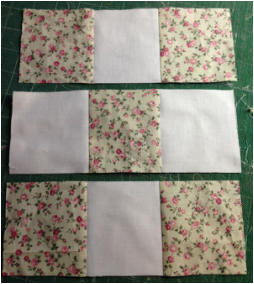
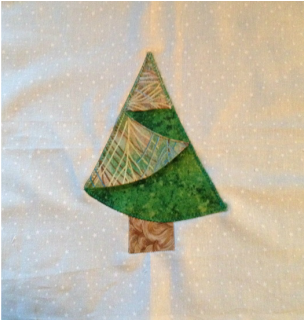 Half Circle Folded Tree Half Circle Folded Tree I know, I have shown you a tree project in the recent past. However, this is one that could be used as a block, embellishment for a Christmas card or for a small mug rug (hostess gift?) or a quilt. It will take you where your imagination goes! You use a 1/2 circle to make it and it is both quick and easy and your friends will say "how did you make that?" You will need: A circle "template" (I used a 8 1/2 round luncheon plate) pen or marker 2 pieces of green fabric to fit your template 2 1/2" square of brown trunk fabric Background fabric to fit your tree (I used 10 1/2" square) Embellishments as you wish Batting if you are making it into a small quilt Backing if you are making it into a small quilt Binding fabric if you wish to bind it Thread to match all fabrics How to make it:
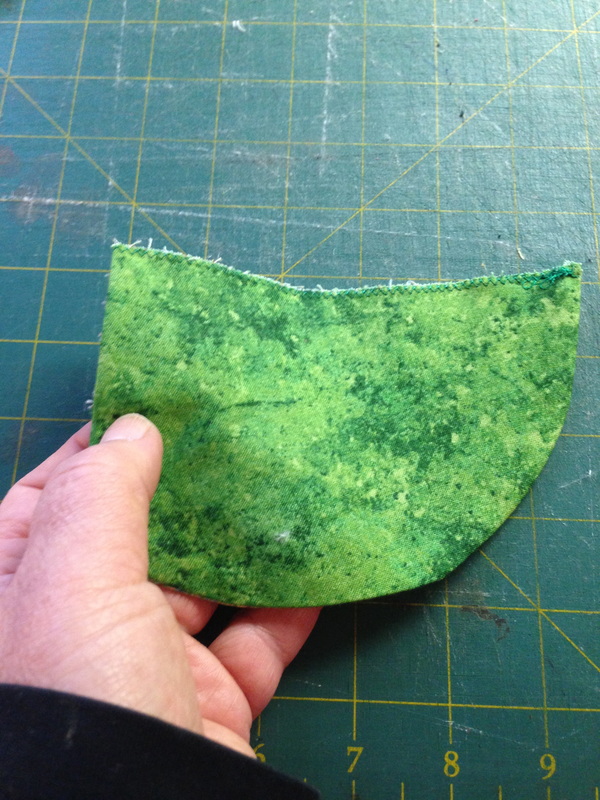
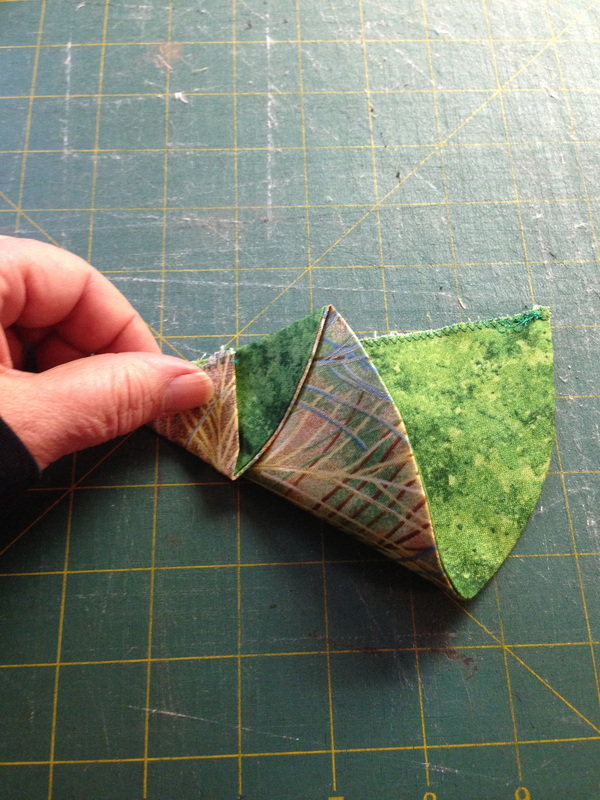
 2. Using your circle template trace and cut one circle from each of 2 green fabrics. 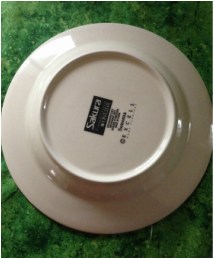 3. Press your trunk fabric under on all 4 sides, 1/4" 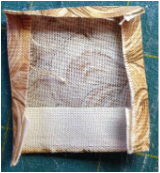 3. Cut out your background fabric 4. Sew 2 circles right sides together using a 1/4" seam allowance. You will not need to leave an opening, sew all the way around 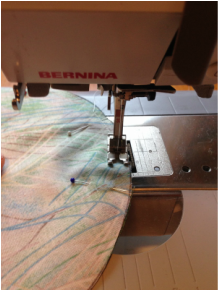 5. Find the centre of the circles by folding them in 1/2 and cut with a rotary cutter through the 2 layers (you will have enough for 2 trees) 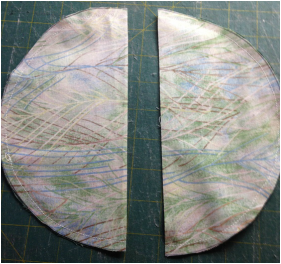 6. Turn the 1/2 circles to the right side and press, set one aside to make a second tree project. Zig zag the raw straight edge with a green thread. 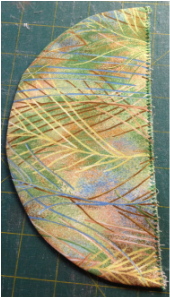 7. Mark the centre along the straight edge of your 1/2 circle by pressing it 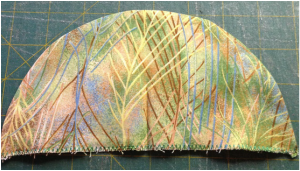 8. Fold your left corner towards your centre as shown below and press 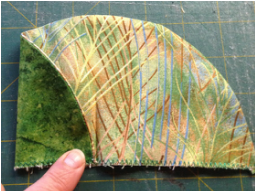 9. Turn the 1/2 circle so the raw edge is away from you, take the edge of the corner and fold it back. Line up the straight edge with the first fold line. 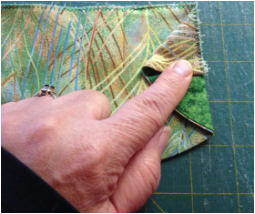 10. Flip your tree over. Take the shorter edge and line it up with the longer edge on the opposite side. 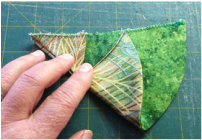 11. Press your new tree, pin the trunk and tree to your background and appliqué in a method you like. 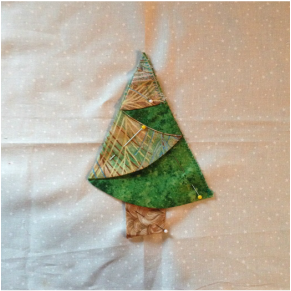 12. Quilt and embellish as desired and admire your efforts.
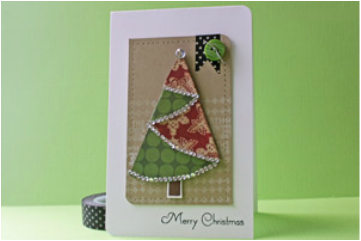 Use your 1/2 circles to make pretty Christmas cards Happy Wednesday!
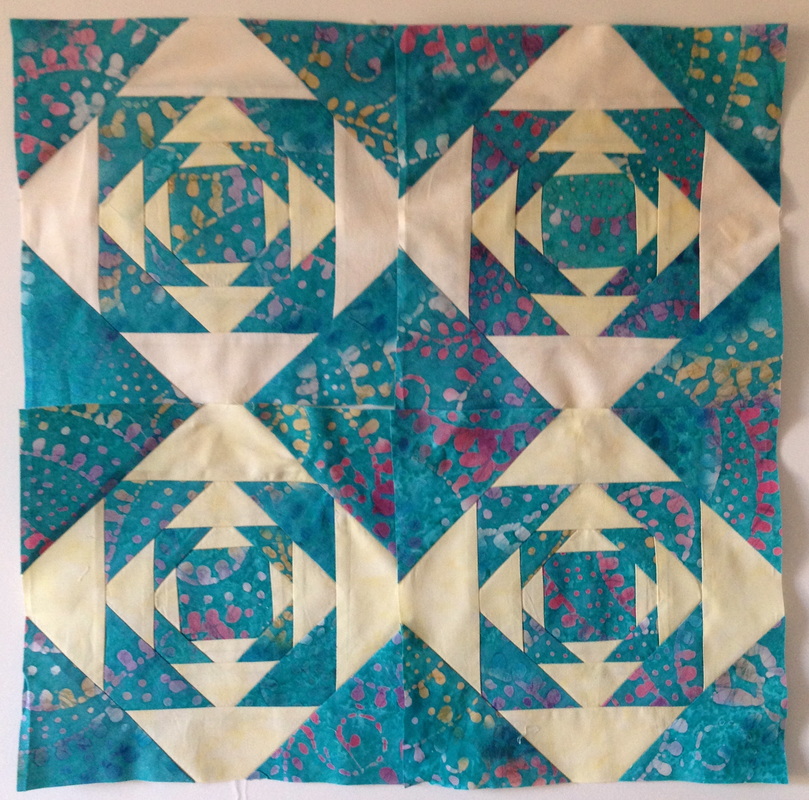
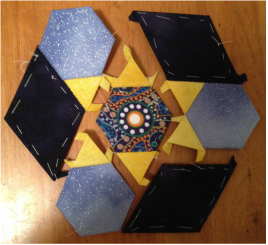
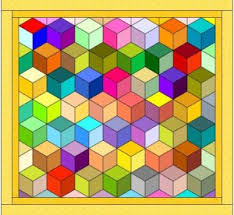
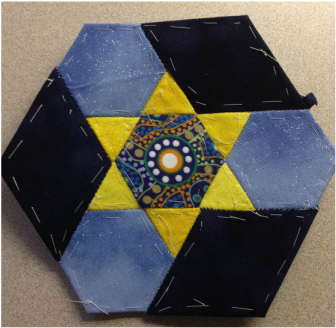 Isn't that an unusual and very precise block? I thought it was appropriate at this time of the year as it has a significant star in the centre and this is the month of the significant star! Yes it is English Paper Pieced. Did you know that most blocks can be English Paper Pieced? Because they are shapes, card stock templates can be made from them and then the fabric can be wrapped around the shape to baste it in place. So..... if you like something to keep your hands busy in the evening while watching TV or listening to music, English Paper Piecing is wonderful. Hexi piecing is all the rage right now and this is the same "EPP" technique. Check out the photos below to see how I put it together:
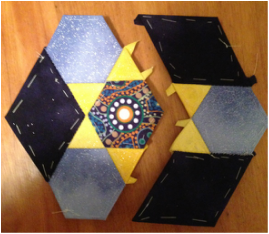
After the pieces are slip stitched together, the entire block will be pressed well and the basting will be removed once it is sewn into a project. This "project" will be revealed to followers of www.quiltingintheloft.com blog at a later date.
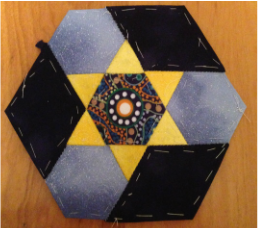
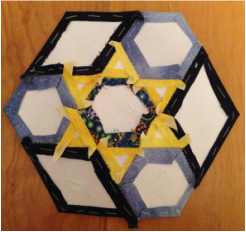
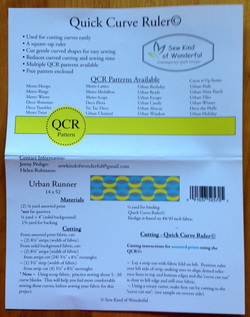
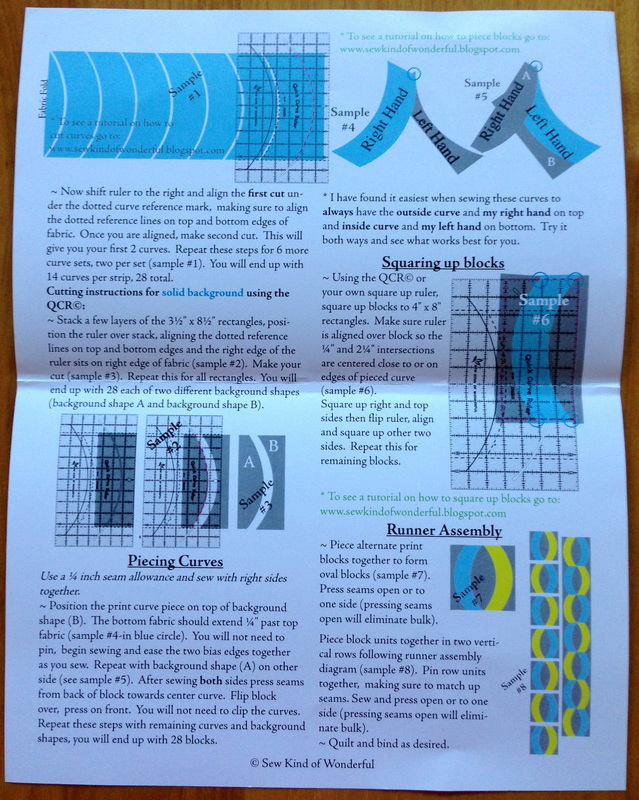
Wouldn't this be great with corners added for a pretty pot holder or made larger for a centre piece or candle mat ... or an entire quilt, the possibilities are endless and that is what is great about making blocks :) Want to give it a try? Download the free PDF pattern in the shop/free PDF patterns section of this web site, use the menu above to navigate to it. Print the pattern out on card stock. Cut your fabric pieces out a scant 1/4" bigger than your card stock. Baste the fabric to the card stock and slip stitch the pieces together. If you need help with the piecing there are many tutorials about EPP on the Internet. I recommend you make use of these tutorials if you are unsure. I sewed the block above together in an evening while watching "The Voice" - that means you can do it too! Enjoy and Happy Wednesday! I just finished a table runner after doing a workshop with the Elmira Needle Sisters. Or at least the top is done! My goal is to get the quilting done by Dec 11, 2015. So hopefully, I can share the custom quilting design with you then! I do not have time to do a quilt right now with long arm obligations, pattern designs, teaching and this blog, my time is limited but I enjoyed making this table runner. Below is a pic of the table runner top. 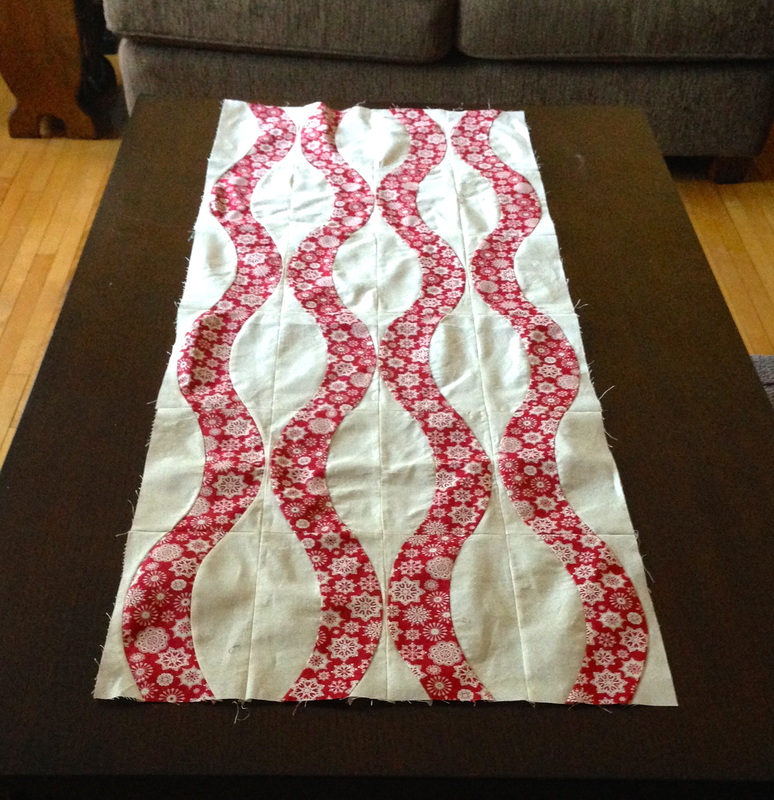 Contemporary Table Runner top- made using the Sew Kind of Wonderful Quick Curve Ruler The "block" for this project is actually kind of an unusual finished size it is 4 1/4 x 7 1/2" - a rectangle. When you are finish making one, you automatically think ... What the heck am I going to do with that? Well I discovered via the assistance of a great teacher Susan, that with this wonderful Quick Curve Ruler, repetitive blocks and careful layout I could make a variation on the "Urban Pods" table runner. See one block isolated below: 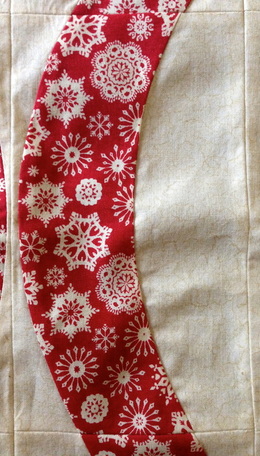 Love this red snowflake fabric! This is one block Because I used only one kind of feature fabric, I did not have to worry about making mirror image blocks, I simply had to flip them around, audition the layout and sew them together. A picture of this ruler is below: 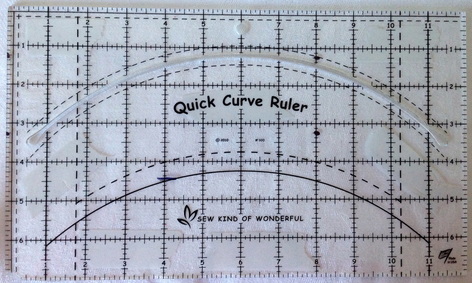 Quick Curve Ruler by Sew Kind of Wonderful If you look closely, you will notice that I placed medical tape on the back side of the ruler to stop it from sliding while I was cutting. This is a great tip if you have this ruler. The ruler comes also with a free pattern which is awesome and it is called "Urban Runner". This is a great bonus! How many rulers do you know that come with a free pattern? Pics of the free pattern handout are shown below:
What I found out as I was taking the class is that Sew Kind of Wonderful has 25 patterns available, some are available here and 2 books that utilize this clearly versatile ruler! The ruler also squares your blocks and can be moved around to make other shapes (this is called techniques). These techniques are why they created patterns and books. They created a single product (the ruler) that can be expanded upon. It's on sale at Connecting Threads right now for 50% off you pay only $16.00 USD or approx 21.35 CDN . This is a real deal compared to what I paid for the ruler!! Also if you order over $75.00 there is free shipping. I was so happy with the way my table runner went together and with the motivation to do more with this ruler, I just borrowed their first book from the Waterloo Quilters' Guild Library, see pic below: 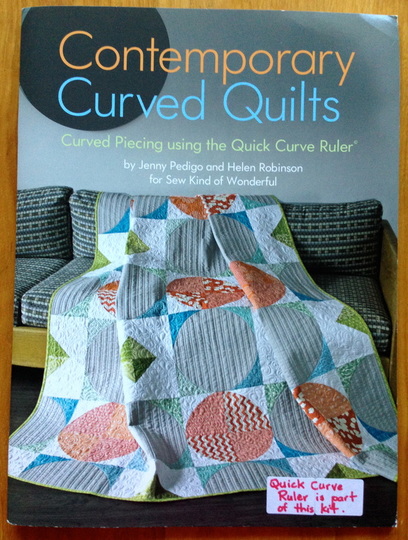 There are 6 techniques and 8 Quilts in the Book- all contemporary The above book is also on Sale at Connecting Threads right now for 20% off - $15.16 US or approx 20.16 CDN ..... and then I got all hopped up on my excitement and bought the most recent, hot off the press, just revealed at Houston Quilt Market in October book also from the same 3 women at Sew Kind of Wonderful, One Wonderful Curve 12 Contemporary Quilts. See a pic of this book below: 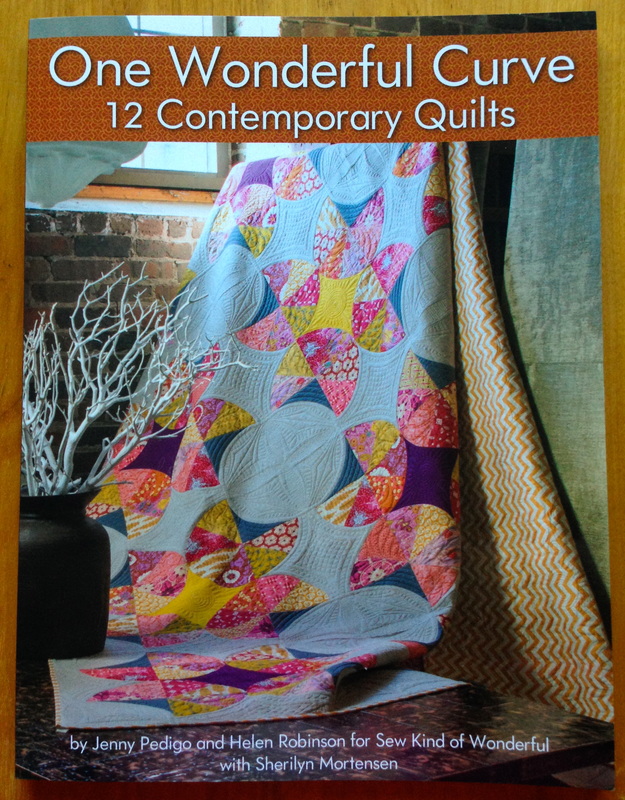 12 Quilts in this book! The book above includes 6 techniques with the same ruler and 12 more quilts.
Do I need to say more, there are rulers I buy and do not get much use out of them, but this ruler is going to get lots of use because, I love the quilts and plan to make more, they are fresh, modern, have lots of opportunity for quilting and the most recent book, has quilting suggestions in the back, yeah! The only place that I can see to get the new book above is www.sewkindofwonderful.com If you purchase the book from them, please tell them I gave them a positive review! Oh and did I mention, I see scalloped edges on my quilts and borders with this ruler?? I dream of many projects from this wonderful group of ladies and their ruler, patterns and books in the new year. My dreams are colourful! Happy Wednesday! 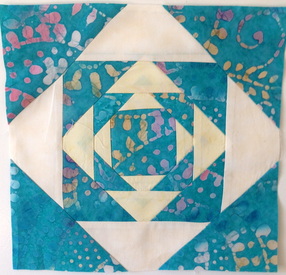
Easiest Ever Pineapple Log Cabin Block- my personal favourite way of doing this block
My not yet sewn together table topper- You will see the secondary "star" pattern in the center
If you have ever done a traditional pineapple log cabin block you would know that it is often paper pieced so that all points are sharp, the blocks above are an easy variation of the paper pieced pineapple log cabin. Many moons ago, I demonstrated the method above at Waterside Quilters in La Salle, Ontario- I miss those lovely ladies!!
See the Traditional version below and look at the points in particular- this is from Electric Quilt 7. 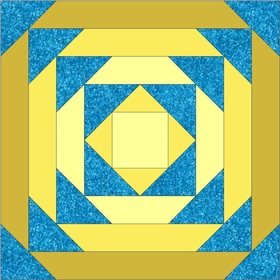
The traditional pineapple log cabin block
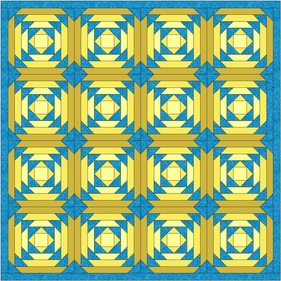
The traditional layout with traditional blocks- lovely but not as easy to construct as my personal favourite.
For the construction of the easy method, watch the you tube video below:
Karen Hellaby has a few great books out and at least 2 that explain this method, the book below is her first one. It is available on Amazon at an affordable price of $8.13 click on the link below for a closer look.
I hope you will try and enjoy making this block.
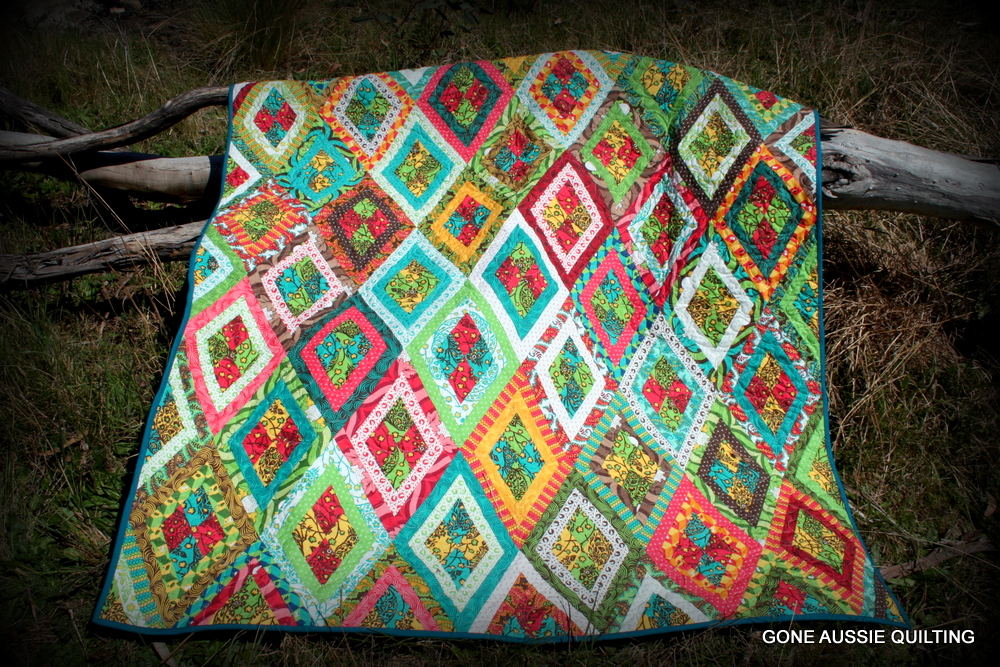
Happy Wednesday! 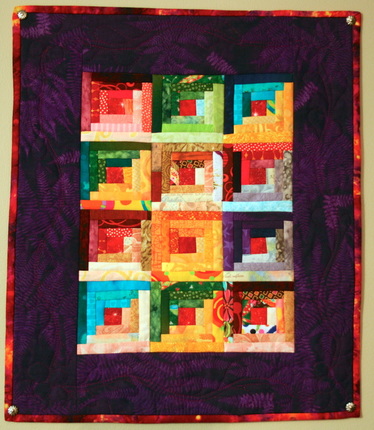 "Katie's Miniature Log Cabin" - made from miniature piecing- each log is approximately 3/4" wide "Katie's Miniature Log Cabin" - made from miniature piecing- each log is approximately 3/4" wide Katie's Miniature Log Cabin Last Wednesday, I discussed the diamond log cabin and then I thought maybe I should back up a bit and discuss the log cabin as this is the origin of the Diamond. I made a little mini for my daughter a few Christmas's back out of colourful fabric and paper piecing, a pic is below. I was also playing around a bit in EQ7 and "designed" the quilt below: 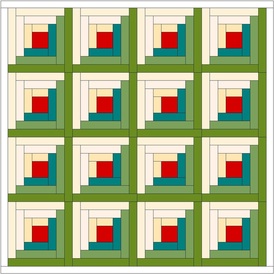 Log Cabin, Traditional Setting Then I decided to play with it and juggle the blocks around: 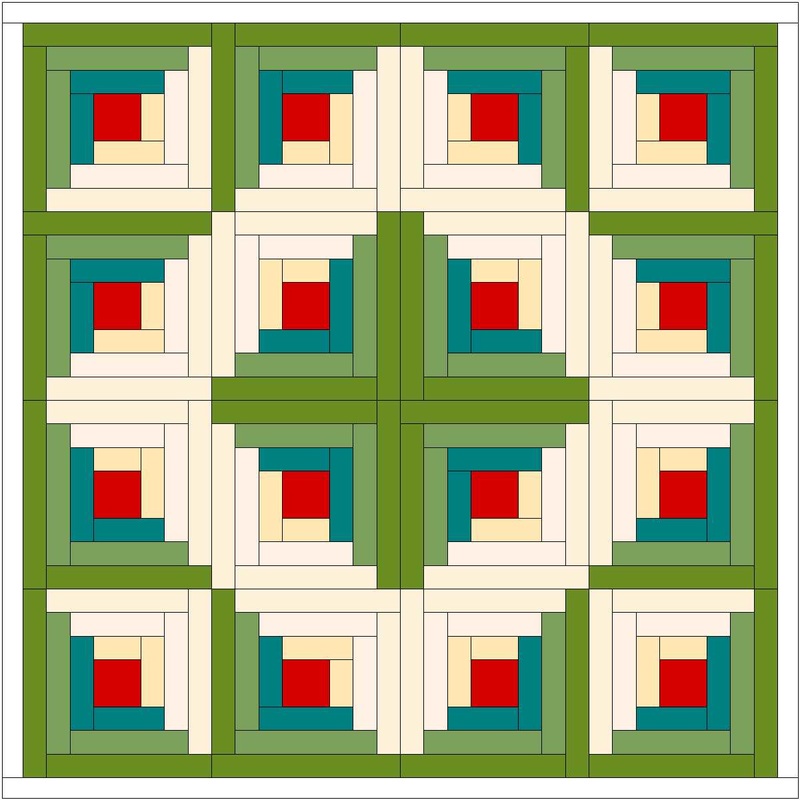 Same quilt but blocks are moved around! What is a log Cabin Block without a log cabin? 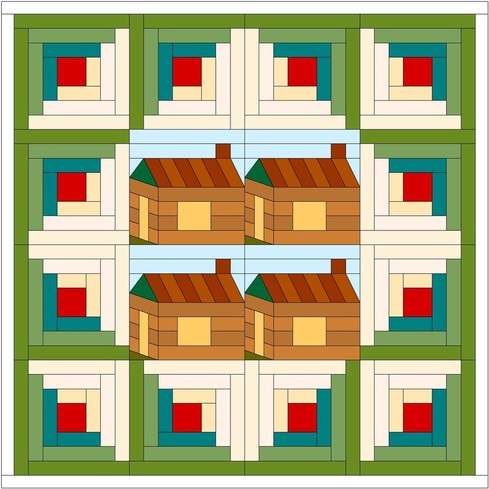 Love the central focus, don't you? Download a free PDF pattern for a log cabin here ..and lest we forget...Today is Remembrance Day here in Canada and I think fondly of my Grandfather and his dedication to service for our Country while overseas. Please take time today to remember and pay respect to our Veterans who have and are serving our country.  I was recently going through some UFO's in my stash and came across some diamond log cabin blocks that I was making from a 60 degree diamond starting point and 2 1/2" strips added (it was a project to use up 2 1/2" strips). A single block looks like this: 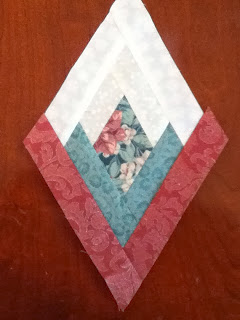 But because I have so many scraps, I want my quilt to look like this:  So I will share with you how to do this block and you can do whatever you like. Step 1: Cut 60 degree diamonds using the 60 degree mark on your Omnigrid Ruler (line it up on the edge of your strip of fabric) . The strip of fabric should be 4 1/2" wide - or whatever width you like. If you want a smaller centre, have at it! Step 2: Using 2 1/2" strips, sew the strips in the order shown in the diagram below (see the numbers on the block below the strip). Trim off your strips even on the edge of 60 degree centre diamond and using your ruler, prior to adding another strip. Press in the same direction away from the diamond for all blocks. 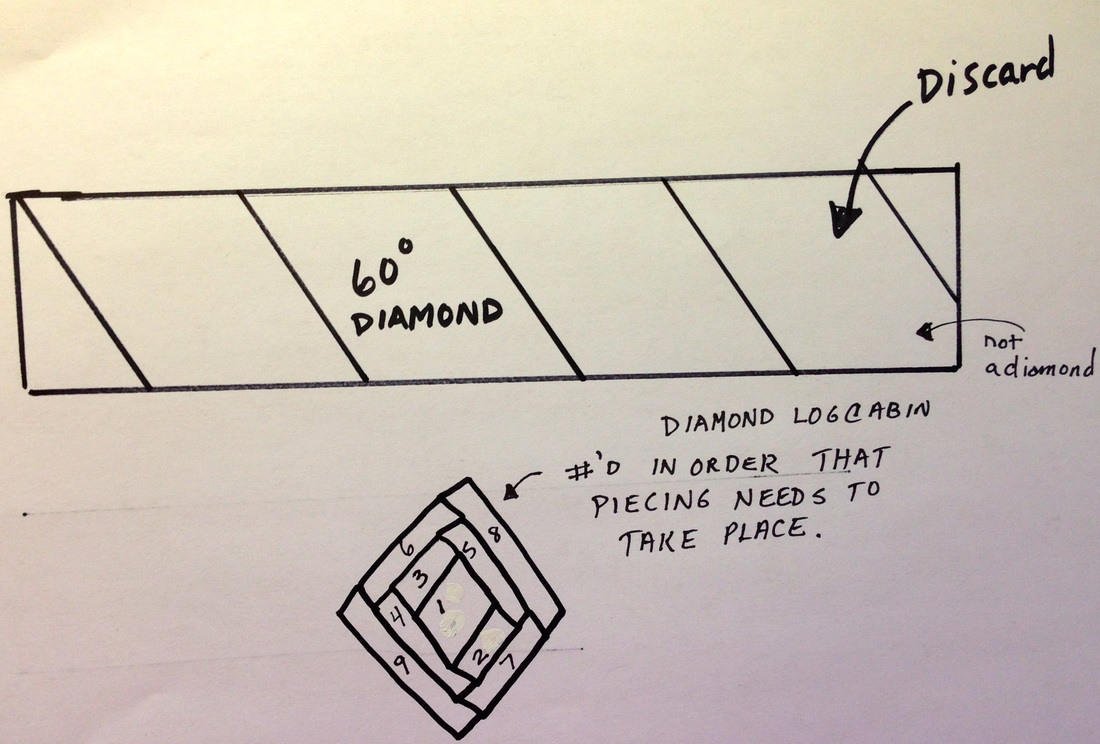 Some other variations using the same diamond shape:
 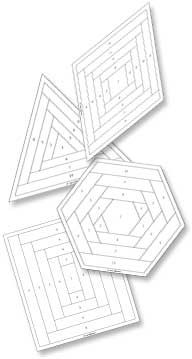 Some other shapes you can use to make log cabin blocks! I hope I have you wondering.. What if ?
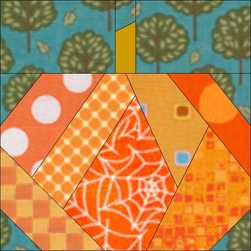
Happy Wednesday!! 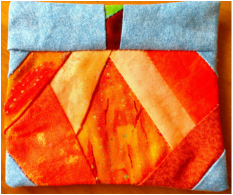 It would be remiss of me if I did not share a pumpkin block on the week of Halloween, so here goes. The block shown, is a mini block and was actually made into a coaster with felt on the back of it. You could use this block and make it into a mini quilt or read more to see other ideas. It's a quick project, Here's how to do it:
Other ideas: 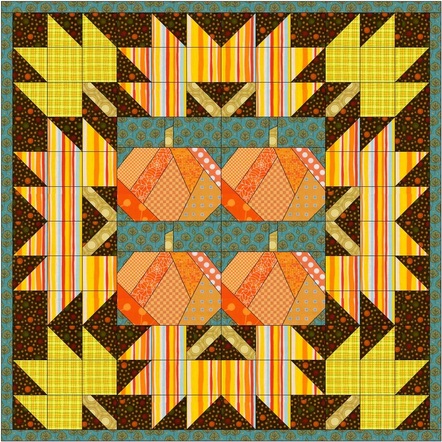 A Pumpkin Quilt 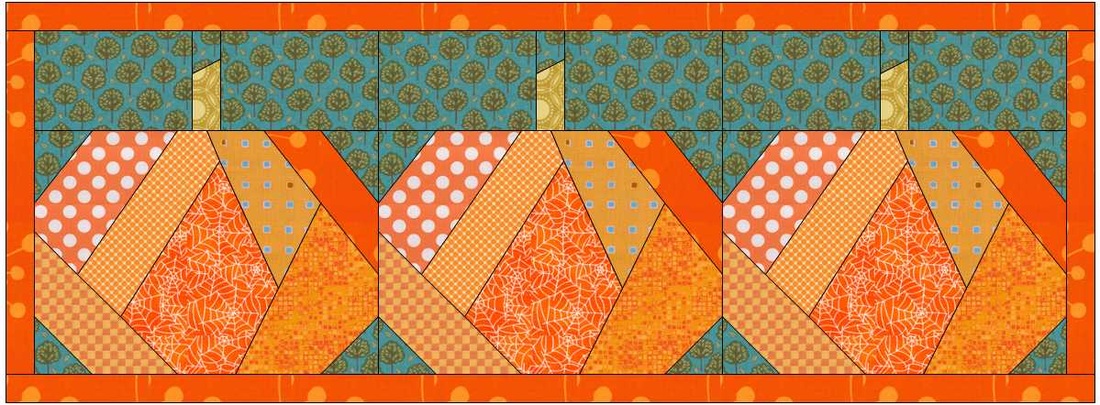 A Table Runner 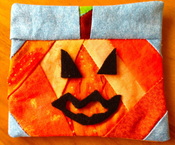 Hee, hee, hee,
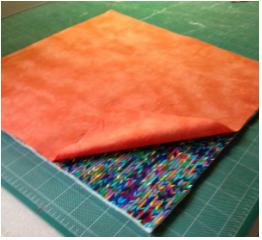
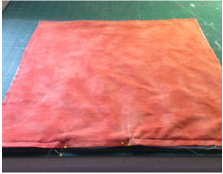
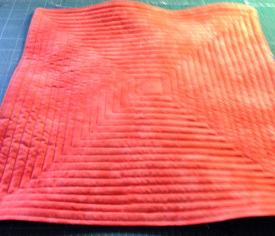
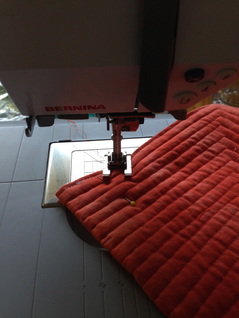
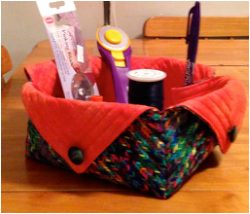
Wishing you a safe and Happy Halloween! 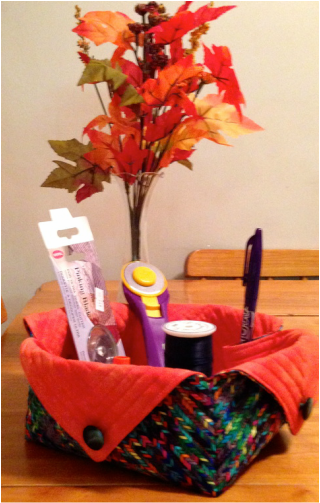 Made from 2- 15" squares of fabric and one piece of batting Ok today's Wednesday Wonder is not a block but it is made with squares of fabric :) Some of you may have made this cute little fabric basket already, but I have not made it yet and recently came across a way to make it and so I thought I would share the method. You can store your sewing supplies, craft supplies, nail polish, pretty soaps, halloween treats or give it to someone as a gift filled with Christmas goodies. It can be made in any size you like and I have already decided that I want to make more of them for sure! Step 1- Determine what fabric you would like for the lining and for the outside, cut lining and outside into a square 10", 12", etc as you like (a rectangle will not work). Cut 2 squares- 1 of lining and one of outside. Cut the same for batting Step 2- Lay the outside fabric right side up on the batting and iron it, lay your lining fabric right side down to the outside fabric- see pics below Step 3- Pin a 3" gap on one side and sew 1/4" all the way around the square, leaving the gap open and clip corners just up to the stitching Step 4- Turn to the right side and poke out corners, press and slip stitch the gap. Step 5- Quilt the quilt sandwich as desired, I quilted mine echoing the outside edges using a walking foot around and around until the square sandwich was filed with echo stitching
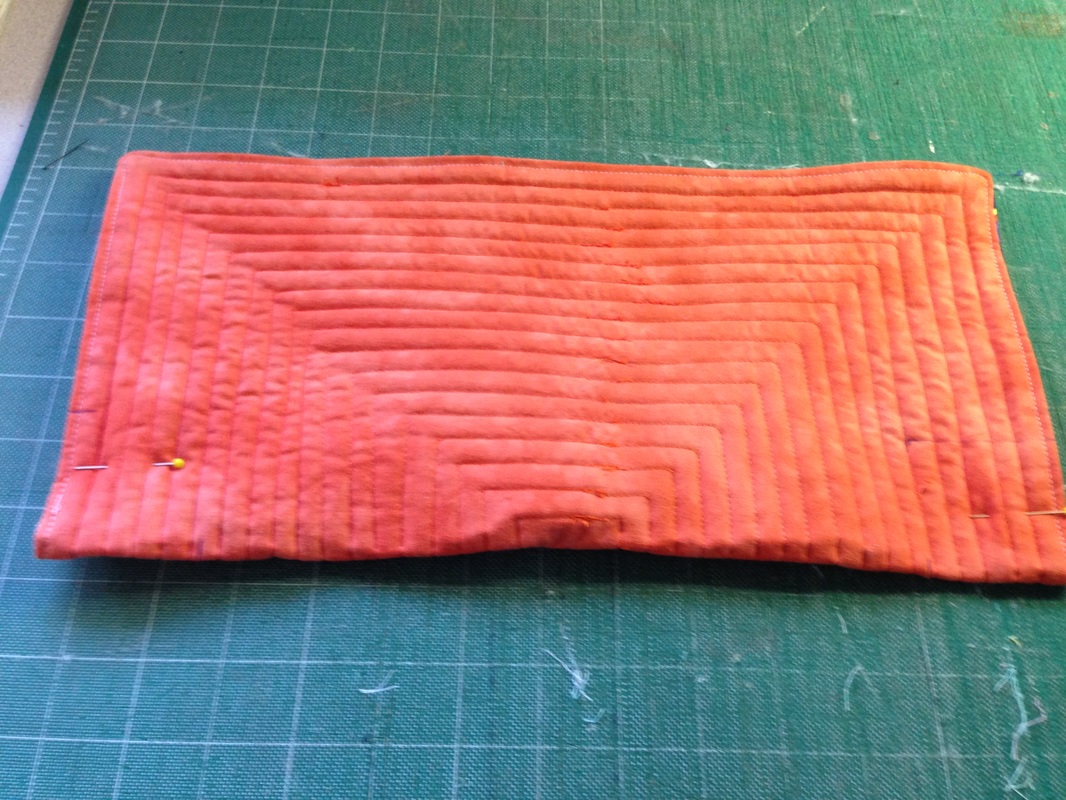
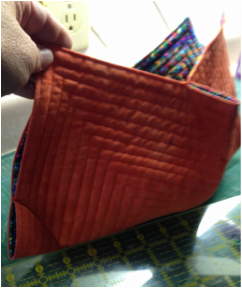
Step 6- Fold your square in half with your lining showing on the outside, in the folded corners draw a mark 2" vertically from the fold along the sewn edge on each side and 2"inches horizontally from the sewn edge onto the fold. Use a frixion or erasable marking pen- draw a line from the 2" vertical line and the 2" horizontal line on an angle and sew from the finished edge on this line towards the folded edge. See below:
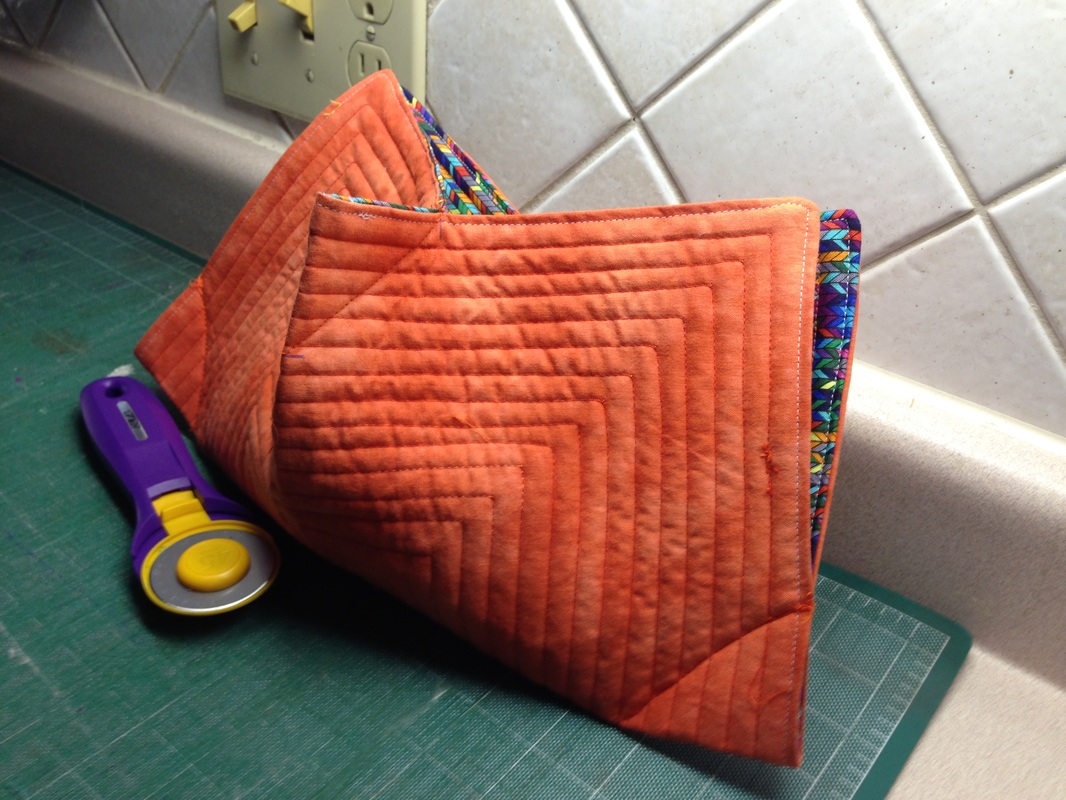
Step 7-Do you remember those origami boxes we made in school with little phrases on them? This project now reminds me of this. Now grab the top centers of your rectangle and pulling toward you fold a rectangle again, measure the same and mark and sew as you did in step 6- refer carefully to my pictures below
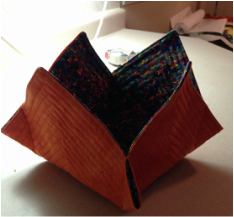
Step 8- Turn your project to the right side and poke corners gently, you will notice the corners are open on the inside and you can either slip stitch these closed and against the lining or keep them open for pens, rotary cutter etc. Step 9- Turn your inside corners out to the outside fabric and sew a button on the point to make flaps, fill it with all your "stuff" and enjoy!- refer to picture
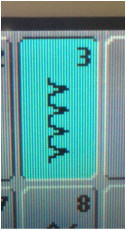
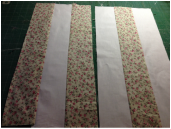
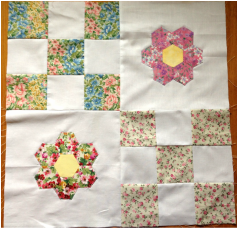 Respecting Tradition 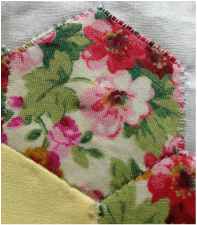 I have an addiction for making hexies, especially while travelling. I am often a bored passenger. I have many of the above flowers made by the English Paper Piecing method and have decided to make them into something. I decided to make a 9-patch mixed with the "grandmothers" flowers in keeping with the floral/traditional look of these little flowers. There is a great tutorial on how to English Paper Piece here My flowers are made from 1 3/4" finished hexes and they are made from floral scraps with all centres finished with the same yellow. The flowers were appliquéd onto my background with a # 3 Bernina Stitch, I believe it's a hemming stitch but I like the look of it! See photos. The backgrounds are 9 1/2" cut (9" finished) from solid white because I intend to show off my quilting once I get the quilt top done. The 9- patch blocks are made from 2 strip sets each with 3 1/2" cut strips
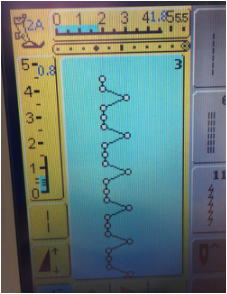 Stitch width 1.8 and length 0.8 using a 2A foot to appliqué the "grandmothers" flowers to the background Enjoy, try and send me photos, I would love to share them!
|
Follow Me:
Welcome!Hi I'm Robin and I am a professional long arm quilter, pattern designer and teacher. I am passionate about all things quilty!  
  Categories
All

Sponsors
This blog contains affiliate links. This means that we endorse products.
We do receive rewards for these endorsements and this helps to keep this site alive and well. We support products which we believe are the best quality and to inspire your creativity! |

 RSS Feed