|
Brought to you by quiltingintheloft.com
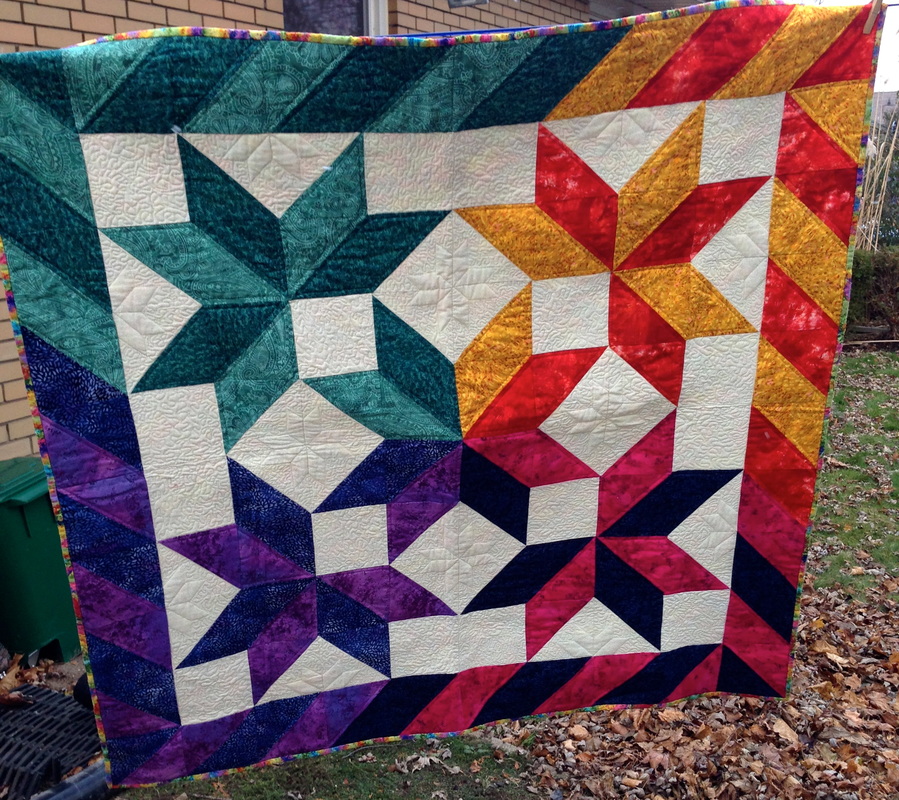
Hi Everyone, I got many requests for the pattern for my 8 Pointed Star Quilt I posted in Saturday Jan 30th, I taught this as a beginner class many years ago in Windsor. It was not a copyrighted pattern at the time, but I cannot locate it, so I have just drawn in up inEQ 7 (Electric Quilt 7) and am providing the layout below. This quilt is made up simply of squares and 1/2 square triangles including the border! Very easy to make and suitable for a beginner. Give it a try!! How to make it:
1/2 Square Triangles Make 1/2 Square triangles by placing a 5 7/8" light fabric square with a dark fabric square right sides together, draw a line diagonally through the centre, pin and sew 1/4" out on either side of the line, cut down the centre only. This tool below makes marking so easy and highly recommended: Half-square and quarter-square triangle blocks are quick and easy with the Quick Quarter tool. Use the Quick Quarter II for marking multi-stitched triangle-squares. Simply place fabric squares right side together, mark center cut line and 1/4" seam allowances, sew and cut. Have a look at where to get it here 
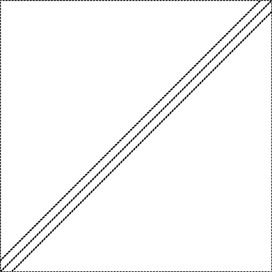
Sew on the lines to the right and left of centre, cut down the centre and press to the dark fabric, these blocks should be 5 1/2" when pressed and 5" when finished (sewn to the next block)
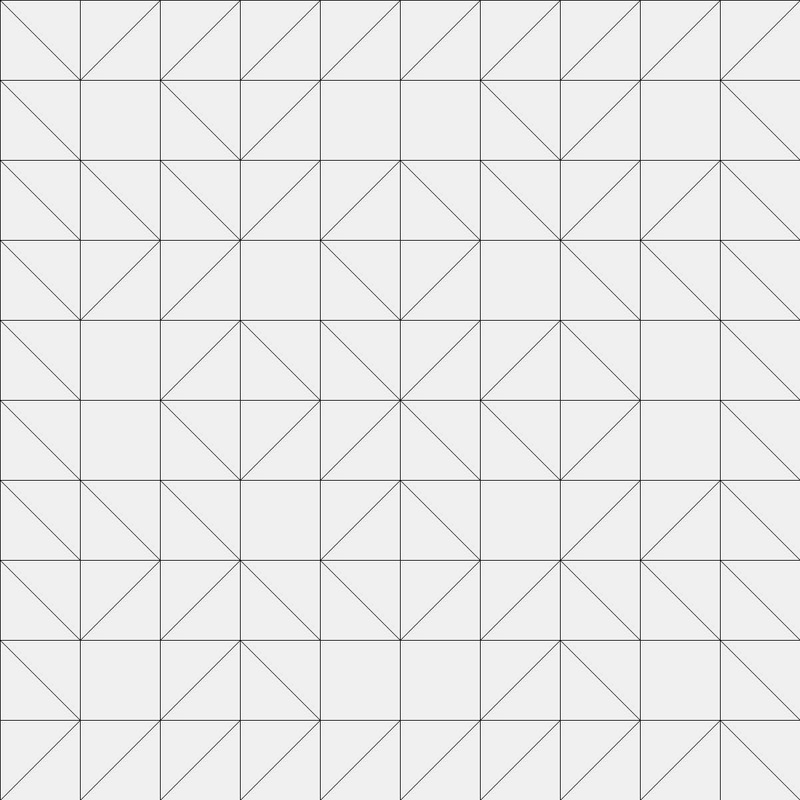
Layout
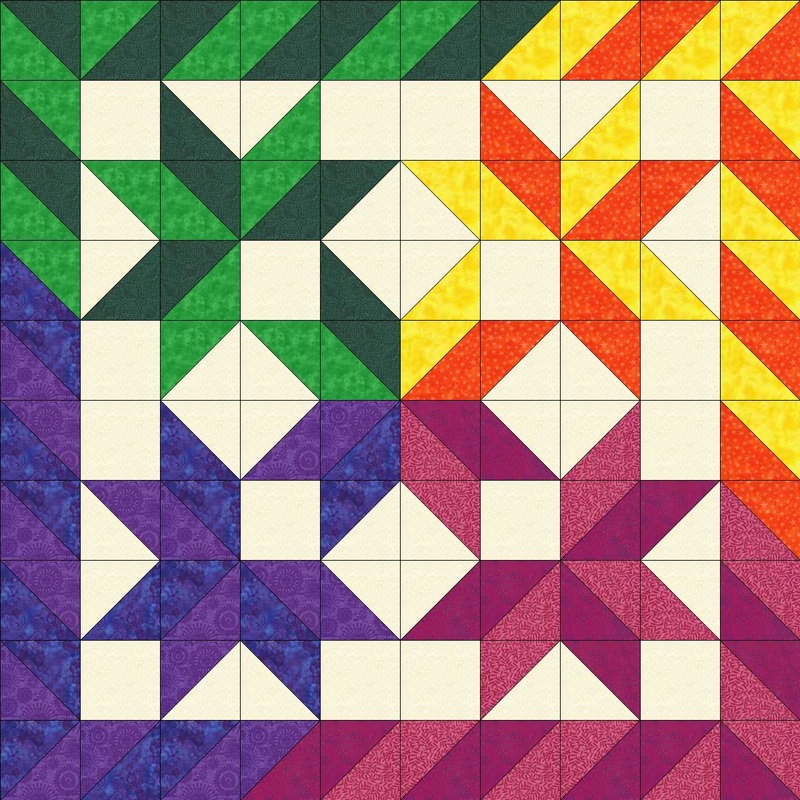
Drawing from EQ7 - Layout your blocks in horizontal lines to sew from the top down
Once all your blocks are cut and pressed lay them out on a flat surface to audition the lay out and then pin each square and 1/2 square triangle together from left to right and sew in horizontal rows (including the border) from the top down and quilt and bind as desired. I hope you enjoyed this tutorial and that you can make use of this pattern. Enjoy
I drew this up in Electric Quilt Today on my Mac, its available for PC's as well, it's wonderful and affordable software for quilt designing! If you think it would help you have a look at it below: 
Happy Monday Everyone, January is done!!
Have a fantastic week :)
8 Comments
Evelyn
2/1/2016 03:21:30 pm
Thank you so much for posting this quilt. It is absolutely beautiful.
Kathy
2/2/2016 06:25:47 pm
This is beautiful and looks fairly easy to make. Thank you for sharing it.
Koryna
2/3/2016 12:18:42 am
Can't wait to try it.
Jamie
9/21/2021 01:17:08 pm
I have a quilt top from my Grandma’s estate. This is the pattern. Would love to talk with you about it and send a pic. 9/21/2021 01:31:06 pm
Sure email me anything you need to send or discuss at [email protected] thanks! Leave a Reply. |
Follow Me:
Welcome!Hi I'm Robin and I am a professional long arm quilter, pattern designer and teacher. I am passionate about all things quilty!  

Categories
All

Sponsors
This blog contains affiliate links. This means that we endorse products.
We do receive rewards for these endorsements and this helps to keep this site alive and well. We support products which we believe are the best quality and to inspire your creativity! |
 RSS Feed
