|
Up already on the BERNINA International Blog is my tutorial on how to make a small notions tote (3 at a time!) Made with decorative stitches and my BERNINA 790 PRO- but you could use the decorative stitches on your individual machine. I am simply trying to get to know the vast number of stitches on the 790PRO. This little project is both practical for storage and a great gift giving idea. Check out the blog post and the free pattern/project tutorial here  BERNINA 790 Pro with decorative stitch menu selected  Decorative Stitched Notions Tote - free tutorial available @ www.blog.bernina.com/en
0 Comments
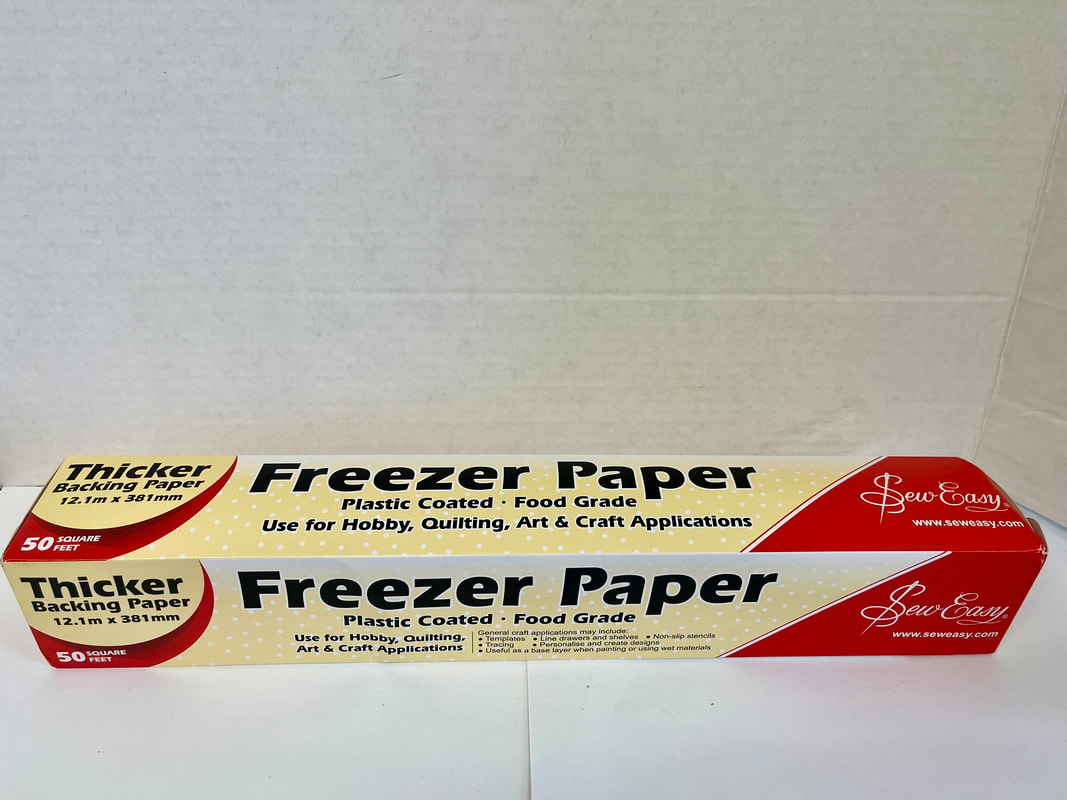
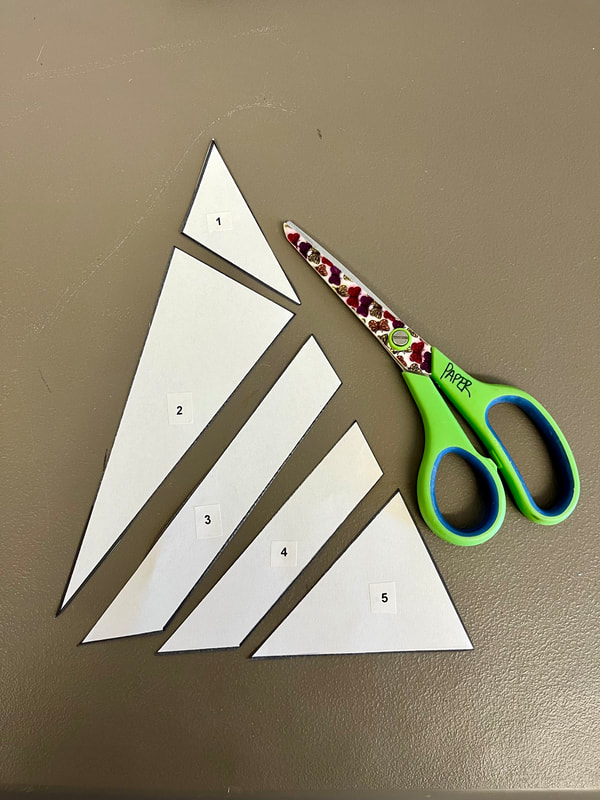
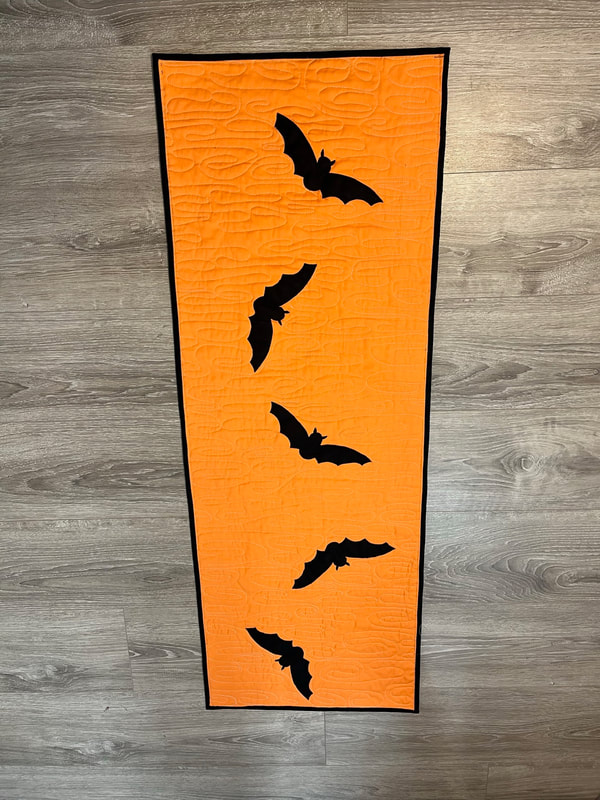
Are you using some or any of your decorative stitches on your sewing machine? If your thoughts are a bit vague or it's a no on this subject then this blog article is written just for you and the CREATE Wall Hanging might be just the project you are looking for. It's my sincere hope that you will start exploring all of your sewing machine's potential and why not start with decorative stitches? Have a look at my blog post here It's entitled Create this Wall Quilt With Decorative Stitches There is a free PDF pattern download for the petals in my shop page here Also, check out my video below for even more instruction. It's a great project for your creative space! Happy Wednesday! 🌷😊☀️  Today @quiltsocial my blog article about how to print patterns on freezer paper from your home printer with Sew Easy Freezer Paper. Check it out here The best method for paper piecing with no tearing from fabric at the end! Happy Tuesday! Today at www.quiltsocial.com I'm finishing up my Batty for Bargello reversible table runner with HeatnBond Lite, sandwiching & quilting and done! Have a look & grab the free Bat appliqué pattern. 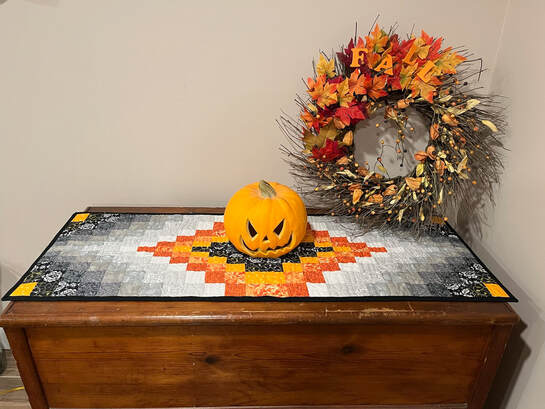 I hope you have enjoyed this Fall /Halloween Table Runner sew along this week at www.quiltsocial.com. Have a great weekend 🍁🎃
Join me today at www.quiltsocial.com when I discuss many creative layouts for one block! One Bargello block has lots of possibilities! 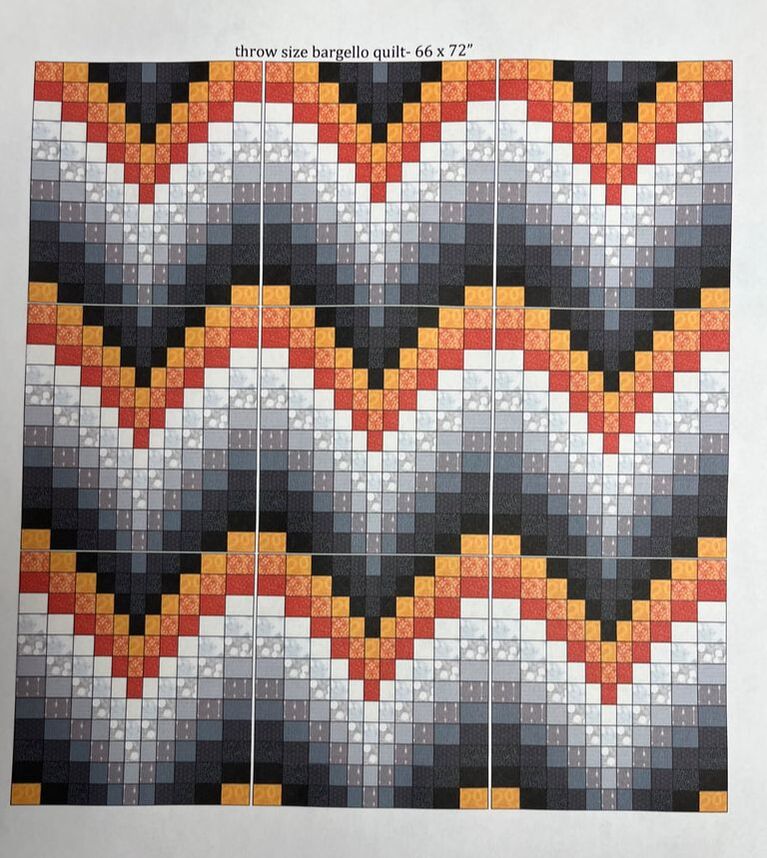 Just one of the many layout possibilities! .Check out www.quiltsocial.com where I discuss accurate piecing tips and a pretty "Batty for Bargello" Fall/halloween table runner. Download the free bat appliqué pattern for the reverse side of this table runner. 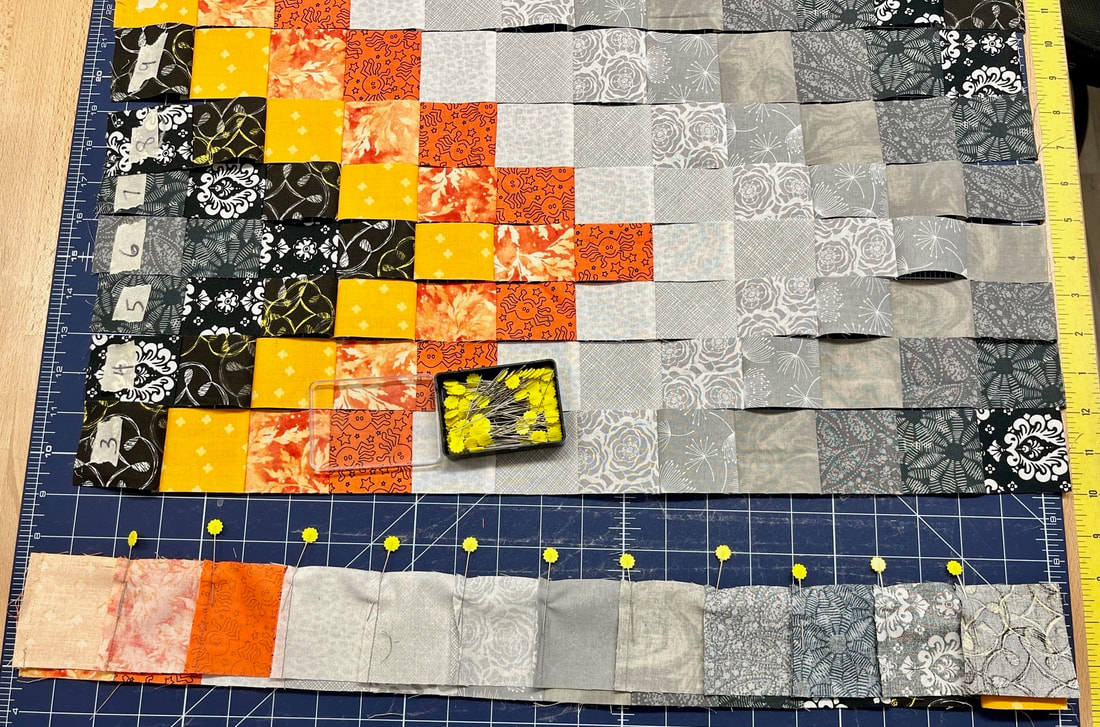 Happy Wednesday! 🦇🍁
Have you Baked Someone Happy lately? To me baking means sharing, caring & it has the added bonus of bringing happiness to my friends & family. How about this slogan on a cute apron? Join me today at www.quiltsocial.com when I discuss how to place the "Bake Someone Happy" design on an apron with Mont Marte Paint Sticks & art supplies. The pattern is a free download, check out Painting on fabric is fun with Monte Marte paint sticks blog post to get the free pattern designed right here in my studio. 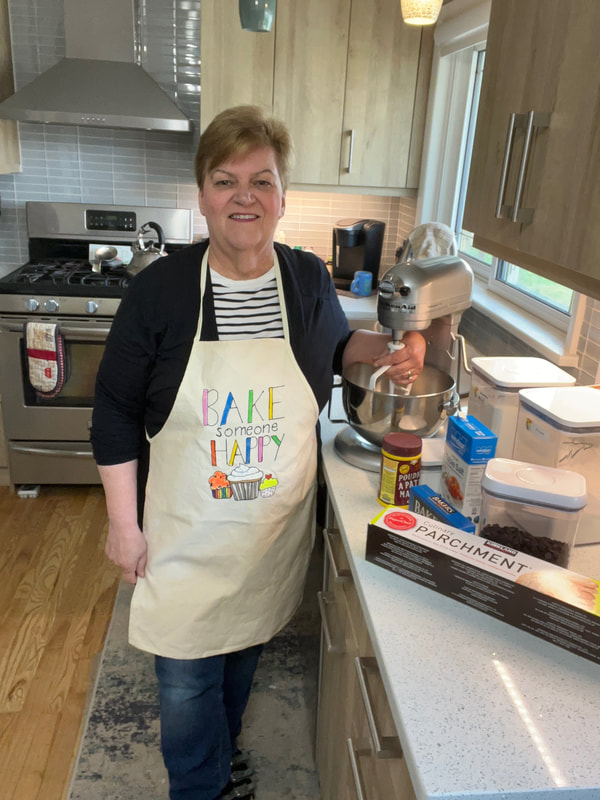 Robin wearing her Bake someone Happy apron Thanks for following along all week with my posts as guest blogger at www.quiltsocial.com . Have a great weekend & Bake Someone Happy!😊❤️🍰
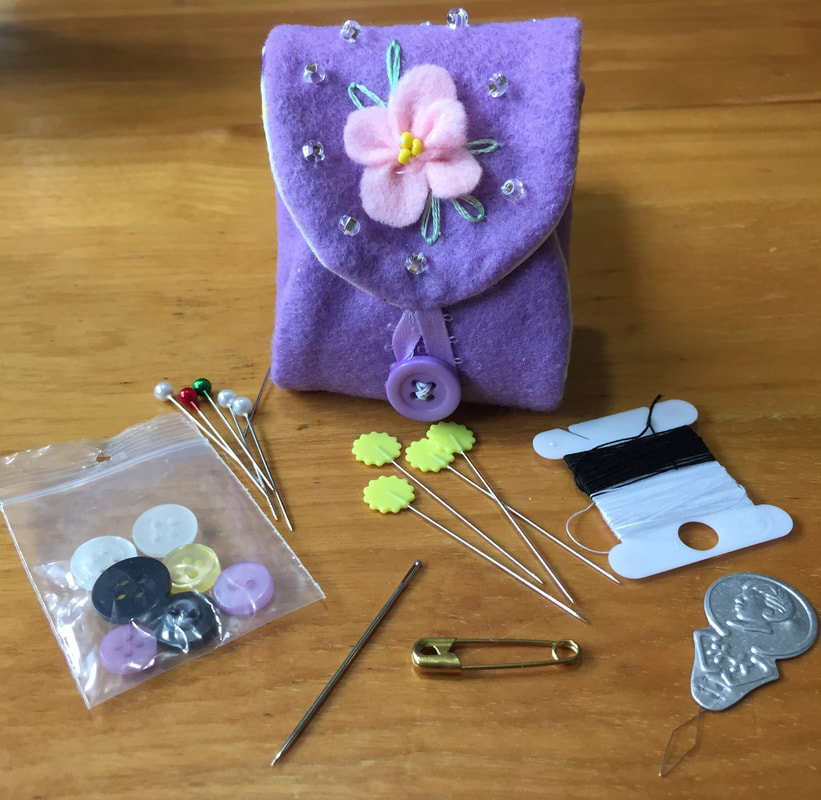 Today at www.quiltsocial.com I'm making this one hour felt mini needle/sewing kit that is small but mighty and holds lots of sewing essentials and fits in the palm of your hands. Also a great little gift idea. Follow along here with all pattern instructions and grab the free pattern download.
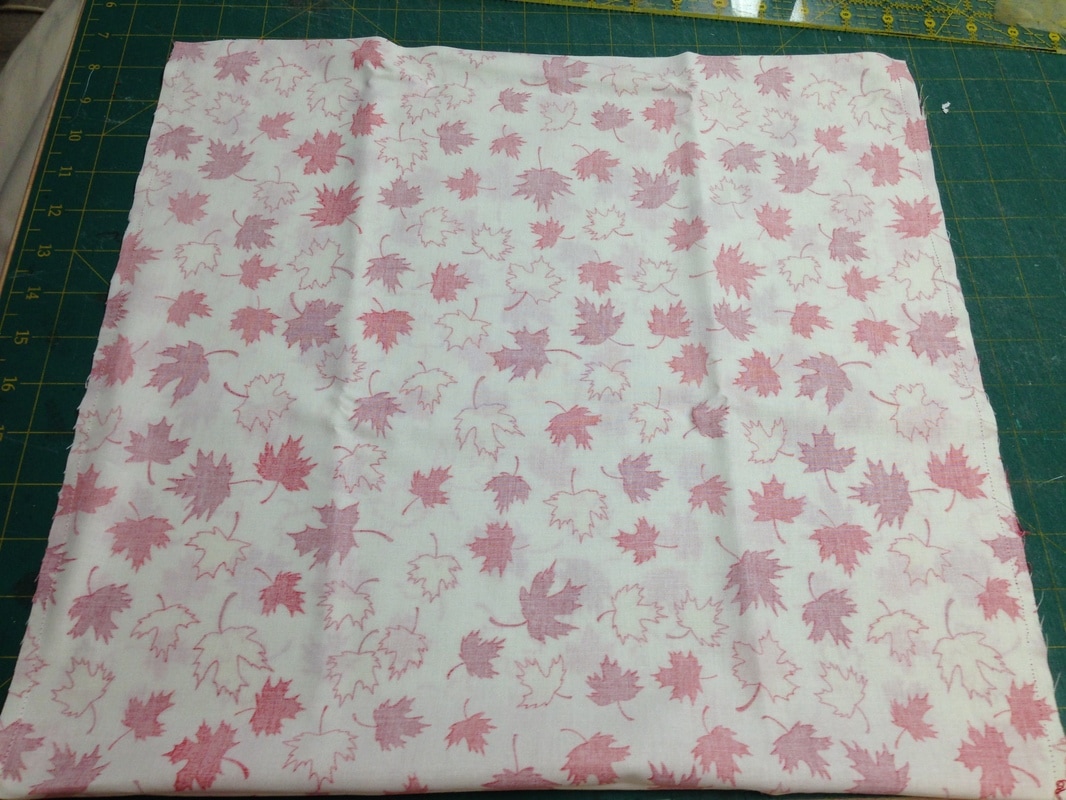
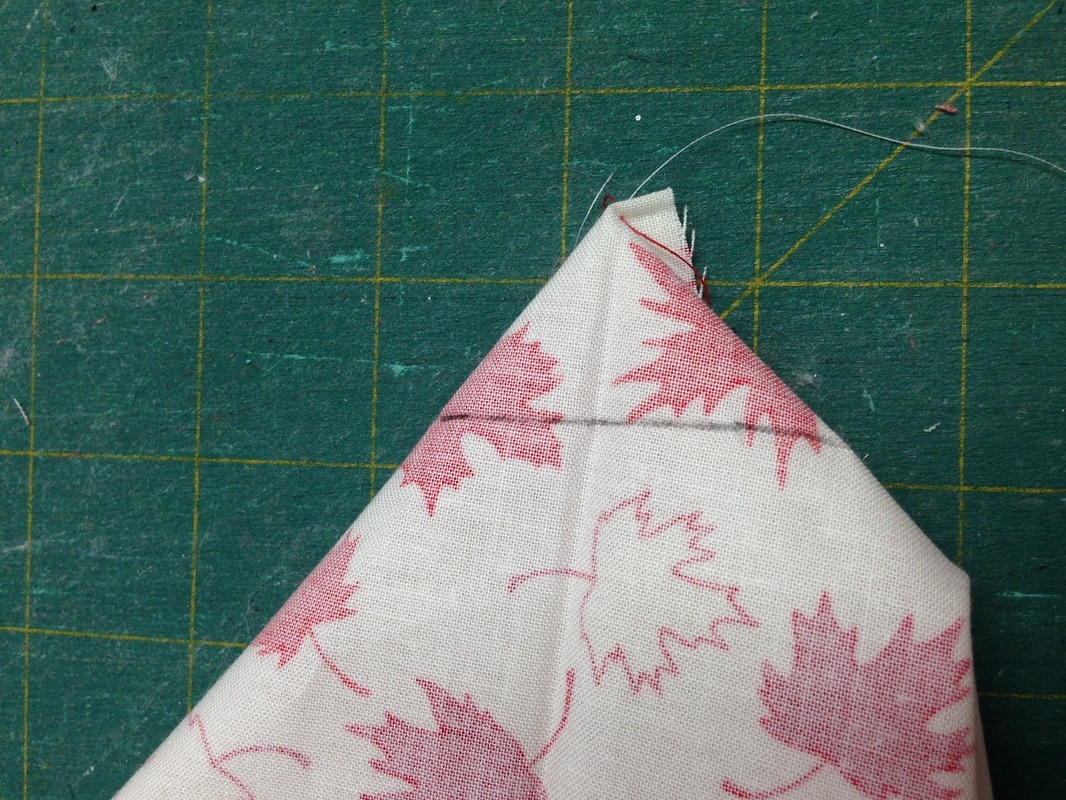
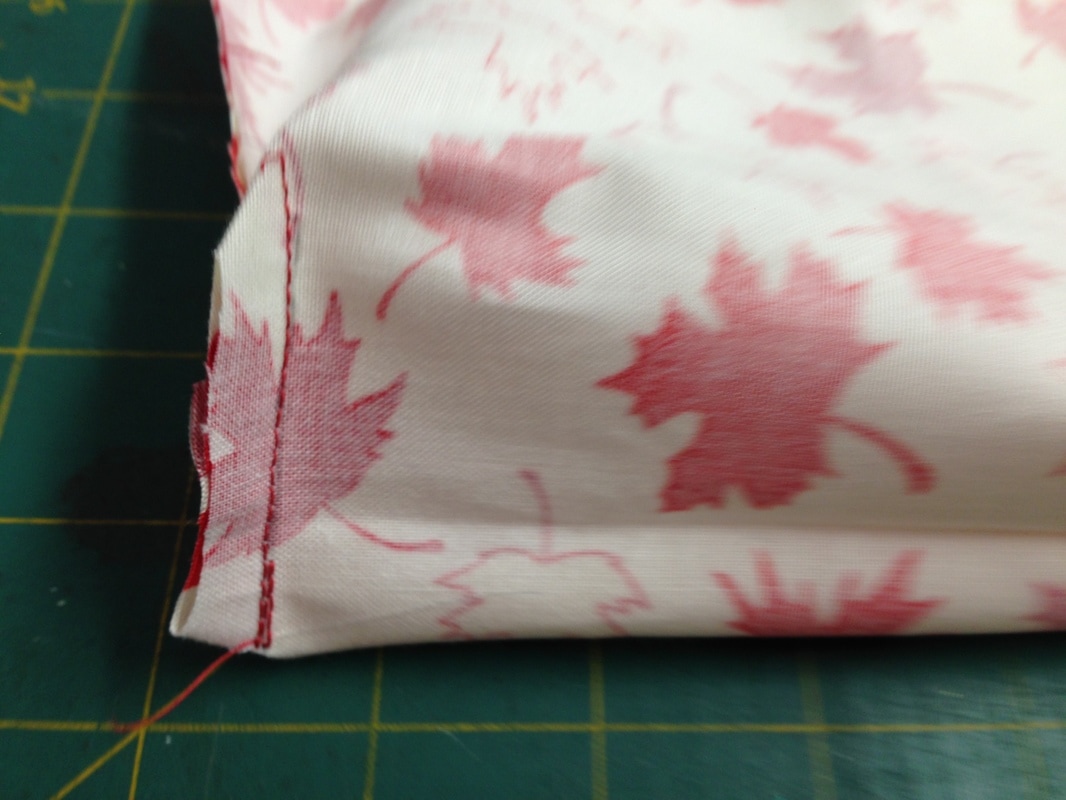
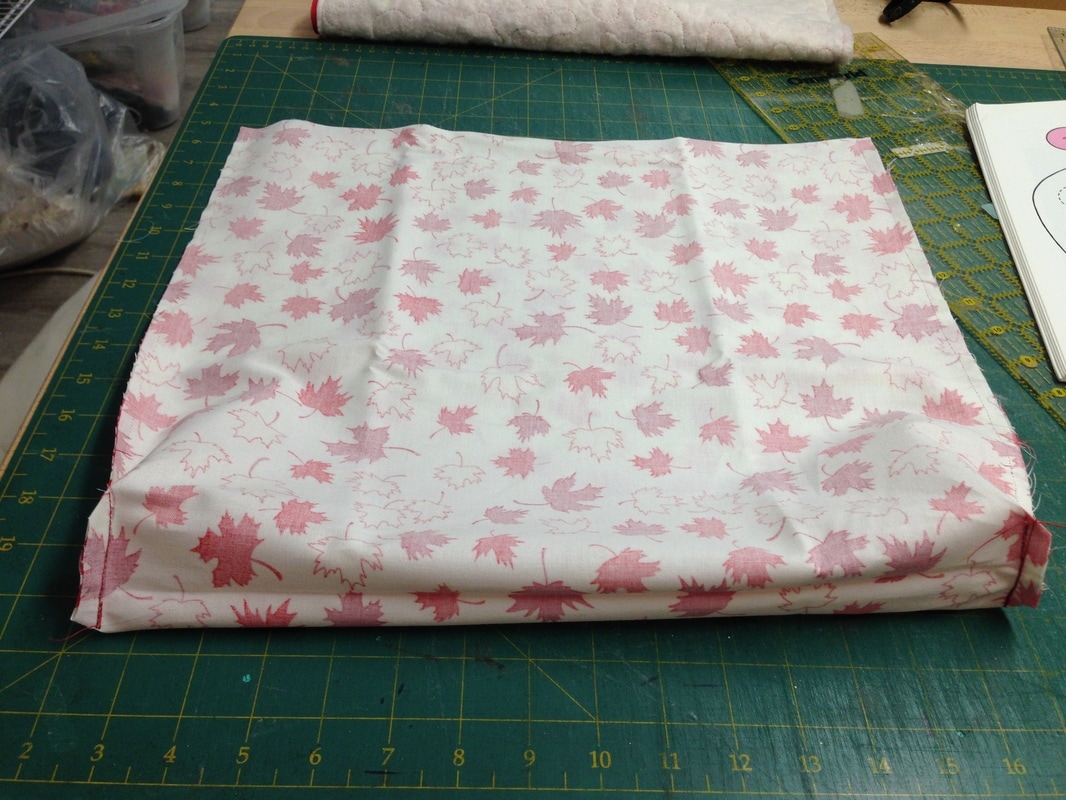
Happy Thursday!! 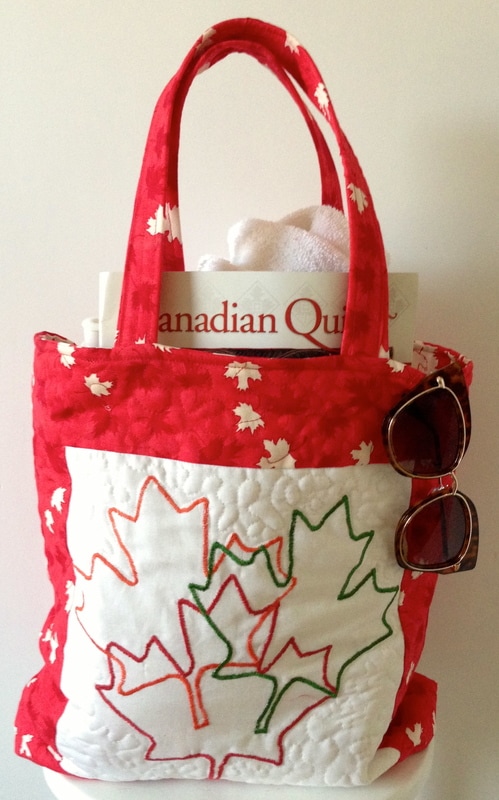 Canada Day Bag Ready for the beach Sorry folks, I have been away for a few days because of recent trunk shows in New Market (Region of York Quilters Guild) and Cambridge- Busy Hands. I was also teaching in Barrie, completing some custom quilts and some wedding prep for our family (my daughters) wedding June 24 (Yikes). Also, I just recently I found out I have a pinched nerve in my neck. The good news is I will survive, albeit I have been told to take it easy !! I am finding that this is not an easy thing to do! Just not in my nature!! 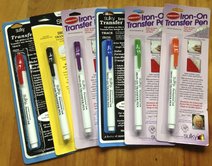 Remember these pens I spoke about in the previous post and the Maple Leaf satin stitch block I did with them? As you can see above I made them into a simple tote. I thought I would share how I made it .... and a great technique for making ultra simple and strong handles for all bags! Simple Tote Tutorial What you will need: Front of bag: 10 3/4" square, orphan block or make the Maple Leaf Block shown above from blog post 05/02/2017 2 Strips 3 1/2" x width of fabric for sashings around block Back of Bag: 16 3/8 x 16 3/8" square of fabric for back of bag Batting: 34 x 18" piece of batting Lining: 32 3/8" x 16 3/8" rectangle of fabric Handles: 2- 3 1/2 x 20" rectangles of fabric 2 Pieces of webbing (nylon or cotton) 1" x 20" How to make this simple tote: Cut your 2- 3 1/2" strips for block sashing as follows: Cut 2 strips 16 1/2 x 3 1/2", cut 2- 10 3/4" x 3 1/2" Sew the 2- 10 3/4" strips to the vertical sides of the block, see below: 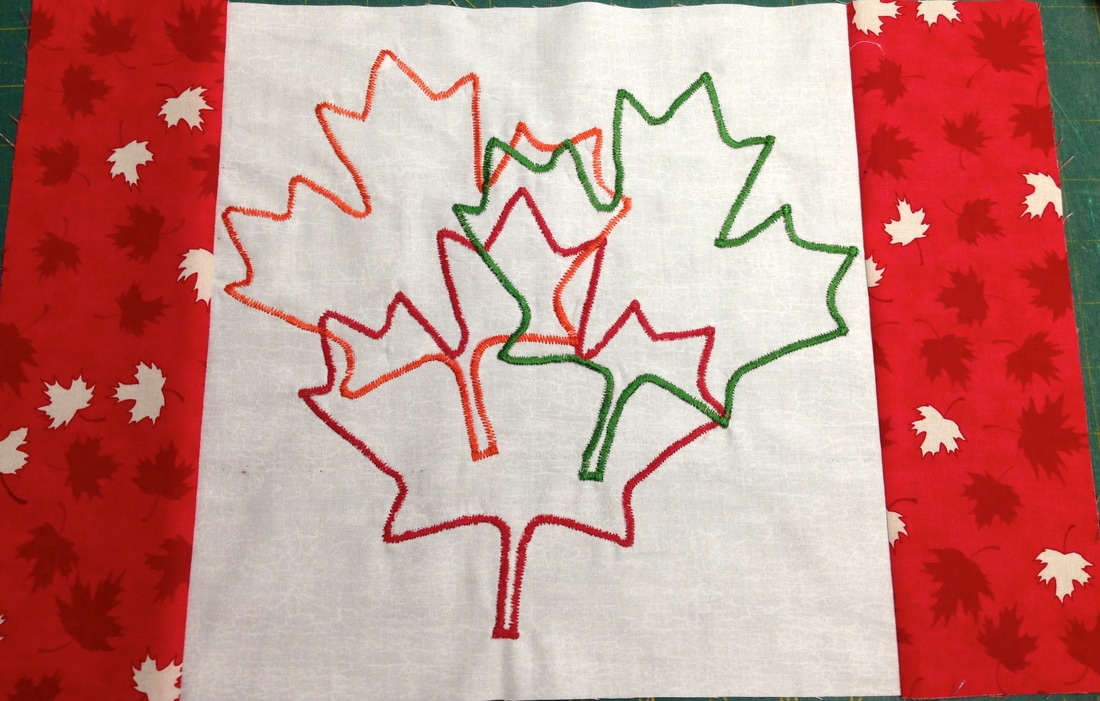 Sew the 16 1/2" strips to the top and bottom of your block, see below: 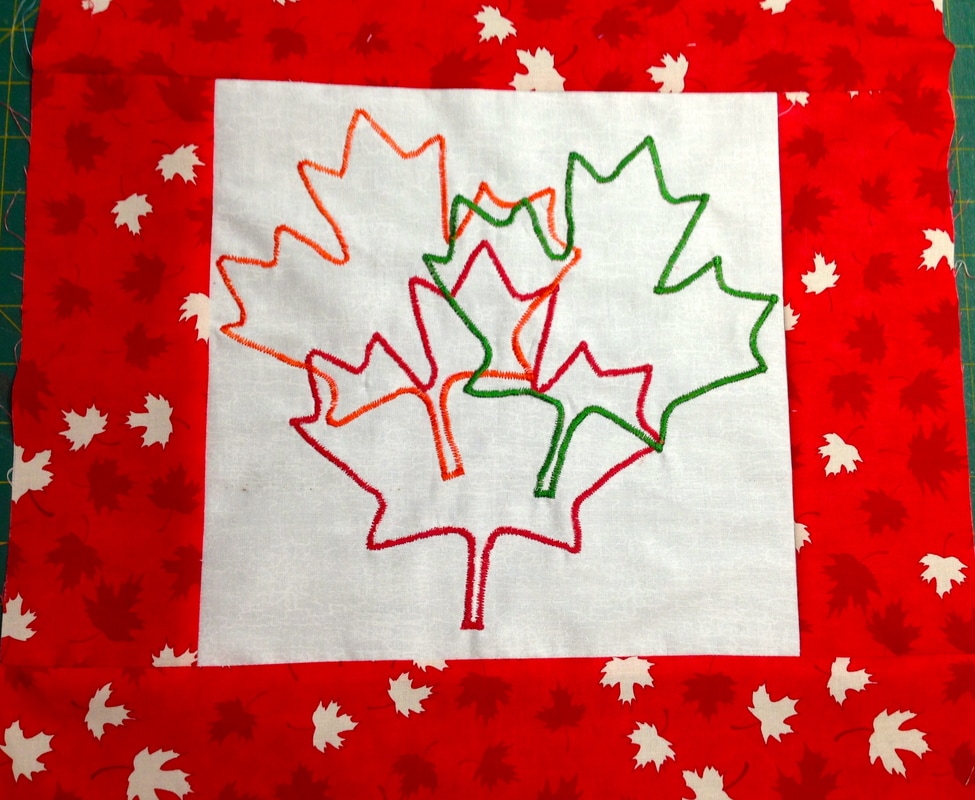 Your front of bag is completed, square it up to 16 3/8" x 16 3/8" Sew your back square fabric to the bottom of the front square right sides together. See below: 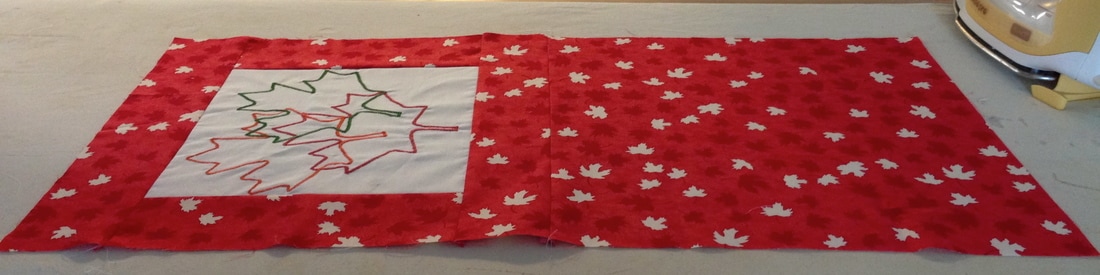 Quilt your top only to the batting with any pattern you desire, I just meandered mine. You could also just use fusible interfacing if your do not want to quilt it. Interfacing will give it body as well. See below: 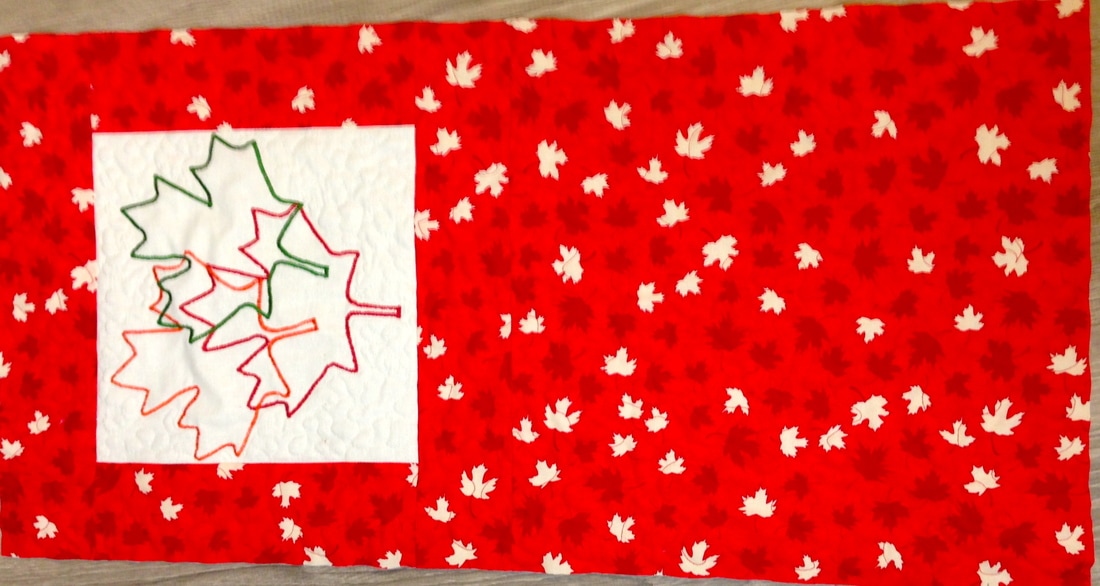 Fold your quilted/interfaced bag front in 1/2, right sides together and sew up the side seams. See below: 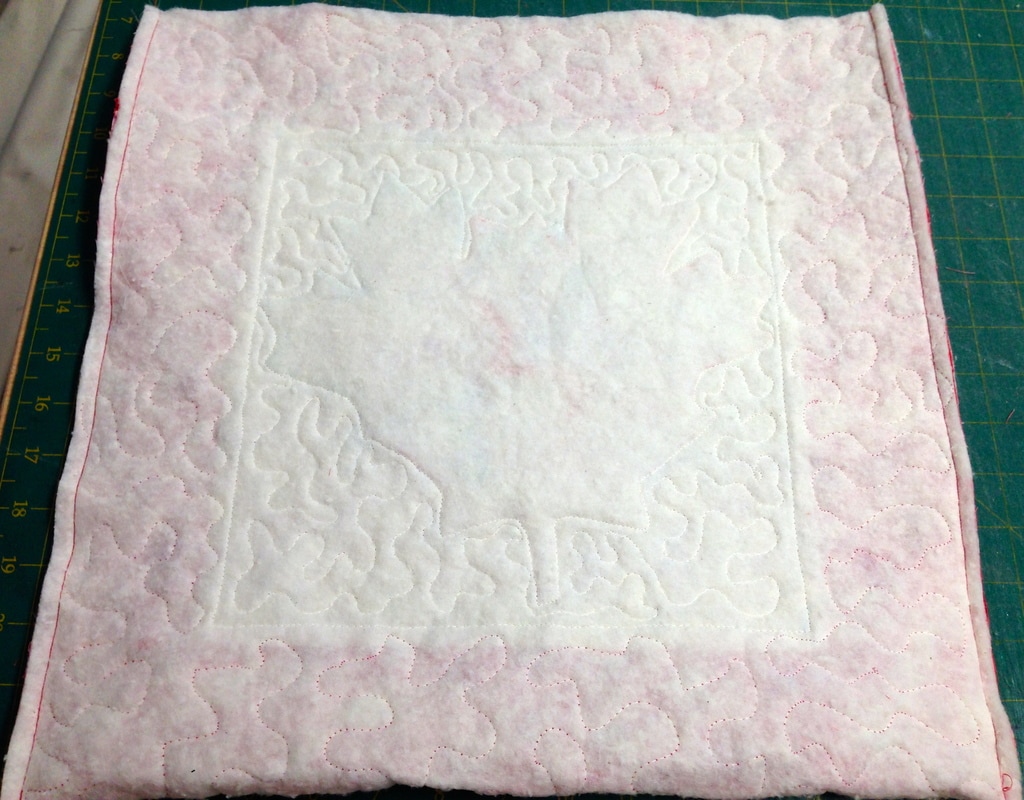 To box the bottom of your bag, mark a line 1" Up from the bottom corners of your bag on both sides. Sew on these lines and clip corners. See below: 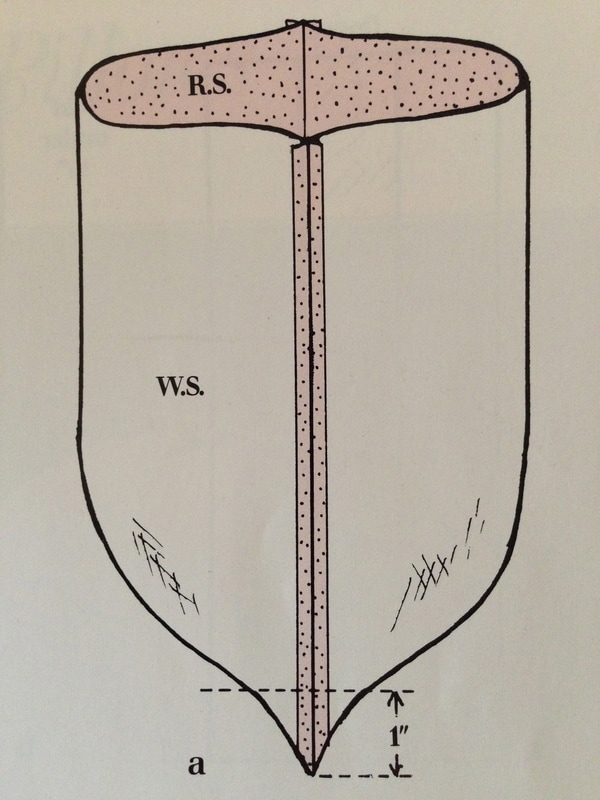 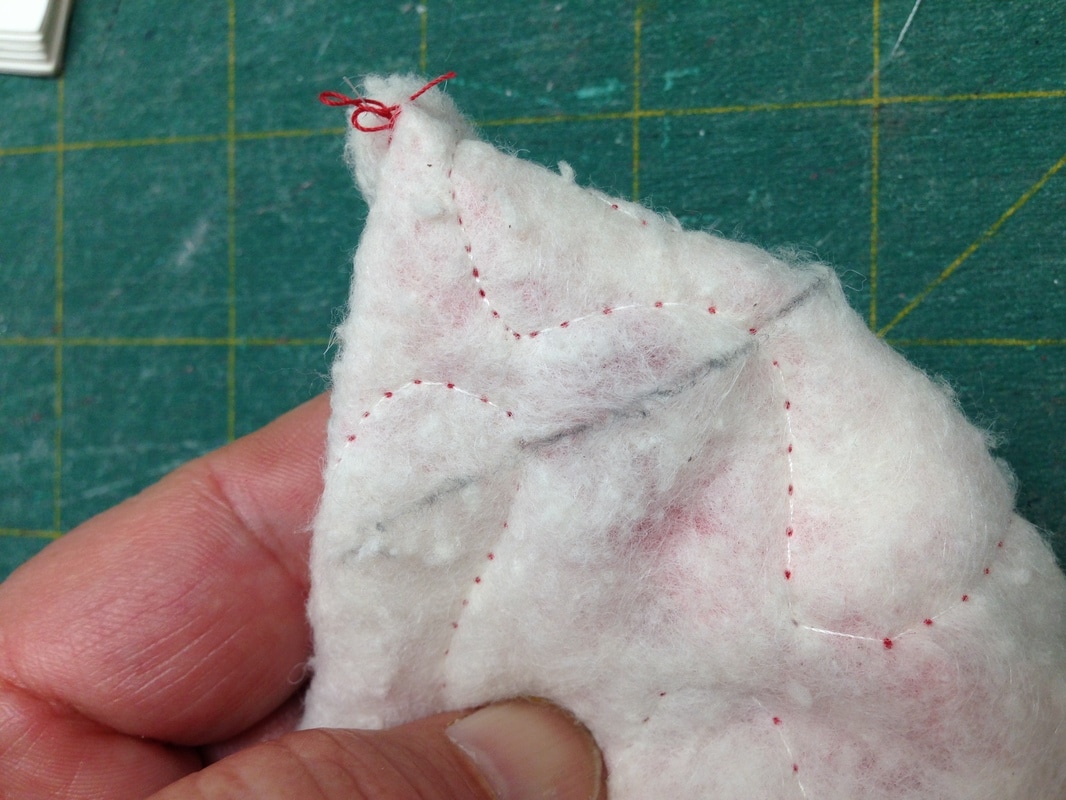 Fold your lining piece right sides together and sew up one side. On the other side sew, leaving a 3" gap for turning. Box the bottom corners as you did for the outside of the bag. See below: To make your handles, pin your webbing piece in the centre of your 3 1/2" x 20" handle fabric (wrong side) and sew it down the centre. See below: 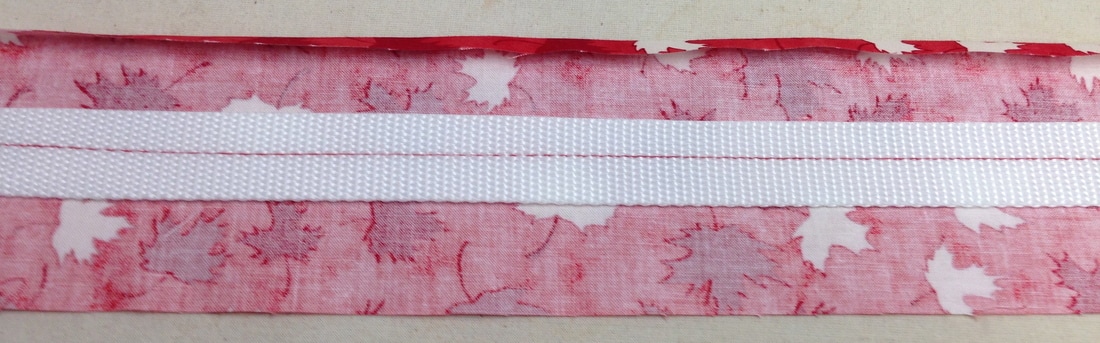 Press one side down 1/4", see above photo: Press the raw edge over the webbing, See below: 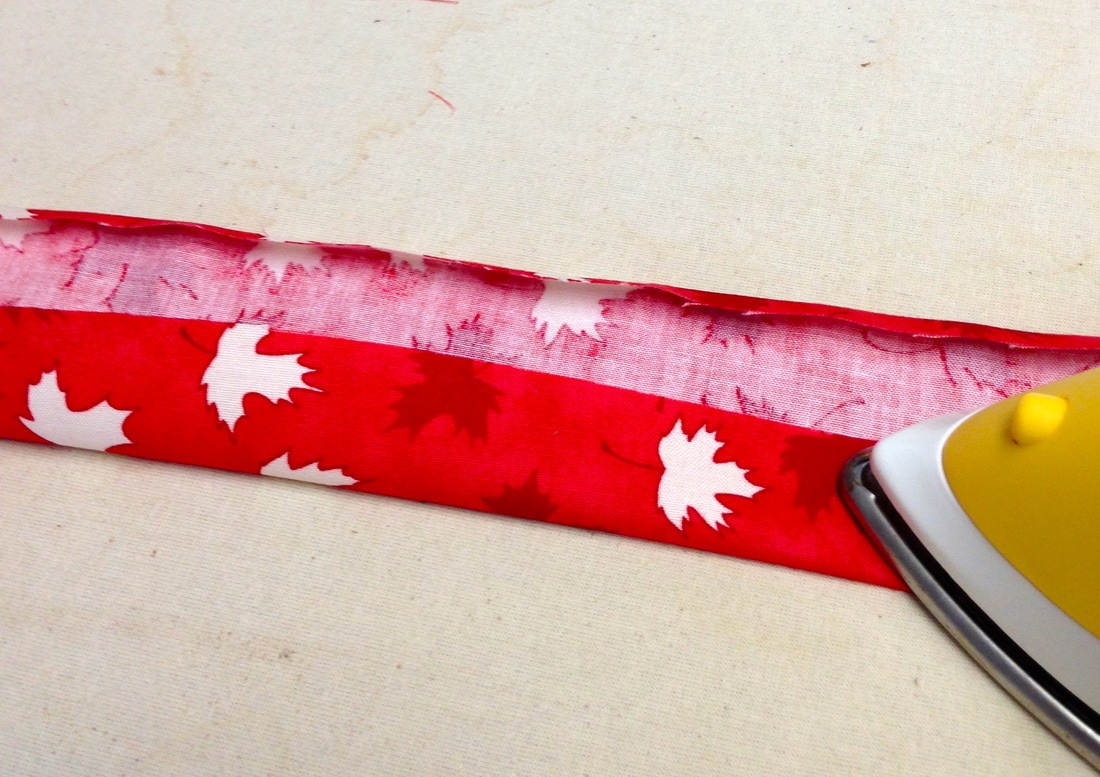 Press the 1/4" folded edge on top of the raw edge as below:  Top stitch to catch folded edge and alternate side (about 1/8" from edge). See below:  I was able to machine stitch through all layers like butter. If you have any issues with the thickness, change your needle to a top stitch or jeans needle as they will be stronger than quilting needles. Make 2 handles this way. You now have 2 very strong handles and it's a simple method for all bags. These handles are also very flexible. Pin and sew your bag handles onto the right side of your bag front and back 5" in from the corner on the right and left side & 1/8" from the top of the bag. Make sure your handles do not get twisted. See below: 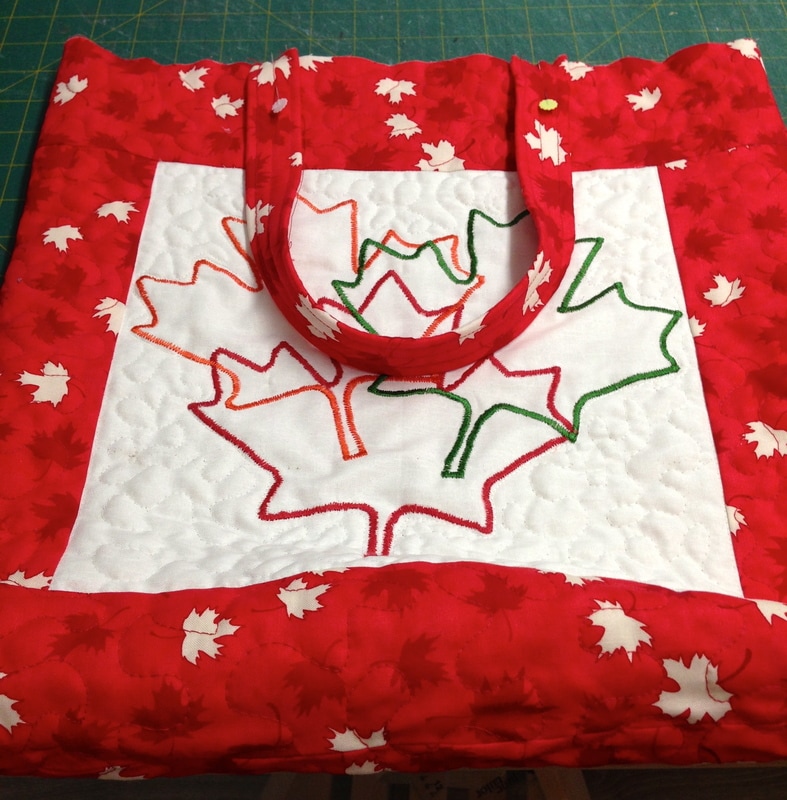 Front of bag 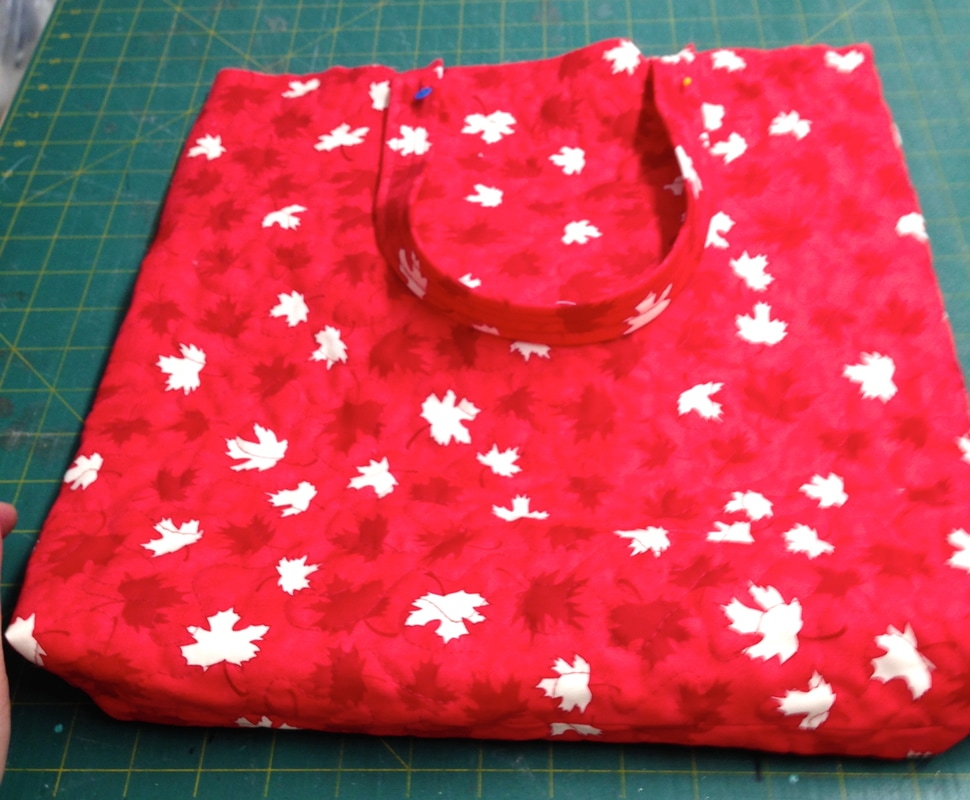 Back of bag 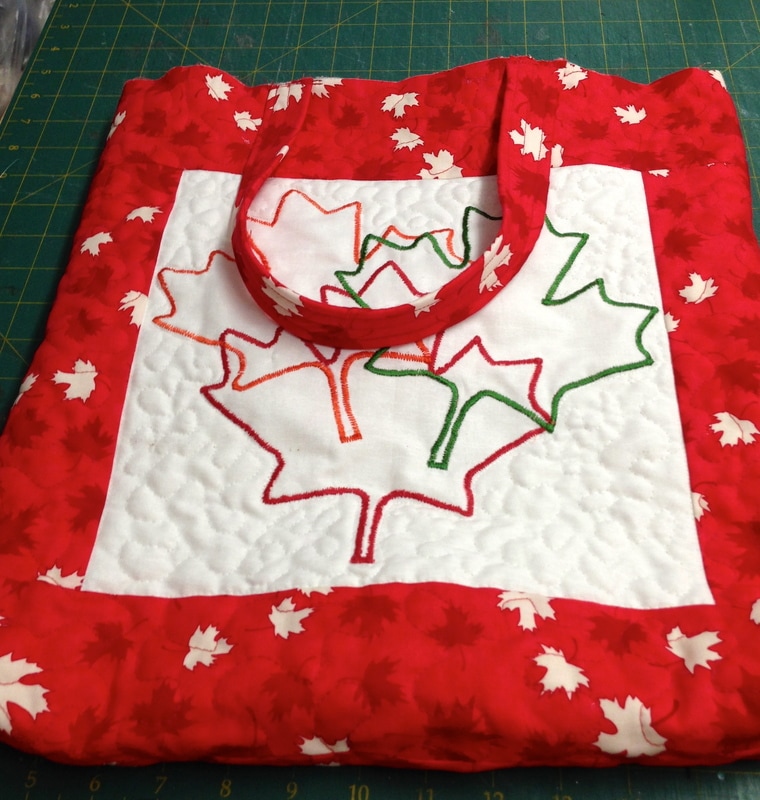 Sewn 1/8" from the top edge Insert the outside of your bag (right side facing out) inside the lining with right sides together. This will seem weird but trust me it works. See below: 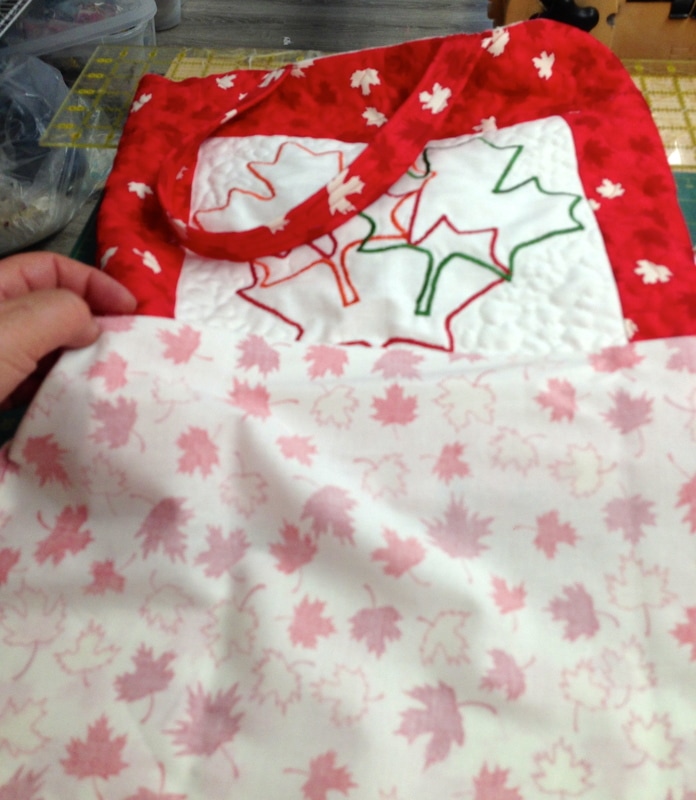 Make sure the handles are facing down and pin all side seams to match, pin around the top edge of the bag and sew. See below: 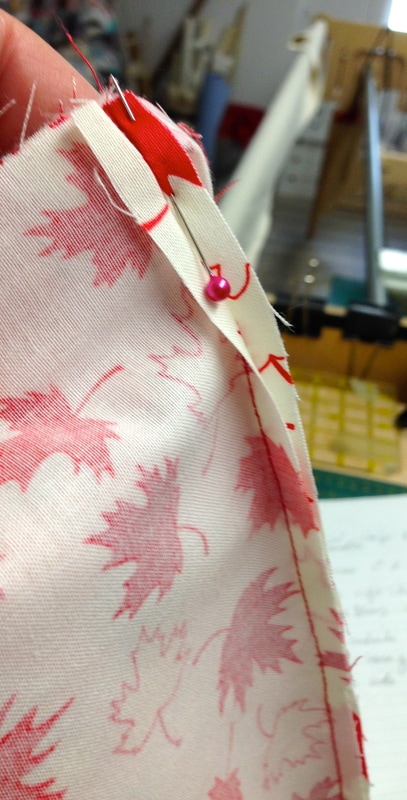 Lining seams and outside of bag seams pinned to match 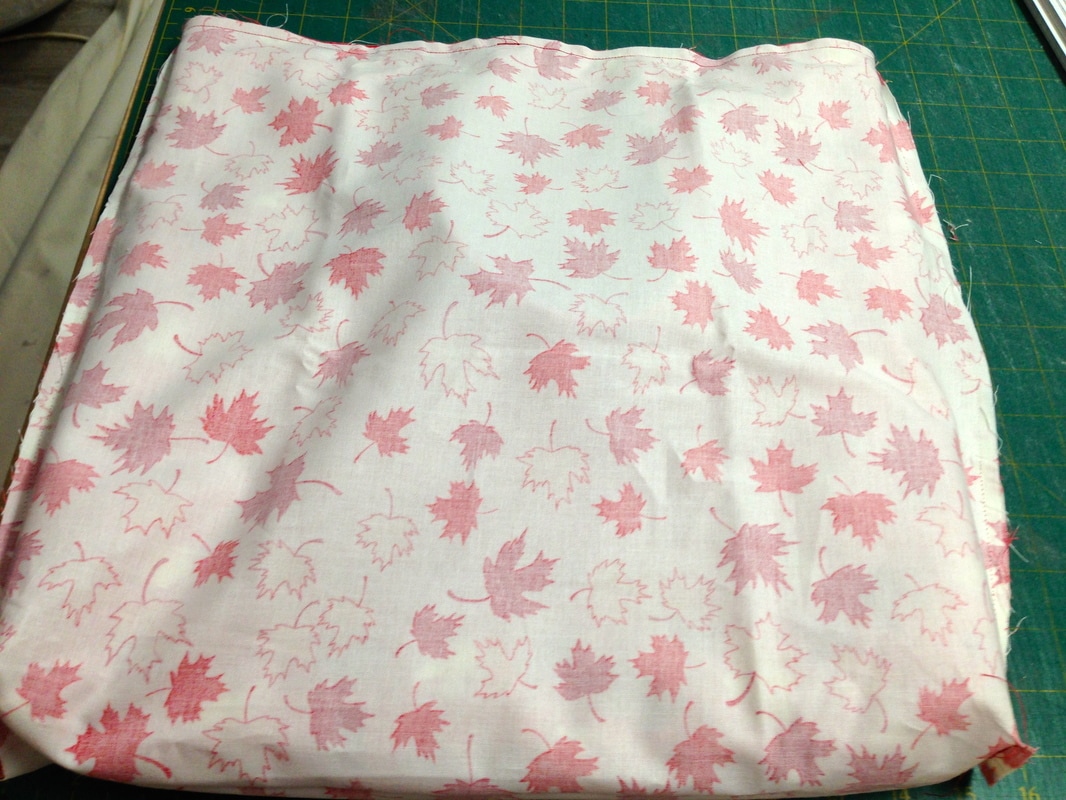 Top edge is sewn Using the gap you left in the lining pull your outside of the bag through the opening. See below: 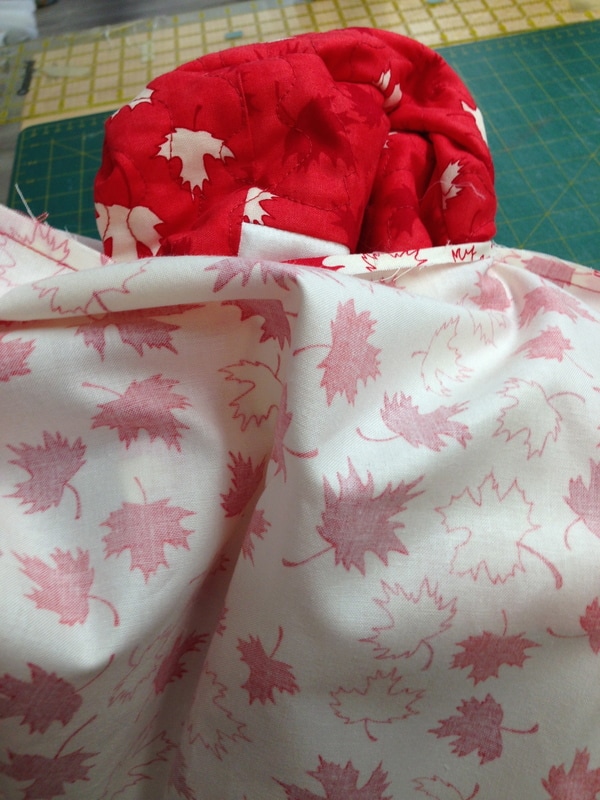 Once you have the entire bag out, tuck the lining back inside the bag, it's permanent home! Sew the gap closed on the lining inside by hand or by machine, your choice. Press the lining down towards the inside and top stitch all around the top edge of the bag to finish your bag. Admire your efforts! 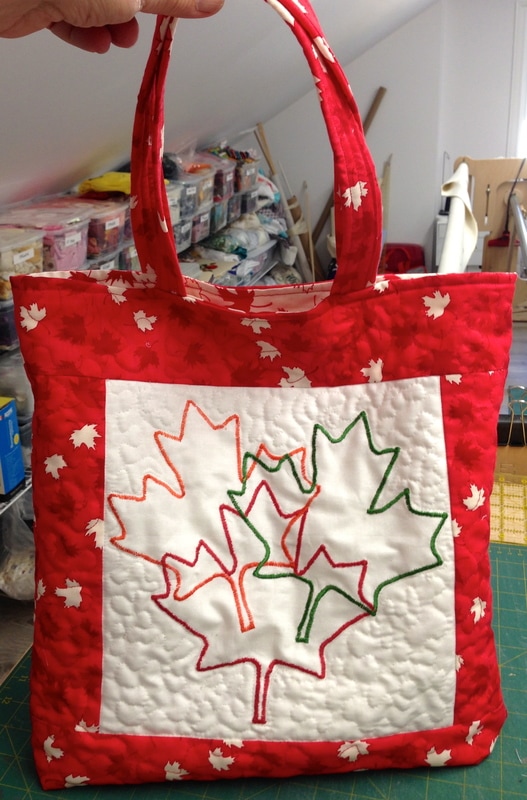 🍁You now have a sturdy bag to go to the beach, holiday or celebrate Canada Day!
I sincerely hope you enjoyed this simple tote tutorial and that you will try my handle method! Happy Friday! Enjoy some lovely weather this holiday weekend! Want/need to know what to do with Fat Quarters? Read all about it and feast your eyes on 5 great,easy and inspiring projects here. Quilters are crazy about fat quarters! That is a fact!! There should be a National Fat Quarter Day! Yes, I am getting carried away! If you are reading this and don't know what a "FQ" is, they are 18 x 22" cuts of fabric- a wide 1/4 yard. As apposed to buying a 1/4 yard 9 x 45" piece of fabric. Now when you go to a quilt shop, you will shop "informed". Essentially, if you are piecing, fat quarters provide the perfect size for a variety of quilting and sewing patterns because you are getting a wider piece of gorgeous fabric! Quilters sometimes build their stash on fat quarters so that they can have a small and relatively inexpensive sampling of pretty awesome fabrics. If you are a FQ collector, you know they multiply like rabbits! 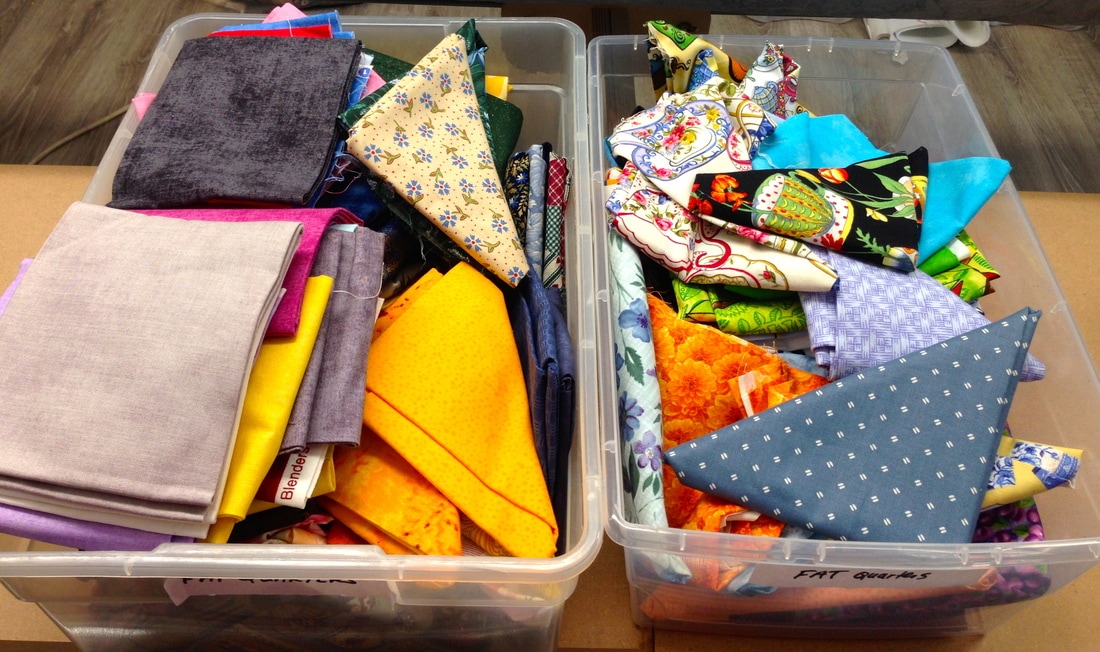 my personal overflowing stash of Fat Quarters- these are only the ones that are folded there are many more in my hoard! This is the time to put them to good use and bust your stash!! So what to do with FQ's? Hmmmmm ......... 1. Make tote bags, 18 x 22" is a great size for one side of a tote bag, use another FQ for the other side and some yardage for handles and lining and you have used up some great fabric! Who doesn't need more bags? or ....Check out this "Strip Happy Fat Quarter Tote" from Connecting Threads 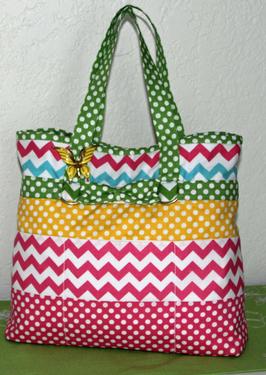 2. Make Aprons, they are useful, great gifts for young and old and you can personalize them with fabric that suits your cook! Craftsy.com has a whole bunch of cute and free pattern links here. 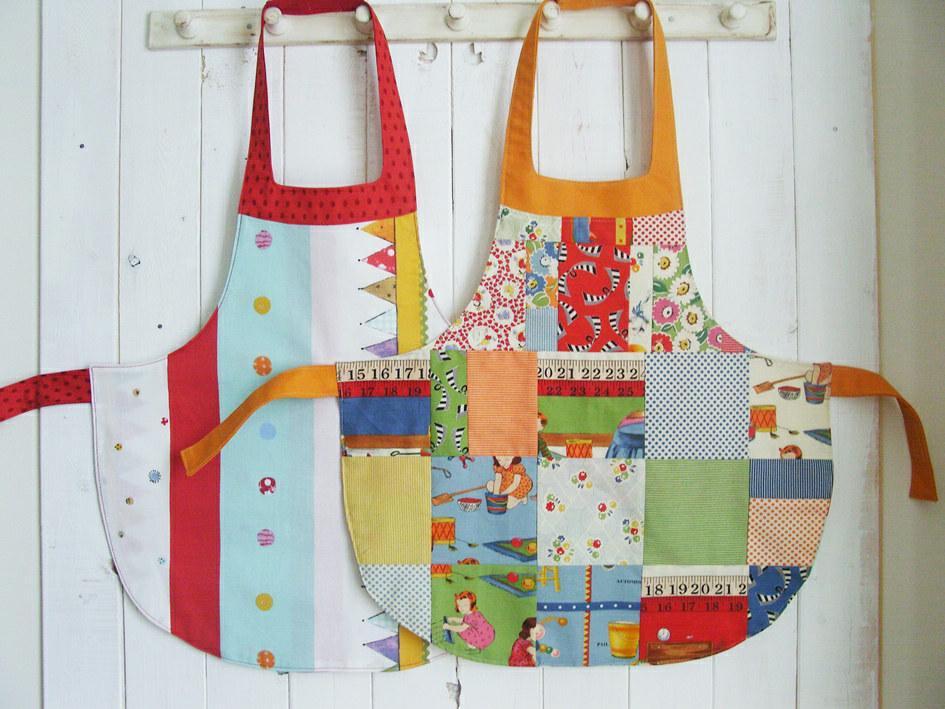 3. Make large quilts, yes many FQ's make light work of a large quilt! So if you purchased a variety of Fat Quarters from the same designer or similar colour way, they make beautiful quilts. See the pretty floral quilt below from www.allpeoplequilt.com and get the free pattern for "Flower Show" here 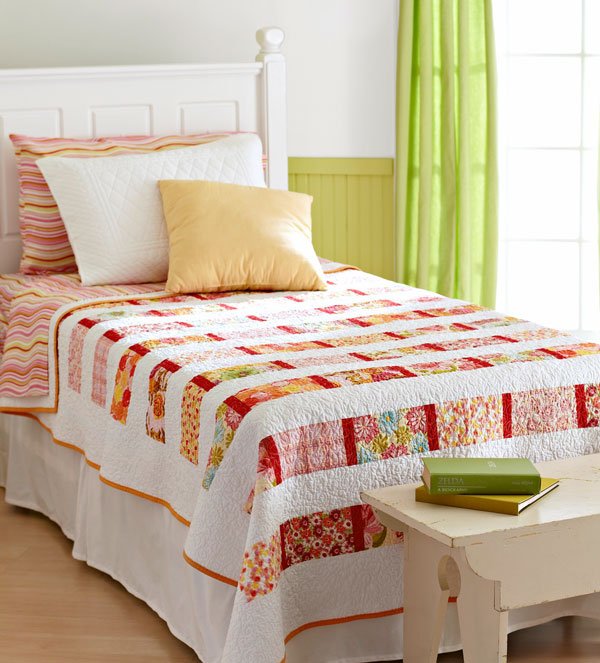 11 coordinating FQ's, 1/4yd of red accent and background fabric make this pretty quilt! 4. Make place mats, place mats are a great way to dress up your table, make it seasonally beautiful, create a warm atmosphere and use up those FQ's! You can make them reversible like the ones below, The FQ fabric is on the back and featured in the hexies on the front. The below place mats I made as class samples for a free motion quilting class that I taught at Simcoe Sew and Quilt in Barrie, Ontario (2015). There is a free download for the "Easy Piped Binding" that I sewed on them here or check out my shop page under free PDF patterns :) 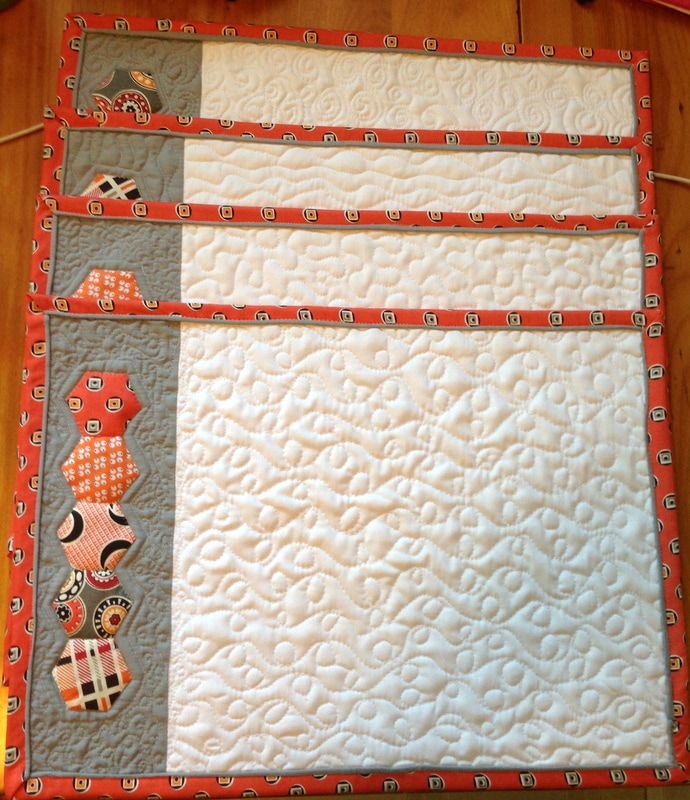 5. Make baby quilts, they require smaller pieces of fabric and can "feature" your fat quarters. I don't know about you but I love cute baby prints, farm animals, zoo animals, baby elephants, dump trucks, cute girly flowers etc. Drumroll please....... Introducing my Newest Pattern to feature baby FQ's...... It is called "Featuring Baby" My "Featuring Baby" Quilt Pattern features the use of just one FQ and shows you how to incorporate that one pretty baby FQ you have in your stash into a cute, modern and easy baby quilt! The pattern shows you how to make easy 4 patches, pinwheels and square in a square blocks and the measurements to use up all of one FQ! I have made the quilt samples up into 2 colour ways to inspire you. Look at your FQ stash of baby prints, pick out one FQ you love and download my "Featuring Baby" Quilt Pattern here 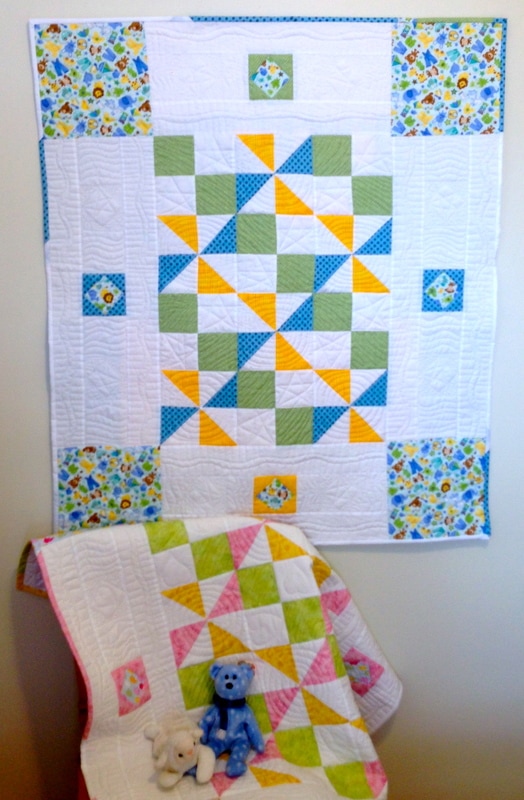 "Featuring Baby" Quilt Pattern in Blue 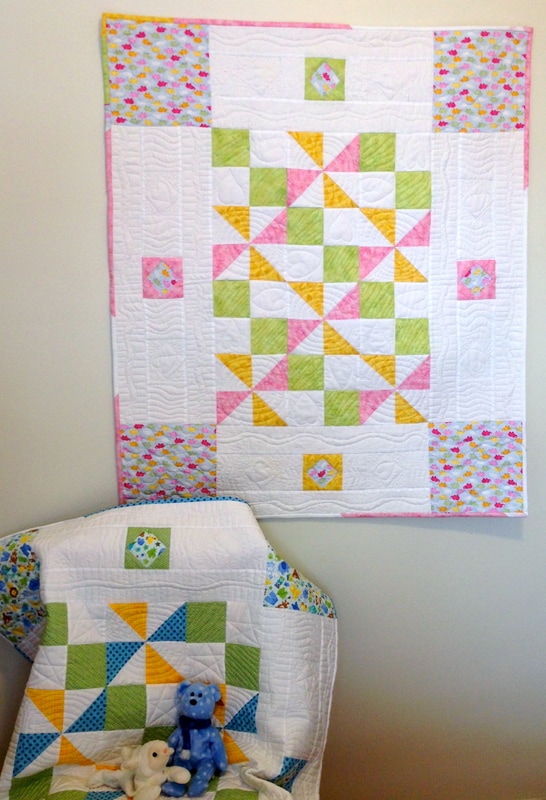 "Featuring Baby" Quilt Pattern in Pink I'm thinking you know what to do with FQ's, let your imagination do it's work and use up that fabric in 2017. Make room for more, there are so many great designers of fabric out there, creating and producing more of that luscious fabric. Almost as good as a box of chocolate covered caramels! Less calories that's for sure! FYI, more great news! I am now accepting payments through the below payment options for my customers at check out in the shop at the top on the menu above.   Have a great Wednesday! 😊
|
Follow Me:
Welcome!Hi I'm Robin and I am a professional long arm quilter, pattern designer and teacher. I am passionate about all things quilty!  

Categories
All

Sponsors
This blog contains affiliate links. This means that we endorse products.
We do receive rewards for these endorsements and this helps to keep this site alive and well. We support products which we believe are the best quality and to inspire your creativity! |


 RSS Feed
