|
Sharing my BERNINA Q20 long arm efforts today with the scrappy K Fasset quilt my youngest daughter put together in kinda random strip piecing to use up left over fabric from her wedding napkins. I finally was able to get it on my frame ! I hope she loves what I did to it. I also binded it by machine for her as she is busy with her 18 month old baby. I used a floral patterned pants and then reduced it in size and alternated large & small designs 8” &3 “ just to make it texturally interesting. I love that with quilting you can learn something with each project. Take a gander at my pics below: Happy Wednesday! 😊☀️🌸
0 Comments
Up already on the BERNINA International Blog is my tutorial on how to make a small notions tote (3 at a time!) Made with decorative stitches and my BERNINA 790 PRO- but you could use the decorative stitches on your individual machine. I am simply trying to get to know the vast number of stitches on the 790PRO.
This little project is both practical for storage and a great gift giving idea. Check out the blog post and the free pattern/project tutorial here Finish some gorgeous seams with BERNINA Feet #'s 70 & 71 Lap Seam Feet on sale for July 1-31 or until supplies last - check them out at your local quilt shop. Hi there and Happy 4th of July for all my American friends & relatives!
Below is a sneak peak picture of an article I have written on the BERNINA International Blog & that will be posted July 14, 2024 on www.blog.bernina.com/en A few hints : it's a free project tutorial, using decorative stitches with my BERNINA 790 PRO. I will leave you in suspense for the rest, check out the blog post, more info to come! Click on the image below and visit my teaching page for the description of this class I have just added. As a full day workshop, it's designed for participants who have a BERNINA QSeries Long Arm Machine and who need more creative inspiration and /or training. It will be fun and extremely creative! Contact your local BERNINA Dealer and tell them you need this class, they can contact me through my contact tab above.
I held another small Quiltingintheloft Studio class recently where we worked on the Enclosed Zipper Bag and ended up learning how to attach a zipper bag into the lining of the actual bag. This created 3 interior pockets. It also included using a lobster claw as a unique closing fixture. I quilted my fabric up on the BERNINA 790 PRO. You can use the ZIPPER FOOT #4/4D designed to stitch next to zipper coils, this foot requires the use of a far right or far left needle position. There is no problem at all going through thickness of fabric with this machine. It handles it all smoothy. Some pictures to date from the finished bags from the day long workshop are below:
Are you using some or any of your decorative stitches on your sewing machine? If your thoughts are a bit vague or it's a no on this subject then this blog article is written just for you and the CREATE Wall Hanging might be just the project you are looking for. It's my sincere hope that you will start exploring all of your sewing machine's potential and why not start with decorative stitches? Have a look at my blog post here It's entitled Create this Wall Quilt With Decorative Stitches There is a free PDF pattern download for the petals in my shop page here Also, check out my video below for even more instruction. It's a great project for your creative space! Happy Wednesday! 🌷😊☀️ Whew ! Do I have a story for you. I wanted to use the Creative Grids Pineapple Mini Ruler for a class to teach the Pineapple Sizzle Tote with my smaller private class at Quiltingintheloft Studio. I though I did not have the ruler and so I ordered it from a mega site ( I think you may know this site). Turned out I got a very bad knock off and waisted time and money.
Moral of the story, order direct from the source or from a reputable local quilt shop! Boy did I learn a lesson. Turned out as well, that I already had this ruler lol. I demoed on my BERNINA 790 PRO and it went through the fabric thickness & strapping like the "PRO" it is! It was a technique class to learn/teach how to use the pineapple ruler and using the Cut Loose Press Pineapple Sizzle Tote Pattern, The student projects to date turned out great. See below: I hope you are enjoying a lovely Monday on this fresh new week! I am simply showing and sharing today- 2 more "quilts" I just finished on my awesome BERNINA Q20 Long Arm. #13-These quilts are unusual the first one is a T Shirt Quilt that I restored as it had zero stabilizer on it and was in disrepair. I don't usually take on T shirt projects but felt a pull to do this one for some reason. I took it apart, stabilized the t shirt sections, added some fabric to make it go onto the rollers of my frame, panto quilted it with Puzzle Pieces and then added a nice hand finished binding. It also will return to my customer freshly laundered, ironed and lint brush. I think it looks so much better than when it was first delivered to me! #14-The second quilt was actually a sleeping bag that was sentimental to my customer as it came from her grandmother. I took it apart on the edges (my customer had already removed the sleeping bag quilting), I removed the batting, added 2 layers of new batting, quilted it ( geometric stitches) and bound it by machine to make it durable for outdoor use if needed. It is now a quilt rather than a sleeping bag. It has also been freshly laundered, ready for use. What was really interesting about this process is I found the BERNINA Q20 Long Arm could go through unusual fabric- stretch jersey T shirts, stabilizer and batting and parachute like nylon fabric with 2 layers of batting with the sleeping bag with absolute ease. I used Glide thread on the top and in the Bottom for both quilts with no issues. It is such a durable, versatile machine! See the photos of both of these quilts below: Happy Monday!☀️
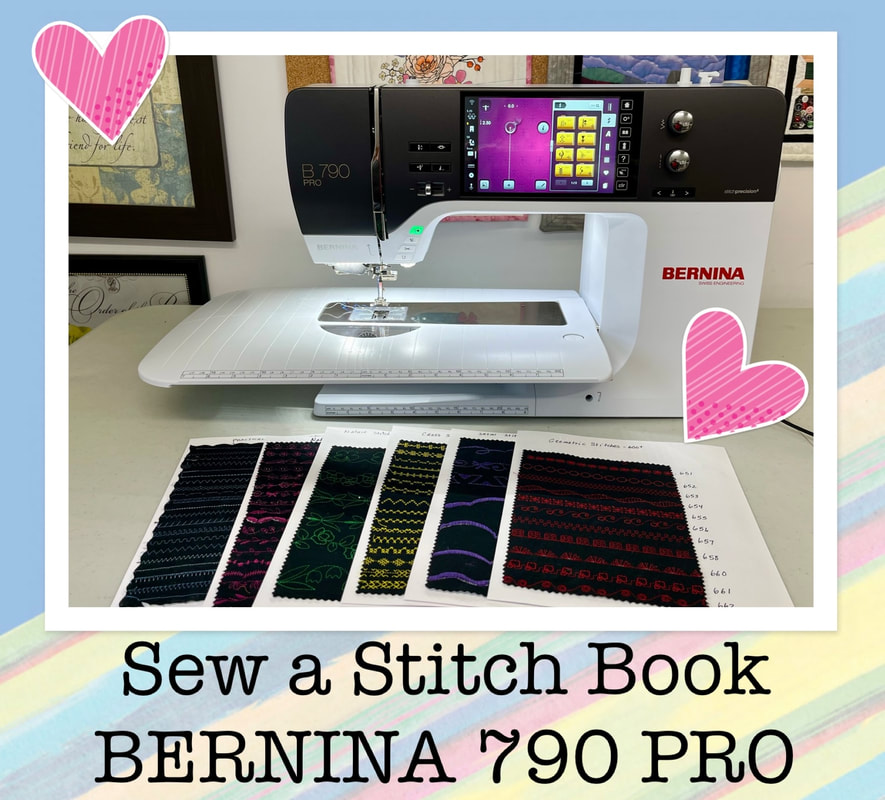
Hi, I just posted an article on the BERNINA International Blog here This article is really what I would consider an essential activity when you get a new machine, however most people don't stop to do it because they are stitching other stuff.😝 The article is entitled Sewing a Stitch Book With Decorative Stitches. I encourage you to make one for your machine! It was a fantastic experience for me and I am not yet finished, stay tuned also to Part 2. I show you how to get started , so have a look, you won't regret it and it's all freeeeeing and you will know your machine so much better! Also check out my YouTube Video Below, Happy Monday😊☀️🌷 |
Follow Me:Welcome!Hi I'm Robin and I am a professional long arm quilter, pattern designer and teacher. I am passionate about all things quilty! Categories
All
Sponsors
This blog contains affiliate links. This means that we endorse products.
We do receive rewards for these endorsements and this helps to keep this site alive and well. We support products which we believe are the best quality and to inspire your creativity! |


 RSS Feed


