|
I recently attended a sewing and quilting event and saw the below amazing IRON ON Transfer Pens being demonstrated and decided I "NEED" them!
LOL, yes I definitely can use them. Wow I am so excited about what I can do with them. Check out a picture of them below: 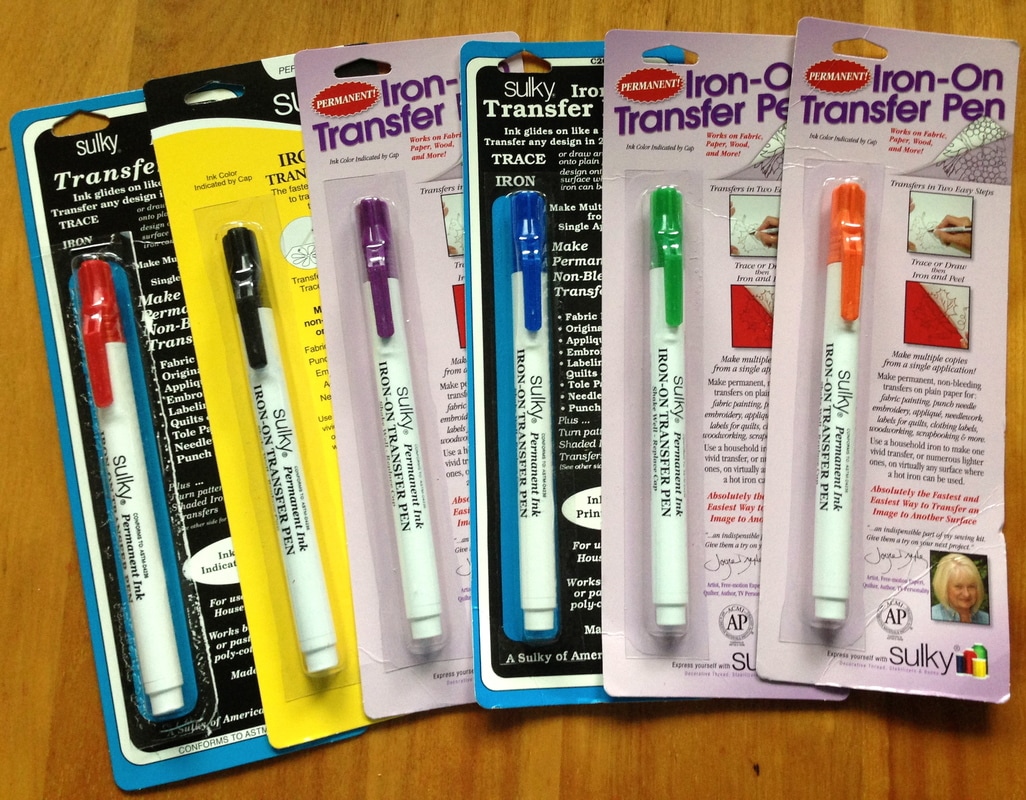
The above are pens I purchased, yes in all different packages because I wanted all of the colours the store had and therefore I had to settle for new and old packaging but they are by Sulky. (All are working great even older packaging).
Now you are wondering .... What to do with these??
I will show you below how they work first and in future posts, what I will be doing with them.
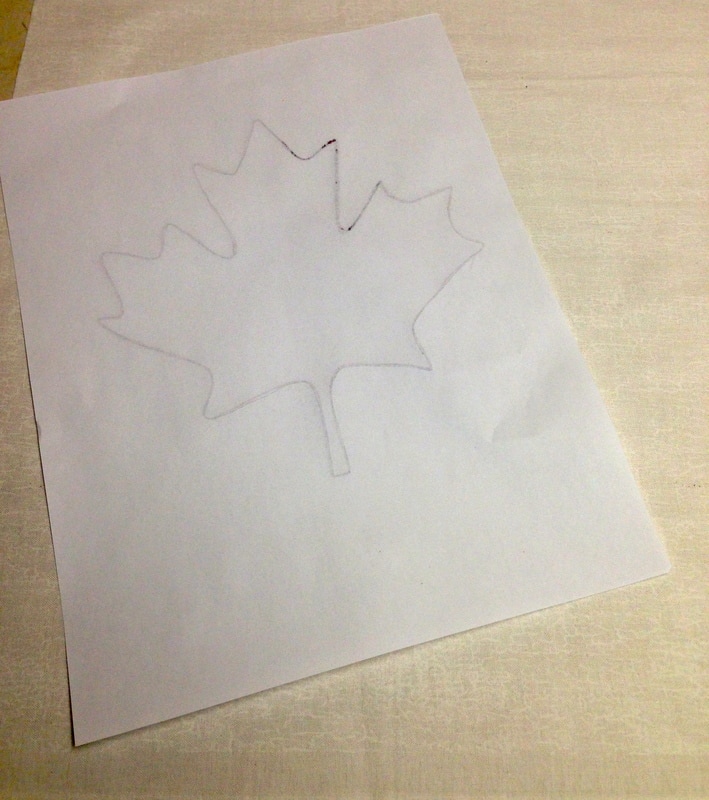
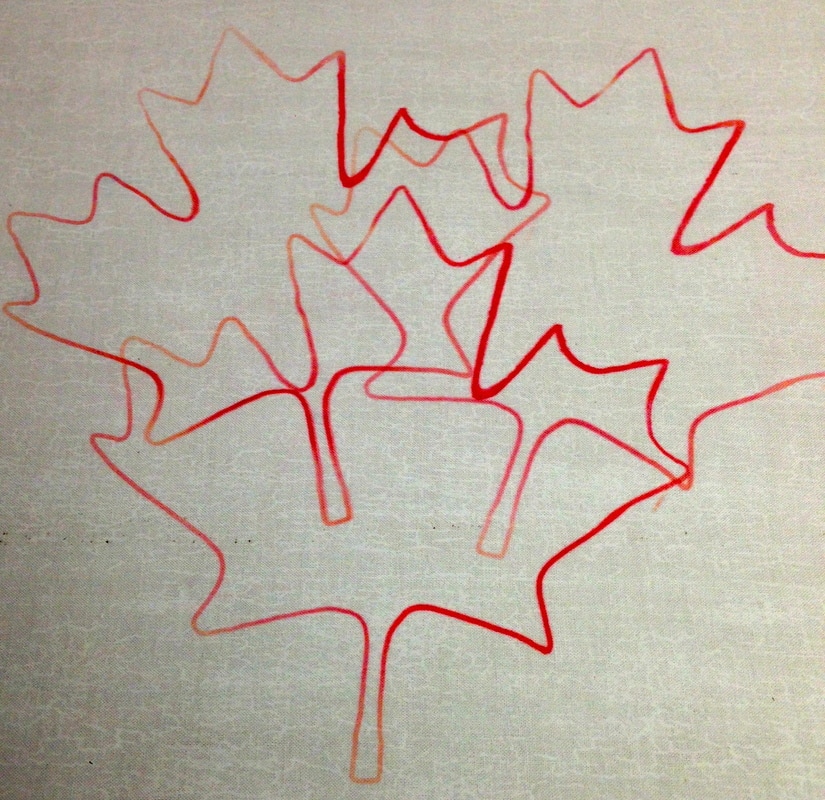
1. Draw out a black line design. There is a free PDF download of a maple leaf in the Shop/ Free PDF Patterns section of this website here. This is the design I am using first. You could use any design or stencil you already have as well. I have a project planned for the maple leaf so this is why I am using it. See below traced out black line design:
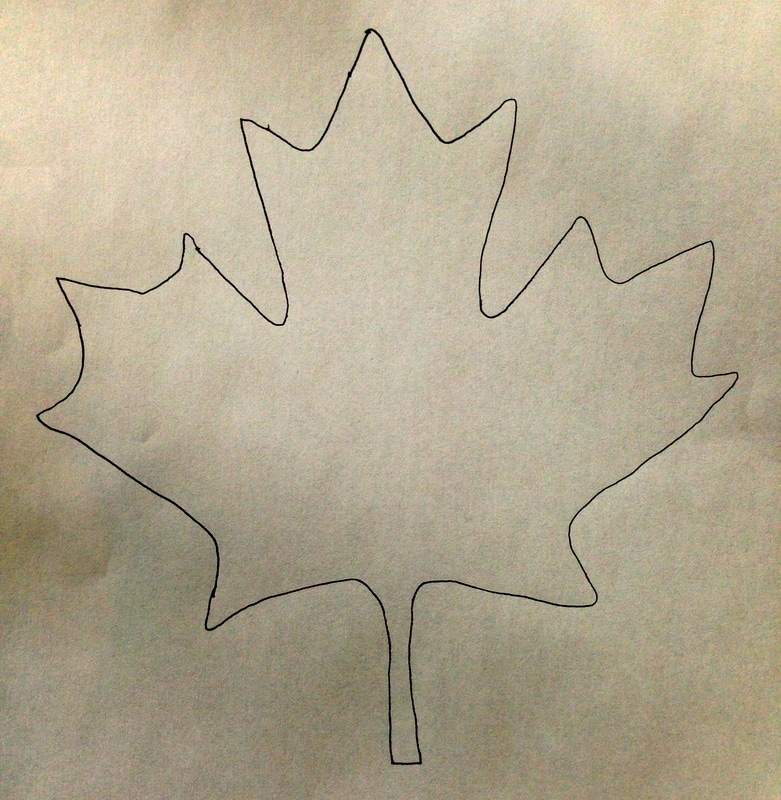
Maple Leaf Pattern Traced out on white paper with a black sharpie marker
2. Cut out a piece of fabric you would like to transfer your design to. I am just going to use a piece of white fabric because I will later insert it into a project. See below:
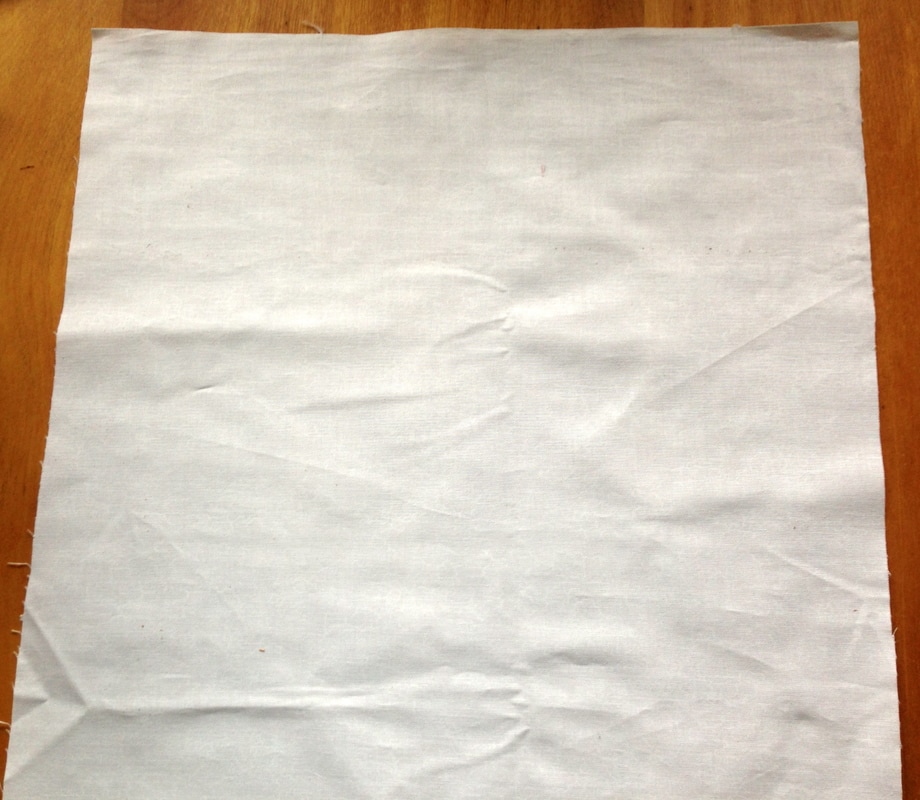
14 x 14 cut square of fabric (bigger than what I need so I can play!)
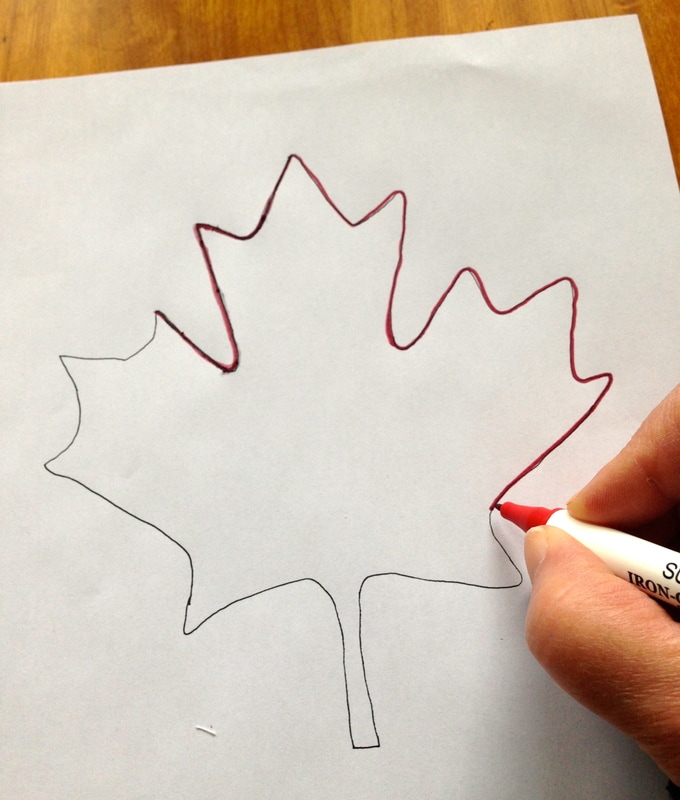
3. Shake up your pen and draw over your black line design with a sulky iron-on transfer pen ( I used red for the first maple leaf).
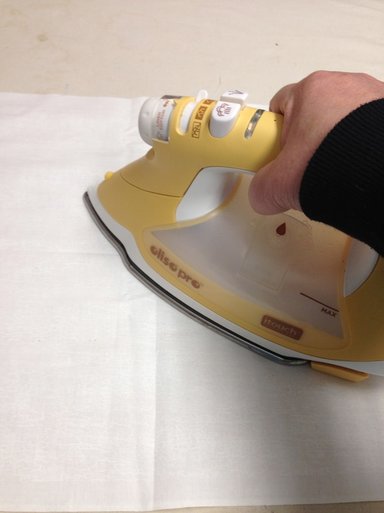
4. Heat set your fabric with an iron. Simply iron over it to warm it up to prepare it to take the ink.
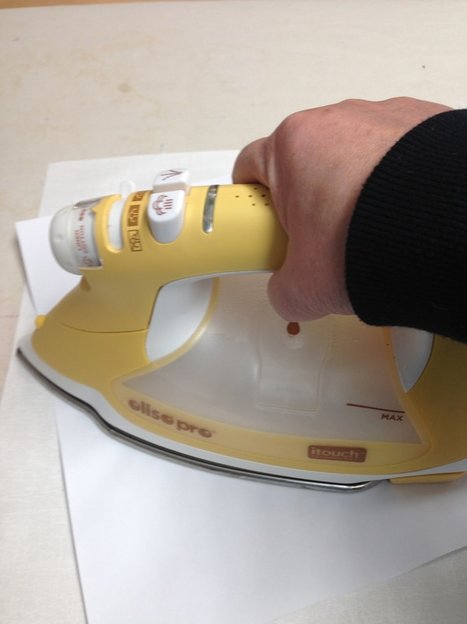
5. Press your image ink side down to right side of your fabric and press. Do not slide your image or iron, press in all areas of the design with a cotton heat setting (if using cotton). Works best with cotton and cotton/poly fabrics per instructions on package
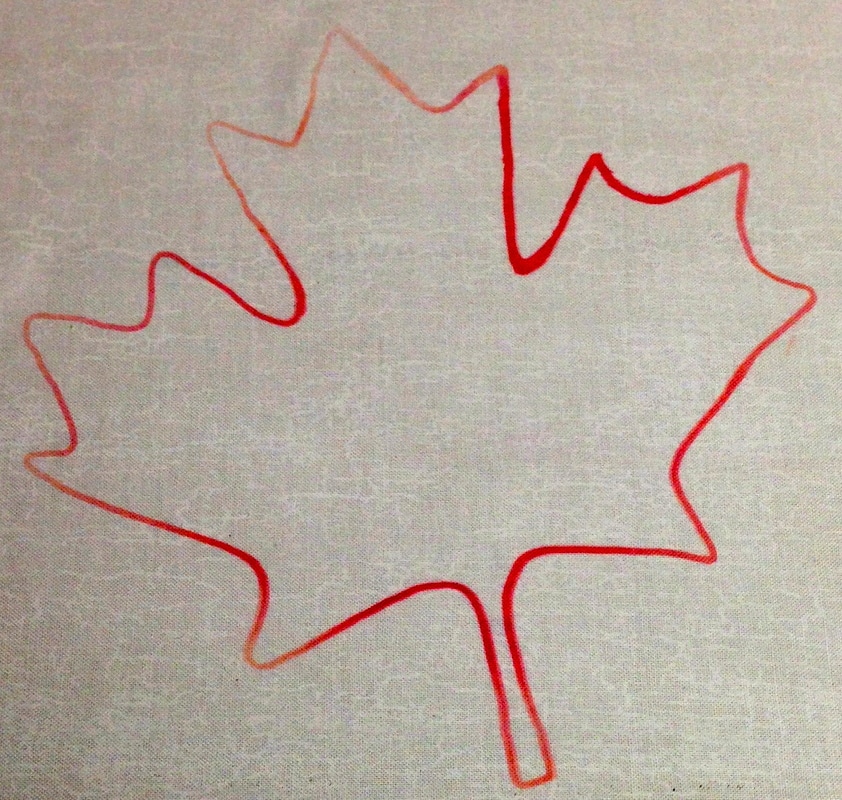
6. Check it out below! The ink is vivid and red and lovely, I am really impressed.
7. So I pressed 2 more with the same inked image (inked only once!). The instructions states you can use the inked image 3-4 times.
8. I decided to use the pens as a marking tool only with this project. See how I satin stitched these leafs below:
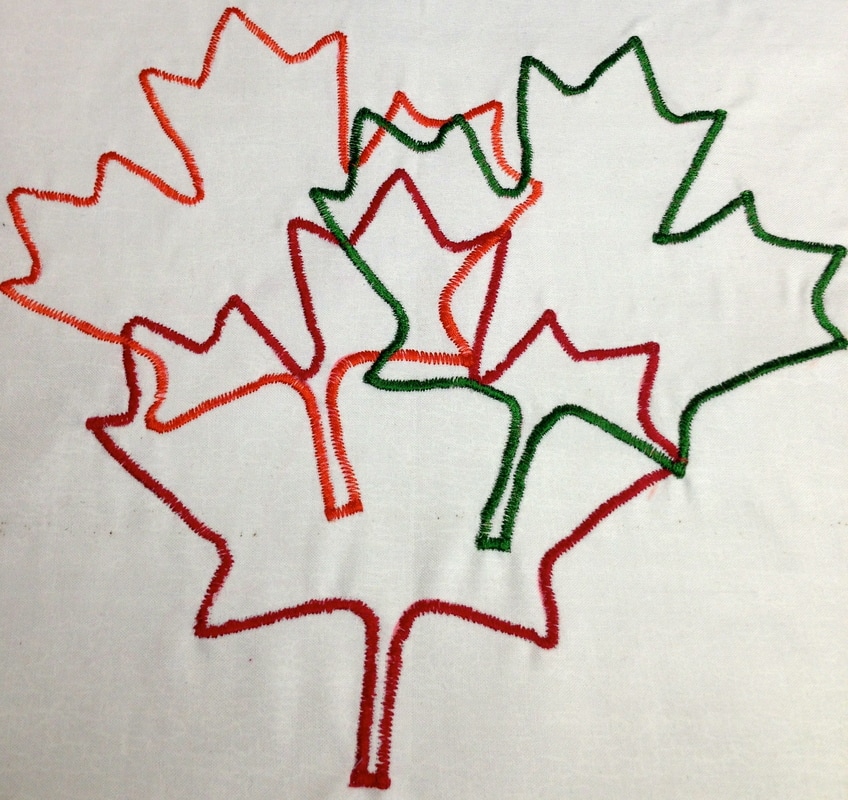
Maple leaves drawn with Sulky Iron-on Permanent Ink Transfer pens and then satin stitched.
Another wee project idea... use your quilting/scrap booking/craft stencils, ink the design directly onto paper (no black line drawing needed as the stencil is your guide) and then transfer to fabric. See below photos where I am using the ink purposely to make it be the design element. Its easy as 1, 2, 3
#1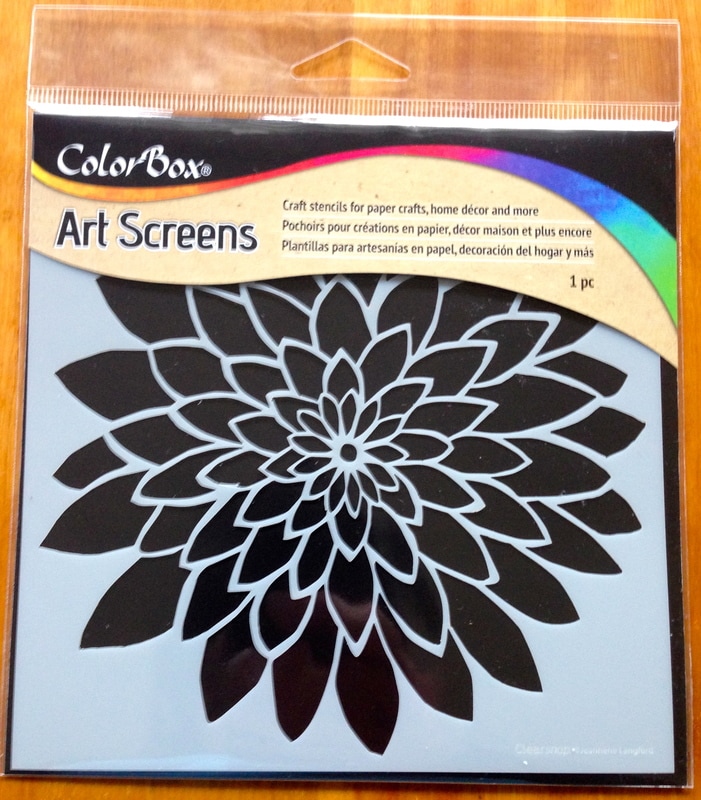
choose a stencil
#2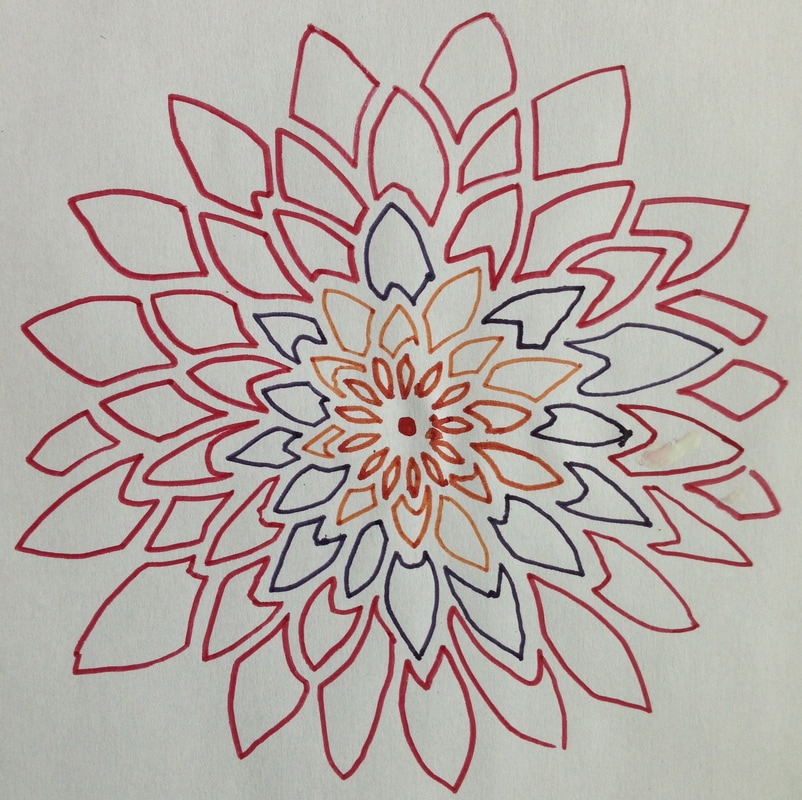
Trace out the stencil with your transfer ink onto paper
#3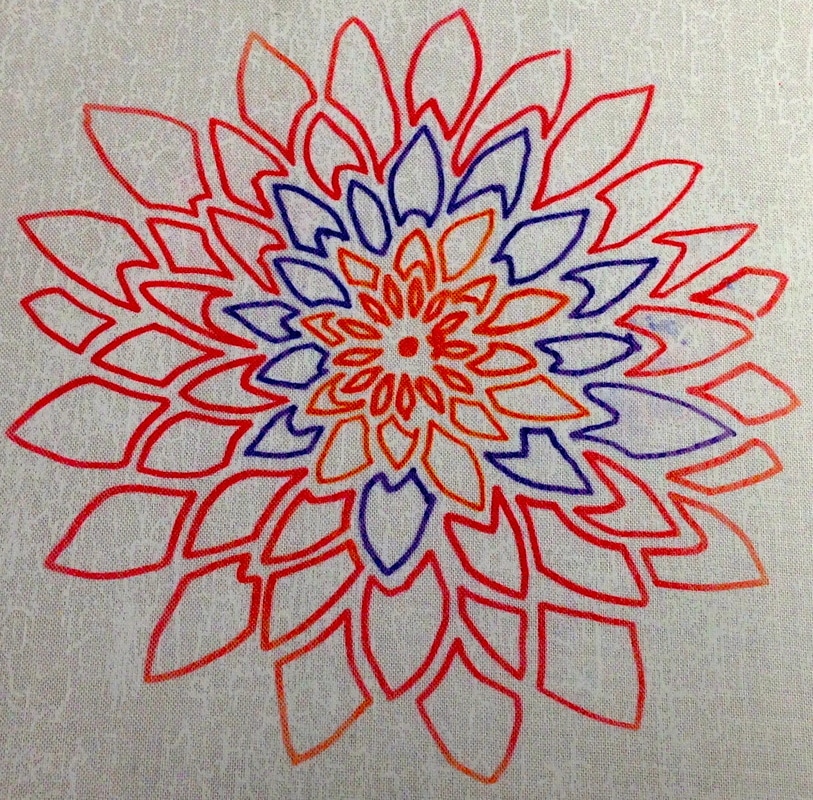
Heat set blossom design with an iron and transfer ink onto fabric
There are many possibilities with both of the leaf and blossom image, I could use them as quilt blocks, embellish something with them ... a pocket, a bag front, pillows, make quilt labels, home dec etc. The sky is the limit!
The important thing is these Sulky Iron-on Transfer Pens allow you to transfer images with ease and no printer required unless you want to search for images on line and use them. They are awesome! 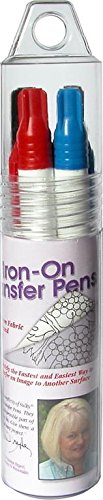
You can purchase them as one colour or as sets
Check back over the next few weeks to see what I do with the above images.
I hope I have inspired you today in some way! Happy Tuesday ☀️Hoping for sun!
3 Comments
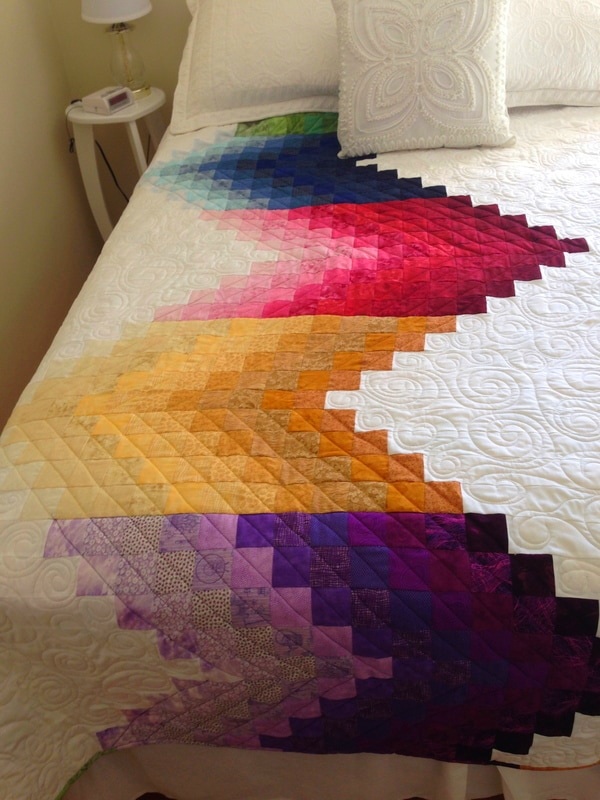 I was able to complete my Ombre Quilt just before Easter and put it on the bed in my spare room. I am pleased with the way it turned out and planning on making it into a pattern as it is my own custom design. See photos of the completed quilt below: 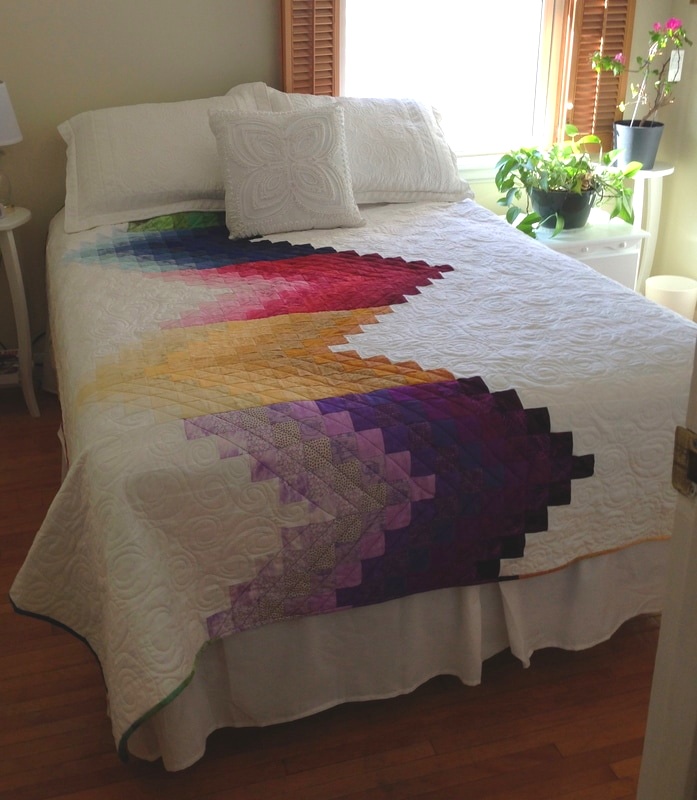 My spare room is south facing but the ombre quilts makes it happy! Ombre quilt, quilted with ruler work and spirals and a multicoloured binding. It sure brightens up my spare bedroom! I'm continuing to find unique ways to use up my stash.
Stay tuned for a pattern release soon complete with colour your own pages! Happy Tuesday and Happy Spring!🌷
I have designed with EQ7 a new quilt to 1) use up my stash by using up my ombre strips 2) design a bargello style quilt 4) audition the colour combinations and 5) make a very accurate quilt.
EQ 7 is wonderful and EQ software has been the top quilt design software in the industry for 25 years! 
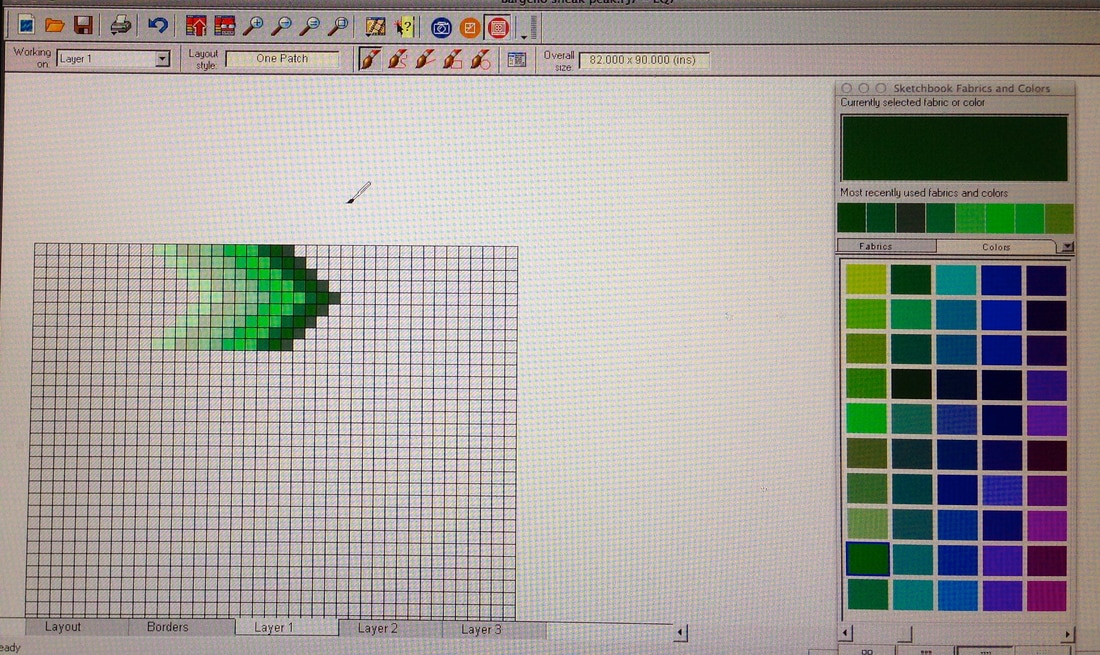
Sneak peak of my design in progress in EQ7
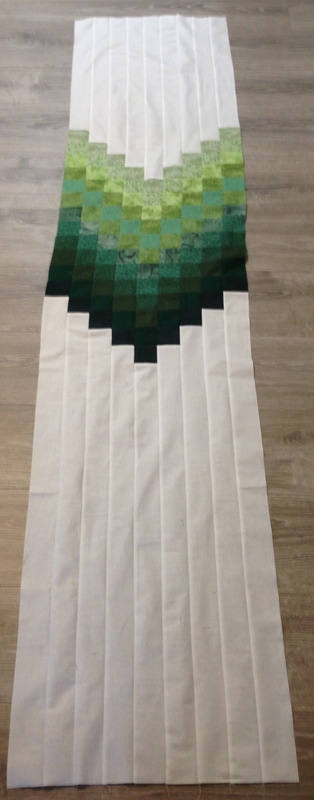
I am happy to say I have started the quilt making process finally! See my photo below. 1/5 of the quilt is pieced!!! It will be double/queen sized.
I auditioned background colours and wanted it modern so grey and white were my options for background. See photo of my strip sets auditioning it with white below:
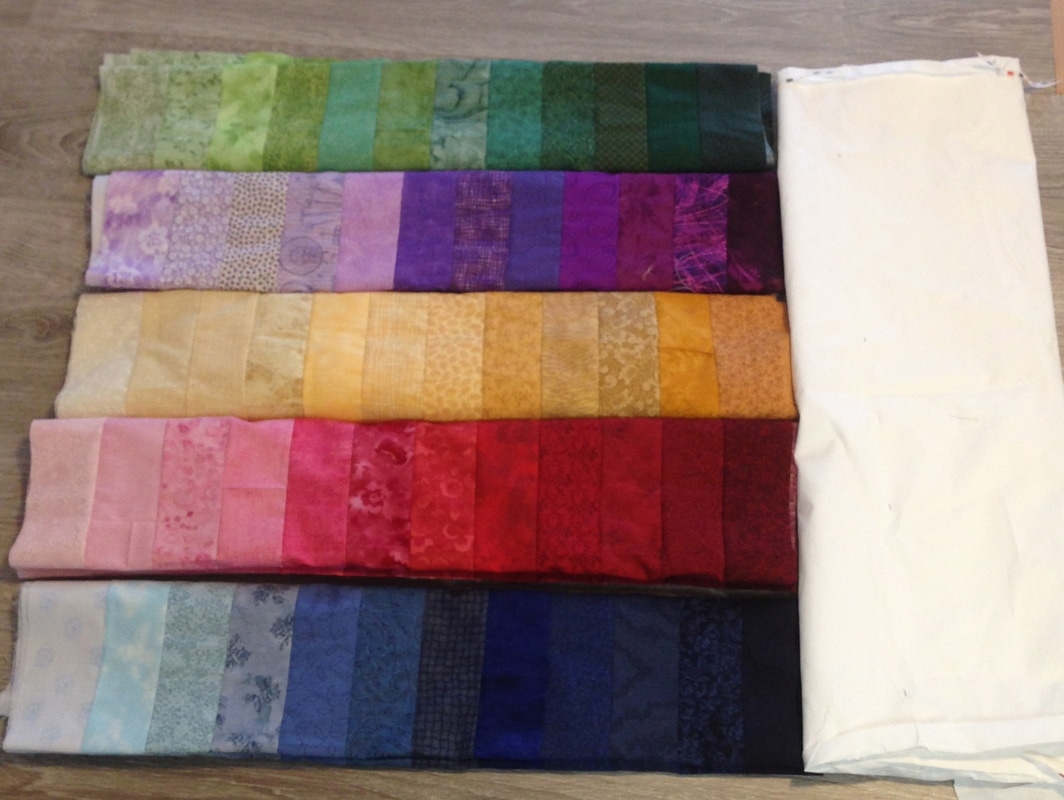
Ombre strip sets auditioned with white fabric
I felt like the white made the colours pop! I tried grey and they looked dull in comparison.
EQ7 made designing this quilt so much easier than if I had to draw it on paper and colour it in. It is a wonderful design tool because you can decide on the size of your quilt and whether it needs sashing, blocks, colours, fabric, placement etc and just press buttons, drag and drop and voila your quilt is designed! 
Add sashing,blocks, borders, colours and settings with EQ7-Literally 100's of design elements
Most of my patterns and quilts these days are being designed on this wonderful software and I hope to use it much more into the future. There is a learning curve with it and I am learning on it every time I try to work with it.
I would be sugar coating it if I did not say there are challenges with it. It is a multifaceted program with lots to learn and there in lies the challenge! However, with so many design, block, sashing, border, fabric, colour and quilting options available, once you master the learning curve you have designs that you can "visually audition" and draw accurately with EQ7. 
Choosing fabric colours with EQ7
Choosing block styles with EQ7
Can you imagine your unique possibilities with this software?
Tune in next tuesday for my next instalment of this quilt... I'm hoping to get it done fast now that I have mastered the design process with EQ7! Happy Tuesday! Need to make many "make ahead gifts" for Canada's 150th birthday celebrations? It's coming fast and furious this July 1- don't let the snow here is Canada fool you! Time has a crazy way of getting away from us. This is a quick idea, a heat resistant pot holder. Tie on an authentically Canadian recipe, add food, decorations and activities and your party is planned! I made these 10 pot holders for an upcoming ladies event I will be attending where we will be entertaining another group of ladies and the theme is Canada Day. The pot holders will be their take away gift. There is a free PDF download of the maple leaf appliqué available here. 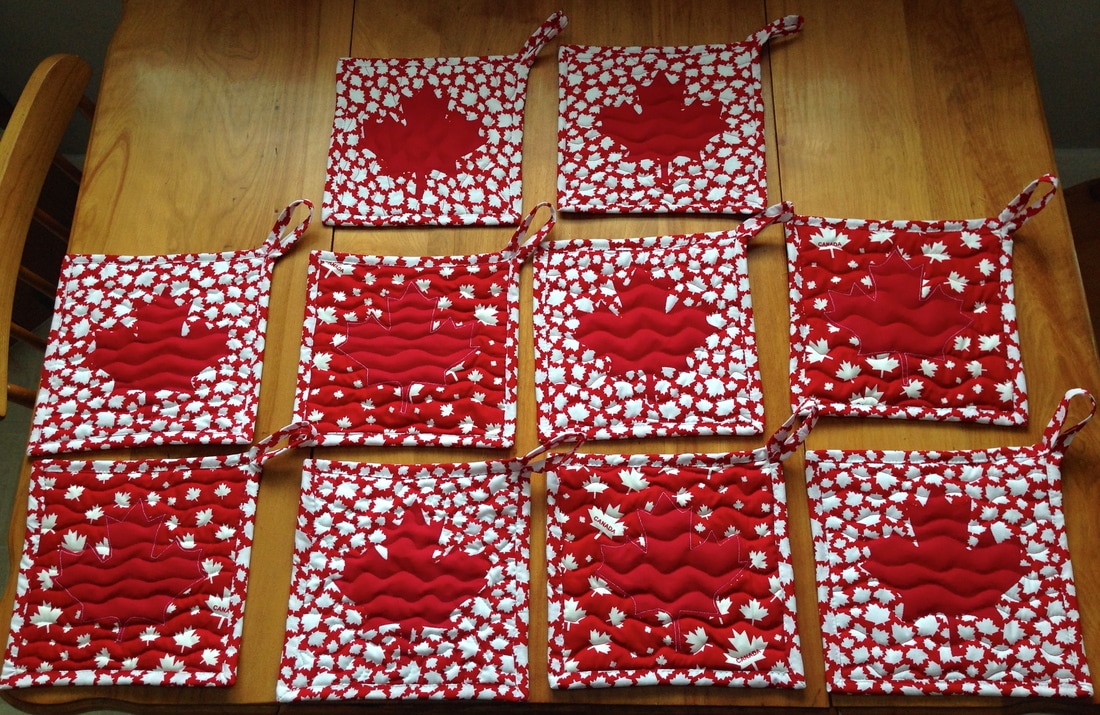 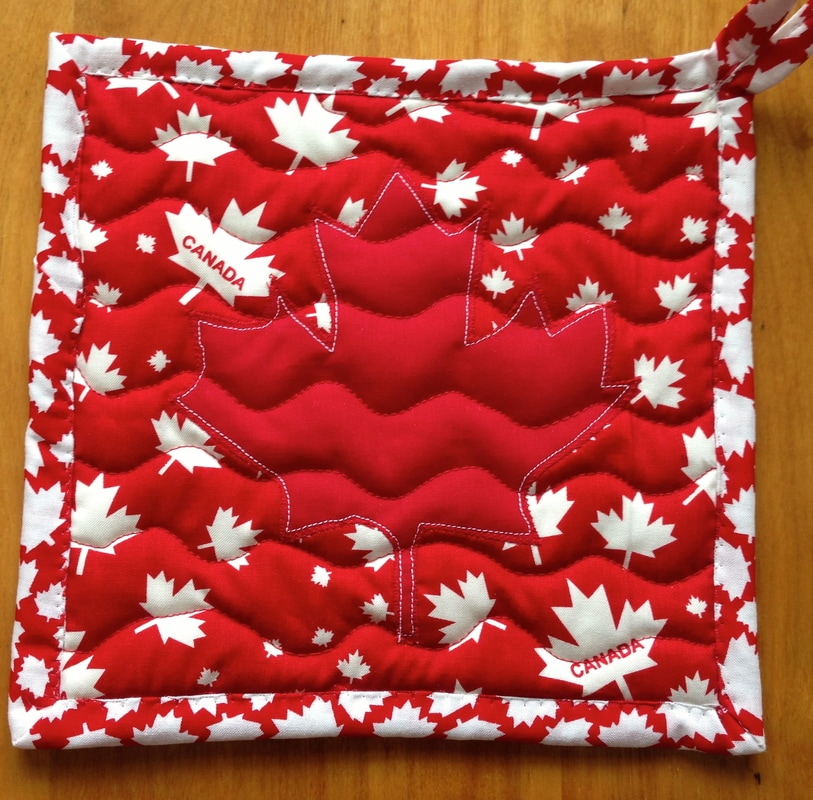 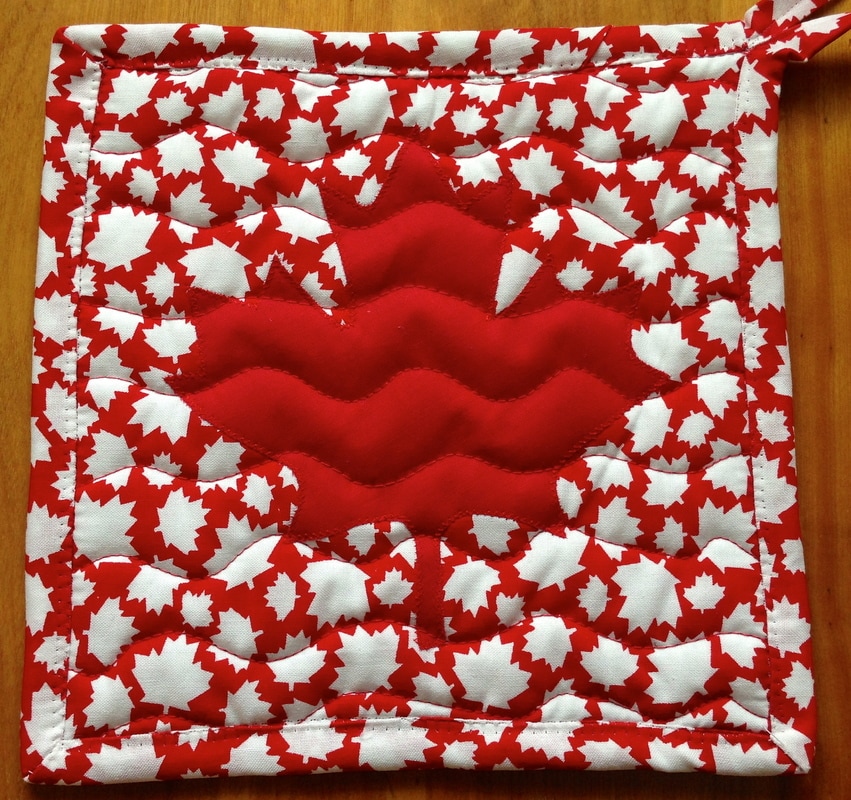 To make the pot holders: 1. Cut a piece of backing fabric, Insul-Bright and front fabric - 9 x 9", Cut one strip of binding fabric 2 1/2" x width of fabric What is Insul-Bright? Insul~Bright is a needle-punched, insulated material ideal for crafters. ... The needled material is breathable and won't break down with washing. The polyester fibers resist conduction while the reflective metalized polyester film reflects radiant energy, hot or cold, back to its source. I know I have talked about this product before (ad nauseum!) but it is wonderful for use on pot holders, trivets, oven mitts etc. Anything where you need to protect your hands from heat. It is also relatively inexpensive and quilts just like quilt batting. I would never be without it! If you follow my blog, this is what I used for my double ended oven mitts. See what it looks like below: 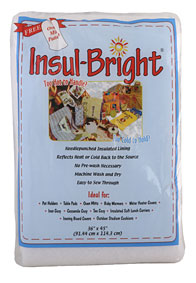 2. Download my free maple leaf appliqué here or get it by clicking on the
"shop" in the menu above and look for free PDF patterns. Appliqué this with your method of choice to the front right side of your pot holder. 3. Sandwich all 3 layers together as cut, baste and quilt (mine are just wavy lines). 4. Add a binding and I added a loop with 6" of extra binding fabric (folded in 1/2) and integrated into one corner. 5. Attach a "Canadian" recipe with curling ribbon to the loop and you have a unisex gift ready! (Or make a Canadian Apron for those Macho men!) I hope you enjoyed this wee tutorial! Send in pics of your Canada gift ideas, July is coming (we hope after this Noreaster we are about to experience) and I will be happy to post and share!! Happy Tuesday! 🍁
Falling in love with a colour is easy. Picking your favorite shade, on the other hand, can be difficult — which is why we love ombre! Or at least why I love it!! This hot color trend has a restful, happy affect on the eye. Colours are not busy, colours appear to glow and the colours appear modern!
Check out the picture of the room below- NOT a quilt however it could be! What a lovely way to decorate a room with an ombre affect and art work. This photo is by Melanie Acevedo, from the book "Undecorate." So beautiful and I believe it really looks modern. 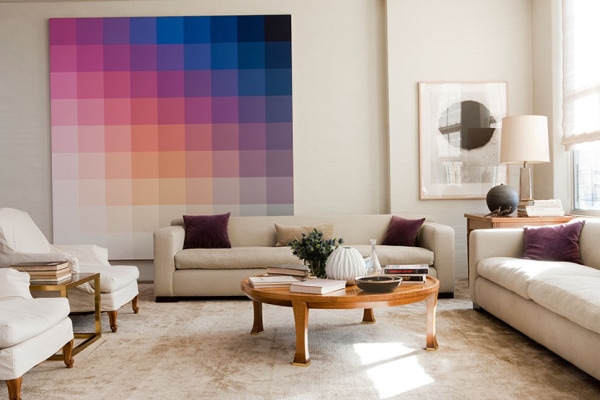
Photo by Melanie Acevedo from the book "Undecorate"
Check out my most recent yellow/gold ombre strip set below, I have 4 sewn together, one more next week and then I start working on modern project (s) with these strip sets. Stay tuned and check back to see what I will be working on. :)
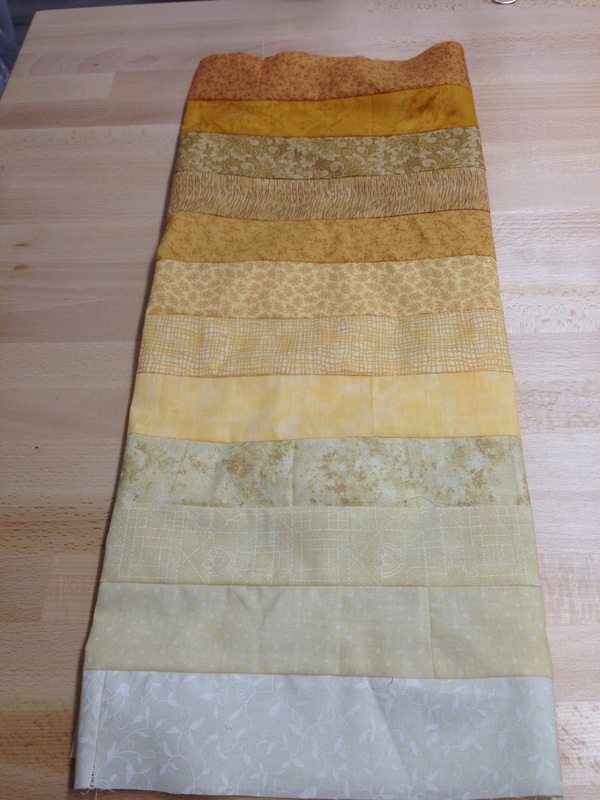
This weeks strip set in shades of yellow
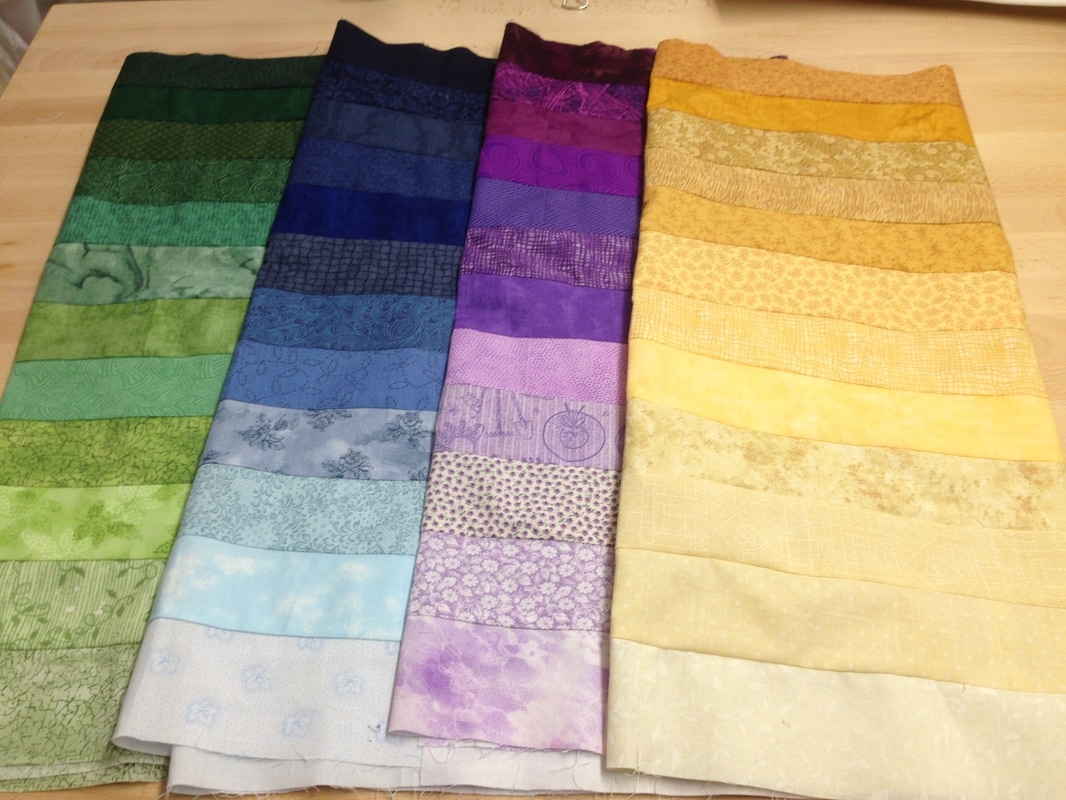
All 4 strip sets to date...They Glow!
Don't forget to use a colour tool if you try to ombre your stash and recommended is the 3-in-1 Color Tool by Joen Wolfrom available below.
An absolute necessity with the two green and red value finders included in this tool!
Get free ombre quilt patterns here !
Photo from craftsy.com/blog Click on the photo to get the free pattern!
Happy Tuesday! Use up your stash with Ombre strips!! ?
I have been very busy these days making of Roman Shades. Five of them to be exact. Two for a friend and 3 for my new quilting studio, I think I have now perfected roman shade making! I am also testing the Westalee Rulers (domestic free motion rulers) for a quilt shop in Barrie, making a sampler for them, doing custom long arm quilting, getting ready for upcoming trunk shows, teaching, some magazine work and more! Phew!! I have not forgotten my ombre project and completed another strip set for upcoming projects (which I will share I promise!!). See the purple ombre strip set below: 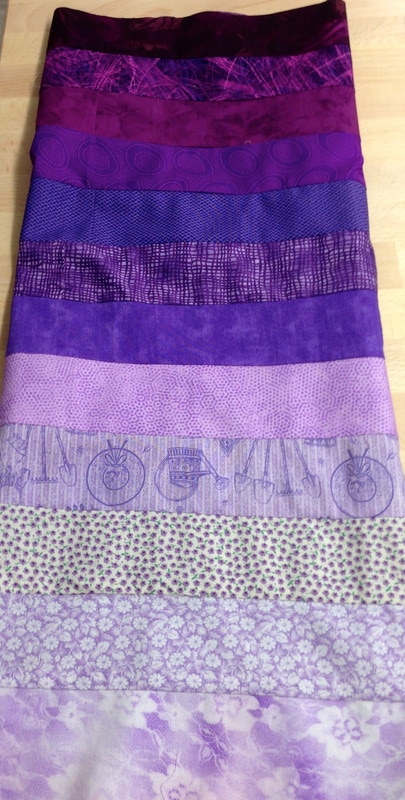 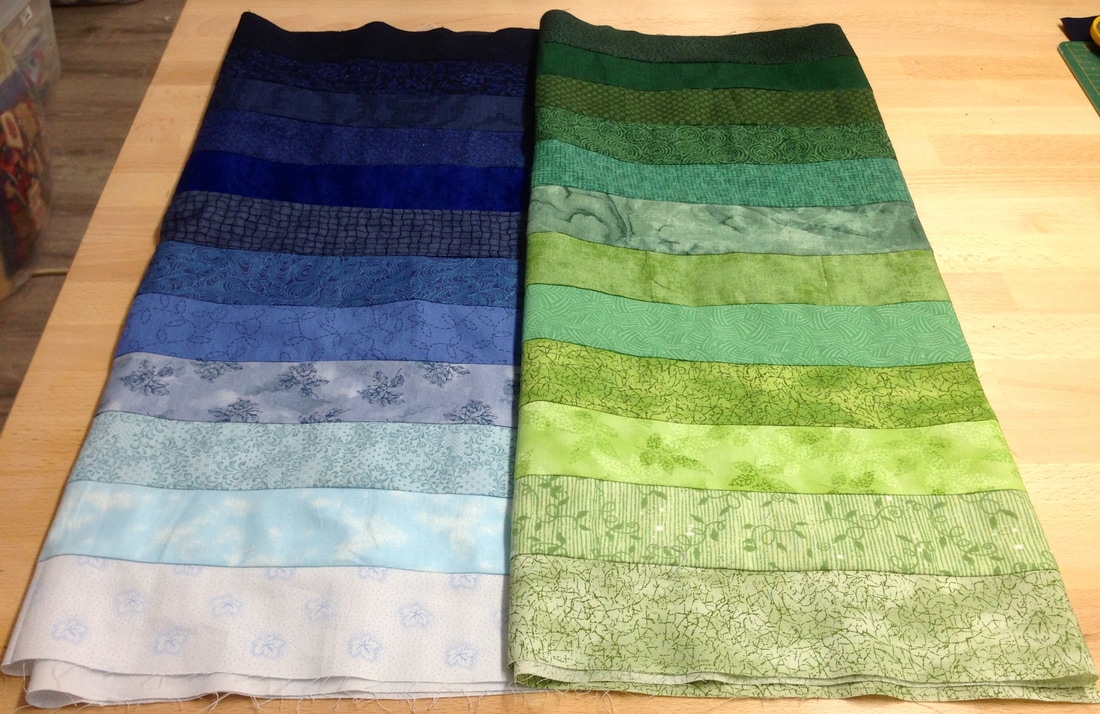 My blue and green ombre strip sets made last week While you are waiting for me to show you what I am doing with my Ombre fabric check out a great blog post about ombre quilting patterns called Ombré Quilt Patterns That’ll Never Go Out of Style. Click here to have a look at some great ideas Also, below is a quilt featured in the blog post on Craftsy from Castilleja Cotton. Isn't it gorgeous!! So one idea for ombre fabric use .... make it Bargello. Just some inspiration for a chilly Thursday in March! 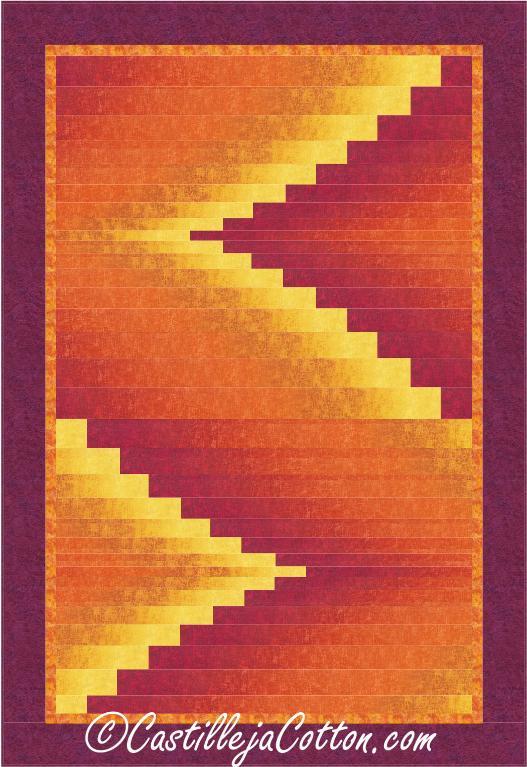 Sorry I am behind on my posting. I will be sure to make it up to my viewers in the coming weeks after my workload settles down!!
Happy Thursday and stay warm, spring will get here eventually 😍 Making creative quilt backs is a great way to use up fabric and your stash! Lately, when considering quilt backing fabric, I have been using up the fabric for the project on the back. It is a great, creative way to showcase the fabric, continue to work with fabric you love and use up little bits and pieces. With careful use of the fabric you can almost make your quilt reversible. Sharing some pics of creative quilt backs with you below:     The below is a recent baby quilt I was making and every single little piece of fabric was pieced together and used as backing. I knew I would not need the scraps for another project at least for a while and wanted them out of my stash!  Consider making creative quilt backs and use up your stash.
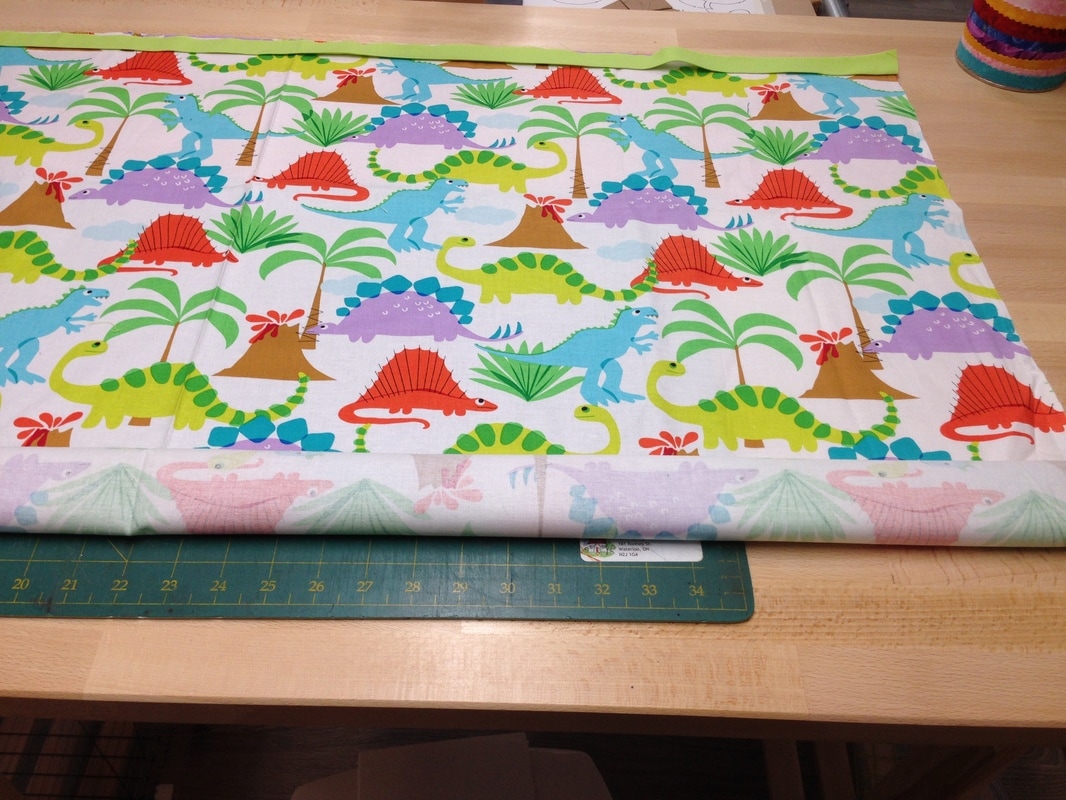
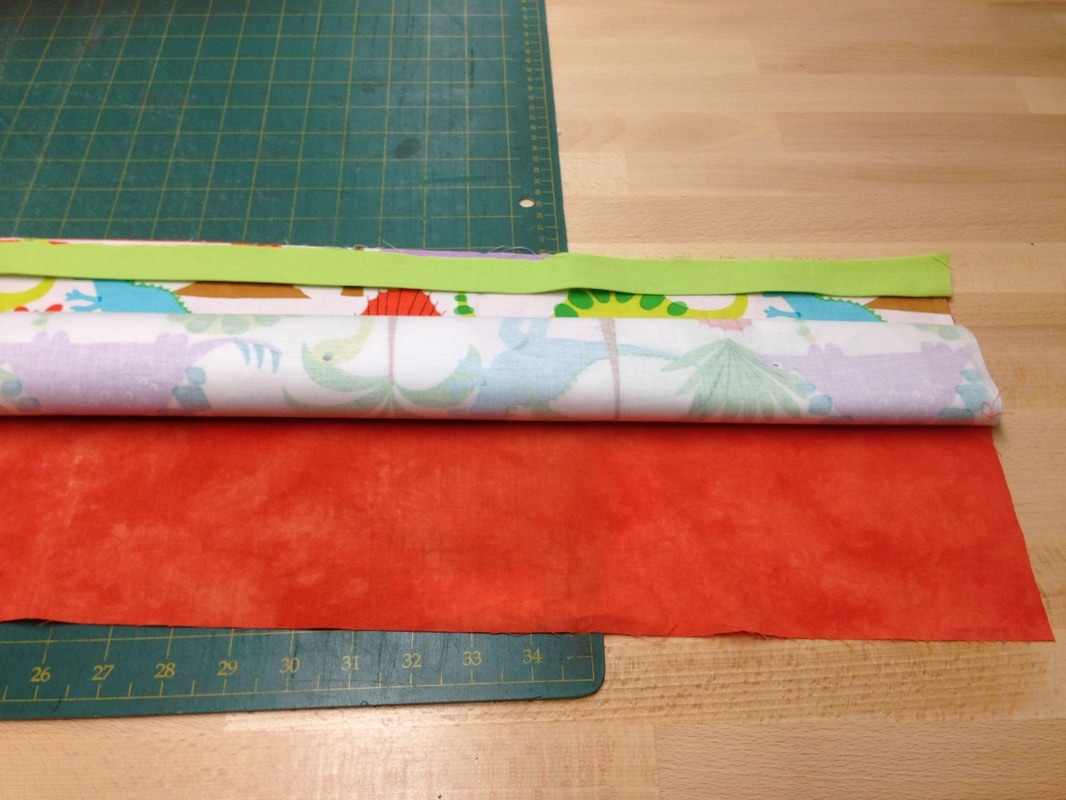
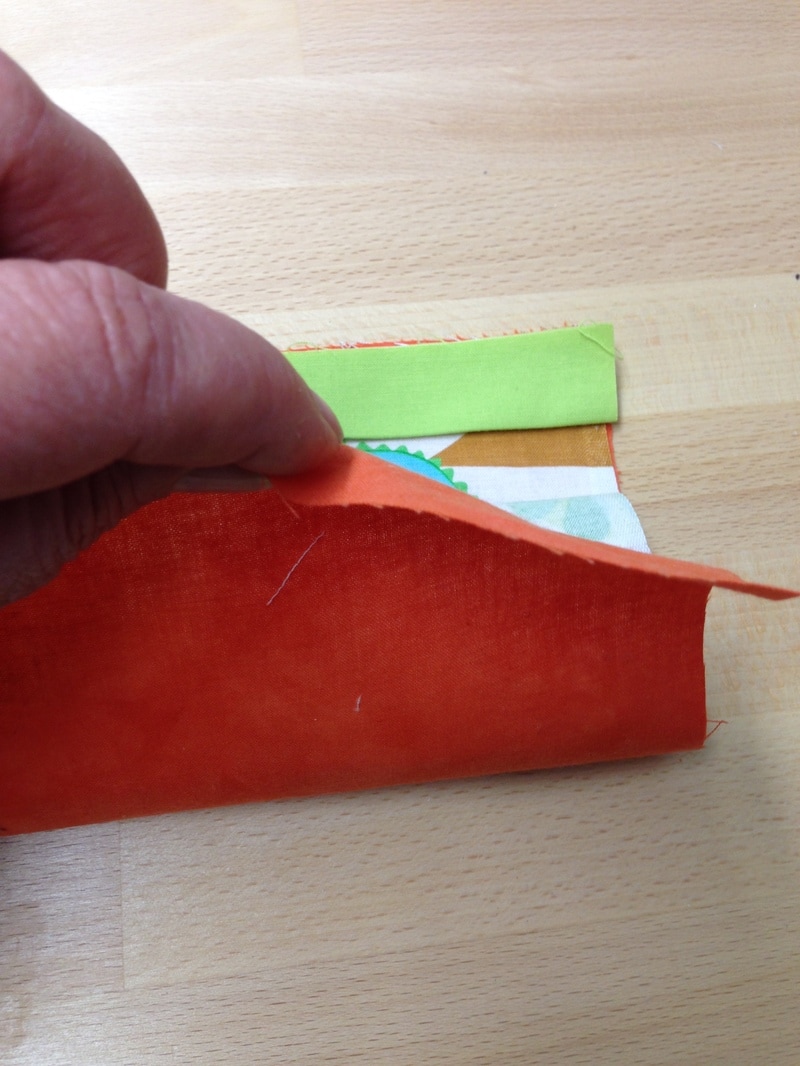
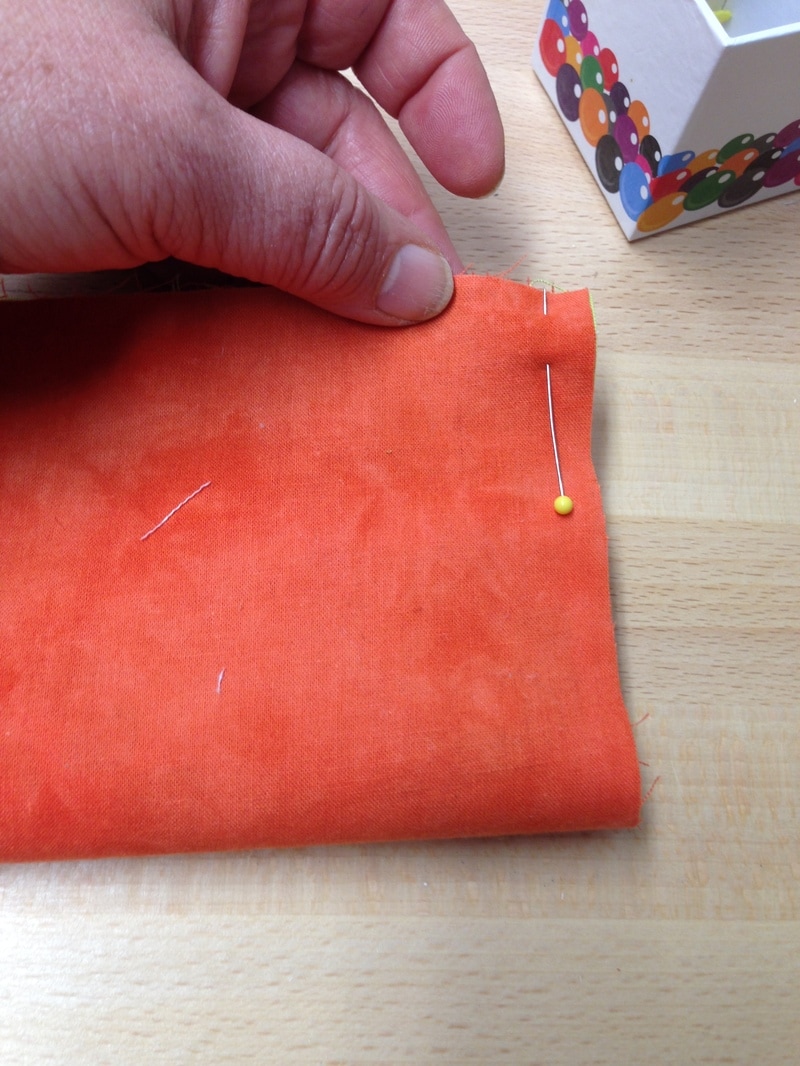
Craftsy.com has a great blog post about this topic called: Creative Quilt Backs: Tips to Make Them Special and this is a wonderful and inspiring blog post explaining how to use prints, large pieces, scrappy bits, diagonal patterns and more! Check it out here Happy Tuesday! Have a great day! 😊 I hope you are enjoying your day! I have been looking at my stash of kids and baby fabric lately and realize I need to use up some of this fabric just sitting around waiting for it to be used. So I am on to another "stash busting" project! What better way than pillow cases? A pillow case uses up about 1 yard (close to 1 meter) of fabric and it's an easy way to have a gift ready for family. It does not have to be made out of "kids' only fabric. It can be made for people of all ages and you can personalize it with a name appliqued or embroidered on it if you like. Todays tutorial is simply how to make the basic pillow case. This "tube" method is so fast and easy, I will never make a pillow case any other way! This is the fabric I chose to get started with: 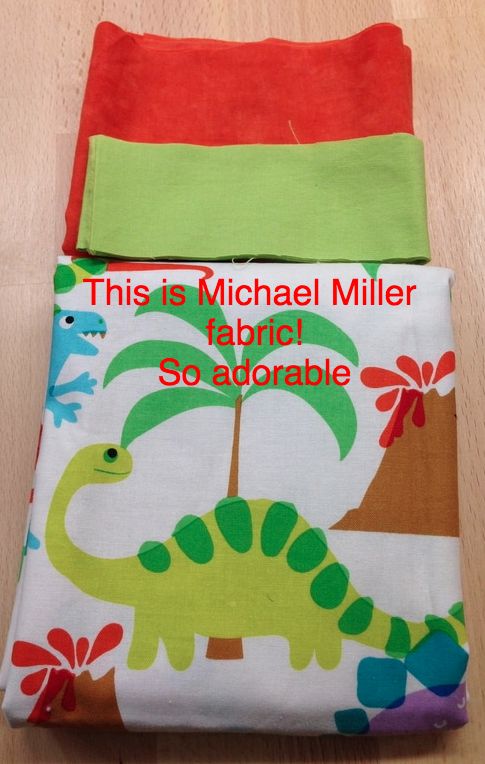 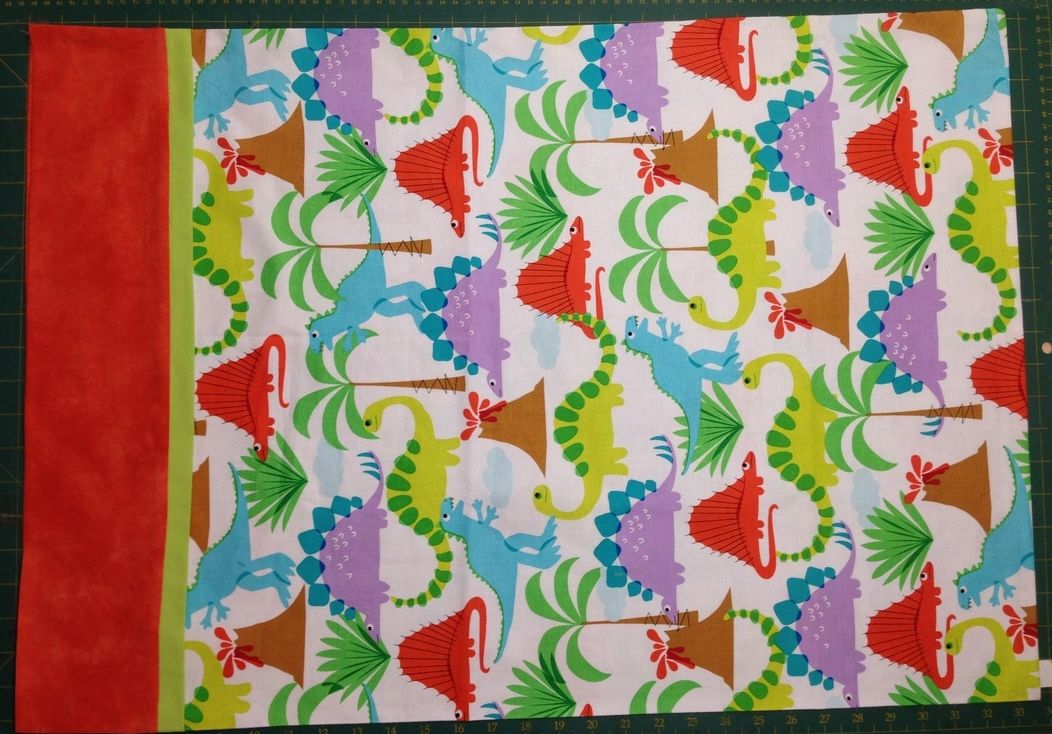 How to make the pillow case: 1) Chose 3 coordinating fabrics and cut 27"x width of fabric of main fabric (dinosaurs), 9" x width of fabric for a cuff, 2" x width of fabric of piping. 2) Lay the fabric on top of each other matching fold lines and cut off selvages through all layers so that you know that all 3 fabrics are exactly the same size. 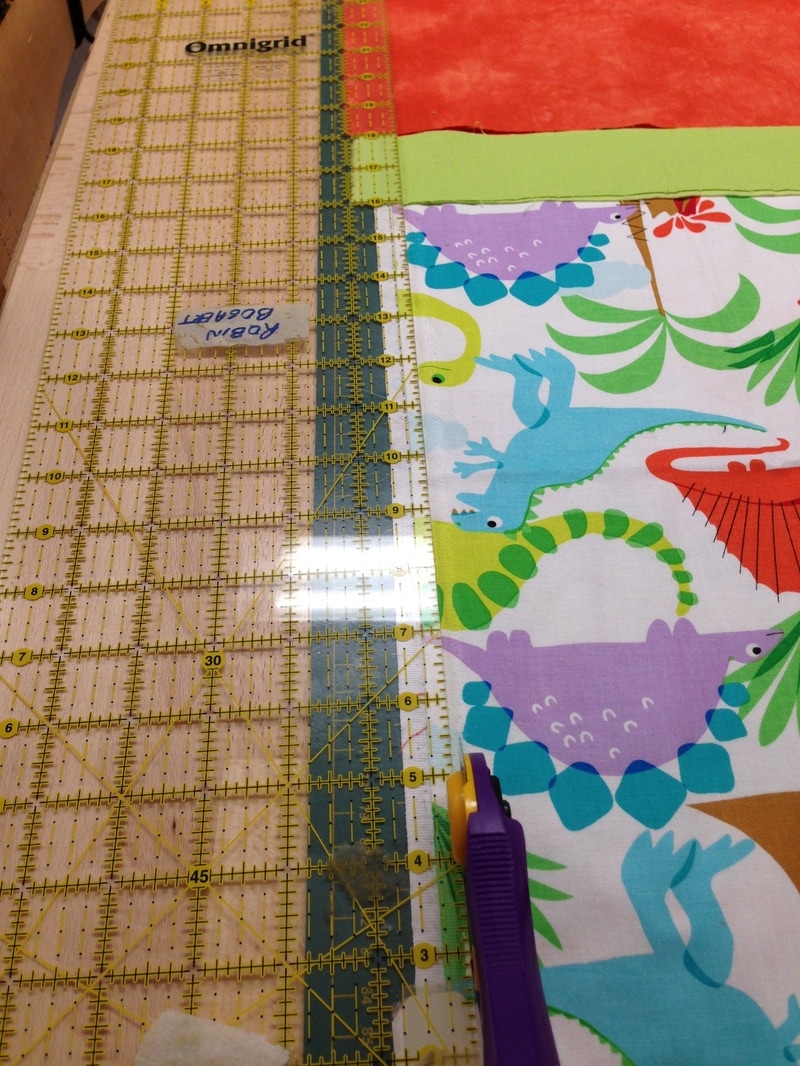 3) Fold the 2" piping piece and the 9" cuff piece in 1/2 on the long side and press well with wrong sides together. 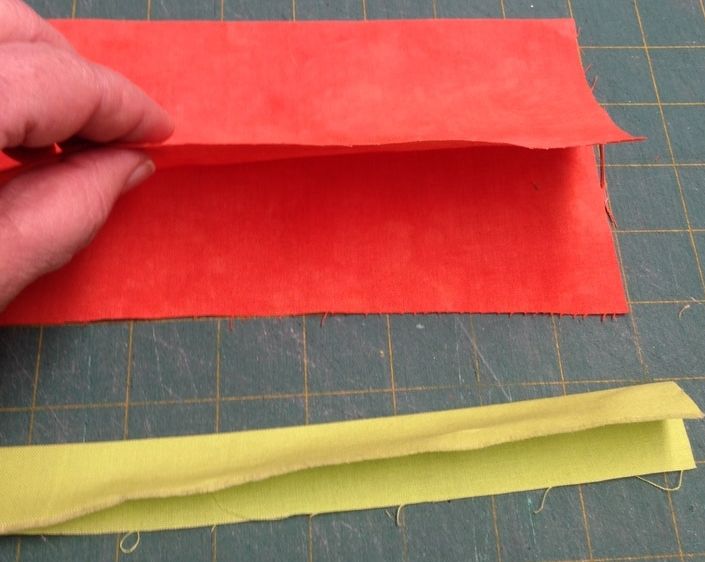 4) Open up your 9" cuff piece and lay it on a flat surface right side facing towards you. 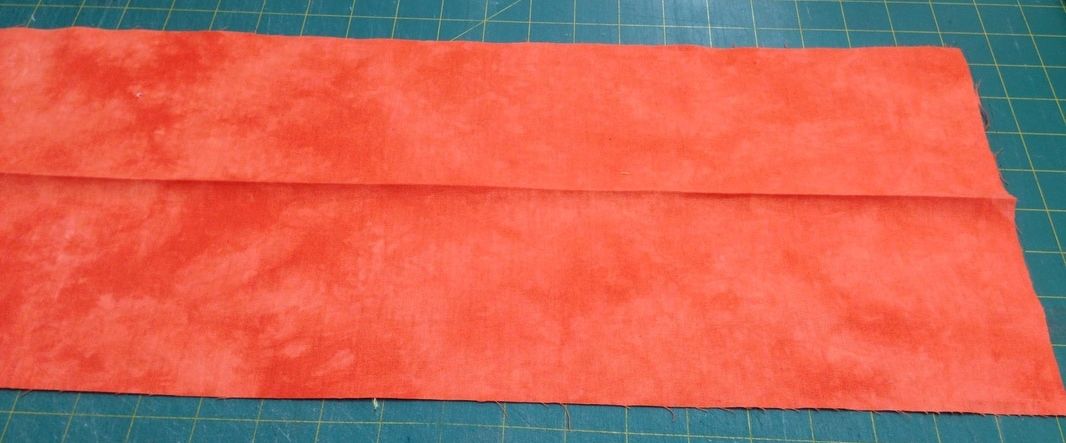 5) Open up and lay your 27" main fabric right side facing up on top of the cuff fabric (I know this seems wierd with wrong side facing right but bear with me!). Match your raw edges. 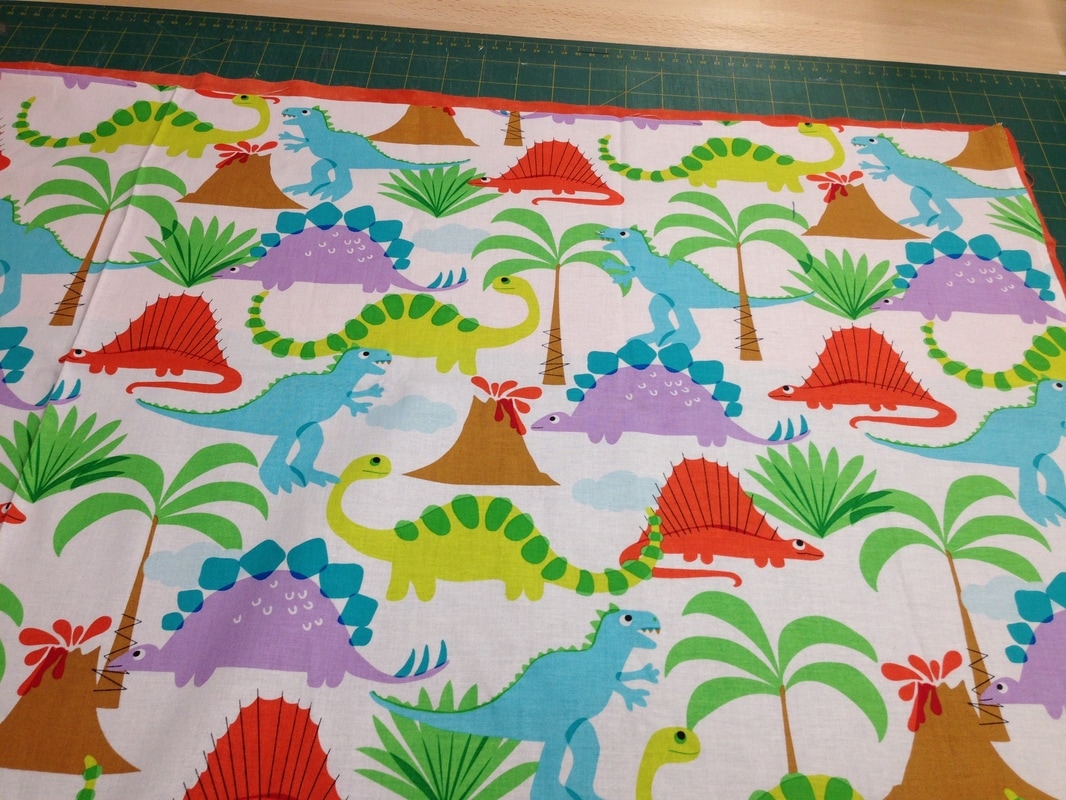 6) Keep your 2" piping fabric folded and lay this piece on top of the other fabrics matching raw edges 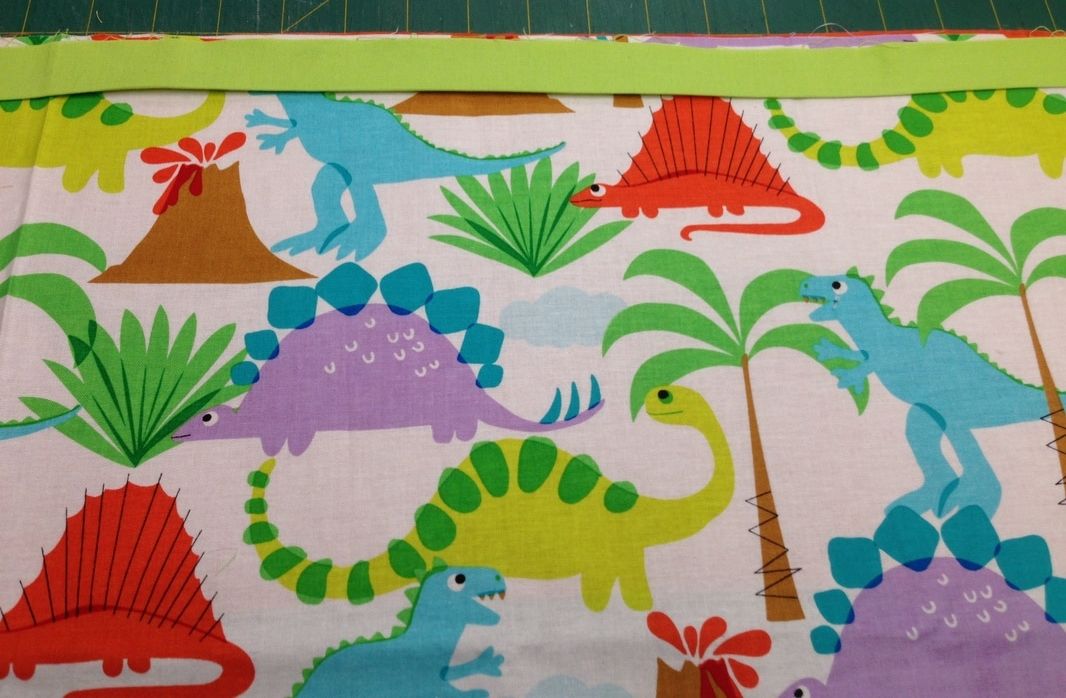 7) Start to roll the bottom edge of your main fabric up from the bottom towards the top edge of all fabrics until you can see the cuff fabric showing underneath your fabric roll. 8) Carefully pick up the bottom edge of the cuff fabric and bring it over top the main fabric roll and piping fabric and pin this bottom edge through all 5 raw edges of the piping main and cuff fabric. You will have a "Tube" 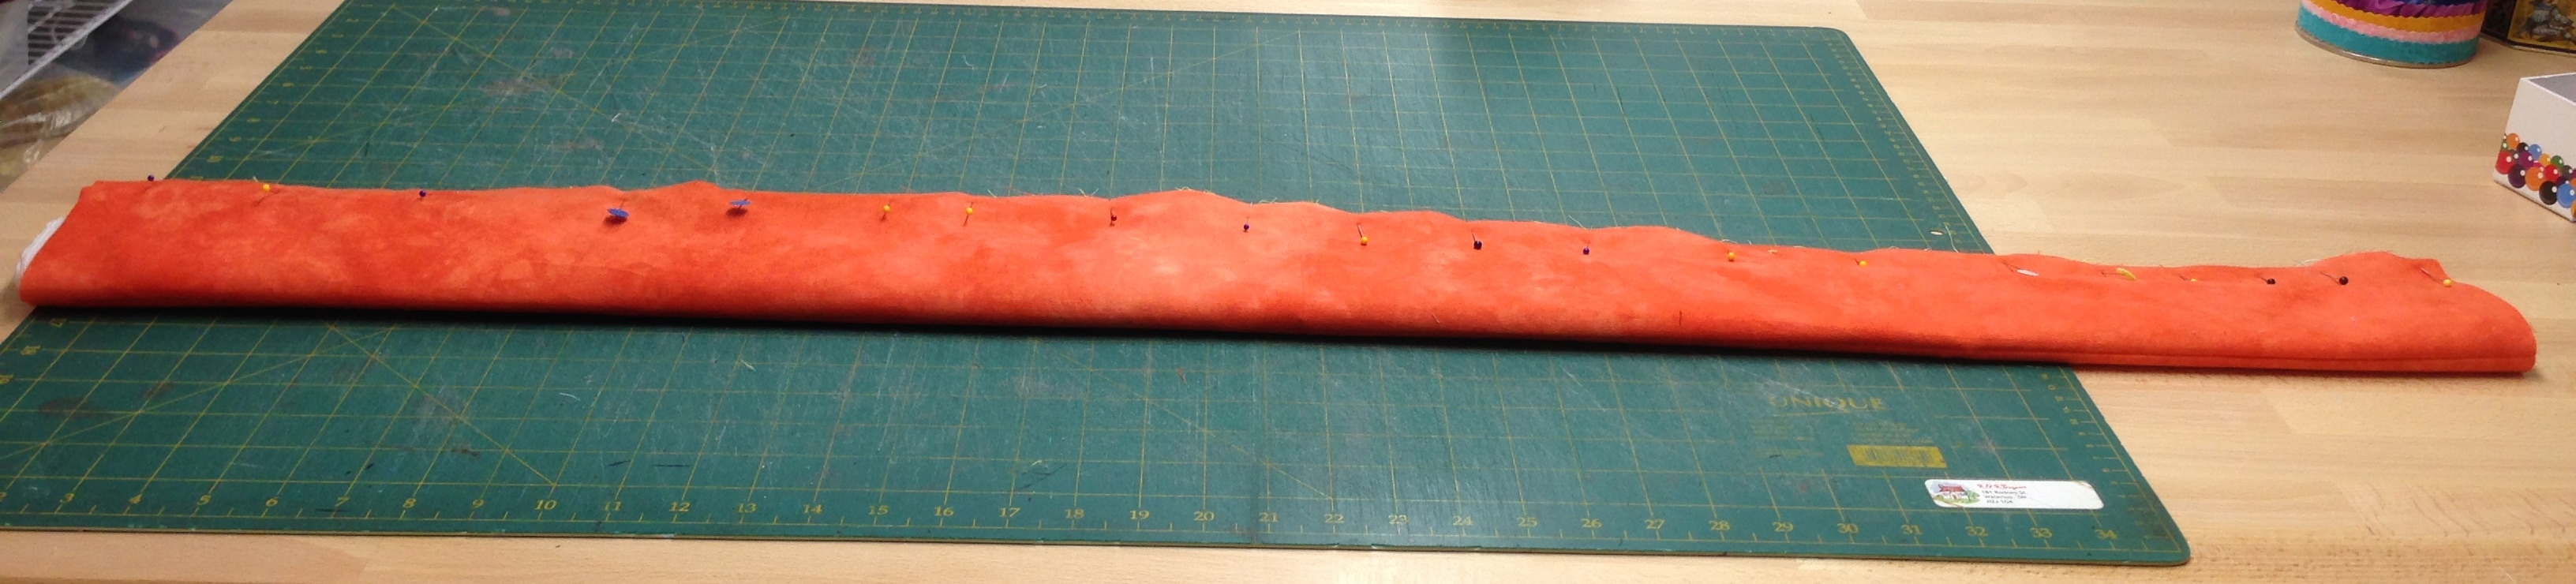 You now have a long tube pinned together 9) Sew 1/4" from the pinned raw edge of the "TUBE" 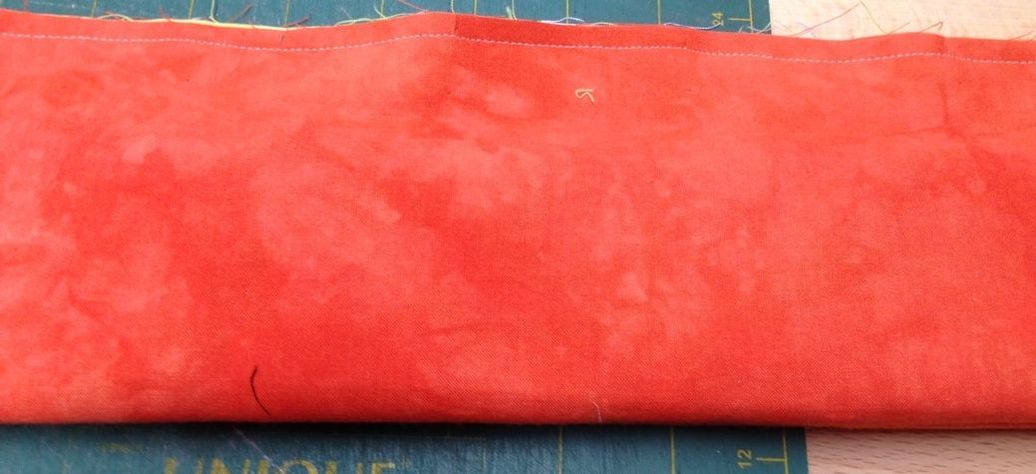 10) You will now turn/pull your fabric through the tube to the right side 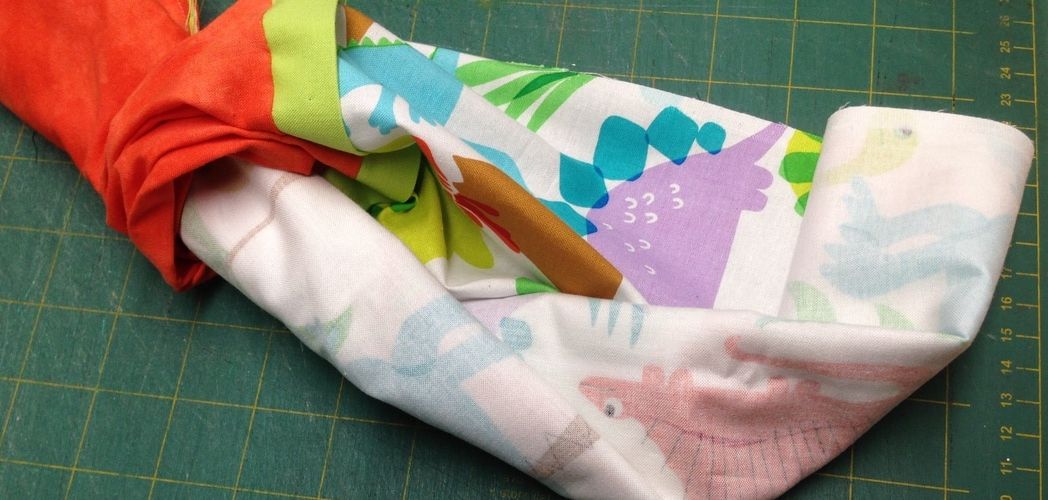 11) When it is all pulled out it should look like this: 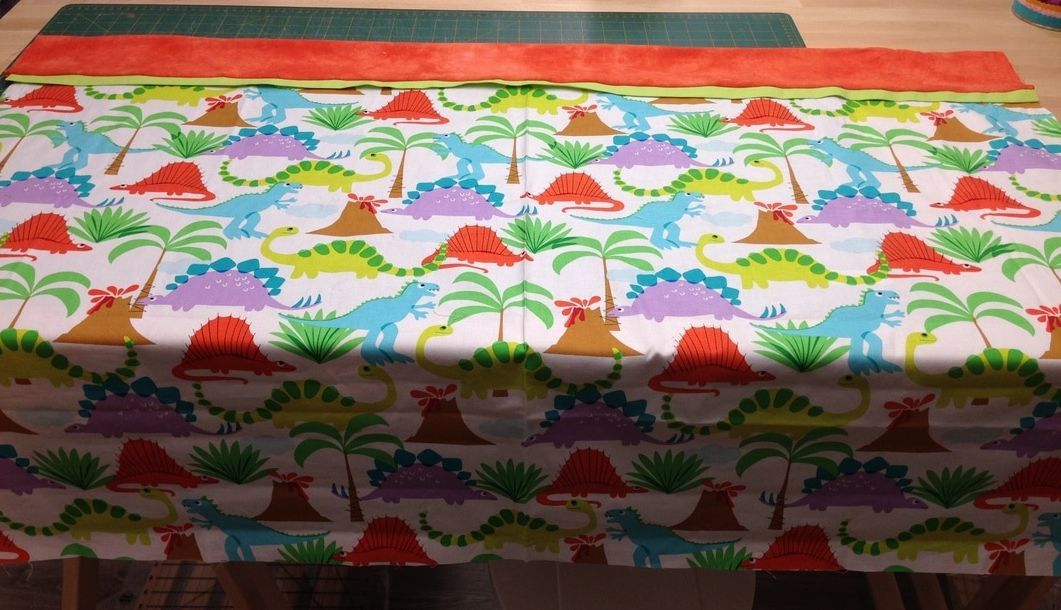 12) Fold your pillow case now right sides together so that piping and cuff match at the sides and pin to secure. 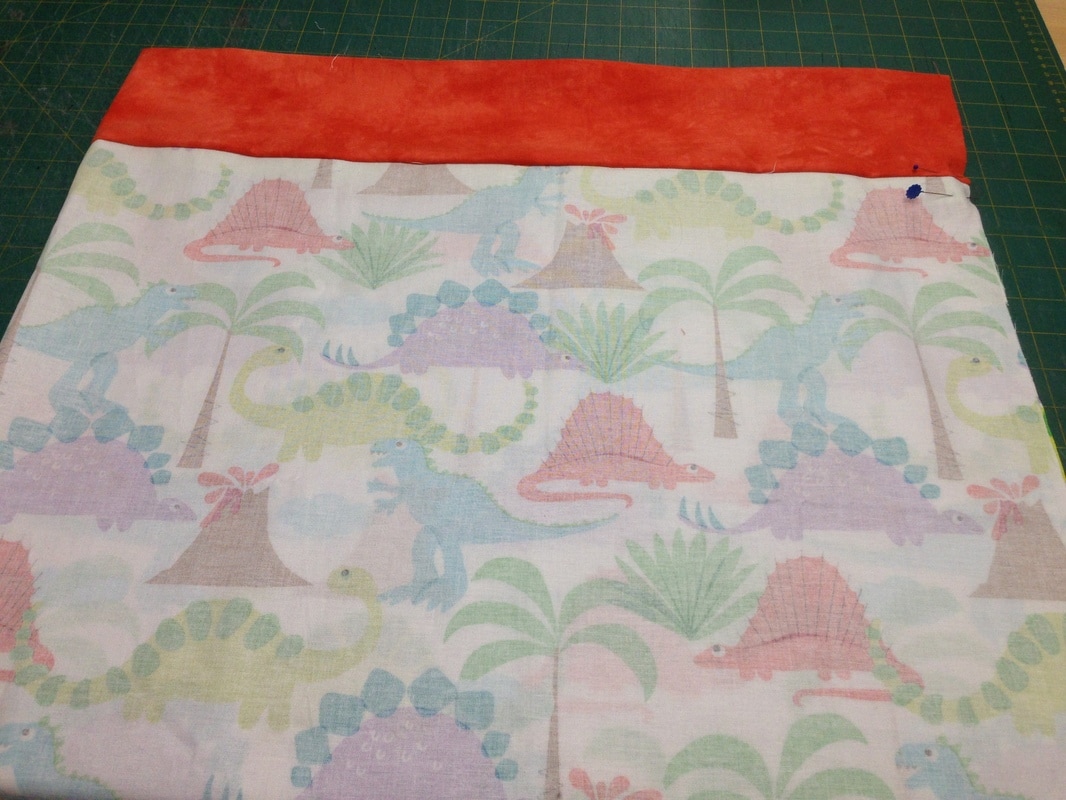 13) Sew down the side and across the bottom with a 1/4" seam allowance (you could also serge it at this stage as well if you have a serger). If you sew, you may also want to zig zag your raw edges to avoid fraying after sewing. 14) Turn your pillow to the right side and you are done! Admire your efforts! 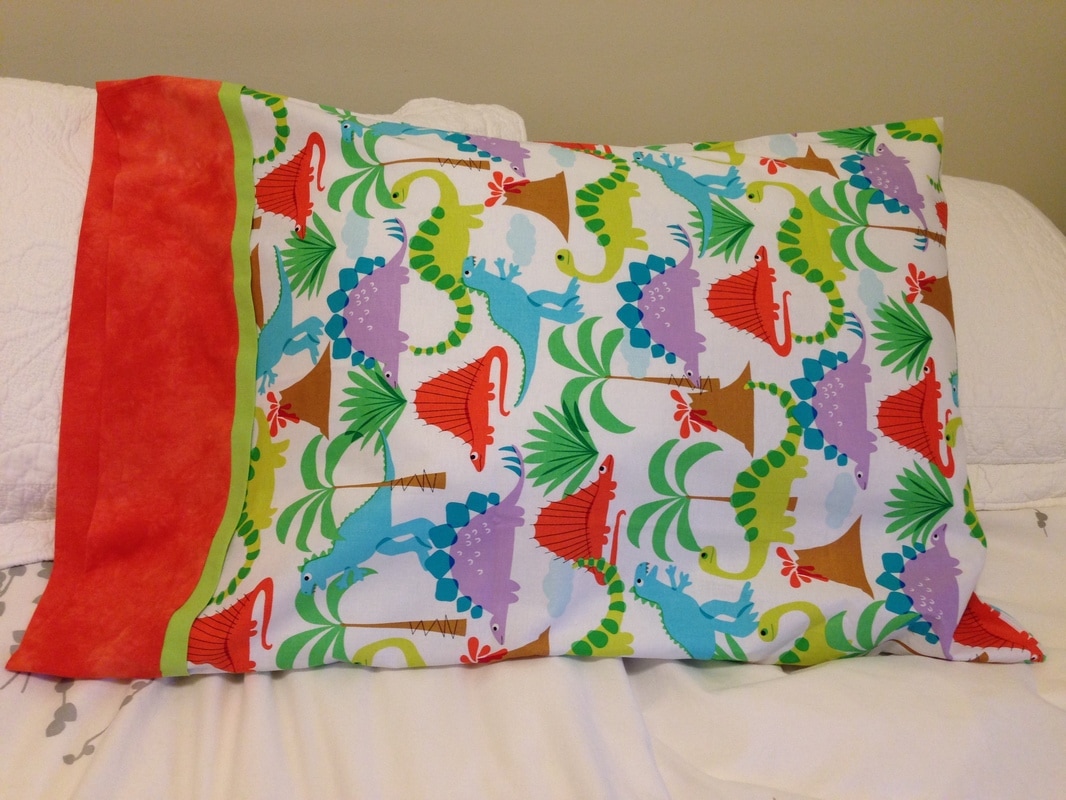 Your pillow case is now ready for gift giving! Some Show and Tell: Thanks to Mabsy for sharing her work and her photos! Mabsy makes these frequently as gifts and now that I have discovered this method, I will too! (I know now why she loves to make them!!)
Using quality quilting cotton (boutique,quilt shop cotton) makes an even longer lasting pillowcase than a purchased one. Choose fabric that is personality specific, embroider it and you have a wonderful gift and you have started to use up your stash! Have a great Tuesday! Stay Warm⛄️😊 This year I promised to talk about scrap busting and using up your/my over abundant stash of fabric. I am discussing this very important topic because we want to be able to get more fabric one day soon right? There is a lot of pretty fabric in my studio but I don't always buy with a "quilt" in mind because.... well, fabric is just so pretty and I buy so much of it because the designers are so talented! It is all their fault! LOL I end up with fabric that just sits and sits because it is so pretty and I don't want to cut into it. I need to get these pretty princesses off their throne!! Is this sounding familiar to you? So I will started with this fabric: 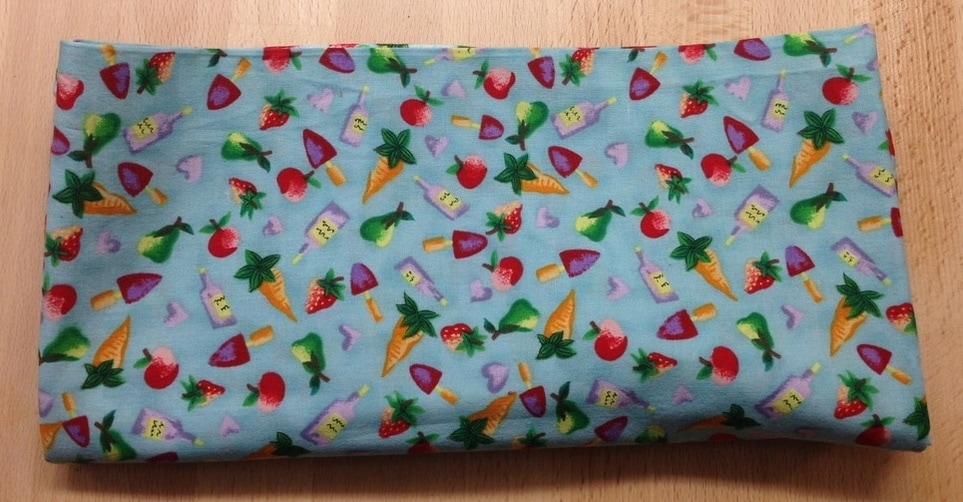 Pretty blue fabric with carrots, strawberries, some kind of bottle, apples, pears, hearts and a garden trowel on it. Cute, nice colours and detail but it will never go into a quilt because it seems to belong in a kitchen sewing project. I cannot tell you when, where or for what purpose I bought it? It is 42" (1.06m) of pretty fabric just lally gaggin' about on my shelf in my studio. So what to do with it? Hmmm....... Something for my kitchen but what?  The Question : What to do with 42" (1.06m) of fabric and use it all up? What would you do? The Answer: 1) First get this out 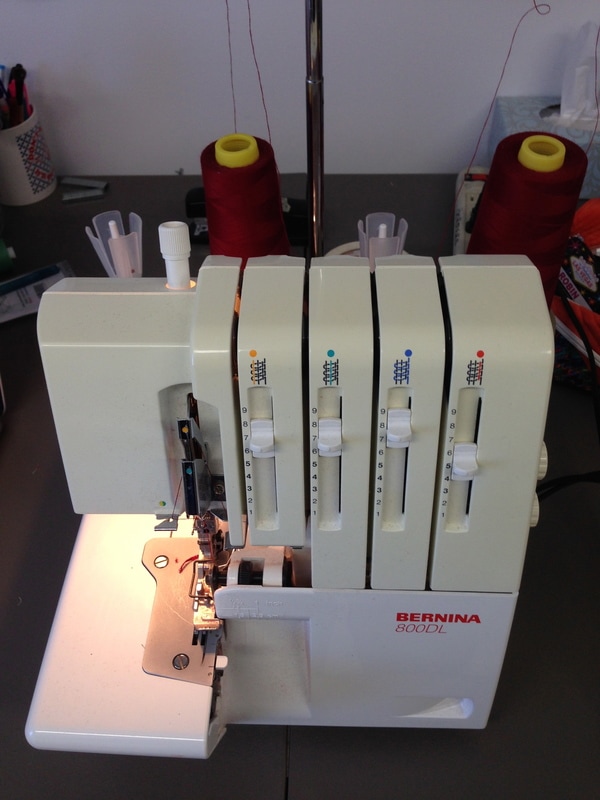 It has been a long time since I have seen this little lady, last used in September 2016 2) Put on 2 spools of red -ish thread or any colour to match your fabric 3) Put the settings on 2 thread rolled hem 4) Cut my fabric up into 8- 14 x 14" squares (to max out the least waste and largest size I can get out of my 42" wide fabric) 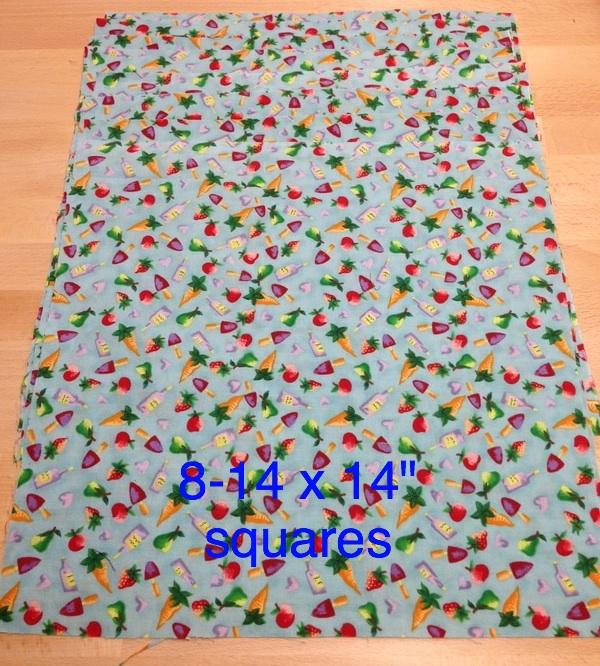 5) Serged all edges of the squares with a 2 thread rolled hem and folded them into NAPKINS The quickest and easiest way to use up fabric! 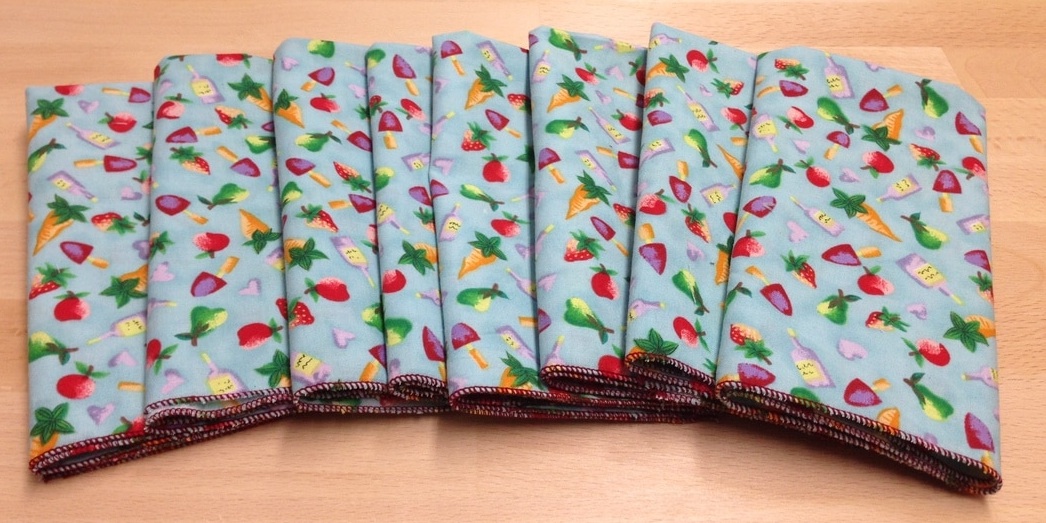 6)*Important Tip*---Once you are finished serging all edges it is important to FRAY CHECK the corners so that all of your serging does not come out and remains un frayed and intact. FRAY CHECK is a product that is also useful for applique, embroidery and for sewing applications where there is a fraying concern. You need just a droplet on the corners, a little goes a long way and it is simply wonderful! See photo of this recommended product below or purchase it here 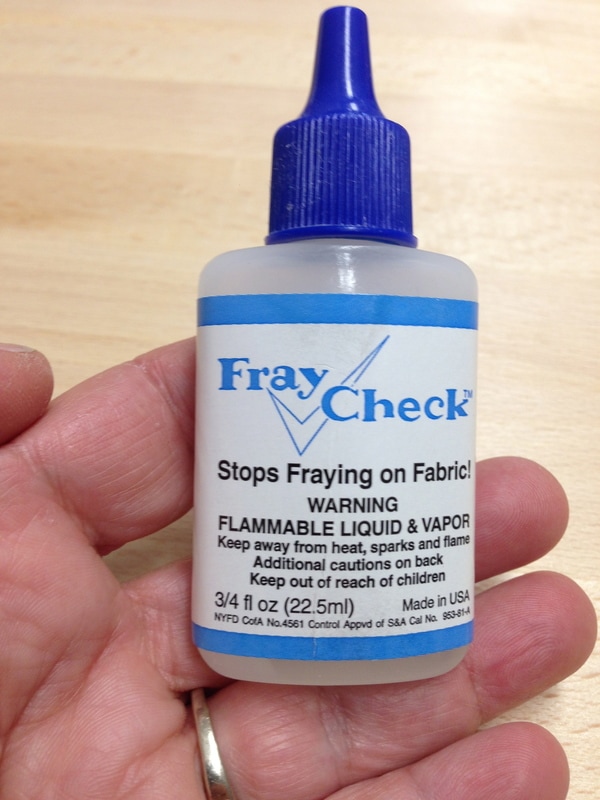 7) Set Your Table! 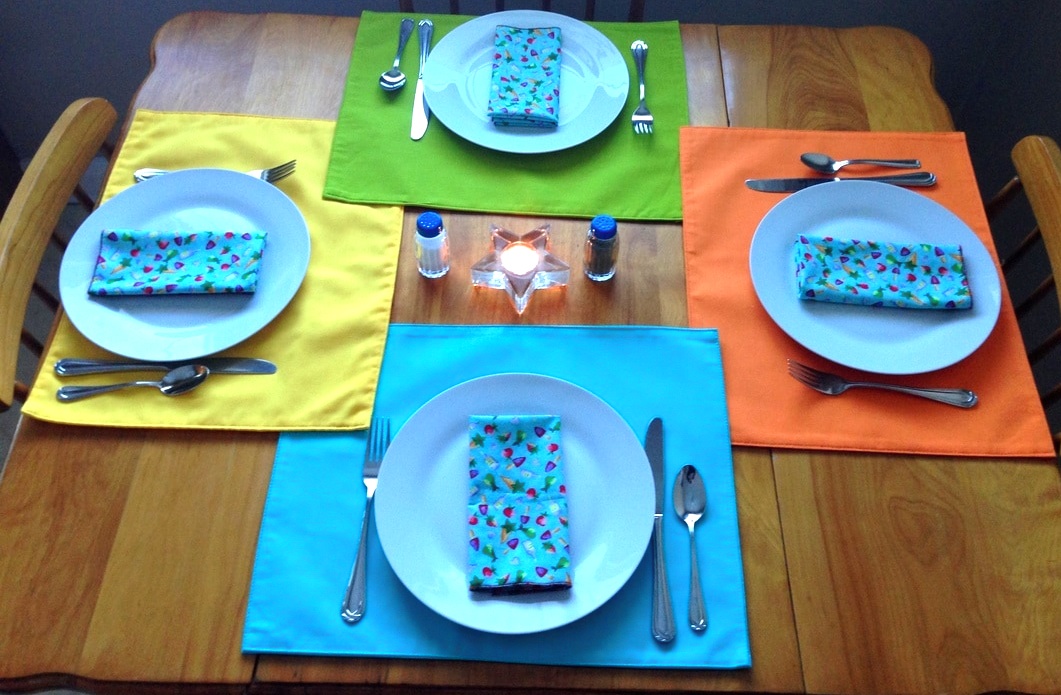 With Placemats I was given as a gift, they go very nicely! 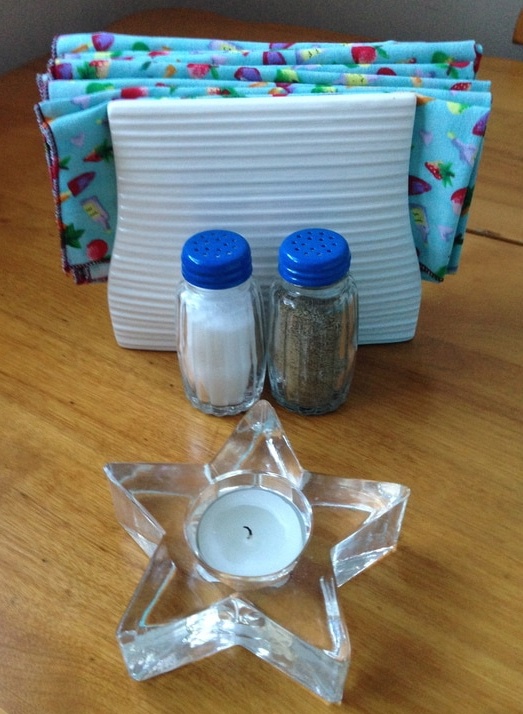 7) Be satisfied with the knowledge that paper napkins will not be necessary this year as these cotton ones can be washed and washed! They do not make for extra washing as they take up very little space in the weekly washing. You can make them for all seasons and change it up your dinner table. As they say variety is the spice of life! Making napkins is "Fat Quarter Friendly" Consider using up some of those beautiful fat quarters you have laying about that you bought because they were pretty and you had no project in mind for them. You will have a variety of pretty napkins! Don't have a serger? No Worries use your sewing machine straight stitches. Check out this great tutorial and link entitled DIY Dinner Napkins with Mitered Corners by Lindsay Conner 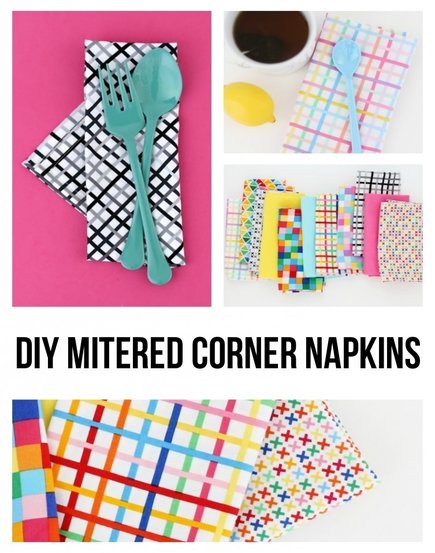 Have a party and make cloth napkins! In September we hosted a bridal shower for my daughter and she wanted a vintage inspired theme. We made napkins for each table and each table was set with one of the colour of napkins below: 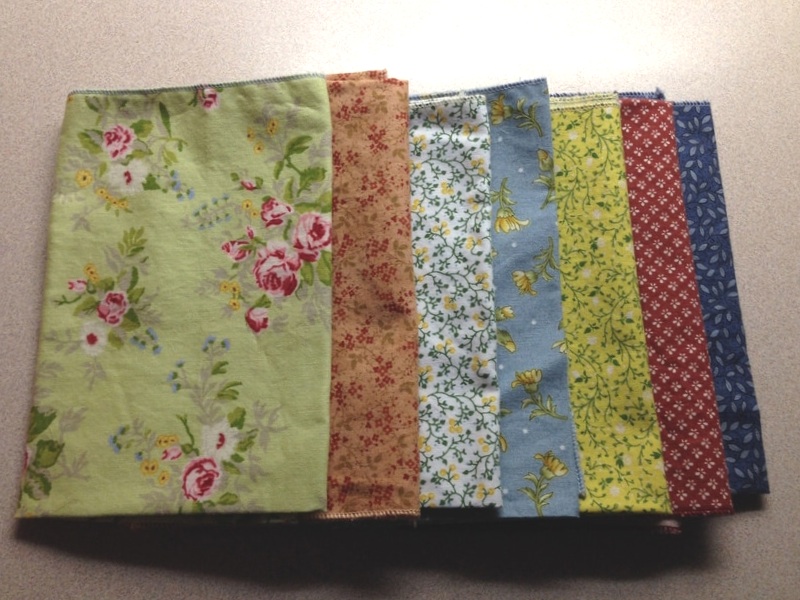 Katie's Bridal Shower Napkins We had to make 60 of these napkins and that's a lot on my own so my good friend Linda offered to help and we made it into an opportunity to socialize. So much fun! Can't you just imagine making a stash of napkins? Your next party can be colourful and environmentally conscious! Avoid the paper napkins in 2017, save trees, money and the environment by using up your pretty fabric stash and put some style on your table!
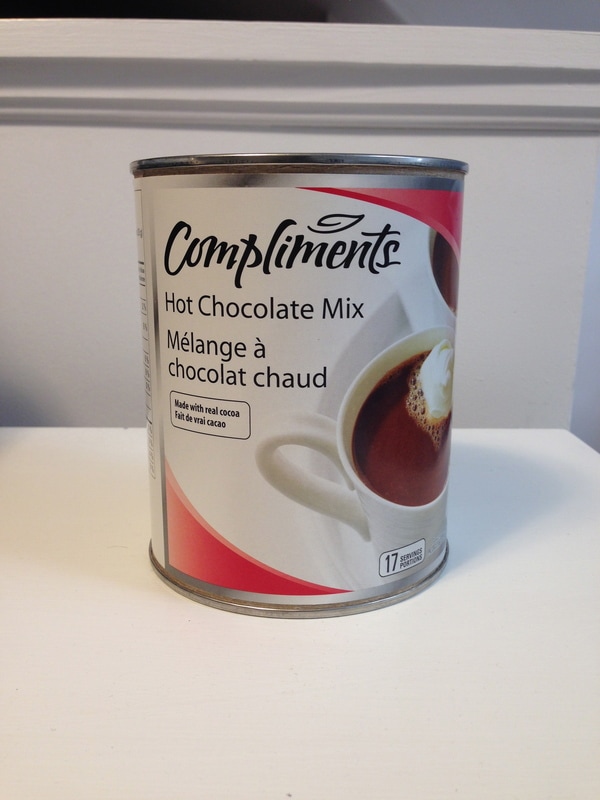
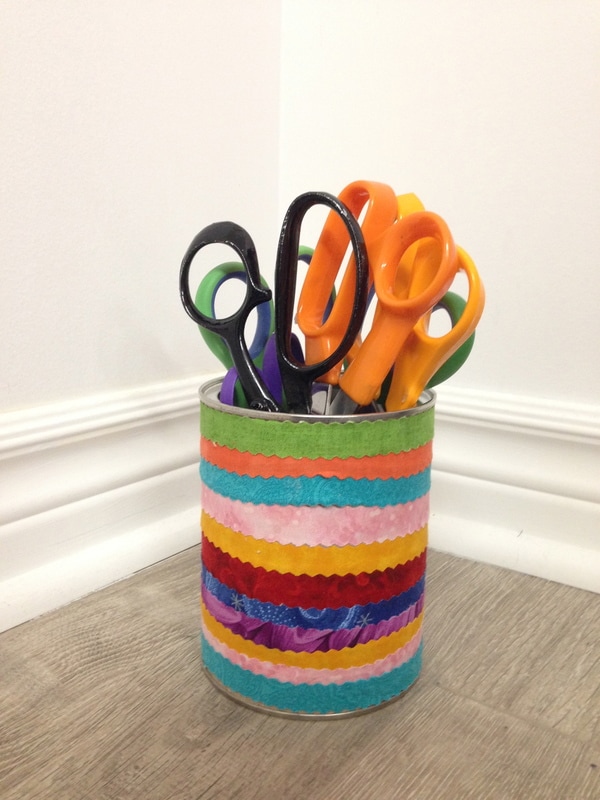
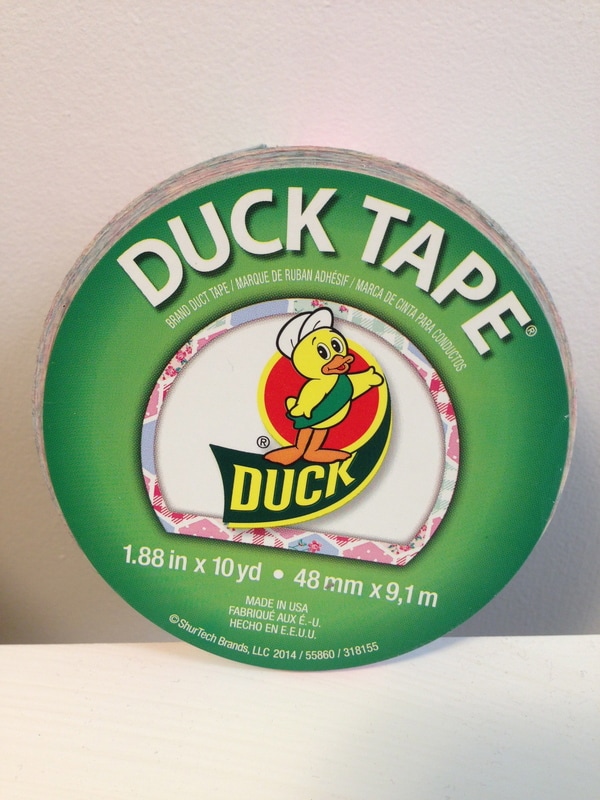
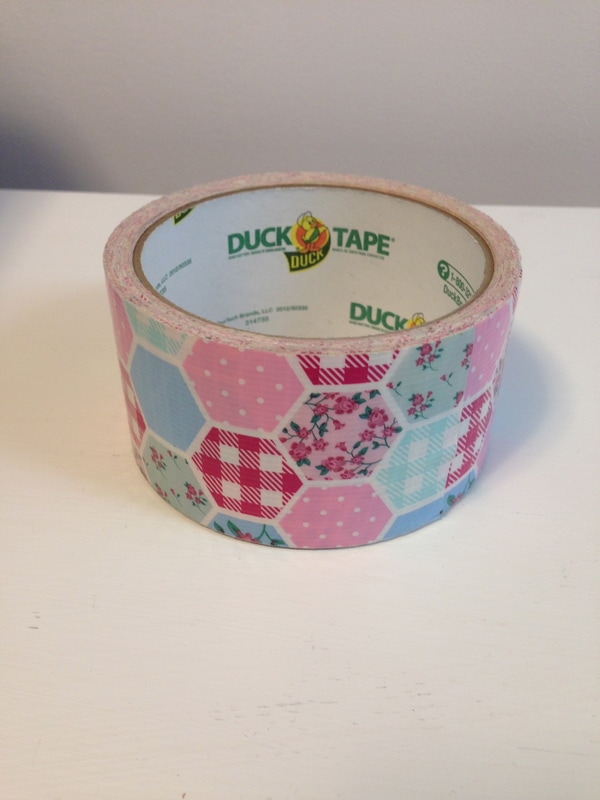
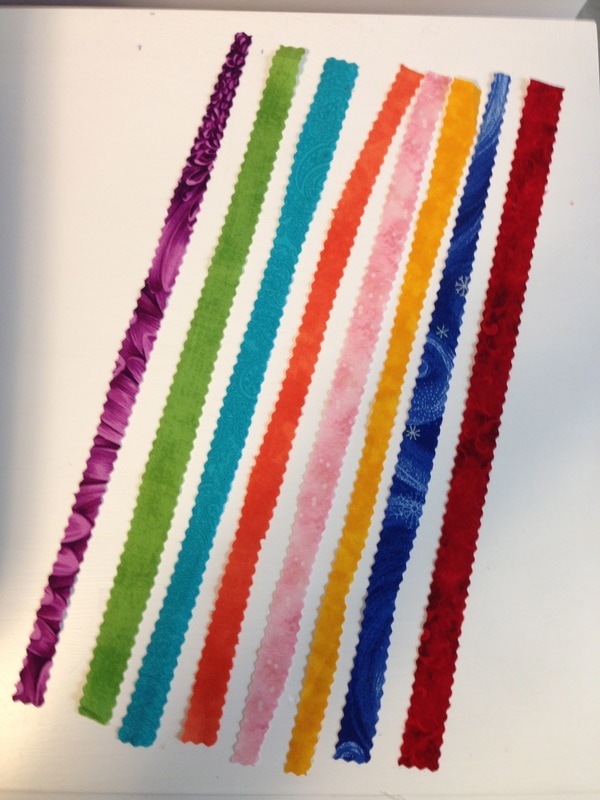
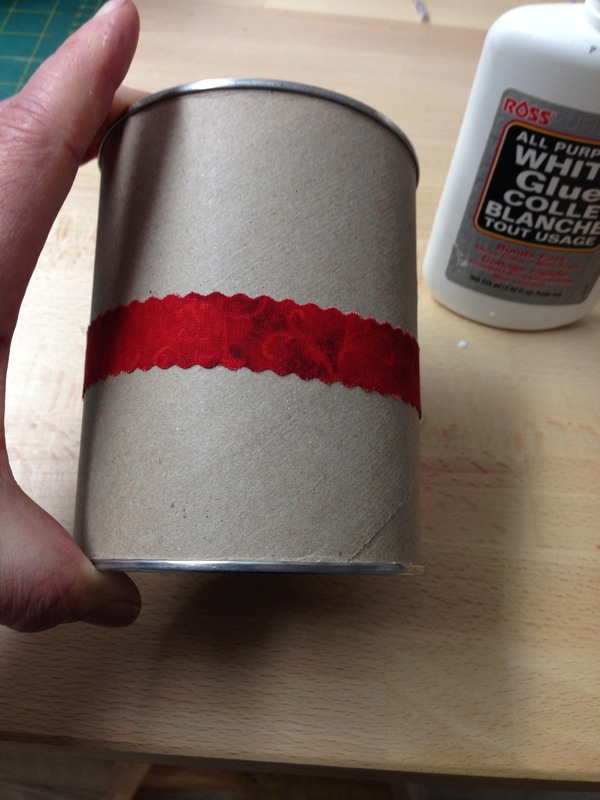
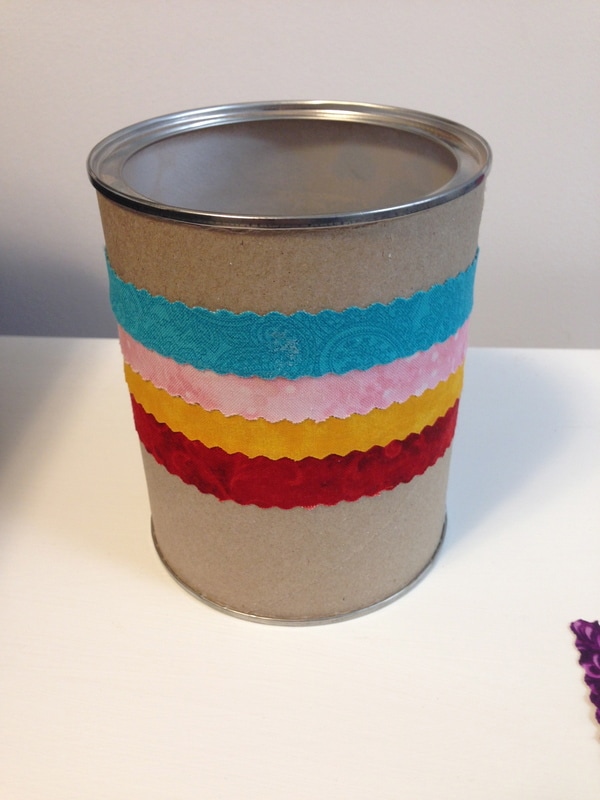
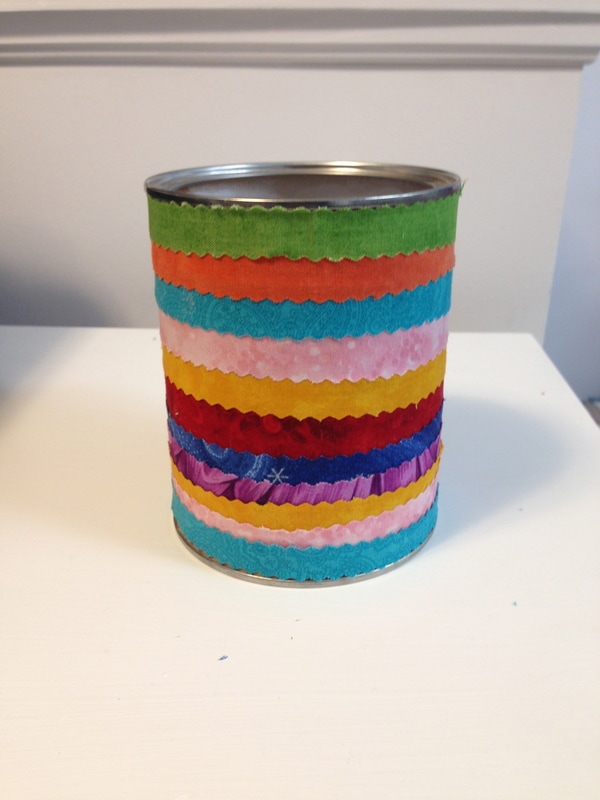
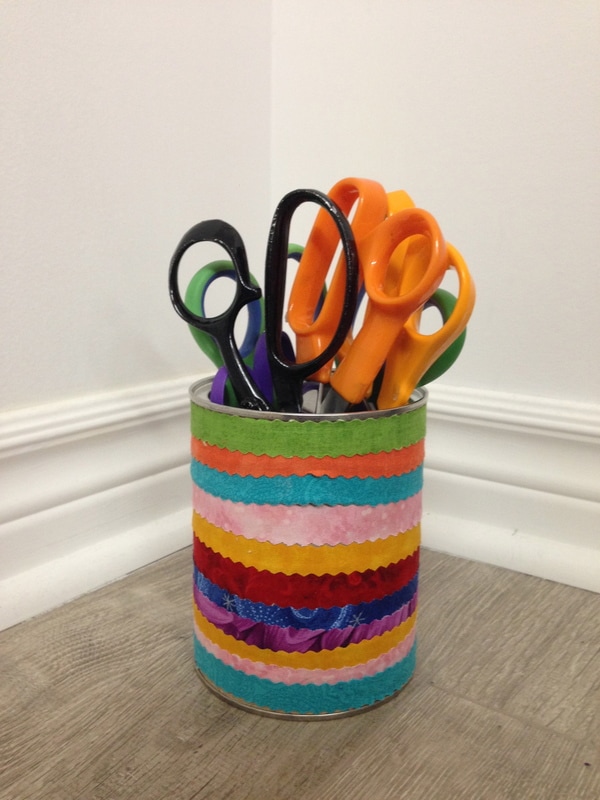
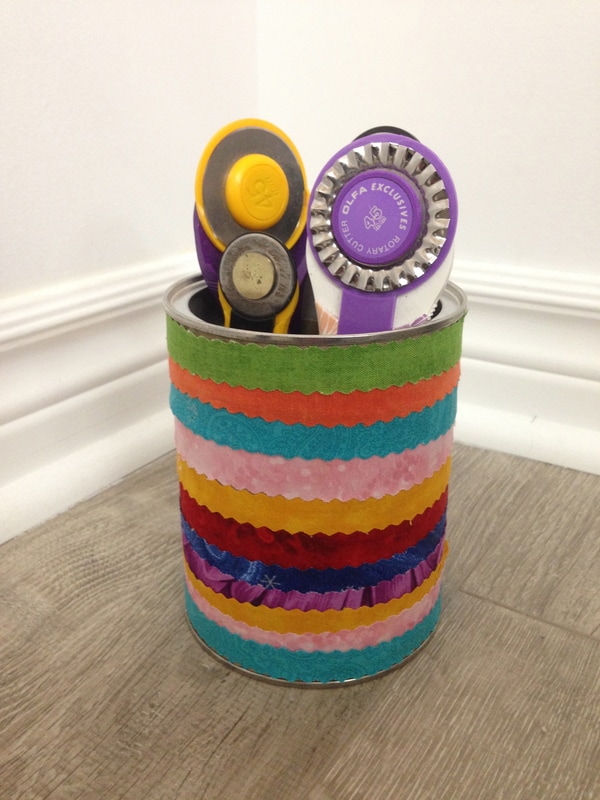
Happy Tuesday!👍 Starting my year off right with one of my resolutions....a reused/recycled project. This is a scissor/tool organizer from reused hot chocolate containers. Read more to see the versatility of this project. We are in the "thick" of hot chocolate season and there is no better beverage than a cup of steamy,sweet,delicious hot chocolate after all that snow shovelling! The City of Waterloo experienced the most snowfall in December 2016 compared to many years before. I now consider myself an authority on hot chocolate consumption! If you have kids or grandkids, you may even go through more hot chocolate than we do. This project is a way to start of the year gently with a project that is easy, very useful and involves reusing and recycling and there is no sewing required! This project is a no brainer and I can thank my sister Alison for the idea. Thanks Alison! Originally, Alison gave me the idea of making an eye glass organizer with these empty containers. If you are like us and at an age when we have multiple drug store glasses everywhere, then you would find this idea useful. See the picture below: 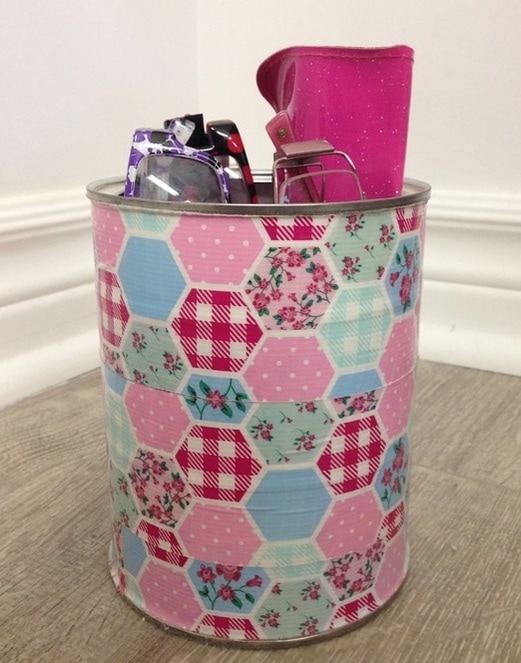 The above eye glass organizer is made with an empty hot chocolate container, 4 toilet paper rolls and decorative "Duck" brand tape. It sits on the desk in my kitchen at all times and I have found it to be a great go to spot to keep my many pairs of classes (I actually think I need one in every room in the house and I am working on it). There are some cool craft projects on the Duck brand website check it out here Don't you just love the above "quilty" pattern? I am truly obsessed! Sorry, I cannot find the source for this but I think I purchased it at Walmart? To make the striped scissor/tool organizer shown you will need:  A hot chocolate container 12 1/2" (32 cm) diameter and 5" (13cm) tall, strips of fabric 14" long (cut with a pinking shear or wavy rotary blade), 4 toilet paper rolls and... 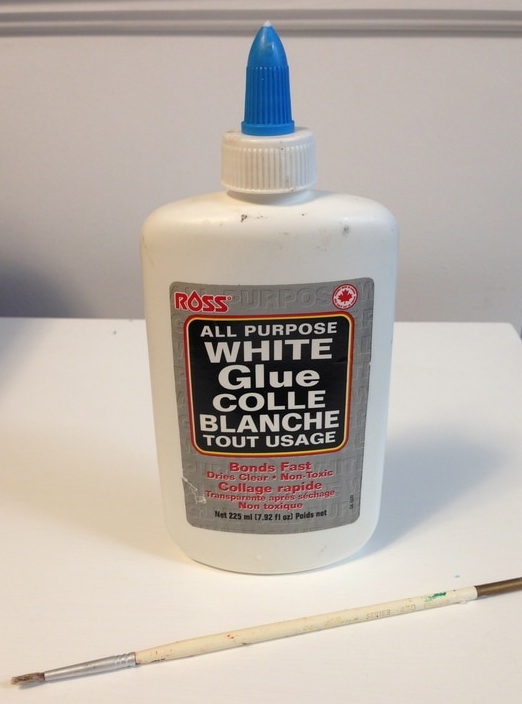 Cheap school glue and a paint brush to apply the glue. The inspiration for the colours in this hot chocolate container/organizer was fabric for roman shades I am making for my sewing studio see the fabric below: 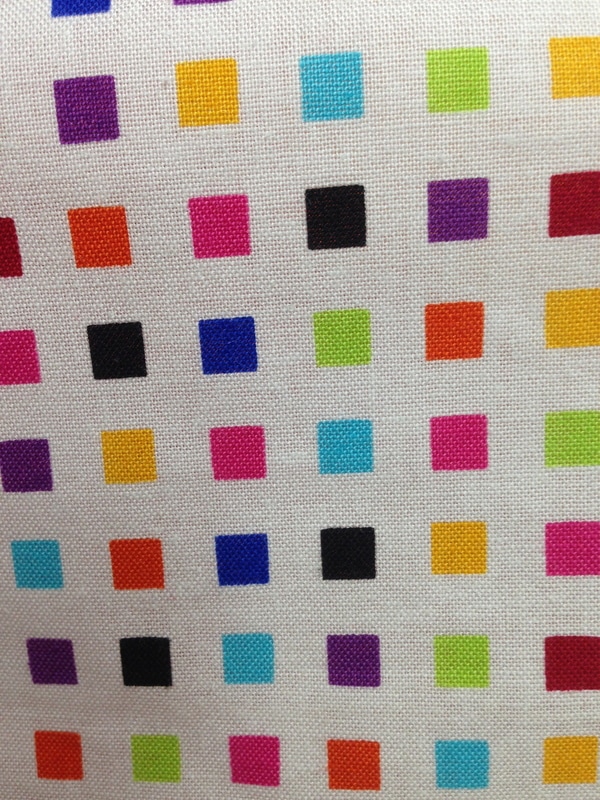 Isn't it pretty? Stay tuned for a show and tell of my roman shades in the very near future! How to make it: 1) Tear the label off your hot chocolate container and recycle the paper! If you cannot get the paper off thats ok as it will get covered. The fabric nd glue will just adhere better to the matte cardboard. 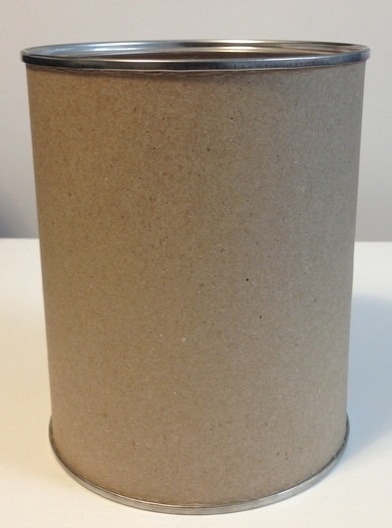 2) Start adding the strips by putting a dab of glue on the back center of your container and on the top of the strip and wrap it around over lapping it slightly, hold the fabric for a minute until it starts to feel like its holding. It is that simple! 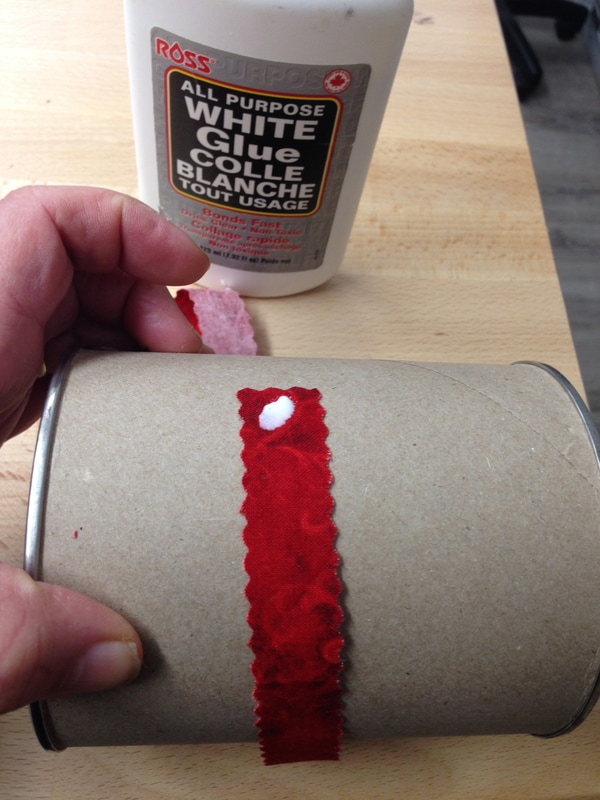 3) Keep adding strips until your container is covered with fabric 4) Insert 4 toilet rolls inside- they will fit tightly and may distort somewhat but thats ok, they are just there to support your tools and will not show once you have your container filled.  5) Fill it with tools such as scissors, rotary cutters, small rulers, pens, pencils, markers, craft supplies etc. (*What to do with the plastic lid? It makes a great round plastic template for a circular applique or cut it up into shapes as a piecing template* You have now recycled something, avoided the landfill and made a new purpose for it! Make this in colours to suit your sewing room. I hope you enjoy this quick and easy project. Happy Tuesday! 😊 This just in! (10:24 am Tuesday January 10th) Mabsy has sent me 2 pictures of recycle containers she made with dollar store sparkle gems! See below:  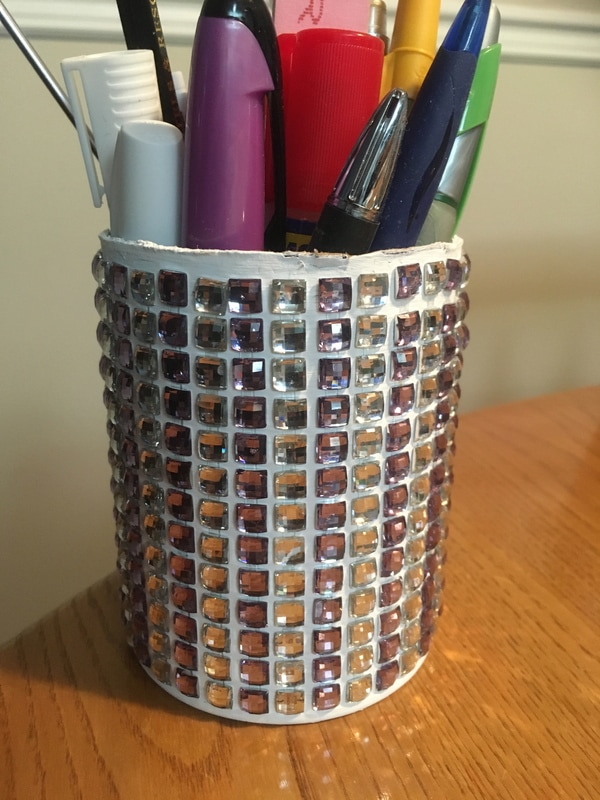 Way to go Mabsy! These are beautiful with the "bling" on them. Another unique way to look at this project. Thanks For Sharing!
|
Follow Me:
Welcome!Hi I'm Robin and I am a professional long arm quilter, pattern designer and teacher. I am passionate about all things quilty!  

Categories
All

Sponsors
This blog contains affiliate links. This means that we endorse products.
We do receive rewards for these endorsements and this helps to keep this site alive and well. We support products which we believe are the best quality and to inspire your creativity! |


 RSS Feed
