|
Brought to you by quiltingintheloft.com
A Great Free Motion Practise Project- "Radiating Blossoms", It's Tool and Technique Tuesday!3/15/2016 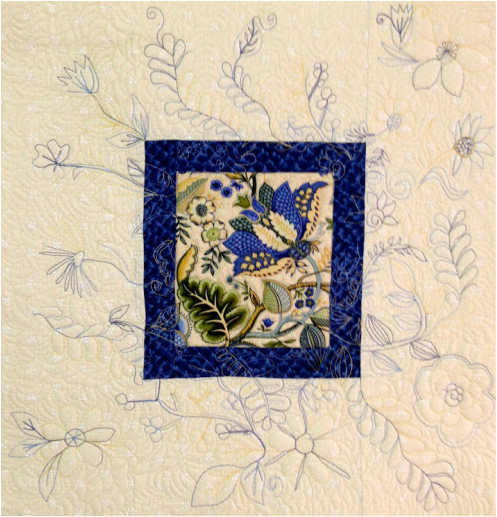 Make this "Radiating Blossoms" quilt to practise your free motion quilting! Quite a few people lately at the Waterloo County Quilters Guild have been taking classes in free motion quilting. I have also been teaching classes on this subject in Barrie. The reason I want to talk about this project is in the hopes that it will give people an idea of what to do to practise their free motion quilting skills. In my opinion practise is vital to improving your free motion skills. If you take piano lessons you have to practise to get better and the same is true of free motion quilting! This little project is kind of the reverse of a quilt, the background is on the outside of the feature fabric to give you space to quilt and the feature fabric is the inspiration to get you thinking creatively. You will want to radiate the design out onto the border and spill it onto the background fabric. It is recommended that you choose a fabric with defined edges and one that you love. Don't be afraid to cut into it! Some other suggestions for feature fabrics: 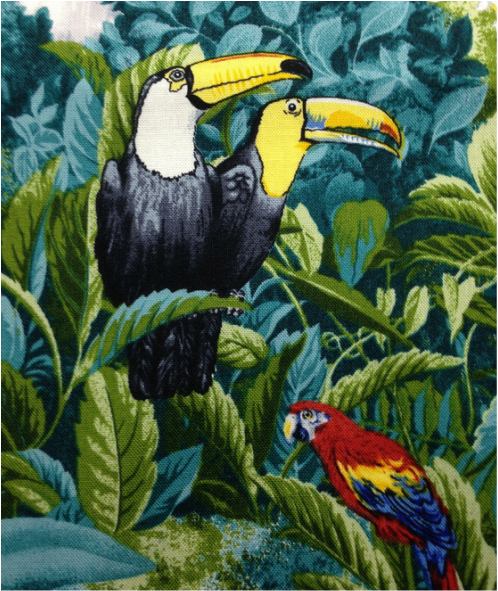 Practise Leaves, feathers, ferns, curly tendrils etc with the above fabric 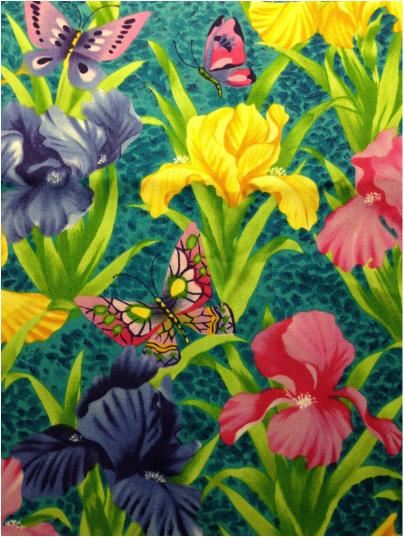 Practise fill stitches, circles, elongated leaves, foliage, butterflies, curly tendrils etc with this 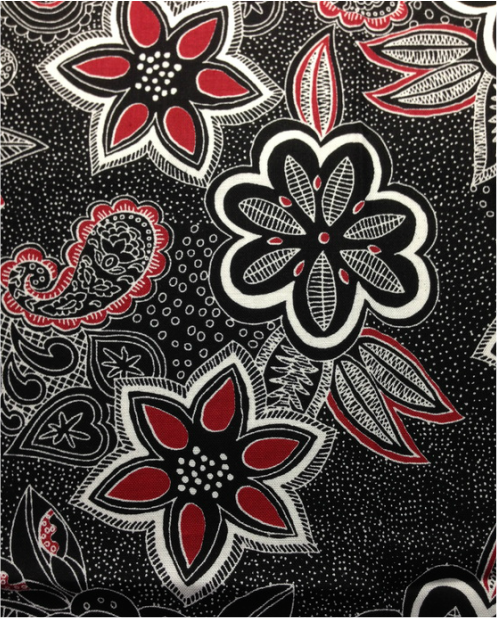 Practise leaves with fills, paisley designs circles and more with this I have given you only a few suggestions, there is so much gorgeous fabric out there, I encourage you to look at your stash, you will probably have some perfect fabric. What you will need to do this project: 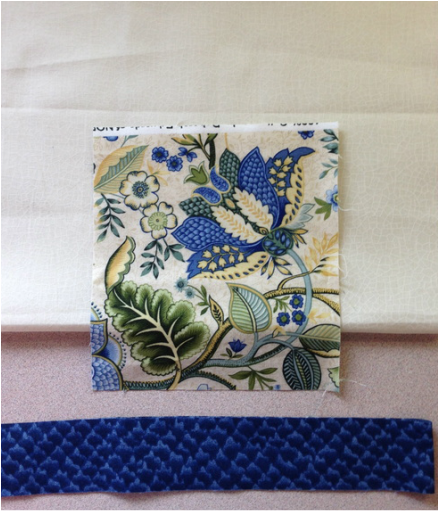 Background fabric (you decide on the size), feature fabric ( mine is 5.5 x 5" and a border strip ( mine is 1.5"). You will also need batting and backing fabric (the size of your top when pieced together) You will also need: 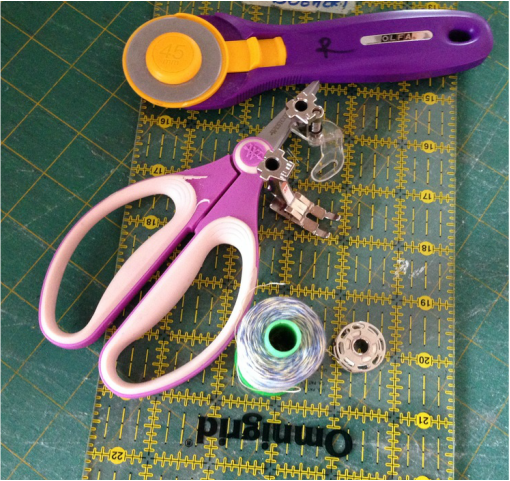 A rotary cutter, scissors, free motion foot, 1/4" foot, cutting mat, ruler, decorative thread ( I used variegated blue and yellow) and bobbin thread to match your backing fabric How to make this project: 1) Cut out all of your fabric 2) Piece your border strip to your feature fabric 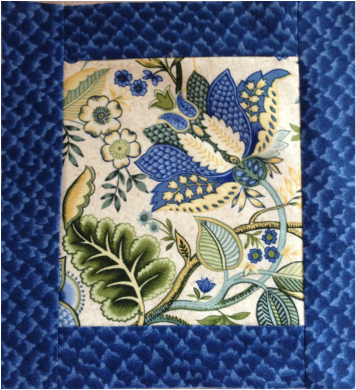 3) Add your background 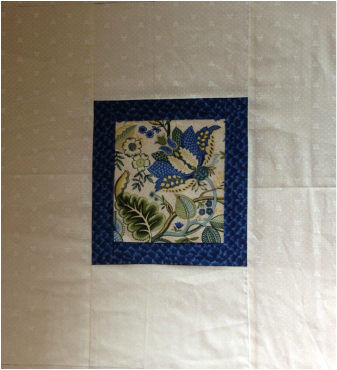 4) Sandwich your quilt with your backing and batting ( I used 505 Quilt Basting Spray) 5) Quilt around the motifs in the centre first and fill in the background spaces if you like, use a meander (stipple stitch) or stacked bananas (your choice of fill) 6) Look at your centre fabric and decide where you can extend a design, i.e. a leaf, stem, flower, feather etc and extend these out onto the border and into your background. Use a disappearing ink pen if it helps you to draw it out first. 7) Leave room for fill stitches, they provide a place for your eye to rest and see the flowers or leaves etc. you have free motion quilted. 8) Use a thread that you can see to make your feature motifs- i.e. flowers or leaves in a brighter colour and use a thread that matches the background for fill stitches. 8) Remember to bring up your threads from the bobbin to avoid nesting and cut threads when you stop on the back 9) Breath! and stop! when feel the design/motif looks the way you want it to, cut threads and move to another area 10) Fill in the background areas with a fill stitch at the end Refer to the pictures below to see what I mean. 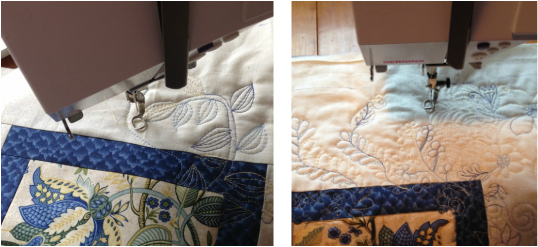  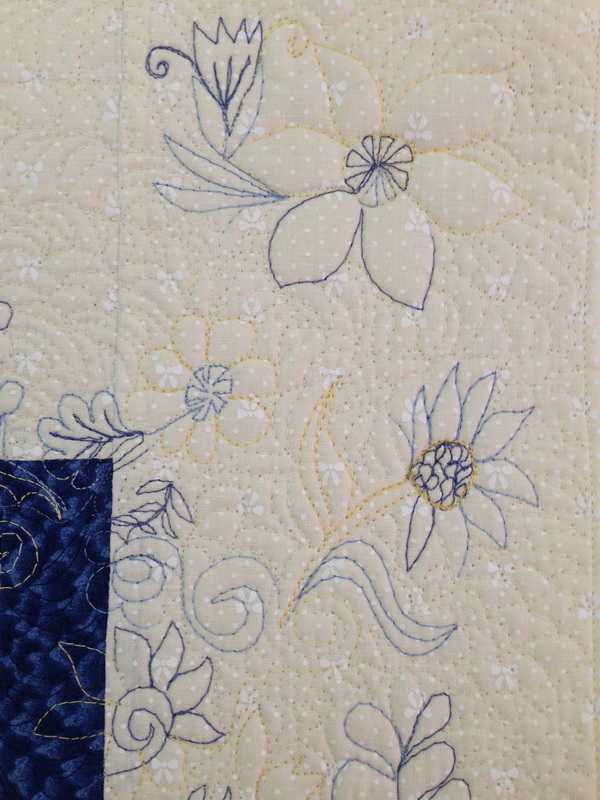 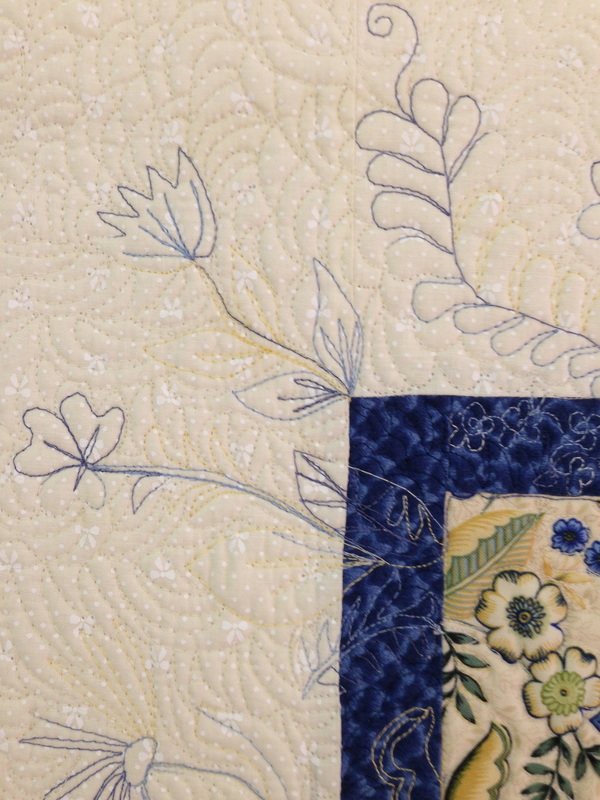 See the designs go onto the border and into the background 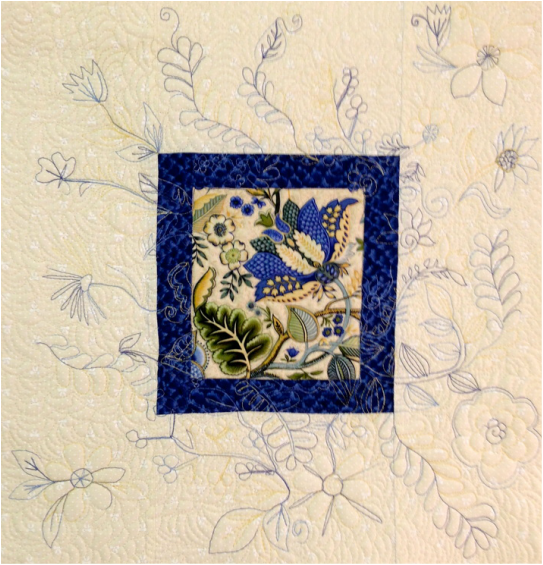 Admire your efforts and keep on practising! You could make many potholders, cushion covers, wall hangings, tote bags etc with these practise pieces.
Happy Tuesday! I hope I have inspired you today! 😊
0 Comments
Leave a Reply. |
Follow Me:
Welcome!Hi I'm Robin and I am a professional long arm quilter, pattern designer and teacher. I am passionate about all things quilty!  

Categories
All

Sponsors
This blog contains affiliate links. This means that we endorse products.
We do receive rewards for these endorsements and this helps to keep this site alive and well. We support products which we believe are the best quality and to inspire your creativity! |
 RSS Feed
