|
Click on the picture below to see Craftsy's Winter Clearance supplies sale - huge discounts on project kits & supplies. Last Chance TODAY! 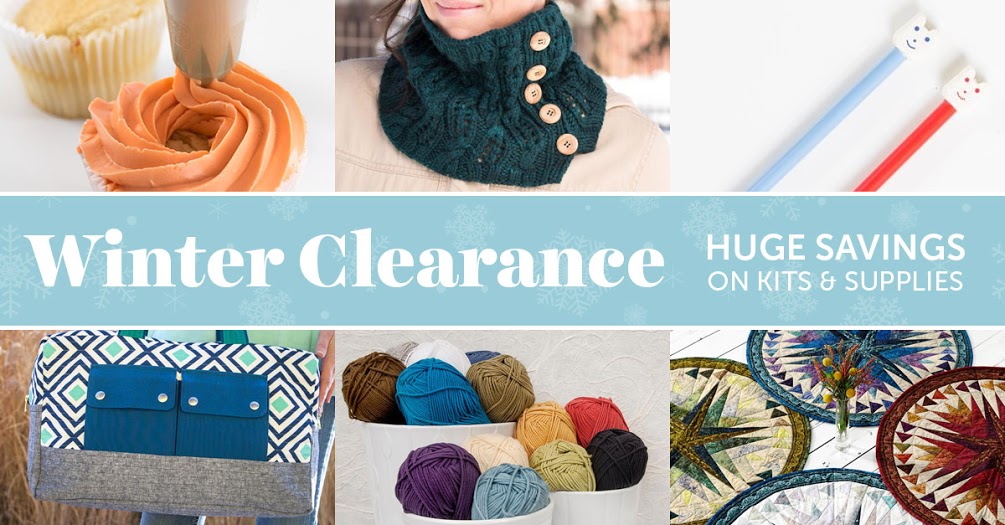 This is your last chance to get deep discounts on project kits and supplies at Craftsy! The sale ends tonight at 11:59pm MT, so be sure to check out the steals on your favorite brands before their Winter Clearance sale is over. Remember, the good stuff goes fast!
Happy Monday and Happy Leap Day! I hope you experience a wonderful week!
0 Comments
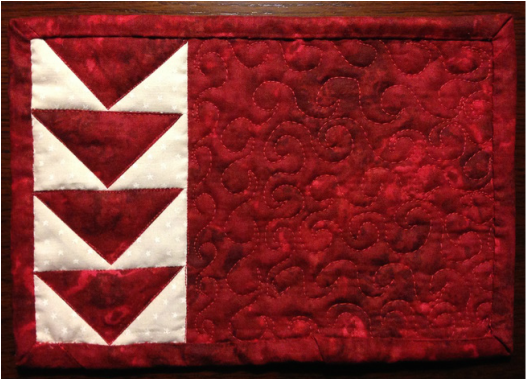 On Tuesday I shared my no waste flying geese tutorial. I decided to make a rug mug out of it by adding a 6 x6" square of fabric to the right side of it. I added backing, batting, quilting & binding. Coasters alone do not cut it by my favourite chair because they are too small! Mug rugs are very useful for both the beverage and the snack. If you have not seen it, scroll down to see tool and technique tuesday this week or have a look at it here. I suggest that you try the tutorial (you will always want to make flying geese this way). Make yourself a little mug rug gift or make a bunch to give away as gifts! 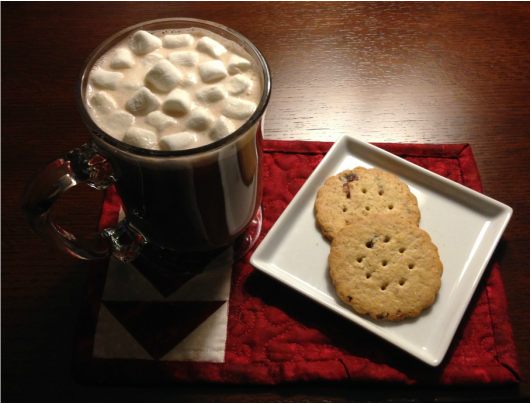 It looks even better this way doesn't it? LOL! By the way, I just got this message from www.craftsy.com related to their sale starting tomorrow Feb 27th until Feb 29th 29th. "Craftsy is taking an additional 20% off their existing clearance prices to give you great deals on their project kits and supplies for only a few days. Be sure to check out the deep discounts on your favorite brands before their Winter Clearance sale is over!" Check it out here . You should take advantage of this before Feb 29th if there are items you need/want.😊 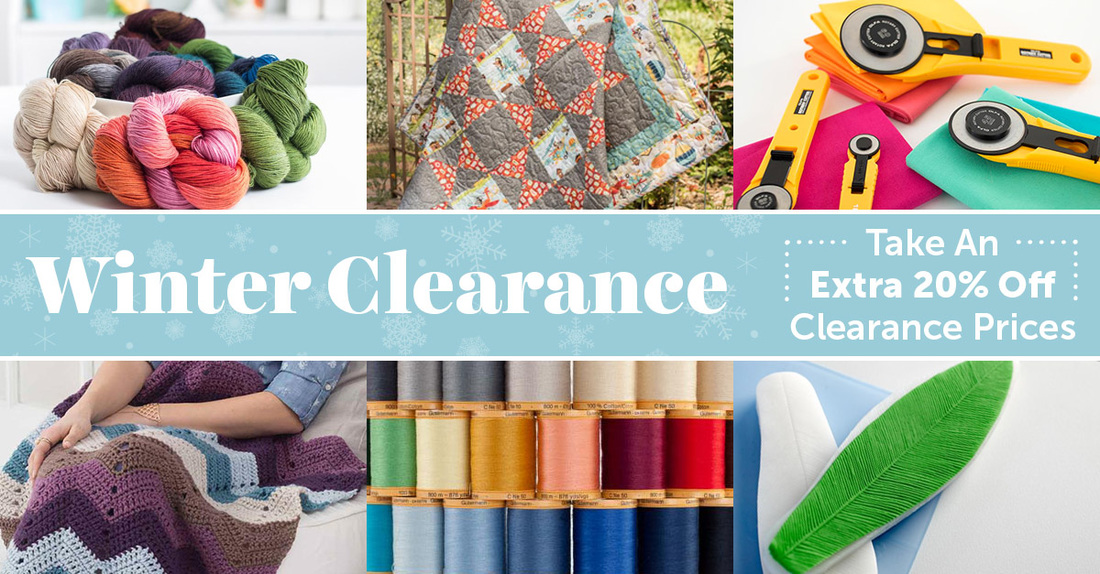 I sincerely hope your Thursday is going as expected!
Don't let the winter weather get you down! February is almost done. ❄️⛄️😊  Block #8- "Marena" -February is done! This weeks block is called "Marena". I believe I was channelling spring with the colours, I just felt like making a lighter block to go with some of the darker ones as at the end this quilt will be an all colour and shade/tone scrappy quilt. It's from the book The New Hexagon, click on the book below if your are interested in joining our "Hexagon Quilt Along". Want to see what it's all about ? Have a look at the original blog post here.  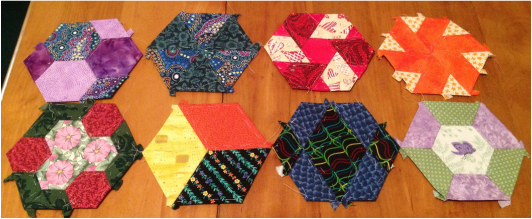 All 8 blocks now complete, Yeah! No "easy" button needed, so easy, relaxing and fun to do!
Join us with our quilt along and share your progress by emailing us your pictures at rlbogaert@gmail.com, we will not share any personal information other than your first name and your blocks. Happy Wednesday Everyone 😊 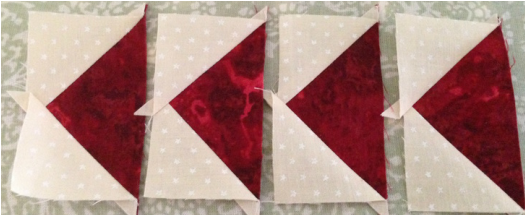 Today, I thought I would share with you a fantastic method to make flying geese piecing units that are easily made without waste. I also have a measurement chart to share with you that you can post in your sewing room for handy reference later. This week, I am teaching a private lesson on Thursday and I thought I would show my student how to make flying geese using the most effective method possible. I hope you all enjoy😊 What you will need: Fabric- 1 strip width of fabric in light about 2 3/8" - 1 square 4 1/4" of a dark fabric Mary Ellens Best Press- check out a source for this here Frixion Pen - check out a source for this here Rotary Cutter- check out a source for this here Ruler- check out a source for this here Sewing Machine Thread to match Scissors How to make the Flying Geese Units: Some rules to make these units: 1) To make 'No Waste' Flying Geese: Cut a square the finished length measurement of the desired flying geese unit and add to this, 1-1/4" (1.25) 2)Cut 4 squares the finished height measurement of desired flying geese and add 7/8" (.875) For example: one unit measuring 1 1/2" x 3" finished: - using rule #1 -Cut one square from dark fabric 4 1/4" x 4 1/4" - using rule #2 -Cut 4 squares from light 2 3/8" x 2 3/8" square See below fabric cut out: 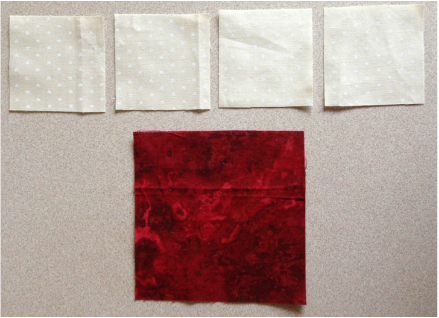 Mark a diagonal line corner to corner with a Frixion pen on the smaller squares and place right sides together with the bigger square, see below: 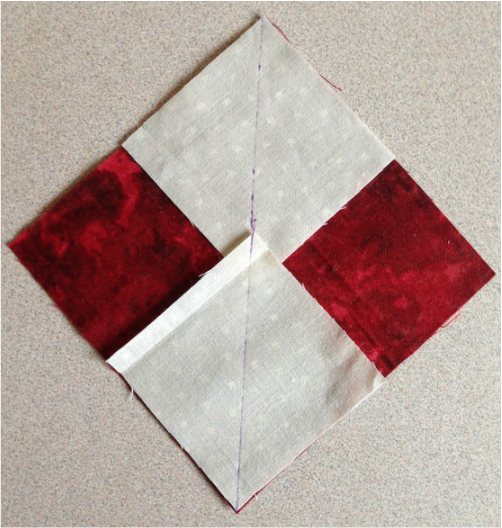 Pin and sew on either side of the line through the centre 1/4" out from the line. 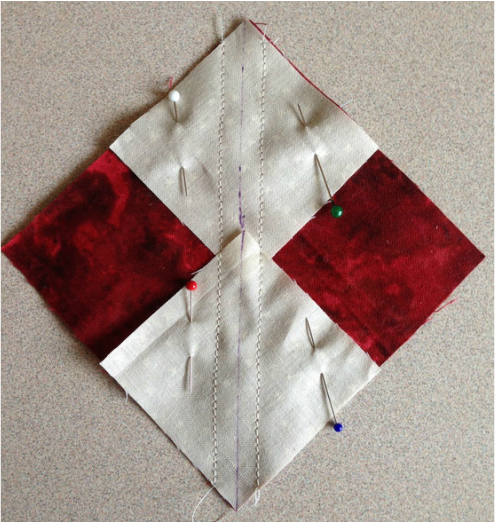 Cut through the centre of the unit above: 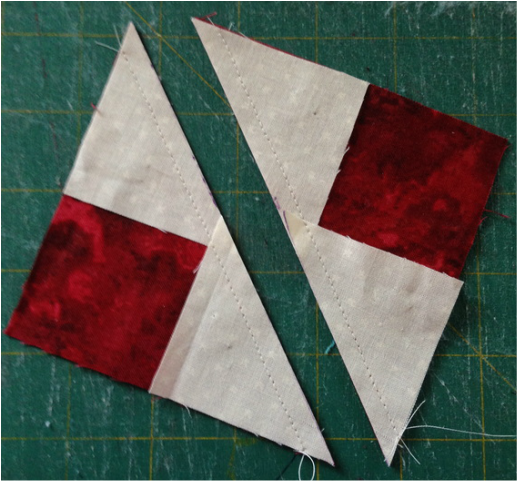 Press towards the geese, give it a spritz of Best Press (helps with the ironing process and makes your units pressed crisp and less likely to stretch), you will have 2 units made at this point 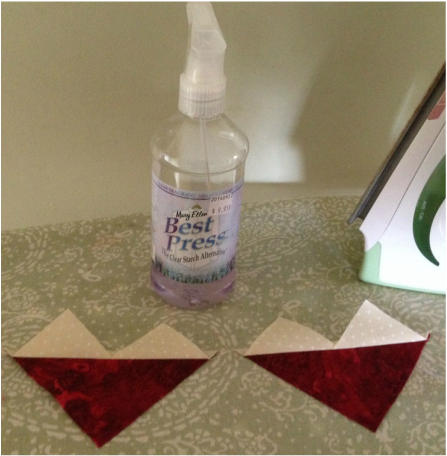 Lay the remaining 2 squares right side together against the above 2 units as shown below and mark with a Frixion pen once again: 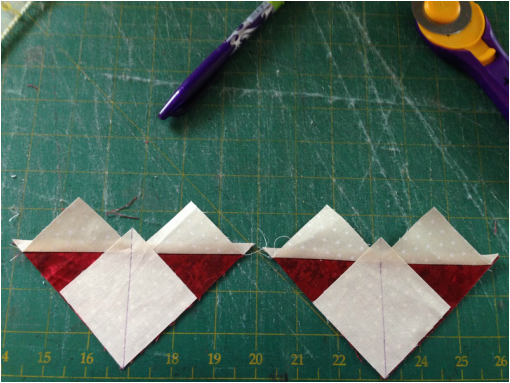 Sew on either side of the line marked 1/4" out 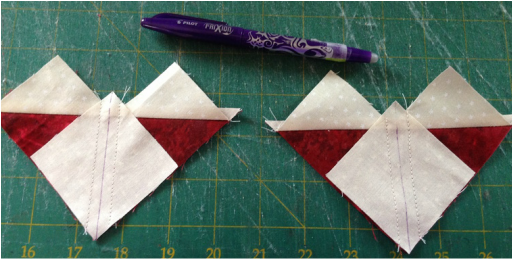 Cut through the centre of each line with a rotary cutter and ruler, you will now have 4 units 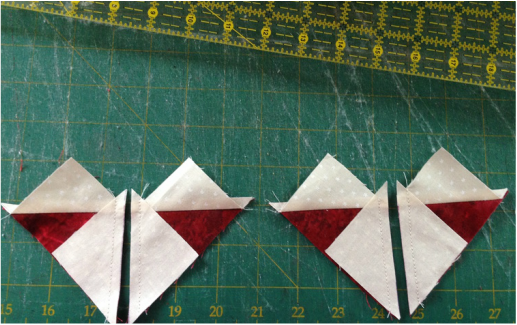 Press again away from the dark and your 4 units are complete. A chart to assist you with different sizes is below: 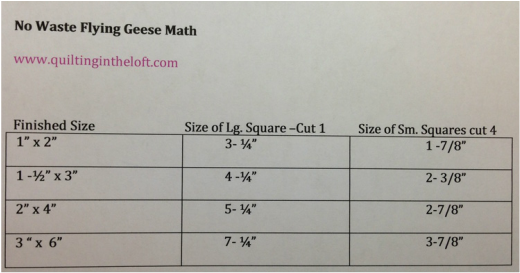 I have a couple of ideas of what I want to do with my flying geese units and will post them later in the week. I would love to see what you do with your flying geese units, please send a picture if you try them. 😊
Happy Tuesday!  One of the 11 demos/lessons for my free motion class Hi everyone, in case you wondered what happened to me last week, I was busy teaching a private beginner quilting lesson, designing and working on two new quilt patterns, helping my daughter on reading week with her thread painting project and teaching a free motion quilting class in Barrie, Ontario! Below is a pic of just about how I felt yesterday!!!  I wanted to talk today about free motion quilting and to encourage those that have never tried it to take a class. My class Saturday at Hummingbird Sewing in Barrie was wonderful and the ladies indicated to me that they were thankful and that they learned a lot. Most indicated at the beginning of the class that they had never tried free motion quilting! The reason that free motion quilting is an important skill set to have in quilting is as follows:
I realize because I hear that some people are intimidated by free motion quilting, but believe me to get proficient at it all you need are 2 things:
Even if you are not creative this can happen. You will get smoother with your stitching, stitch length and control of your work with instruction and practise. I am available at your venue if your group or guild believe they need some help in this direction at very reasonable rates, have a look at my teaching page here Scroll down to #6 on my teaching page (teaching is in the above menue) and you will see some of the samples of my free motion class and the class description. Please feel free to use my contact page for scheduling. I guarantee, that you will feel less intimidated about free motion quilting and more confident to use this valuable skill after taking my class. Happy Monday everyone, My wish for all... a wonderful week, some sun and milder temps before we head into a deep freeze again! 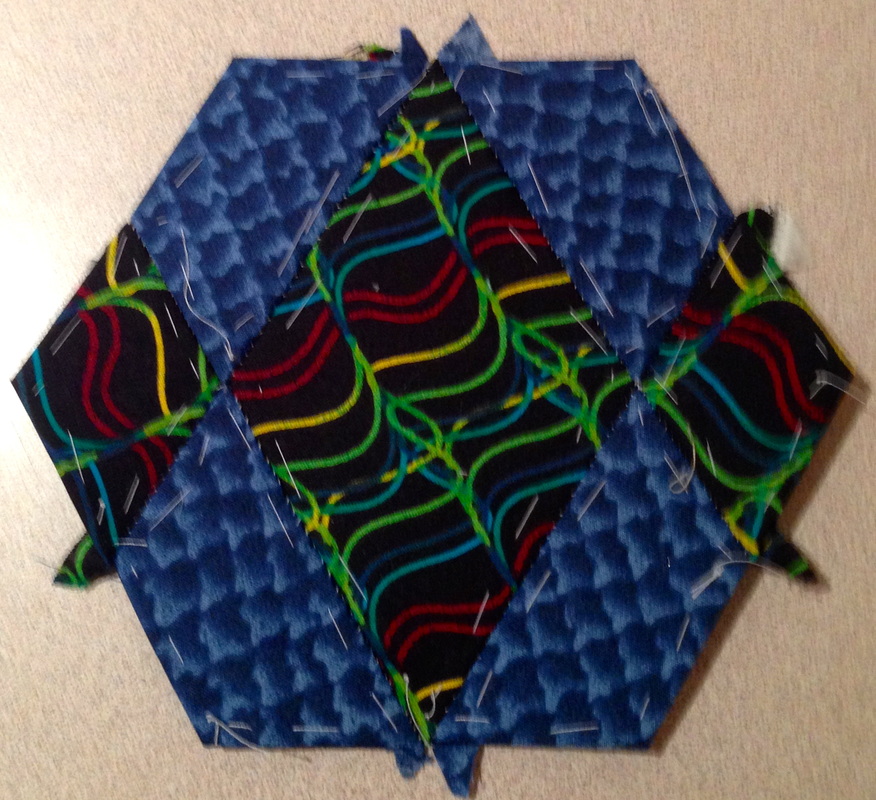 Block # 7 "Maureen" We are well into winter and at block 7 of our quilt along, almost enough to make a table runner! But hang in there - only 45 left to go to freedom! Seriously, they only take an evening or less to complete while watching TV. It is nice to re-visit your scraps while making the blocks. This quilt along is from the book below and if you click on the book it will take you to Connecting Threads where you can purchase it if you like and challenge yourself to complete all 52 blocks this year!  52 blocks to paper piece and projects to complete with the blocks Click here to see all of the other blocks to date! It is getting difficult to capture them in one photo so, I will post all at the end of each month.
Interested in seeing where we started with this? Click here to look at our first blog post and instructions for the quilt along. Have a great Wednesday everyone!👍 You are half way through the week, Yeah! 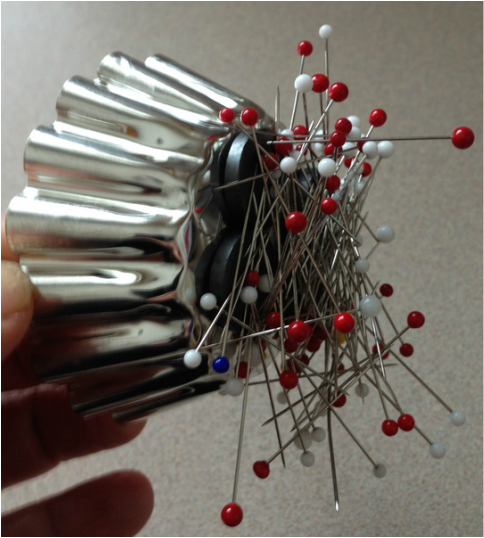
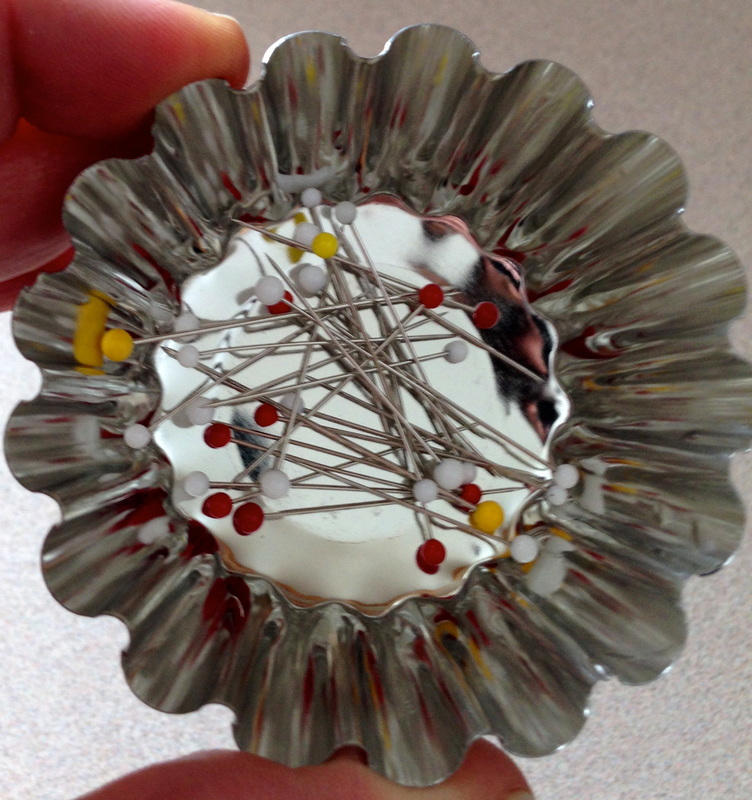
Cost to make one- only .50 cents
It's a pin holder and catcher
Hi everyone, I lost track of where my magnetic "pin holder" was and stumbled upon a really neat and affordable way of replacing it.
I was actually looking at magnets at the $ store and found a package of magnets- see picture below: 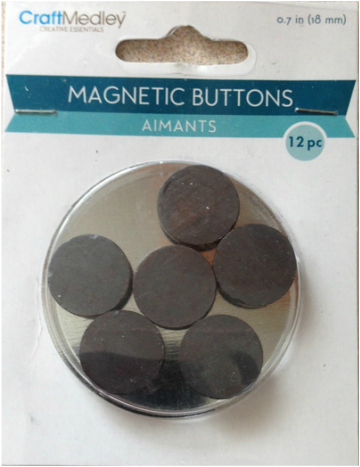
12 magnets for a $ at the local $ store
... and I thought how could I attach these to a bowl or container of some type to make a pin holder?
Then I saw these: 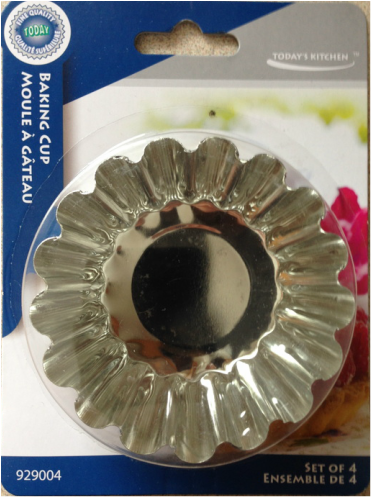
Simple little metal baking cups- 4 in a pack for $1.00
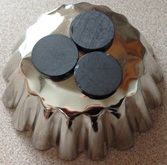
All you do is... place (no gluing necessary) 3 of the magnets to the bottom of the pretty little cupcake dish and you have a very affordable pin keeper. If you hold the bottom where the magnets are to the pins you leave lying about, the magnets will scoop up your mess.
This is also tiny so if you have only a small surface area to sew on, then this little magnetic pin cup would work for you! One package of magnets and one of baking cups = 4 pin holders . Sew... give one to a sewing friend! There are some other alternative solutions/purchase options if you want a pretty coloured pin holder and if you are not a "DIY'er". Some of the below come with additional features as well and they are:

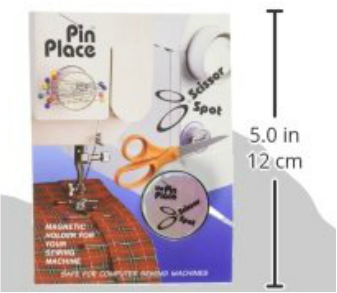
The Pin Caddy from Connecting Threads- a bigger surface for more pins - $13.00 at 20% off sale
Happy Tuesday everyone! ✂︎
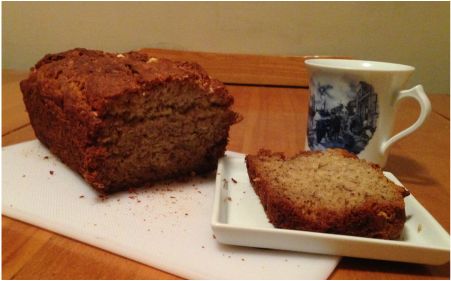 I just finished baking a lovely loaf of Gluten Free/ Dairy Free banana bread. It is a recipe I found with dairy ingredients, I just used non-dairy substitutions. So you could make it with dairy if you wanted to! I show the substitutions in the recipe below.
The smell alone tonight as it was baking made it irresistable! As you can see from the picture above, we have already sliced it and started to enjoy it. It has great texture, it's very moist and the perfect banana flavoured sweetness. It is wonderful served warm, just like the way we ate it because we could not wait! Ingredients:
How to make it:
.... So if you need to bring a gluten free, dairy free treat to a family or friend event, this banana loaf is perfect. Simple ingredients, very tasty and easy to make. Enjoy! Happy Sunday and Happy Valentines Day 💋❤️  Craftsy has a whole page dedicated to ideas for valentines days including classes for candy making, cooking, baking , cake making and yes GLUTEN FREE as well! In addition, they have FREE valentines day related patterns, check out some of these free patterns and ideas ideas below: Craftsy.com also shares a supportive community of crafters who share your passion, post their work with great photo inspiration!
As a Craftsy community member, I can attest to the value of this resource for quilters, artists, cooks and crafters of all persuasion. So if you are searching for Valentines ideas check out this Valentines Day page here. It's Fantastic! Thank Goodness it's Friday.. You Made It. Have a love---ly weekend and a Happy Valentines Day!  To celebrate their 1,000th online class, Craftsy is giving you the chance to get 50% off the most commonly 'wishlisted' classes!
That class you have had your eye on for a while might just be on sale. Why not see for yourself and browse these deals before they're gone? Hurry, the offer ends TODAY! Click here to see all the classes on sale. |
Follow Me:
Welcome!Hi I'm Robin and I am a professional long arm quilter, pattern designer and teacher. I am passionate about all things quilty!  
  Categories
All

Sponsors
This blog contains affiliate links. This means that we endorse products.
We do receive rewards for these endorsements and this helps to keep this site alive and well. We support products which we believe are the best quality and to inspire your creativity! |


 RSS Feed