QUILTINGINTHELOFT
  • Blog
  • About
  • Quilting
  • Shop
  • Teaching
  • Gallery
  • Contact
  • Crochet
  • Sponsorships
  • Blog
  • About
  • Quilting
  • Shop
  • Teaching
  • Gallery
  • Contact
  • Crochet
  • Sponsorships
Search

Welcome To Quiltingintheloft.com

Picture
Brought to you by quiltingintheloft.com

DIY for Easter, Party Favors

4/13/2019

0 Comments

 
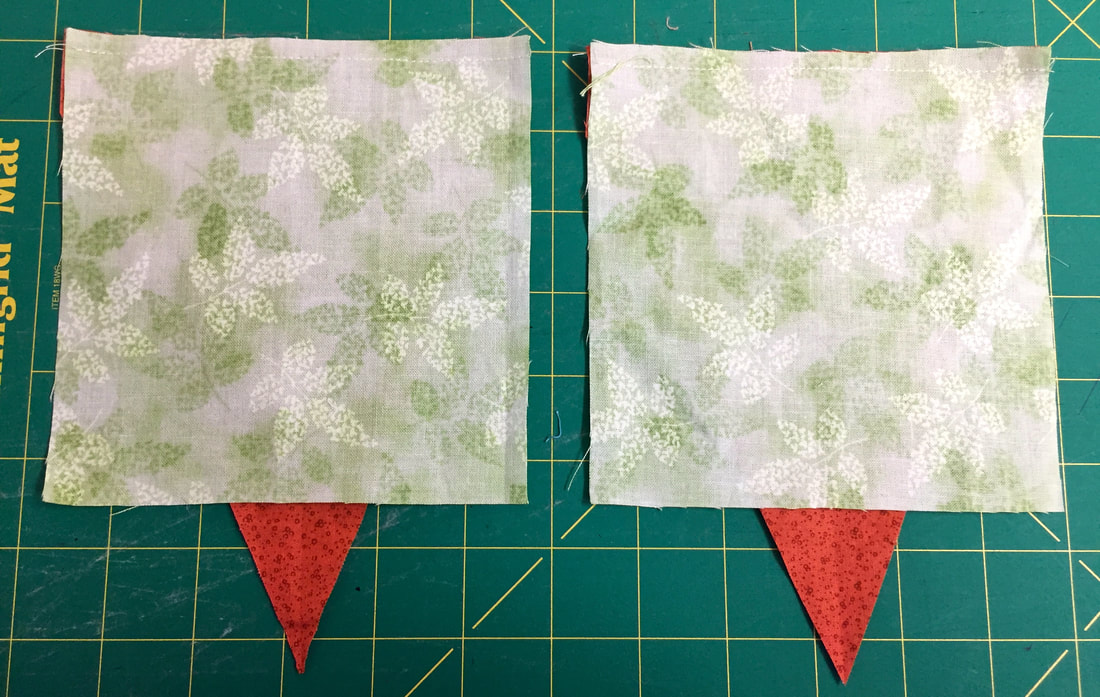
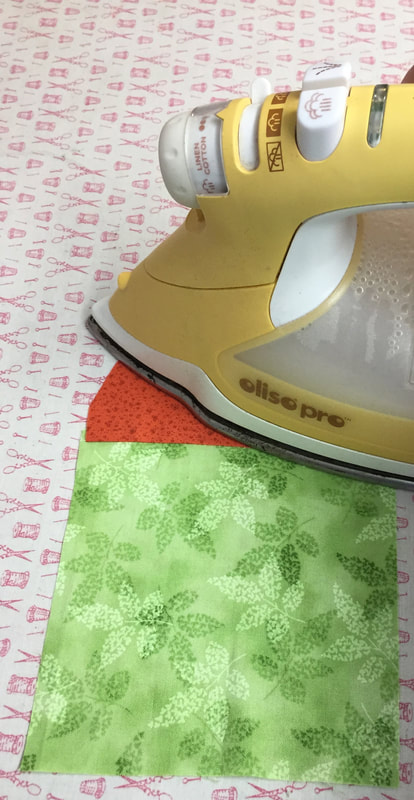
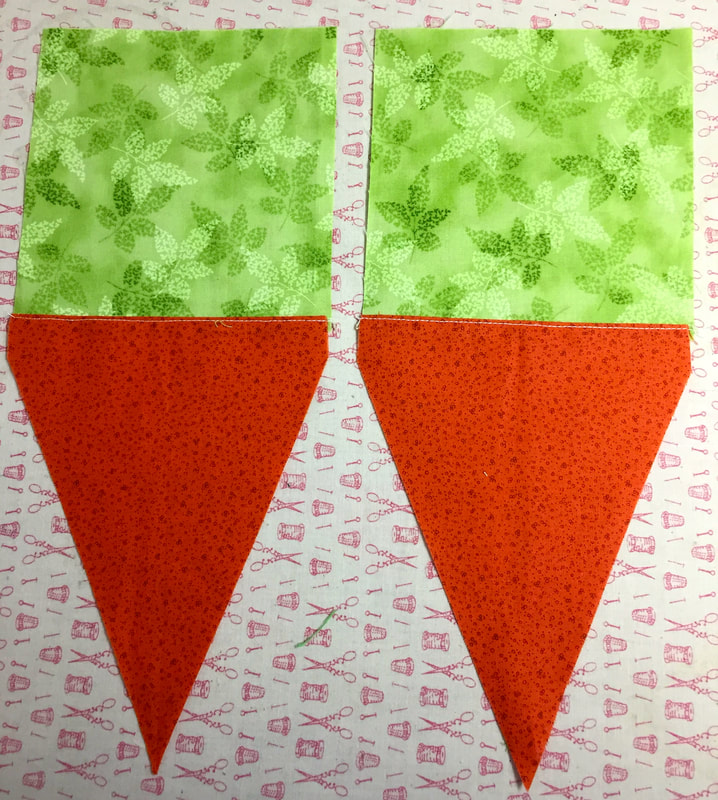
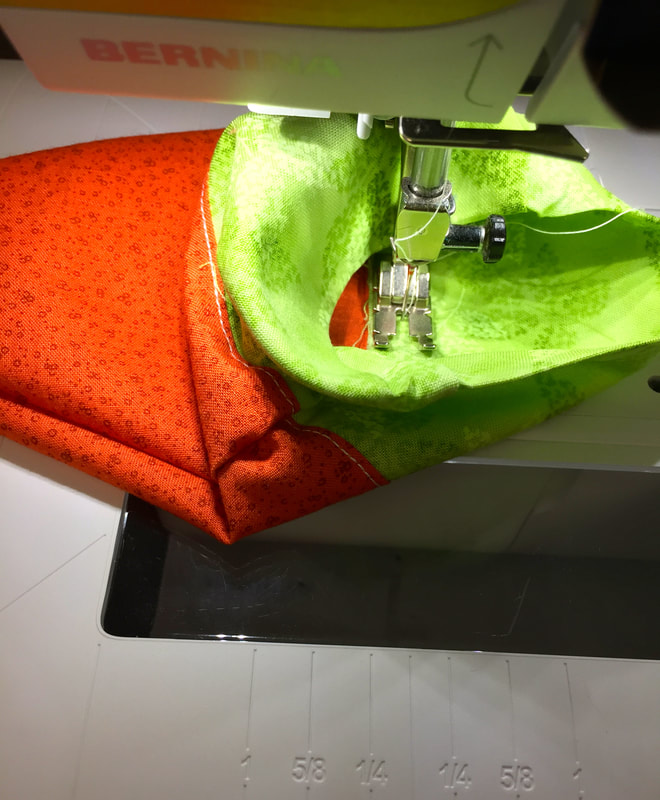
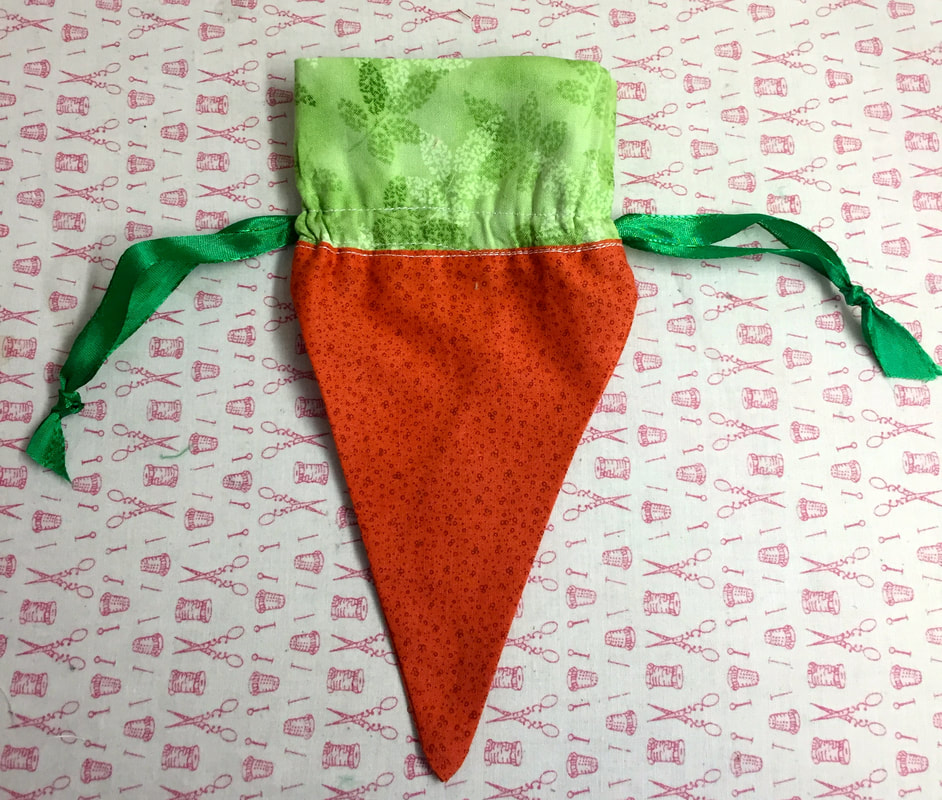
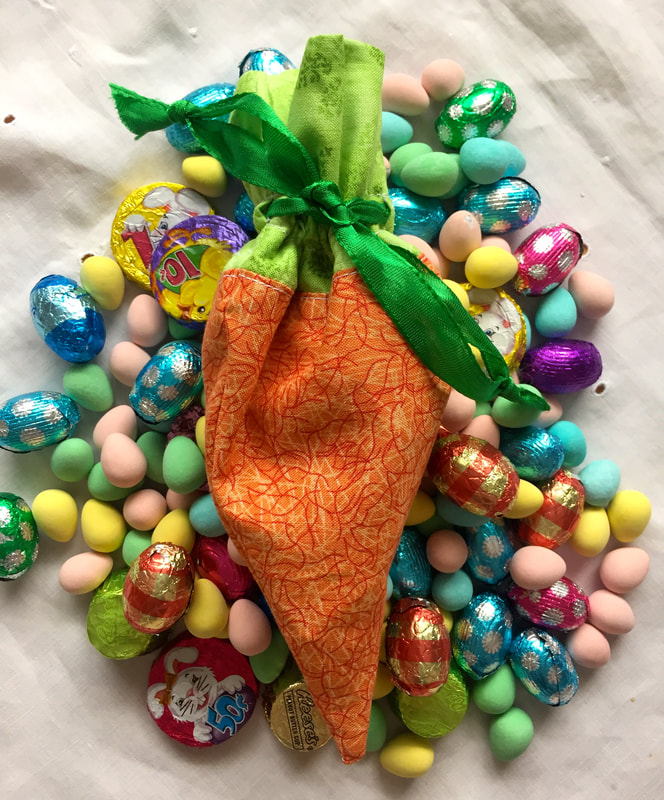
I'm trying to get ahead of the holiday rush this year and share with you some ideas to DIY for Easter. 

​Check back this week there will be more ideas anywhere from April 13 all the way up to Easter as I get my DIY"S done! The emphasis is of course easy DIY's given that Easter is only one week away.

So here is the first one, I like to call a "Carrot Treat Party Tote", see all the photos and how to tutorial below:
Picture
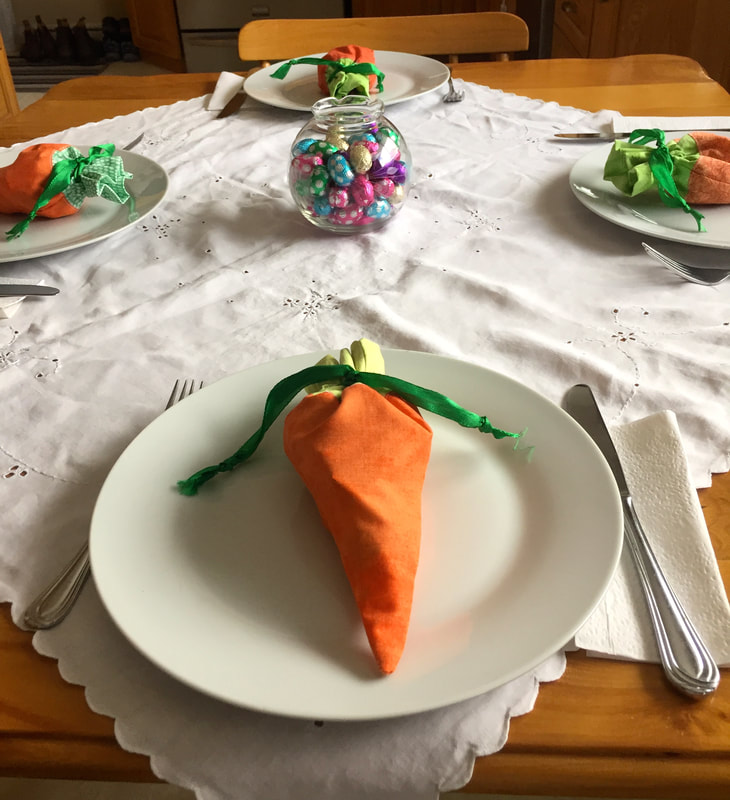
Carrot Treat Party Tote is filled with chocolates, a great take away, and conversation starter for an Easter party
Picture
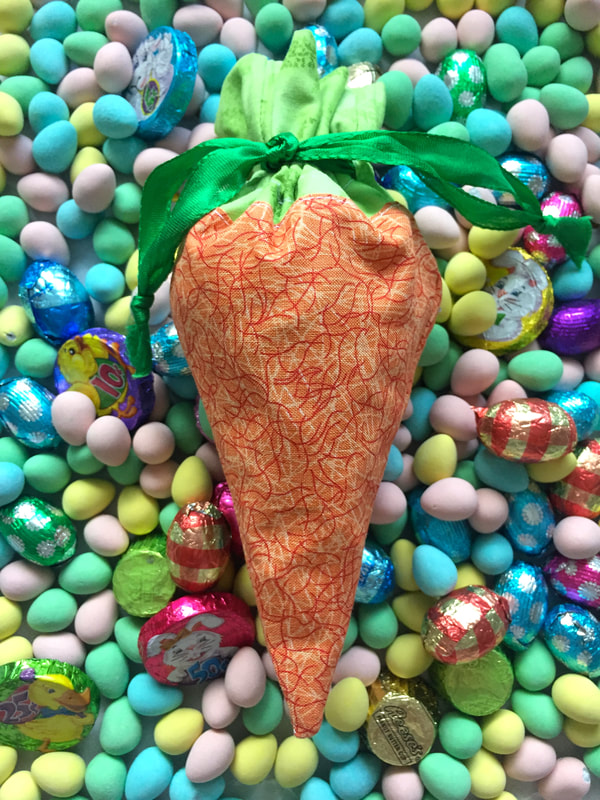
mmmmmm filled with chocolate!
Supplies Needed to Make One Carrot Treat Party Tote:
  • 2 green squares of fabric 5.5" x 5.5"
  • 2 orange rectangles 7" tall x 5.5" wide
  • 2-16" lengths of green ribbon or cord, 1/2" wide or less
  • Rotary cutter and ruler
  • Thread to match your project
How to DIY the Carrot Treat Party Tote:
  • Fold both of your orange rectangles in 1/2 along the length right sides together.
Picture
  • Measure 1" down from the top right corner while folded as shown above and mark, draw a line from the 1" mark to the left folded corner with a fade away or wash away marking pen and cut on this line with a rotary cutter and ruler.
Picture
Picture
Picture
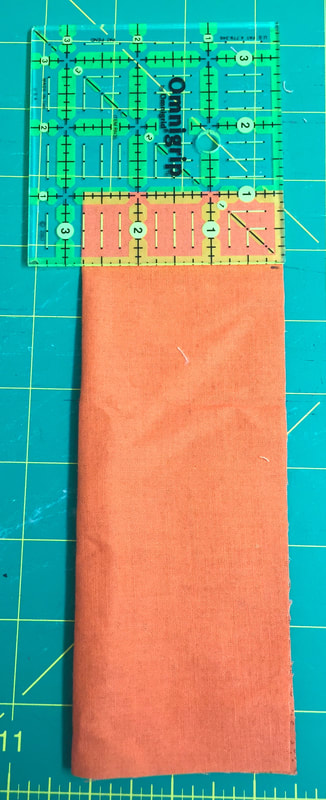
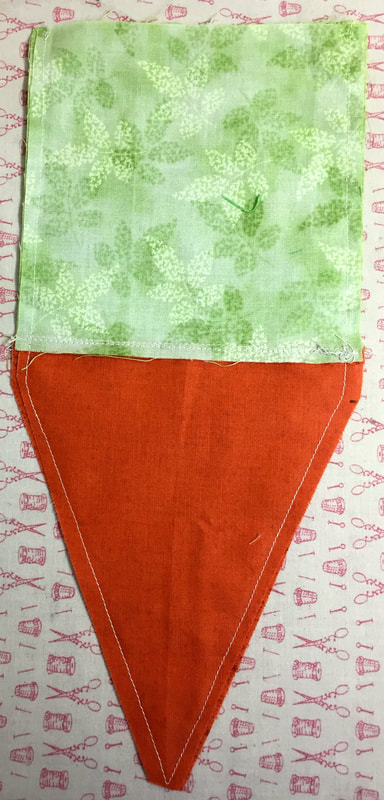
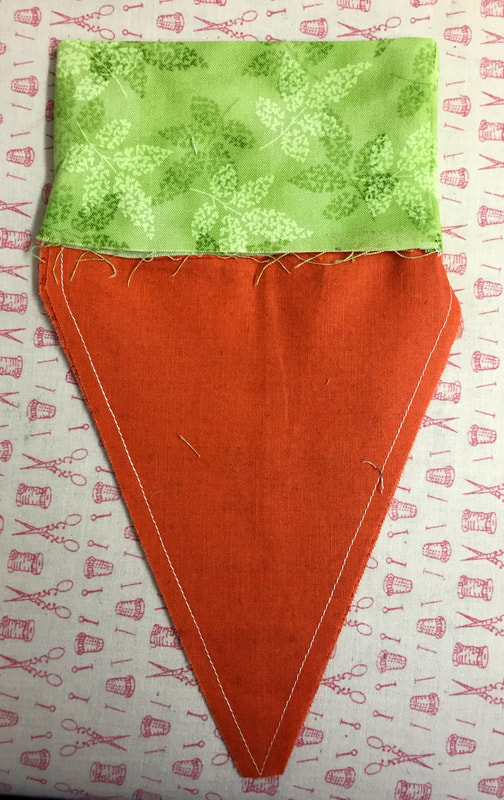
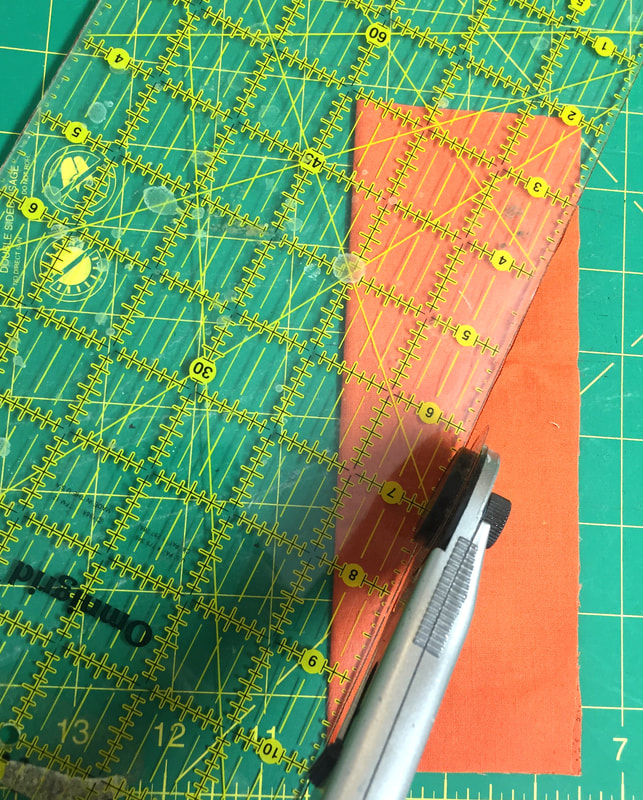
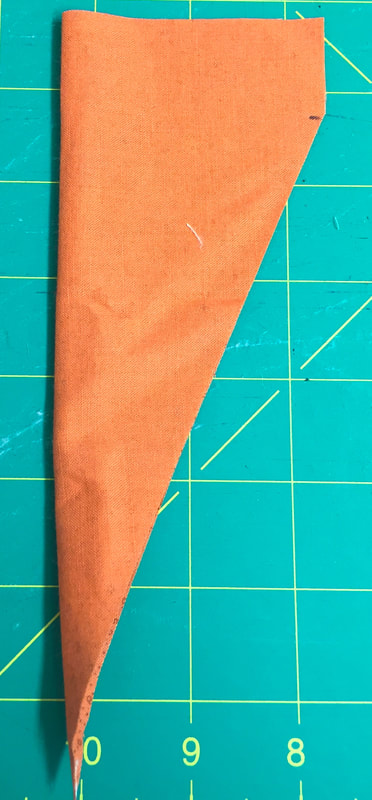
You will need 2 of these for each carrot
  • Lay your green squares right side down matching the top edge of the carrot pieces and sew with a 1/4" seam allowance.
Picture
  • Press your carrot tops (green) towards the carrot and top stitch close to the seam on the orange side.
Picture
Picture
  • Place carrot pieces right sides together and sew from one side, pivot at the bottom and up the other side.  Clip the point. Leave the top open.  Use a 1/4" seam allowance.
Picture
  • Press the green portion of the seams open.  (This step is important as it helps with the ribbon casing)
  • Leaving the carrot wrong sides out, fold the green part down matching the raw edge of the top of the green with the seam edge of where the orange and green fabric meet.  Press well. See below:
Picture
  • Turn the carrot right sides out and open up the carrot top,  sew a line 1/2" from the raw edge of the green fabric.  Sew on on the wrong side of the carrot top to start the first line of the ribbon casing and then do a second one about 1/2" away from the other one.  Working on the inside (wrong side) makes it much easier to sew. Sew as accurately as you can.  See below:
Picture
  • Once you have the two lines sewn, you can pick out the side seam between the casing lines carefully and thread the ribbon/cord through carefully, first one length on one side and the other length on the other side of the carrot top.  Use a safety pin to thread the ribbon through. Tie the two ends together as shown.
Picture
  • Press your carrot and get it ready to stuff with treats, pull the ribbon to gather.
Picture
Picture
  • Once your fabric is cut these take about 15 minutes to make.  I have made 4 so far and will probably make lots more.....
Picture
  • Cute on a table of 4 .  Would love to see these also on a large family table.
  • I hope you enjoyed this easy DIY Easter  tutorial.
Have a great Saturday!
Picture
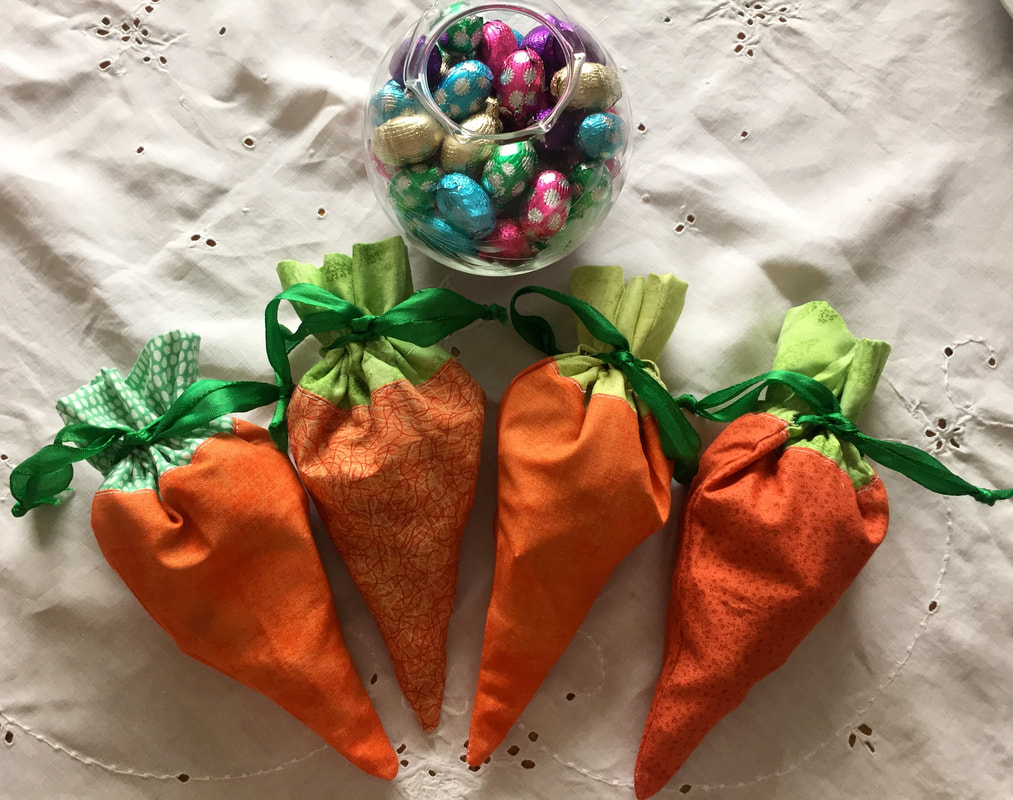
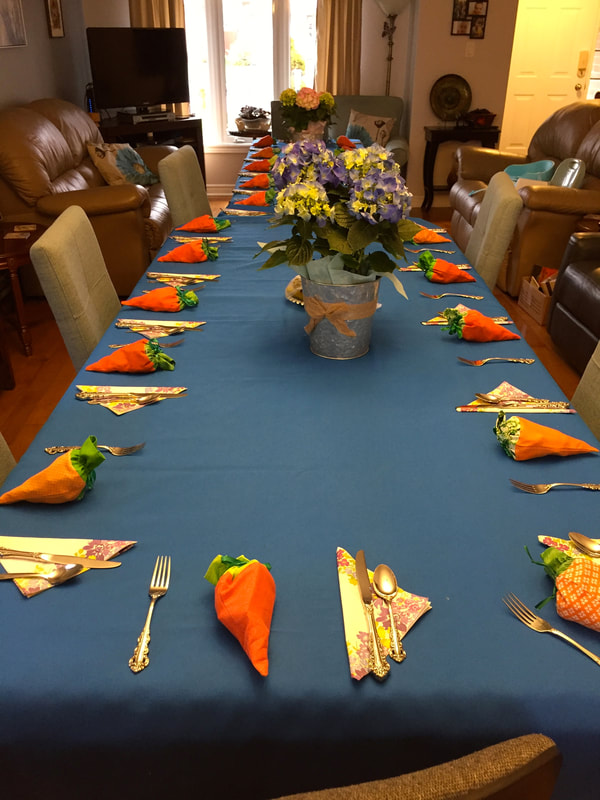
This just in ....23 at our Easter dinner and 23 Carrot Easter Treat Bags
0 Comments


Leave a Reply.

    Follow Me:

    RSS Feed

      Subscribe to receive updates and exclusive content!

    Subscribe to Newsletter
    Picture

    Welcome!

    ​​Hi I'm Robin and I am a professional long arm quilter, pattern designer and teacher.  I am passionate about all thin​gs quilty!

    Picture
    KeepsakeQuilting

         Categories

    All
    About Us
    Baby Gift Ideas
    Baking
    Be Inspired!
    BERNINA
    Classes
    Crochet
    DIY
    Environment Friendly Projects
    Fabric
    Fantastic BOOKS
    Free Patterns
    Give Aways
    Happy-monday
    Hexagon-quilt-along
    Holidays
    Local-events
    Long Arm Quilting
    Monthly-minis
    Organizing
    Patterns
    Publications
    QUILTsocial.com
    Recipes
    Rulerwork
    Ruler Work
    Sale-items
    Scan-n-cut
    Stash-busting
    Teaching
    TGIF Fridays
    The Best Notions
    Tool & Technique Tuesday
    Tutorials
    Wedding DIY
    Wednesday Wonder Blocks
    You Tube

    Picture
    HummingBird Sewing Centre
    Waterloo County Quilters' 
    Elmira Needle Sisters
    Katjas Quilt Shoppe
    Xposures By Melony
    Quilt & Fibre Art Festival 
    hyggeligt.ca , St Marys
    Quilting By Design, New Hamburg
    Twill and Timber.com
    Wild North Kids
    ​​Leah  Day
    Den 'Ve Gems
          Sponsors
    This blog contains affiliate links. This means that we endorse products. 
    We do receive rewards for these endorsements and this helps to keep this site alive and well.
    We support products which we believe are the best quality and to inspire your creativity!
Proudly powered by Weebly
  • Blog
  • About
  • Quilting
  • Shop
  • Teaching
  • Gallery
  • Contact
  • Crochet
  • Sponsorships