|
Brought to you by quiltingintheloft.com
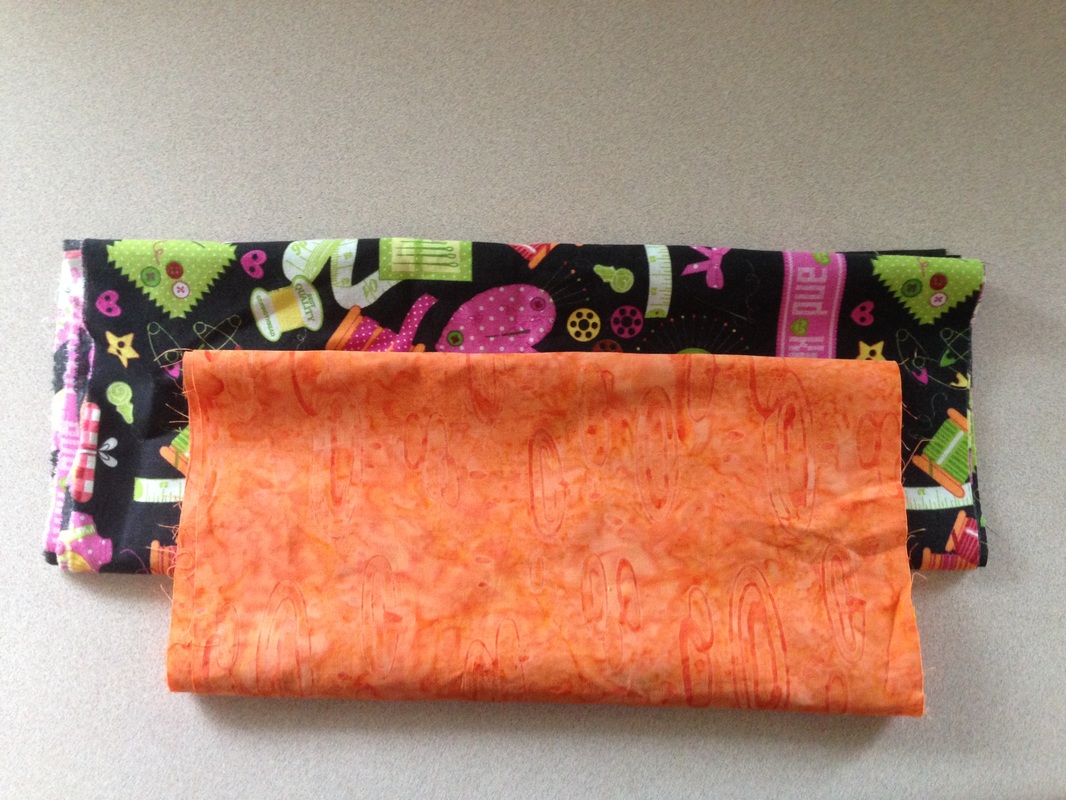
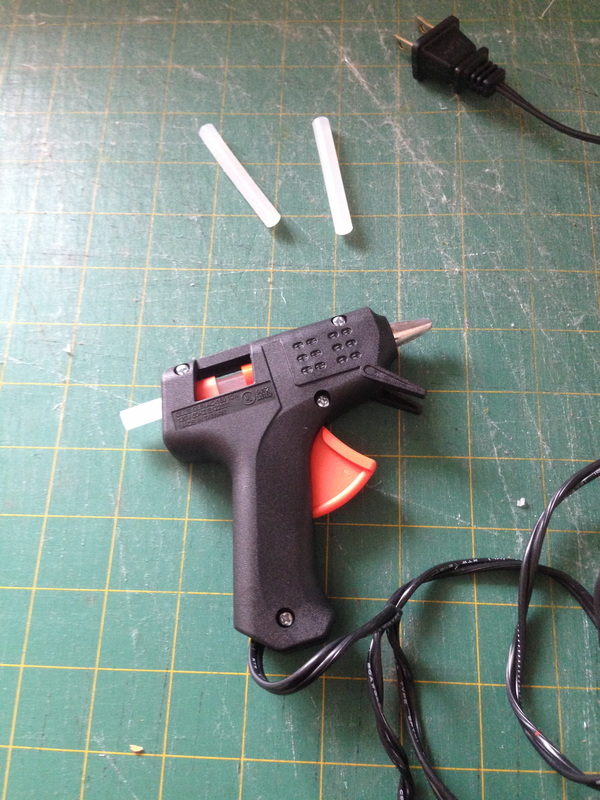
What does an embroidery hoop plus fabric, plus a glue gun make? 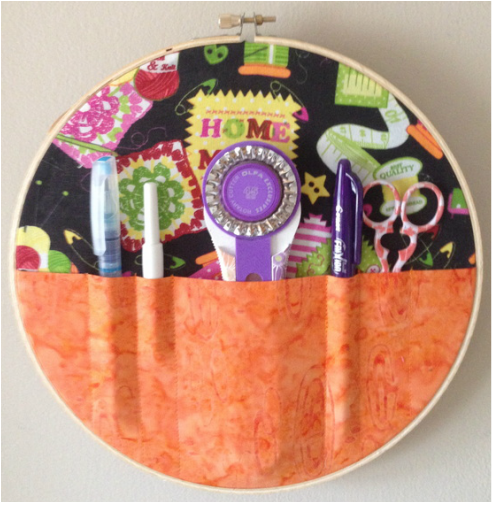 AN EASY DIY SEWING SUPPLY ORGANIZER!! No kidding! It takes about 20 minutes to make (after supplies are assembled). You can sew it or make it no sew- your choice! What You Will Need:
How to make it:
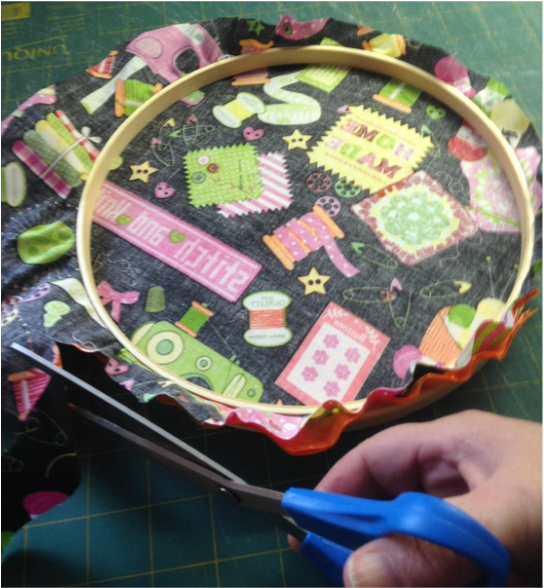
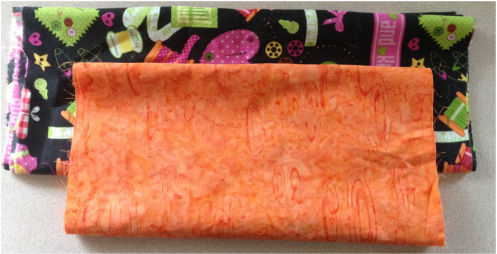 my fabric selection 2. Press your fabric and spray it with a spray starch to give it body. I used my homemade spray starch see this blog post here 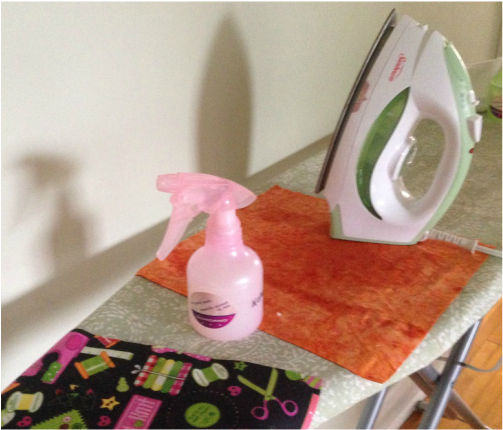 ironing with natural spray starch 3. Fold the fabric for the pocket in 1/2 wrong sides together, lay it right sides together on top of the background fabric and "Audition" it in the hoop for placement. 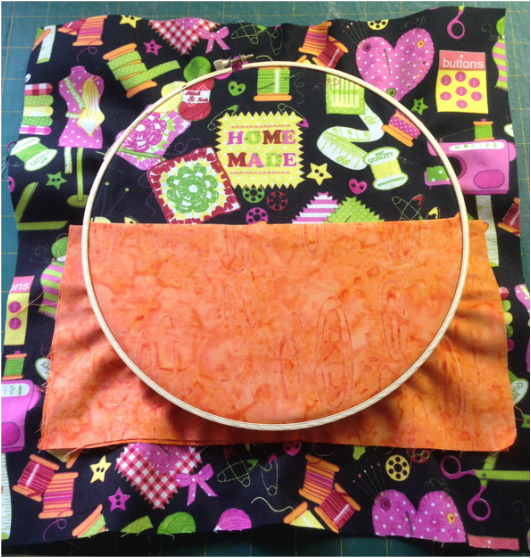 "auditioning" the fabric 4. Take your fabric out of the hoop and attach the fabrics together with glue or sewing ( I sewed a line just beyond the hoop pinch line to attach them) Trim away the excess fabric leaving about 2" beyond the hoop size to upholster to the back. Use pinking shears or a wavy blade to cut edges and avoid fraying.
5. With a ruler and Frixion pen mark lines for pockets and top stitch lines through all layers to make pockets for Rotary cutter, pens, scissors etc. My lines were 3" on centre, 3/4" and 1" . 3" for the rotary cutter 3/4" for pens and 1" for small scissors. If you did not want to sew, simply keep one large pocket with no small channel pockets, no top stitching required 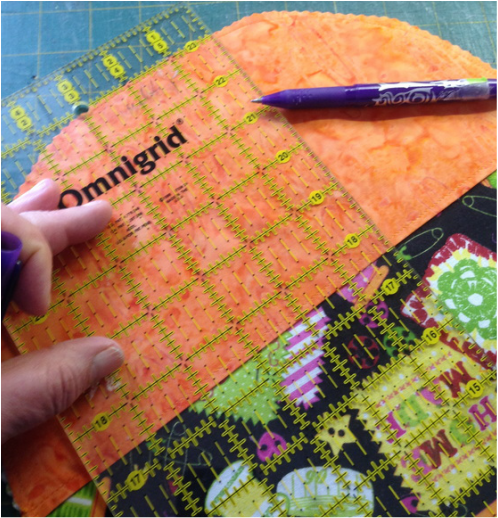 marking with a Frixion pen and a ruler  see lines on the pocket above 6. Once the top stitching of the lines are done, put it in the hoop and tighten the screw to hold in place, glue excess fabric tight to back edge with a glue gun. 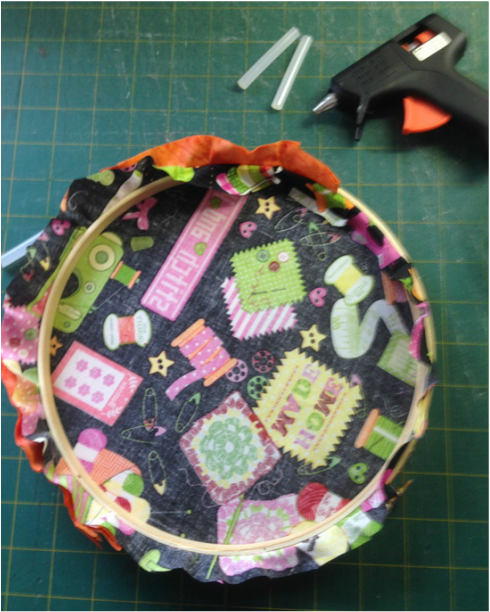 gluing the excess fabric 7. Place items to organize in your pocket and proudly display in your sewing/activity space and enjoy! 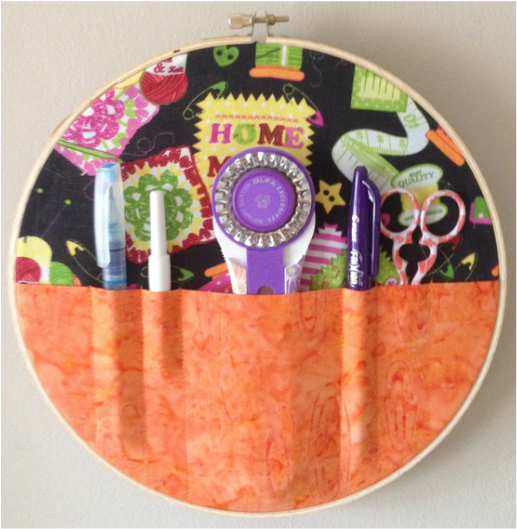 Happy Tuesday Everyone and Welcome to March!
I hope you try this very easy tutorial!! Send in your pictures to [email protected] 😊
0 Comments
Leave a Reply. |
Follow Me:
Welcome!Hi I'm Robin and I am a professional long arm quilter, pattern designer and teacher. I am passionate about all things quilty!  

Categories
All

Sponsors
This blog contains affiliate links. This means that we endorse products.
We do receive rewards for these endorsements and this helps to keep this site alive and well. We support products which we believe are the best quality and to inspire your creativity! |
 RSS Feed
