QUILTINGINTHELOFT
  • Blog
  • About
  • Quilting
  • Shop
  • Teaching
  • Gallery
  • Contact
  • Crochet
  • Sponsorships
  • Blog
  • About
  • Quilting
  • Shop
  • Teaching
  • Gallery
  • Contact
  • Crochet
  • Sponsorships
Search

Welcome To Quiltingintheloft.com

Picture
Brought to you by quiltingintheloft.com

Free Magic 1/2 Square Triangle Tutorial, It's Tool and Technique Tuesday!

3/8/2016

0 Comments

 
Picture
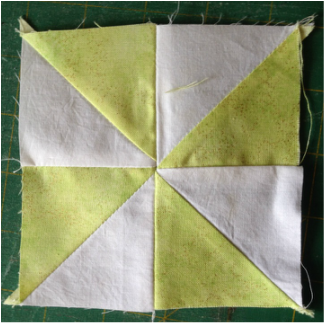
A pinwheel/windmill block- make 2 blocks all at once with this technique!
This free tutorial will show you how to make many-(8 )-1/2 square triangle units like the ones above all at once.  You can use these to make pinwheel/windmill blocks or any block involving a 1/2 square triangle

Step 1:
To make a Magic 8, first determine what size finished half-square triangles are desired.
For example:
  1. Let’s say you want to make 3” finished half-square triangles.
  2. Add to your 3” measurement, 7/8”.  (Your total is now 3-7/8”)
  3. Multiply your total of 3-7/8” by 2. (That equals 7-3/4”)
  4. 7-3/4” squares are the size needed to make your 3” finished half-square triangles.
Step 2:
​Determine your 2 fabrics, mine are lime green and white
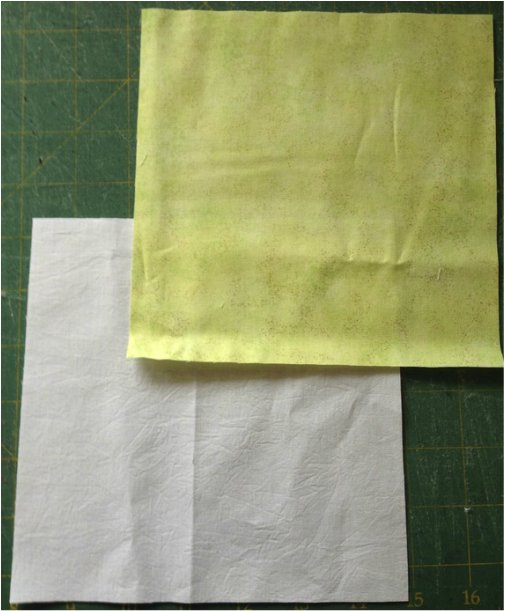
Picture
Step 3: 
​With right sides together, draw two diagonal lines corner to corner.
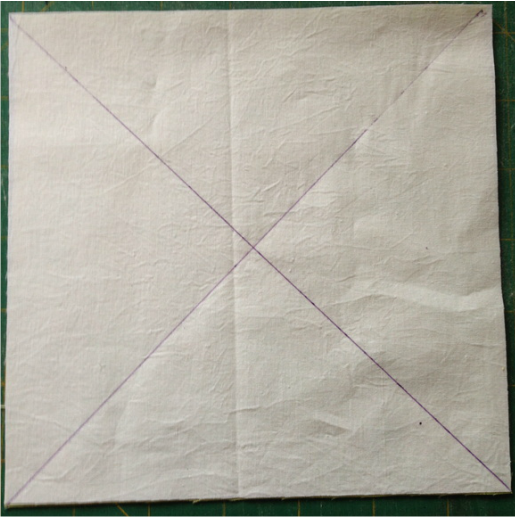
Picture
Step 4: 
​Stitch a quarter inch of either side of both drawn lines.
​
Picture
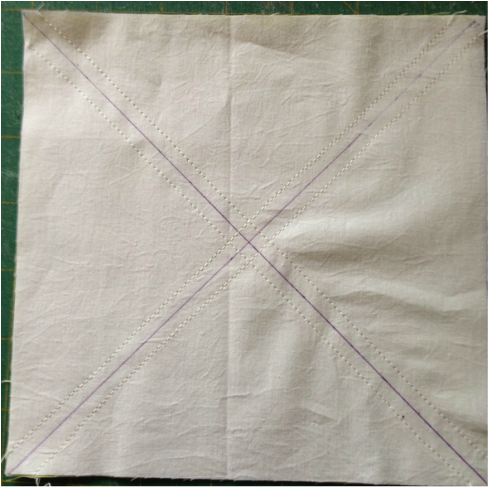
Step 5:
Carefully cut apart with out shifting the stitched fabric square.
There will be four cuts:
Cut down the centre vertically, horizontally and then diagonally on each line you drew earlier
Use a rotary cutter and ruler to make sure you are accurate 
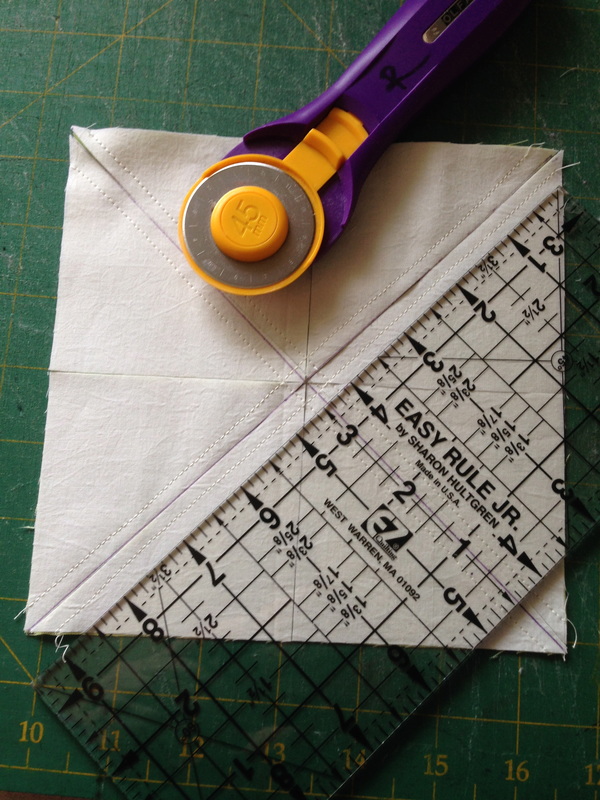
Picture
Step 6:
​Separate all 8 units and you will see you have 8- 1/2 square triangle units made like magic!
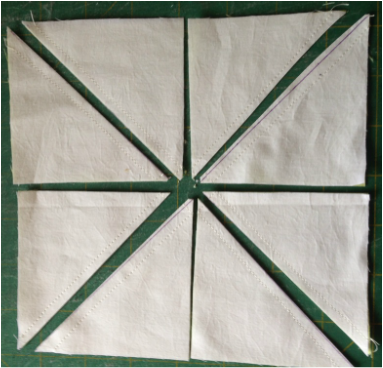
Picture
Step 7:
​Press towards the dark fabric and sew together like the below graphic and use pins to match points (recommended)
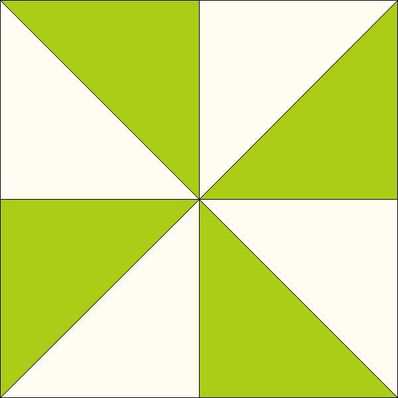
Picture
Step 8:
​Press connecting seams open to avoid bulking up the centre seam (recommended)
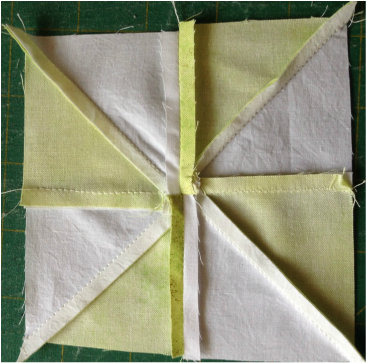
Picture
Step 8:
​Admire your efforts- I think this is the easiest way to make 1/2 square triangles!
Picture
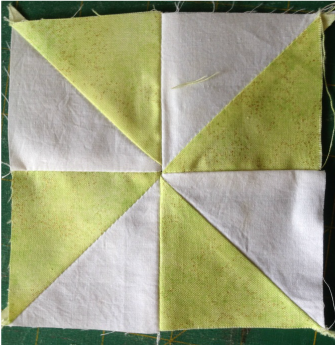
Now get busy and make a quilt entirely from the method above with pinwheels/windmill blocks LOL.

It would make a great summer quilt, don't you think?

 Send us pictures to share if you do!

​Happy Tuesday!😊
0 Comments


Leave a Reply.

    Follow Me:

    RSS Feed

      Subscribe to receive updates and exclusive content!

    Subscribe to Newsletter
    Picture

    Welcome!

    ​​Hi I'm Robin and I am a professional long arm quilter, pattern designer and teacher.  I am passionate about all thin​gs quilty!

    Picture
    KeepsakeQuilting

         Categories

    All
    About Us
    Baby Gift Ideas
    Baking
    Be Inspired!
    BERNINA
    Classes
    Crochet
    DIY
    Environment Friendly Projects
    Fabric
    Fantastic BOOKS
    Free Patterns
    Give Aways
    Happy-monday
    Hexagon-quilt-along
    Holidays
    Local-events
    Long Arm Quilting
    Monthly-minis
    Organizing
    Patterns
    Publications
    QUILTsocial.com
    Recipes
    Rulerwork
    Ruler Work
    Sale-items
    Scan-n-cut
    Stash-busting
    Teaching
    TGIF Fridays
    The Best Notions
    Tool & Technique Tuesday
    Tutorials
    Wedding DIY
    Wednesday Wonder Blocks
    You Tube

    Picture
    HummingBird Sewing Centre
    Waterloo County Quilters' 
    Elmira Needle Sisters
    Katjas Quilt Shoppe
    Xposures By Melony
    Quilt & Fibre Art Festival 
    hyggeligt.ca , St Marys
    Quilting By Design, New Hamburg
    Twill and Timber.com
    Wild North Kids
    ​​Leah  Day
    Den 'Ve Gems
          Sponsors
    This blog contains affiliate links. This means that we endorse products. 
    We do receive rewards for these endorsements and this helps to keep this site alive and well.
    We support products which we believe are the best quality and to inspire your creativity!
Proudly powered by Weebly
  • Blog
  • About
  • Quilting
  • Shop
  • Teaching
  • Gallery
  • Contact
  • Crochet
  • Sponsorships