QUILTINGINTHELOFT
  • Blog
  • About
  • Quilting
  • Shop
  • Teaching
  • Gallery
  • Contact
  • Crochet
  • Sponsorships
  • Blog
  • About
  • Quilting
  • Shop
  • Teaching
  • Gallery
  • Contact
  • Crochet
  • Sponsorships
Search

Welcome To Quiltingintheloft.com

Picture
Brought to you by quiltingintheloft.com

Gluten Free, Dairy Free,  Bread Recipe, Easy and Excellent!

1/24/2016

0 Comments

 
Picture
I have been gluten free now for about one and a half years and have been purchasing over priced small sliced, gluten free bread that I don't even like! Enough is enough!

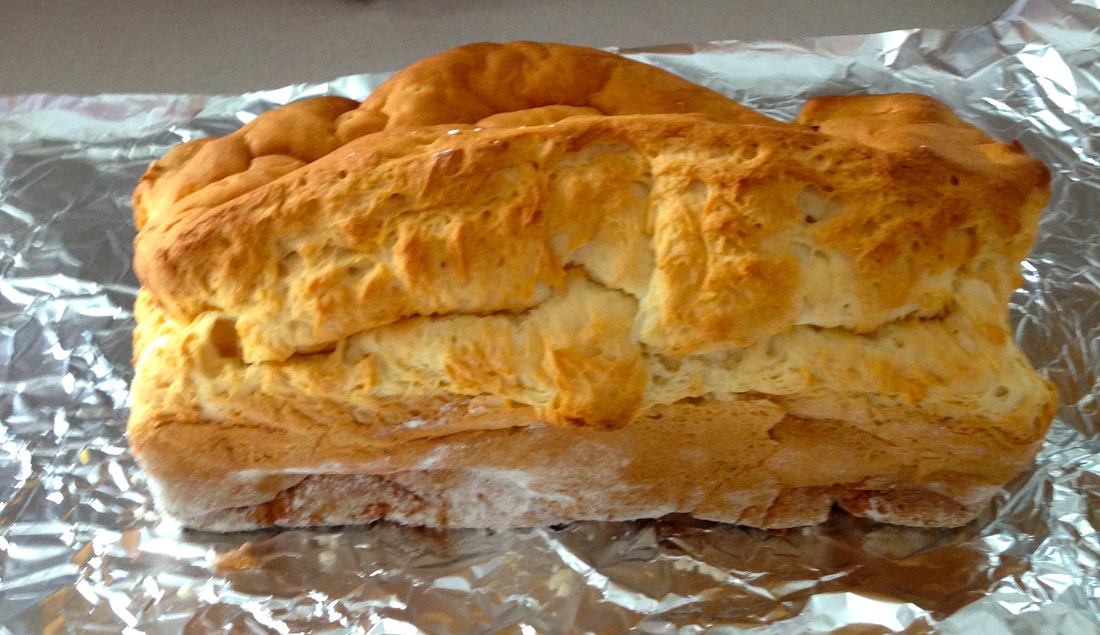
 I decided to try this recipe and I feel like I have found gold!!  I know it looks a little lumpy, but the taste and texture is wonderful and the slice size is normal!

I just had to share and I hope that others enjoy it as much as I do.

What you will need:
YEAST MIX:
  • 1½ Cup Water 
  • 4 Tablespoons Honey
  • 2½ teaspoons Dry Active Yeast 
DRY MIX:
  • 3 Cups of all purpose gluten free flour mix (mine is "Our Compliments")
  • 1½ teaspoons Xanthan Gum 
  • 4 teaspoons Baking Powder
  • 1 teaspoon Salt
WET MIX:
  • 2 teaspoons Lemon Juice
  • ¼ Cup Olive Oil
  • 2 Large Eggs  (or EnerG egg replacer)

How to make it:  (follow directions exactly for best results)
  1. In measuring cup, measure & warm water to just above body temperature - should be warm to the touch (not hot or cold). Stir in Honey and add Yeast last. Set-aside & let proof for approx. 10 minutes.
  2. Combine Dry Mix ingredients in small bowl.
  3. Combine Wet Mix ingredients in bowl of stand mixer fitted with the paddle attachment.
  4. Mix just for a few seconds.
  5. Add in the proofed Yeast Mix and mix again for just a few seconds.
  6. Add the Dry Mix and beat on medium-high for approx. 3 minutes. Dough will be wet, but thick and sticky!
  7. Oil and flour your  9 x 5" loaf pan 
  8. Using a spatula, scrape the bread mixture into your prepared loaf pan and set on top of your stove to proof while the oven is preheating. Be sure to smooth out the loaf with wet fingers before proofing as the loaf will not smooth out itself.
  9. Preheat your oven to 375 degrees.
  10. It is important not to over-proof the bread - just let it rise until the mixture is approximately double in size (20-30 minutes depending on your room temperature.) Don't let it rise above your loaf pan… or just until it crests the top. 
  11. Bake for approx. 30-45 minutes. If the crust is darkening too quickly, you can cover it with foil (tent open ended) and return to baking until done. 
  12. Remove loaf pan from oven and let cool for 3-5 minutes before turning out onto your cooling rack. Allow to cool completely before attempting to cut into slices. Use a bread Knife to cut into even slices and wrap in saran and then place all in a zip lock bag to keep  fresh. Refrigerate or freeze to maintain freshness.
Also. after making and tasting this bread, I think you could add cinnamon and raisins to this and/or savoury herbs and spices and it would be wonderful this way as well.

I would love to hear what you think of this bread, please comment below if you make some.  

​Happy Sunday! 
0 Comments


Leave a Reply.

    Follow Me:

    RSS Feed

      Subscribe to receive updates and exclusive content!

    Subscribe to Newsletter
    Picture

    Welcome!

    ​​Hi I'm Robin and I am a professional long arm quilter, pattern designer and teacher.  I am passionate about all thin​gs quilty!

    Picture
    KeepsakeQuilting

         Categories

    All
    About Us
    Baby Gift Ideas
    Baking
    Be Inspired!
    BERNINA
    Classes
    Crochet
    DIY
    Environment Friendly Projects
    Fabric
    Fantastic BOOKS
    Free Patterns
    Give Aways
    Happy-monday
    Hexagon-quilt-along
    Holidays
    Local-events
    Long Arm Quilting
    Monthly-minis
    Organizing
    Patterns
    Publications
    QUILTsocial.com
    Recipes
    Rulerwork
    Ruler Work
    Sale-items
    Scan-n-cut
    Stash-busting
    Teaching
    TGIF Fridays
    The Best Notions
    Tool & Technique Tuesday
    Tutorials
    Wedding DIY
    Wednesday Wonder Blocks
    You Tube

    Picture
    HummingBird Sewing Centre
    Waterloo County Quilters' 
    Elmira Needle Sisters
    Katjas Quilt Shoppe
    Xposures By Melony
    Quilt & Fibre Art Festival 
    hyggeligt.ca , St Marys
    Quilting By Design, New Hamburg
    Twill and Timber.com
    Wild North Kids
    ​​Leah  Day
    Den 'Ve Gems
          Sponsors
    This blog contains affiliate links. This means that we endorse products. 
    We do receive rewards for these endorsements and this helps to keep this site alive and well.
    We support products which we believe are the best quality and to inspire your creativity!
Proudly powered by Weebly
  • Blog
  • About
  • Quilting
  • Shop
  • Teaching
  • Gallery
  • Contact
  • Crochet
  • Sponsorships