|
Brought to you by quiltingintheloft.com
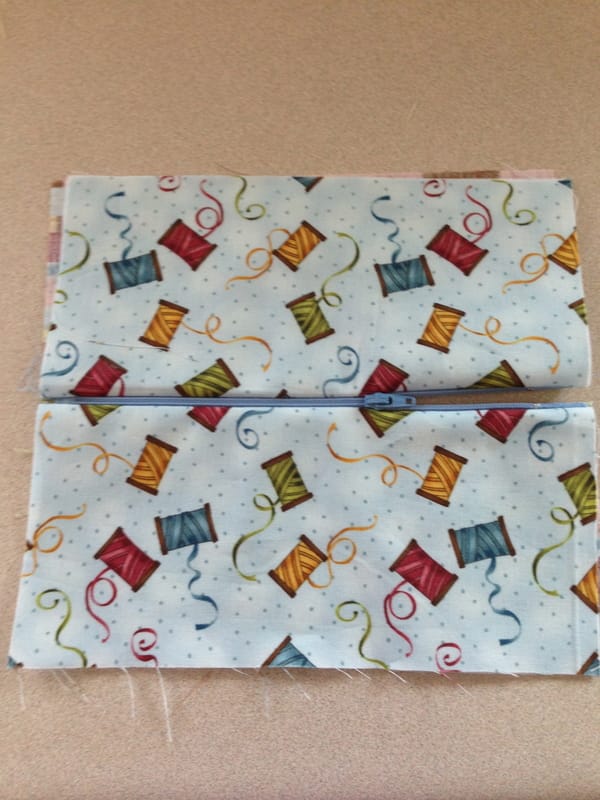
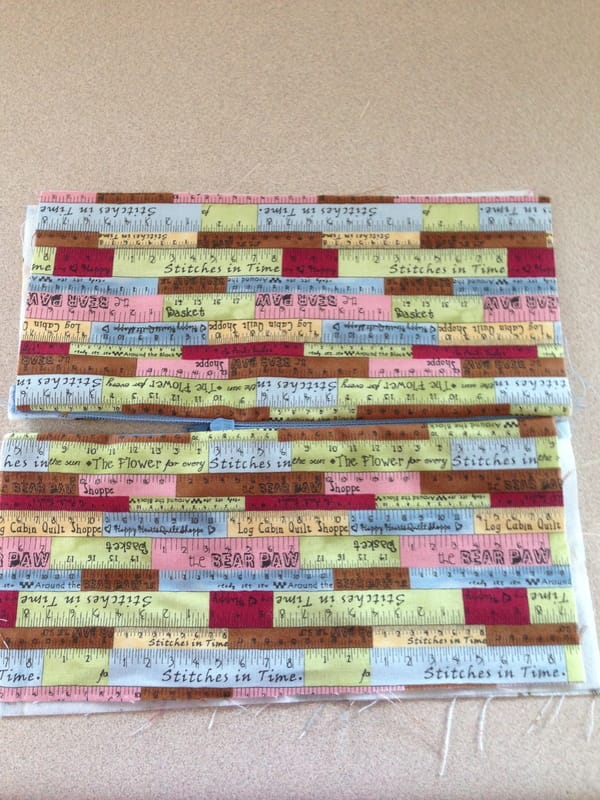
Happy New Year and Happy January! I am writing this post at the request of a friend nearby who saw my pouch sitting about in my studio and she said: "Why don't you do a blog post on that?" This is for you Joan! I am sure everyone will find it useful and lets face it totes, bags, pouches.... you can never have enough as they are so useful! It also just happens to be that time of the year to get organized and these little totes are very helpful. 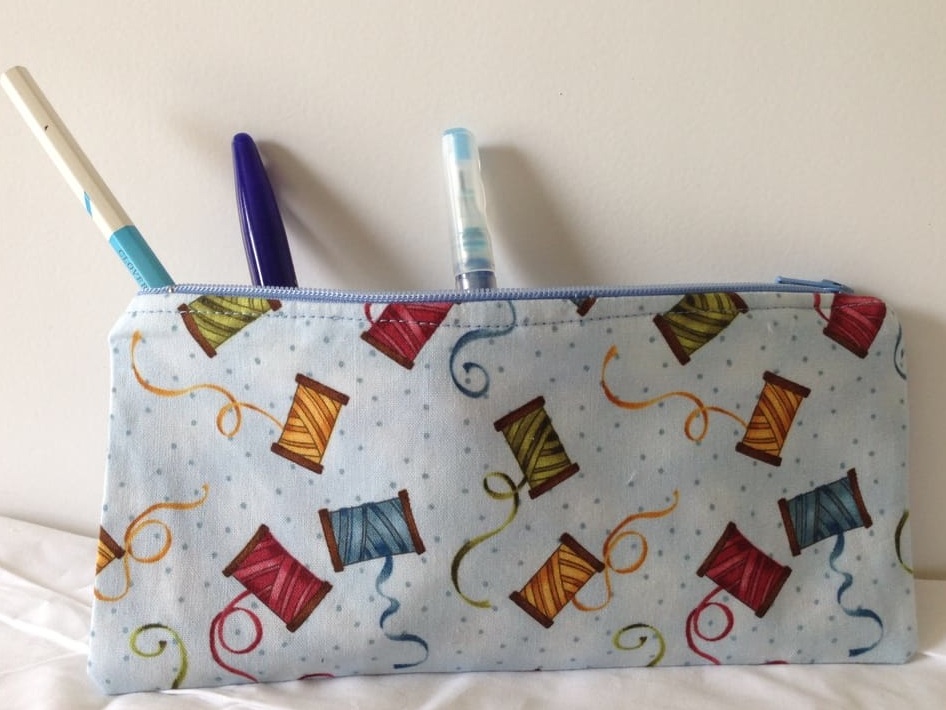 What you will need: 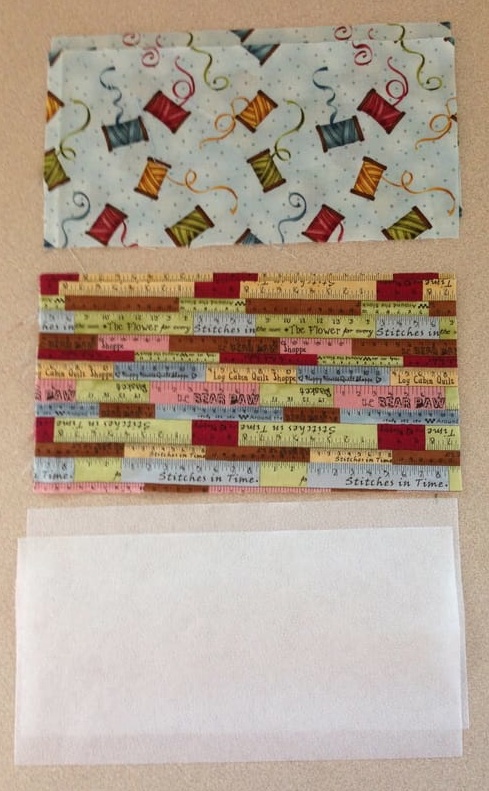 2 pieces of lining fabric, 2 pieces of outside (main) fabric and 2 pieces of fusible lightweight interfacing Note: your fabric can be any size you wish, pencil case sized, make up bag or a simple tissue tote size. You choose. You will also need......  A zipper slightly larger than the length of the opening of your pouch Also required: A zipper foot Thread to match An iron Sewing Machine Scissors How to make it:
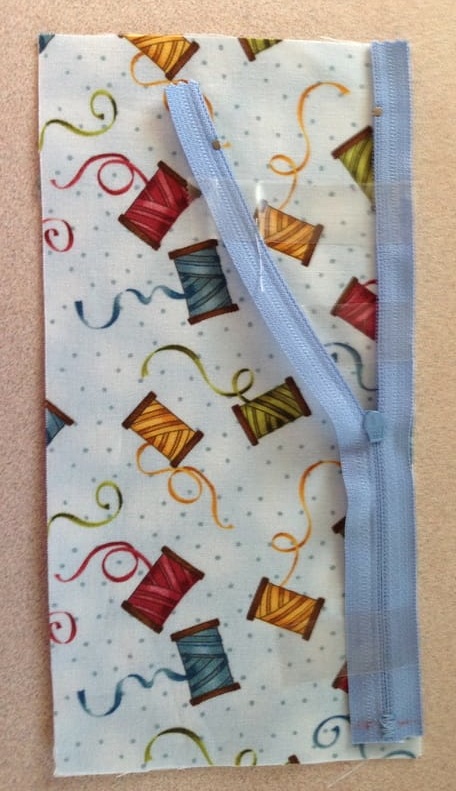 3. Lay the right side of the other main fabric on the other right side of the zipper and sew it with a zipper foot 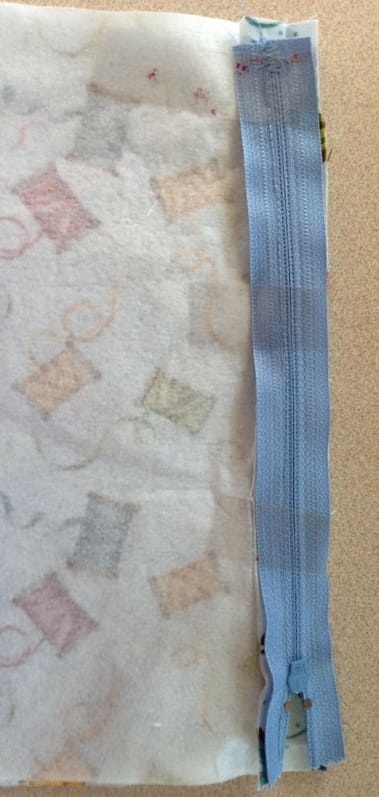 hard to see in the photo but one edge of the zipper is stitched and the other edge is temporarily taped ready for sewing with the zipper foot, Right side of the fabric against the right side of the zipper 4. Flip the whole project over and place the right side of the lining flush with the wrong side of the zipper and tape or pin in place. Sew on the previously sewn line with a zipper foot. 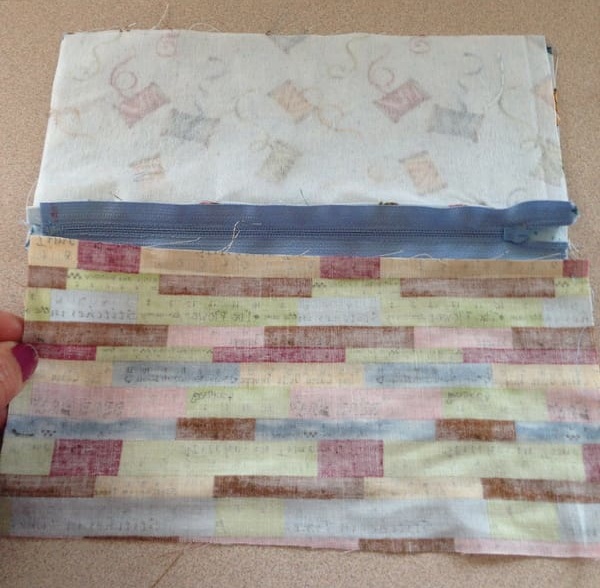 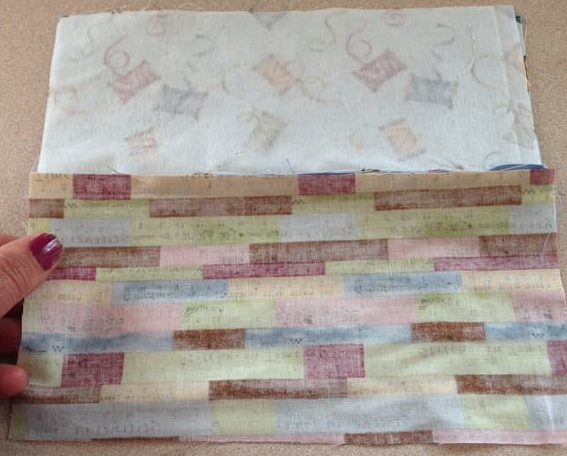 right side of the lining now sewn to the wrong side of the zipper on the same line as for the outside (main) fabric 5. Do the same as in 4 with the other right side of lining fabric on the other wrong side of the zipper. 6. Trim your zipper if necessary and make a new zipper stop by zigzagging over the zipper end. Zigzag stitch all raw edges. 7. Press the lining and main fabric away from the zipper so that they look like the pictures below, trim all edges so your project is now square: 8. With your zipper open, line up the project with right sides (main fabric to main fabric and lining to lining together) and sew down the sides and bottom with a ¼” seam allowance. Zig Zag stitch your raw edges if you like. Your opening for turning will be your open zipper. 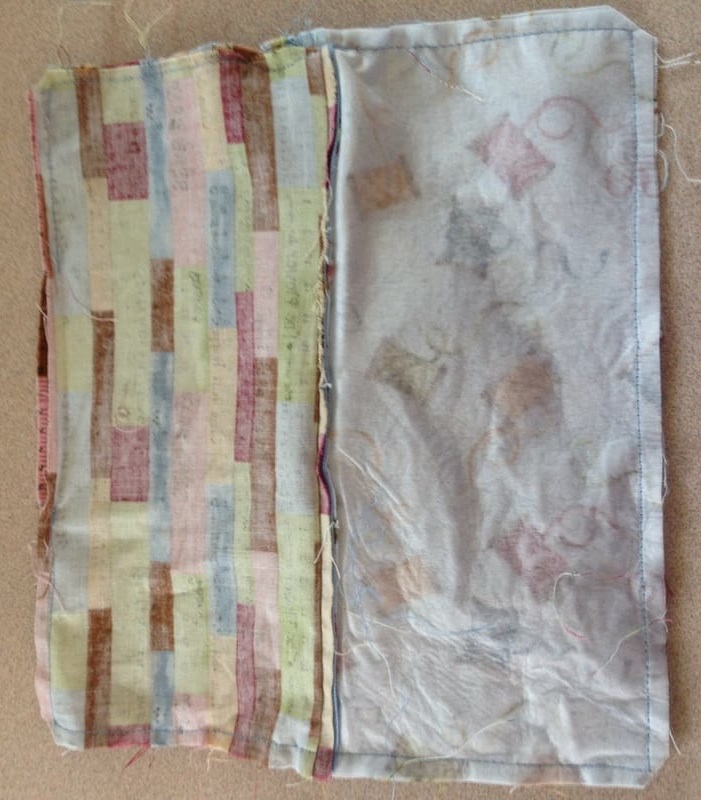 Showing back side of the pouch 9. Turn your project to the right side through the zipper, tuck your lining inside the zipper. 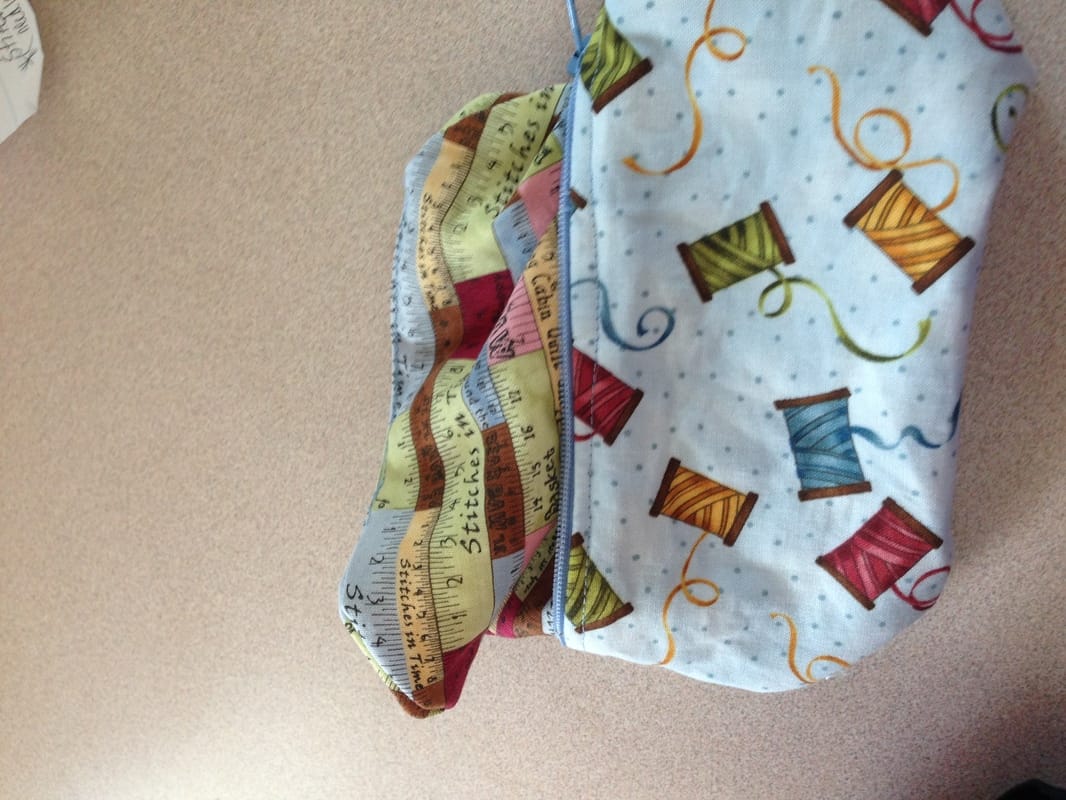 Top Stitch 1/4" from the top edge of the zipper all the way around once your pouch is turned. 10. Admire your efforts! Store pencils, pens, quilt markers, scissors, makeup, nail polish, toiletries art supplies etc. 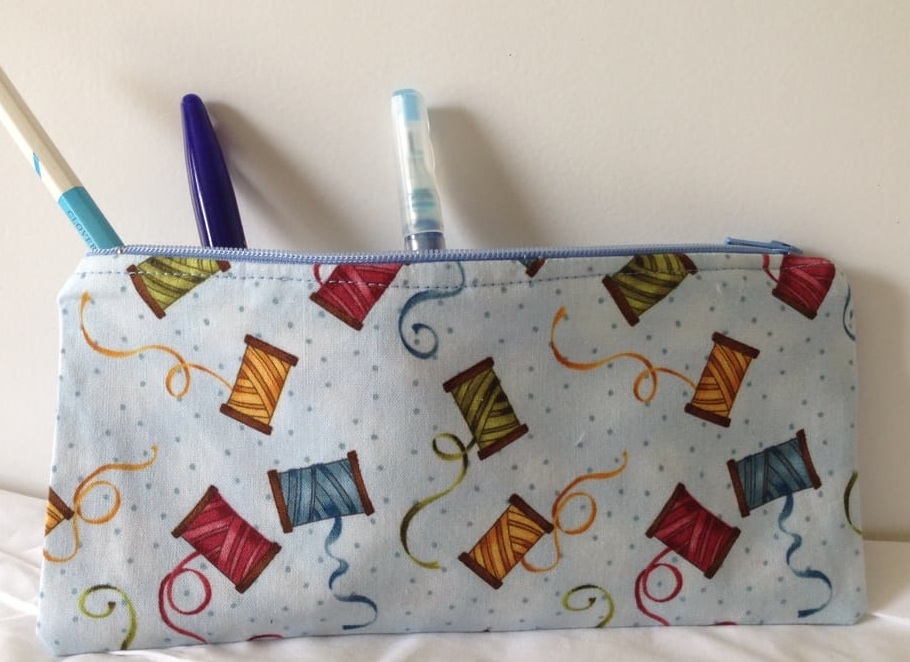 Get a head start on Christmas and gift giving in 2017 and make many of these handy pouches!!
Happy Tuesday, I hope the rainy weather (here in Waterloo, Ontario) is not affecting your creativity! 😊
0 Comments
Leave a Reply. |
Follow Me:
Welcome!Hi I'm Robin and I am a professional long arm quilter, pattern designer and teacher. I am passionate about all things quilty!  

Categories
All

Sponsors
This blog contains affiliate links. This means that we endorse products.
We do receive rewards for these endorsements and this helps to keep this site alive and well. We support products which we believe are the best quality and to inspire your creativity! |
 RSS Feed
