|
Brought to you by quiltingintheloft.com
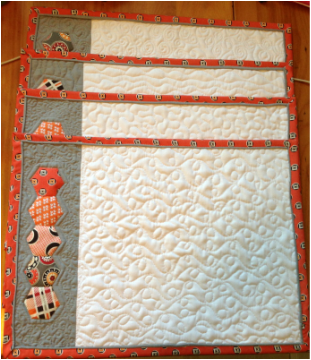
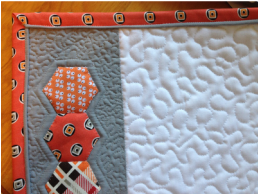
I decided recently that I wanted to pipe the binding on one of my quilted projects and thought I would share it with those who would like to do the same. The piping adds just a bit of pizazz to ordinary binding. This tutorial is completely by machine but you could also do the final step by hand. It's your work of art! Cutting Instructions: Cut the piping fabric 1 3/4" x Width of Fabric Cut the main binding fabric 1 1/2" x Width of fabric It is important the this cutting is accurate Sewing Instructions: Step 1: Sew the piping lengths together mitred as your would for normal binding. Do the same mitred join for the main binding lengths. Step 2: Sew the 1 1/2" length of joined binding to the piping fabric right sides together using a 1/4" seam allowance (it is important that this sewing is accurate) See photo below: 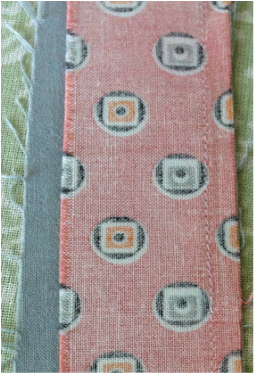 Piping fabric on the bottom, main binding on the top, right sides together -sew with 1/4" seam allowance Step 3: Turn over to the right side and press towards the piping fabric being careful to press evenly so as not to distort the piping. This also helps to "fill" the piping somewhat Step 4: With raw edges wrong sides together evenly, press and fold the main binding and piping together. See photo below: 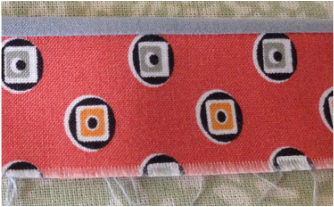 Step 5: With the raw edge of the main binding facing the back edge of your quilted project, sew it with a 1/4" seam allowance to your project as you would with any other binding. Fold your corners and mitre as you normally do. Step 6: Wrap your binding towards the front of your project- you will see that the main fabric and piping is showing. Sew in the ditch right next to the piping. TIP: Use pins or hold firmly when wrapping and holding onto your binding while sewing it so that it remains straight or you may wish to sew the binding to the front by hand. See photo below: 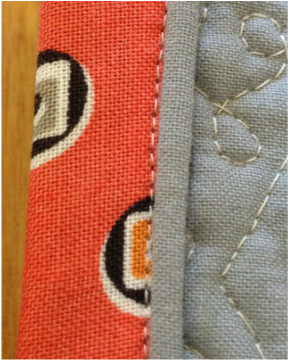 Step 7: Admire your efforts! You have just conquered machine piped binding. See photo of my finished placemats below- bound with this method.
1 Comment
Gwen Breen
9/29/2015 11:07:55 am
Perfectly done tutorial on the piped binding....I had tried explaining it previously at my guild, you describe and photo it to perfection. Thanks, I enjoyed your blog Leave a Reply. |
Follow Me:
Welcome!Hi I'm Robin and I am a professional long arm quilter, pattern designer and teacher. I am passionate about all things quilty!  

Categories
All

Sponsors
This blog contains affiliate links. This means that we endorse products.
We do receive rewards for these endorsements and this helps to keep this site alive and well. We support products which we believe are the best quality and to inspire your creativity! |
 RSS Feed
