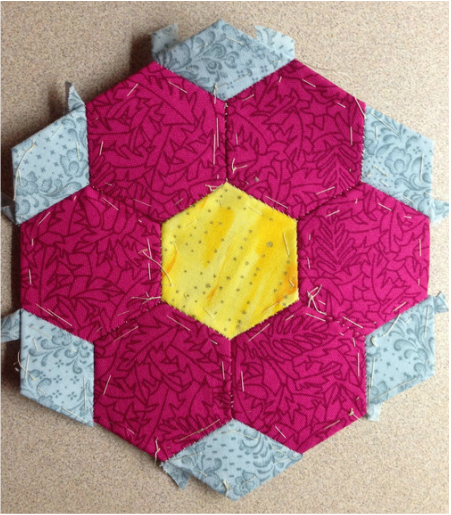
Block # 13 "Judy"
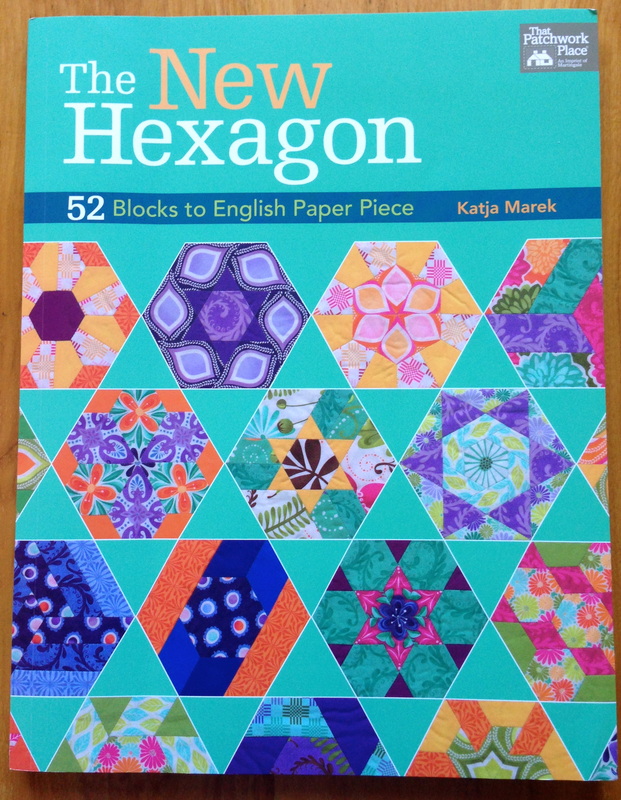
Block # 13 is from this book
If you are interested you can purchase it below and join our challenge:
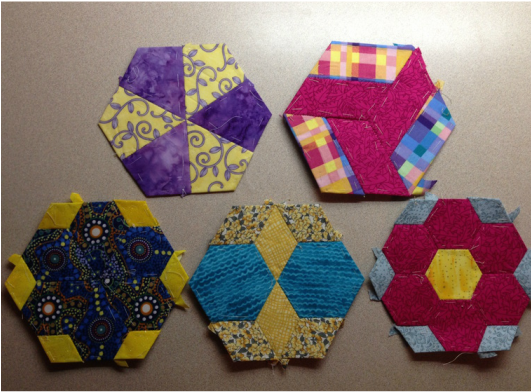
#9, 10, 11, 12 & 13 - all 5 blocks for March- the lovely ladies Doris, Kelly,Susan, Brandi & Judy
Check out the original blog post in January explaining this year long challenge and quilt along with by clicking here
Happy Wednesday everyone! Spring is trying to visit, enjoy!!
0 Comments
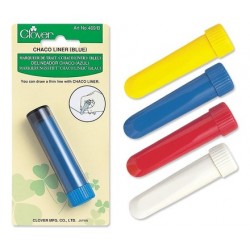
I often hear the question when I teach classes in Free Motion Quilting, "which marker(s) do you think is best for quilting?"
I decided I would post my answer below so that it is written down for students for future reference and for others who have never tried these marking tools. 1) CHACO LINER PEN STYLE This little gadget is just plain fun to use and is very effective. It comes in four colors: white, pink, blue, and yellow. Refills are available for each color. * Mark your quilt top AFTER it is basted. This chalk formulation still rubs off as you pin and baste. * Use with a ruler or stencil to mark along the line you want. * The chalk wears off during quilting. I have had the yellow one since 1999 and have refilled it only a few times. The yellow one is effective because it is light yet still shows up on light fabrics and is always seems the best marker for me. It always works, always provides me with a thin and very visible line when I use it with a stencil, ruler or template. It has a wheel at the bottom much like a dressmakers marking tool (except thinner) and as you mark it lets go of the yellow chalk along your marking lines. The colour completely disappears once the quilt is quilted and/or you brush it away with your hands or a slightly damp, clean cloth. A very reliable tool Check it out for purchase below:
The refills are also very affordable, check them out below:
2)I also love, love, love the Mark B Gone pen or wash away blue marker because it marks a lovely, blue, water erasable line and does not go away until you apply water to it. It does not always show up on like coloured fabric or darker fabrics but wonderful for lighter and medium coloured fabrics. I have used one of these pens for many, many years as well. It is great for use with stencils, marking seam allowance, straight lines, templates etc.
Why a "Mark- B- Gone" vs a "Chaco Liner"?- It does not rub off like the chaco liner and sometimes it is useful if you do not want your marks to rub off- it stays until you want it removed. HINT: if you have any trouble at all getting rid of the light blue line or it comes back to haunt you after you think you have applied water to it. Add a little bit ( 1 tsp) baking soda to 2 cups of warm water and spray it on the blue mark, voila it will be gone!!! Check it out for purchase below:
3) The Frixion Pen is also one of my "go to" tools for marking, I am told it does come back if your quilt is in the cold, but who the heck wants to leave a beautiful quilt out in the cold!! This is a newer product, so the longevity of my testing is just not there. I have been using it for about 2 years now.
It is a gel pen, comes in many colours and marks a lovely fine line and is erasable with the heat of an iron! It is also great for notes as there is an eraser at the end of the pen to completely erase your errors. I love this one as well. The only issue I see with this tool is that it is difficult to see on dark fabrics. Check it out for purchase below:
My recommendation is .....always buy the best tools you can within your own personal budget. A carpenter cannot work effectively without great tools and our beautiful sewing and quilting deserves the same respect
Happy Tuesday everyone, I hope you are having a great day!  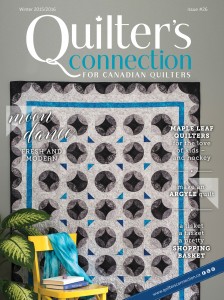 I am happy to announce that I will be published in Quilters Connection Magazine in their Summer Edition which will be mailed out May 27th 2016, and will be on store shelves through the months of June, July and August! Two of my original quilt designs will be featured there. How did this all happen? Heather the publisher of this lovely Canadian magazine contacted me after she was looking at one of my blog posts and thought my "technique" would work for their summer theme and so she invited me to submit some work Can you guess what technique it was? Please comment below if you think you know. Also can you guess what the Quilters Connection Magazine summer theme is? Below is a sneak peak of my designs, but just a whisper as I would like you all to see it in the magazine. I had so much fun working with the this theme! I can't wait for you to see them!!!   Ha,Ha I know I am just giving you a morsel, please check it out in the magazine! 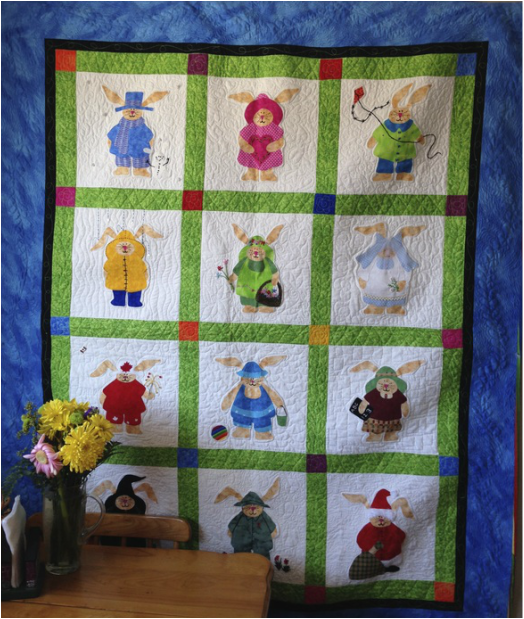 My solo Easter quilt "Calendar Bunnies" starts at the top right with January and goes from left to right with bunnies and a monthly theme Happy Thursday, Happy Easter and have a great time with family this weekend!🐣😊
 #12 block "Brandi"  This weeks block looks challenging, but it's easy! These blocks always surprise me, I look at them in the book and think ...hmmmmm not sure, that looks a little difficult. Then I start on the block and it seems always to be easy and that is the joy of English paper piecing, its surprisingly easy when you use this method!! For those of you who are newbies to this blog, have a look at my Jan 1, 2016 post here to find out what we are doing and/or click on Hexagon Quilt Along on the the categories menu on the right hand column/sidebar on this page to look at all 12 blocks to date! Check out the book below where "The New Hexagon" this block series comes from and you can purchase it by clicking on the link below if you want to try it: Next Wednesday, I will be posting a pic of all the March blocks
Have a Happy Wednesday Everyone! 🐰 Facing a quilt means taking fabric from the front (or back) and turning it to the opposite side so that you don't have to bind it, but it looks finished. It is ideal for small or art quilt projects. Front to back facing gives you the neatest finished look, however back to front facing may also work for a quirkier/artsy quilt. Last week Tuesday, you may have seen my blog post about "Radiating Blossoms" using a fabric centre for inspiration and practising free motion quilting out onto the border area. This little quilt ended up being faced as I am going to use it as an art quilt to hang on my bathroom wall. How to Face a Quilt: 1) When you finish a quilt add 1.5" width all the way around on the length wise and width wise borders 2) Press the outside edge under 1/4" towards the wrong side of your quilt all the way around the perimeter. 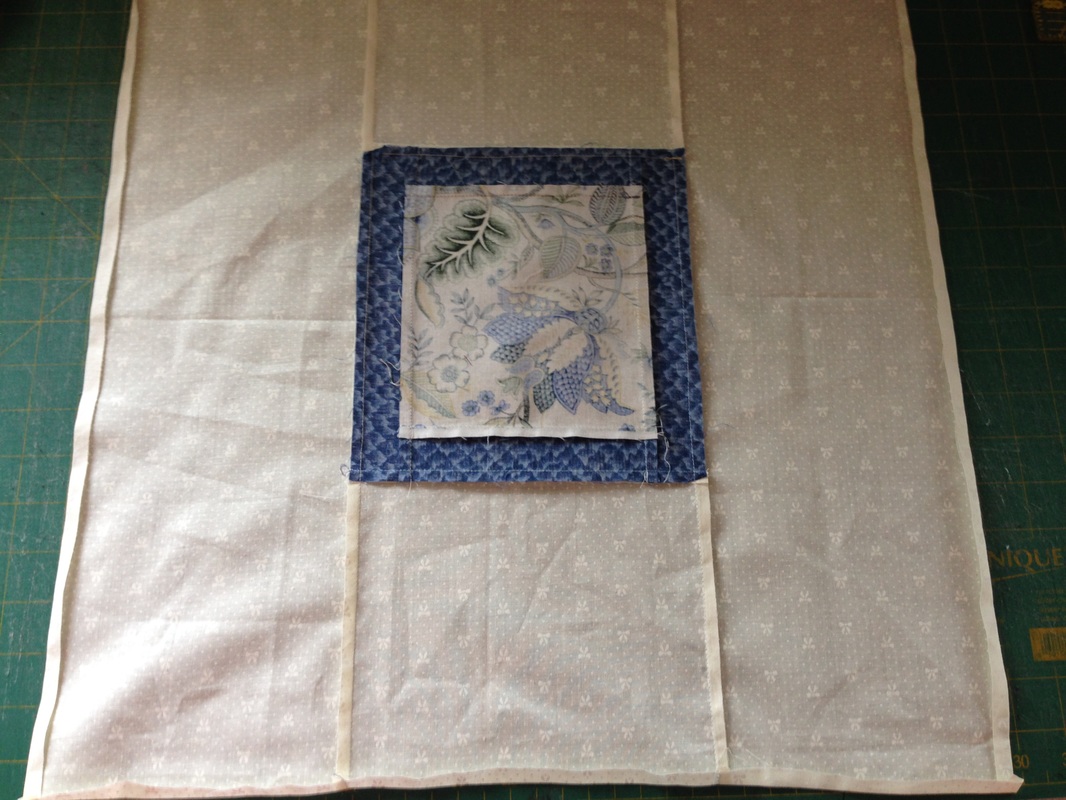 Edges are pressed under 1/4" 3) Draw a line with your Frixion pen on both horizontals and verticals 1.25" in from the edge all the way around. 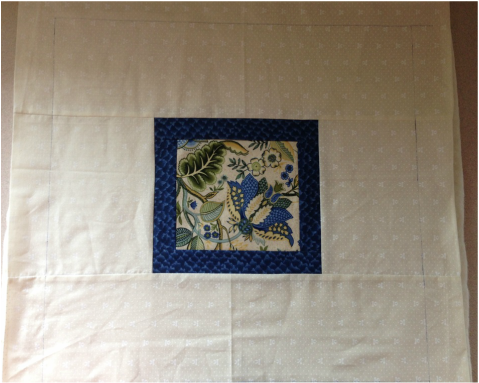 The 1.25" line drawn around the quilt top 4) Allow your batting to be a little bit bigger than your finished quilt top to allow for sprawl of the batting as you quilt and the same for the backing (you can trim this after the quilting). Sandwich and baste your quilt. 5) Quilt your quilt but do not go beyond the frixion markings 6) Sew on the Frixion marking 7) Trim both your backing and batting fabric very close to the line you just stitched but do not cut into the top fabric of your quilt 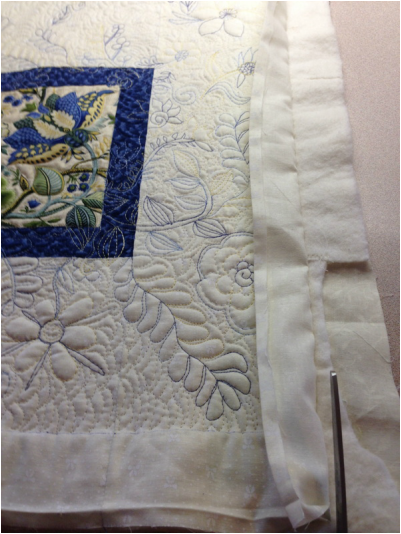 Cutting away the batting and backing close to the Frixion/stitch line 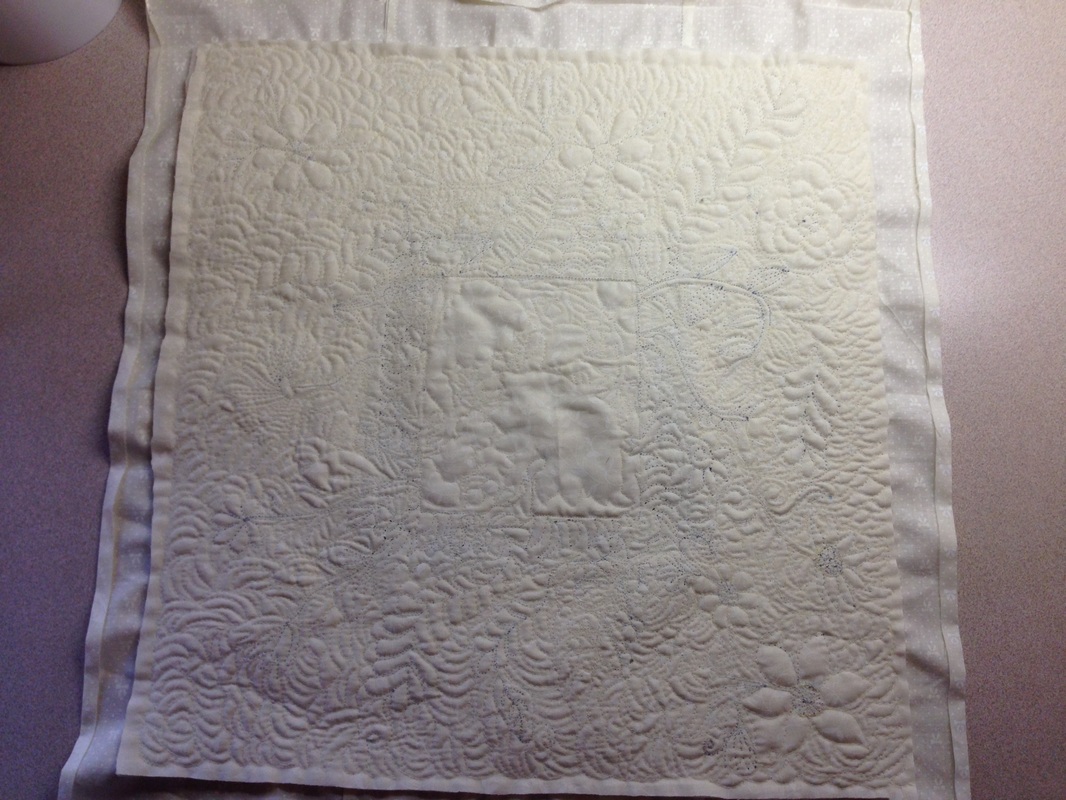 8. Once all edges are trimmed, turn your quilt over, press your facing and pin the edges towards the back.  9. Slip stitch your facing to the back of your quilt, overlap your corners neatly or fold and mitre them, remove your pins, press from the right side and you are done! 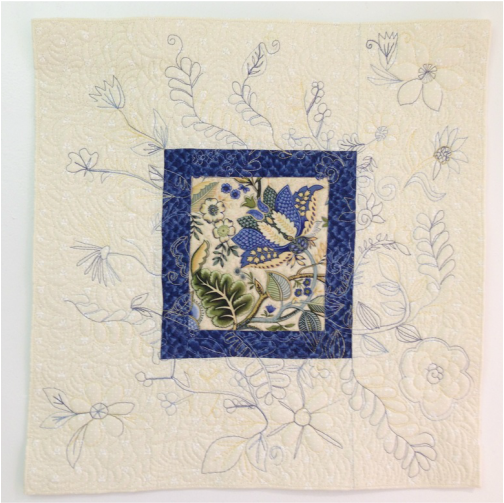 Have a great Tuesday everyone, I hope that this tutorial is helpful!🐣
Hi everyone, I woke up to snow on the ground this morning ... is spring going to make its appearance? I sure hope so and soon! I have been so busy lately with renovations on our house, custom quilting and teaching that I feel I have neglected my blog. I promise to get back at it and soon! Saturday I taught a free motion class at Hummingbird Sewing in Barrie Ontario to 5 very nice ladies and we discovered that that my tear drop and echoes design can make butterflies. I love teaching because there is always someone who discovers a new design and expands on the ones I demo. The learning with quilting is endless and so is the creativity, by the end of the class some of these students were free motion quilting actual scenes! Below is a picture of the ladies from my class. 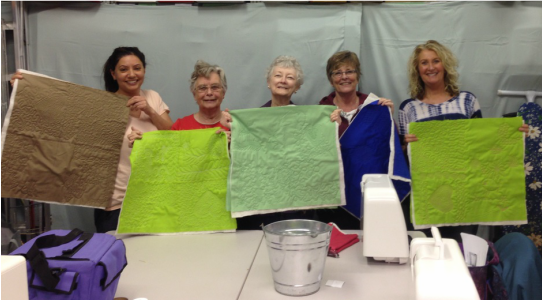 They were all working on practise squares only and they were a lovely enthusiastic bunch! Below is a picture of what I mean about my tear drop free motion design being made into a butterfly, 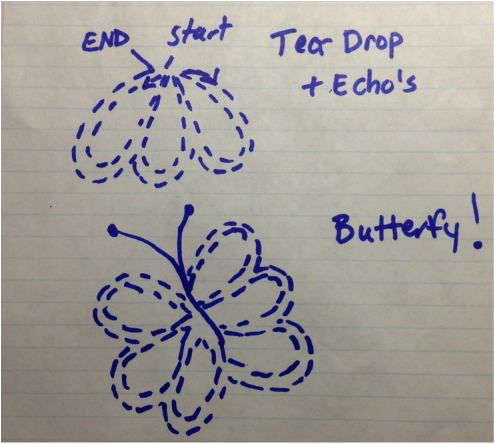 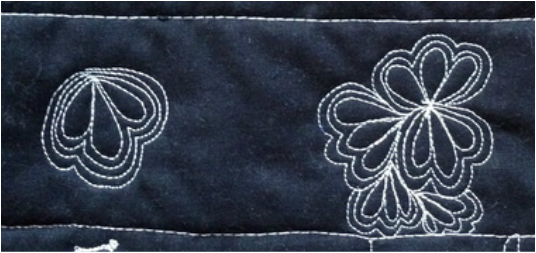 Tear Drop and Echos design stitched out and used as a fill design Happy Monday, I hope you have a great week!🐥

Block #11 - "Susan"
Hi everyone, this weeks block is shown above, lots of pieces but easy peasy!
I know I keep repeating myself but for new reader of this blog - this is from the book "The New Hexagon" Check it out below at Amazon.ca
If you don't know how to English Paper Piece and want to try many other modern projects I highly recommend the book below "All Points Patchwork", I have it, it has many, many template shapes in it and numerous fantastic projects and ..... its very affordable even with our crazy Canadian $ right now
Check out the first ever blog post about this Hexagon Quilt Along HERE to see what it's all about
Happy Wednesday everyone and I hope everyone with kids (or grandkids, grand doggies etc) is having a great March break! A Great Free Motion Practise Project- "Radiating Blossoms", It's Tool and Technique Tuesday!3/15/2016  Make this "Radiating Blossoms" quilt to practise your free motion quilting! Quite a few people lately at the Waterloo County Quilters Guild have been taking classes in free motion quilting. I have also been teaching classes on this subject in Barrie. The reason I want to talk about this project is in the hopes that it will give people an idea of what to do to practise their free motion quilting skills. In my opinion practise is vital to improving your free motion skills. If you take piano lessons you have to practise to get better and the same is true of free motion quilting! This little project is kind of the reverse of a quilt, the background is on the outside of the feature fabric to give you space to quilt and the feature fabric is the inspiration to get you thinking creatively. You will want to radiate the design out onto the border and spill it onto the background fabric. It is recommended that you choose a fabric with defined edges and one that you love. Don't be afraid to cut into it! Some other suggestions for feature fabrics:  Practise Leaves, feathers, ferns, curly tendrils etc with the above fabric 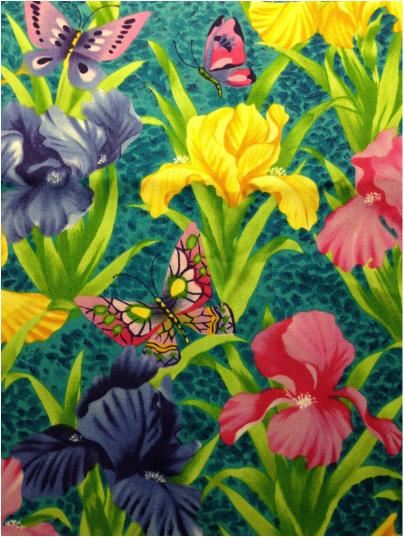 Practise fill stitches, circles, elongated leaves, foliage, butterflies, curly tendrils etc with this 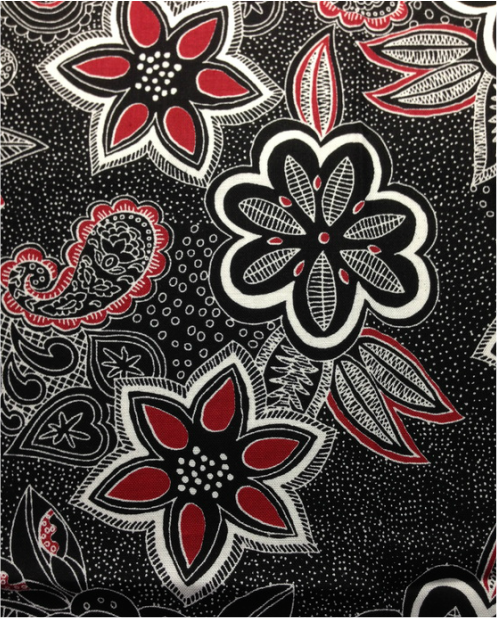 Practise leaves with fills, paisley designs circles and more with this I have given you only a few suggestions, there is so much gorgeous fabric out there, I encourage you to look at your stash, you will probably have some perfect fabric. What you will need to do this project: 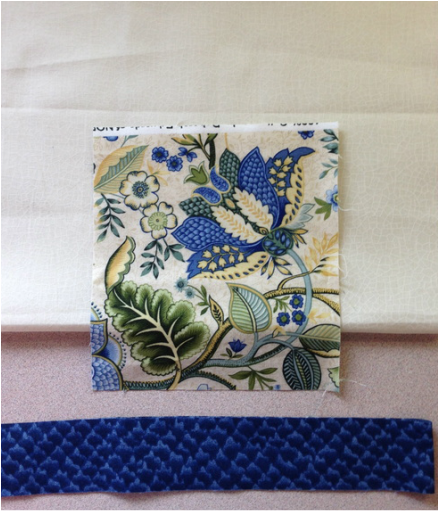 Background fabric (you decide on the size), feature fabric ( mine is 5.5 x 5" and a border strip ( mine is 1.5"). You will also need batting and backing fabric (the size of your top when pieced together) You will also need: 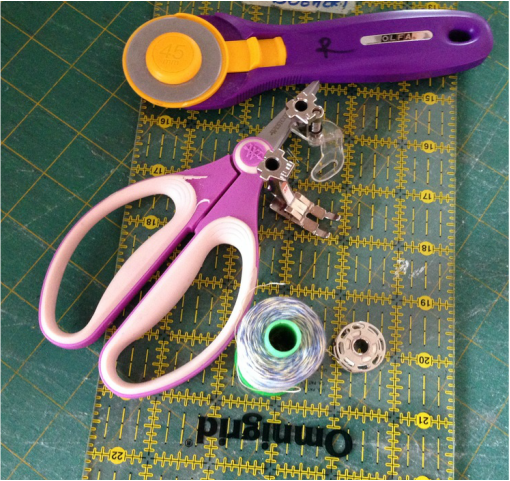 A rotary cutter, scissors, free motion foot, 1/4" foot, cutting mat, ruler, decorative thread ( I used variegated blue and yellow) and bobbin thread to match your backing fabric How to make this project: 1) Cut out all of your fabric 2) Piece your border strip to your feature fabric 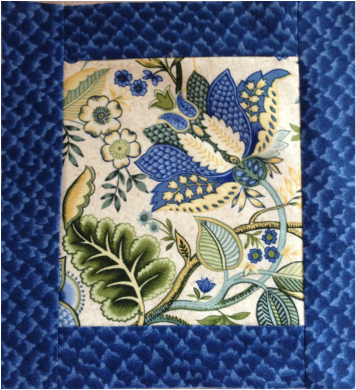 3) Add your background 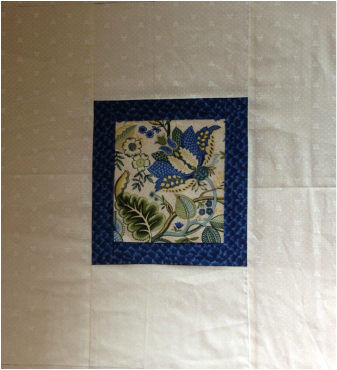 4) Sandwich your quilt with your backing and batting ( I used 505 Quilt Basting Spray) 5) Quilt around the motifs in the centre first and fill in the background spaces if you like, use a meander (stipple stitch) or stacked bananas (your choice of fill) 6) Look at your centre fabric and decide where you can extend a design, i.e. a leaf, stem, flower, feather etc and extend these out onto the border and into your background. Use a disappearing ink pen if it helps you to draw it out first. 7) Leave room for fill stitches, they provide a place for your eye to rest and see the flowers or leaves etc. you have free motion quilted. 8) Use a thread that you can see to make your feature motifs- i.e. flowers or leaves in a brighter colour and use a thread that matches the background for fill stitches. 8) Remember to bring up your threads from the bobbin to avoid nesting and cut threads when you stop on the back 9) Breath! and stop! when feel the design/motif looks the way you want it to, cut threads and move to another area 10) Fill in the background areas with a fill stitch at the end Refer to the pictures below to see what I mean. 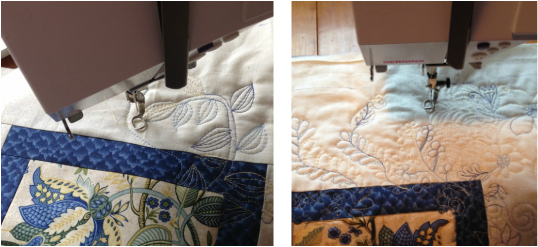  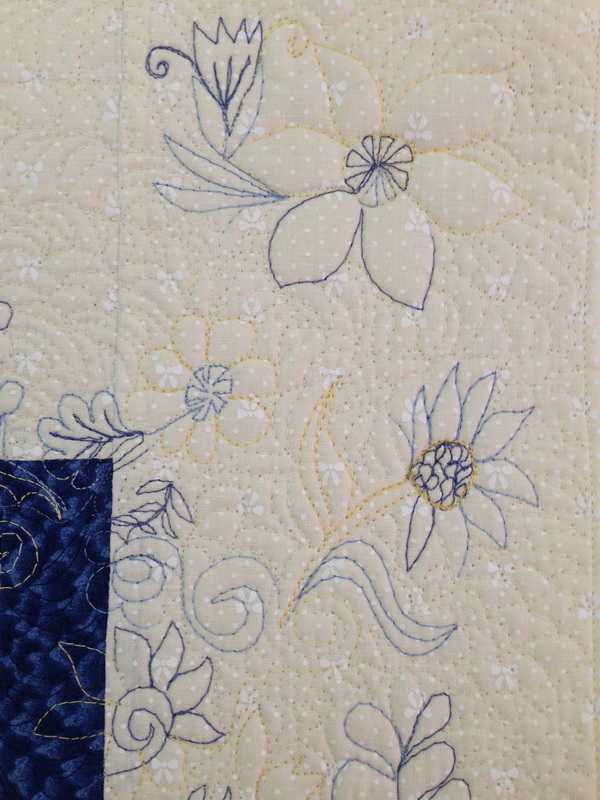 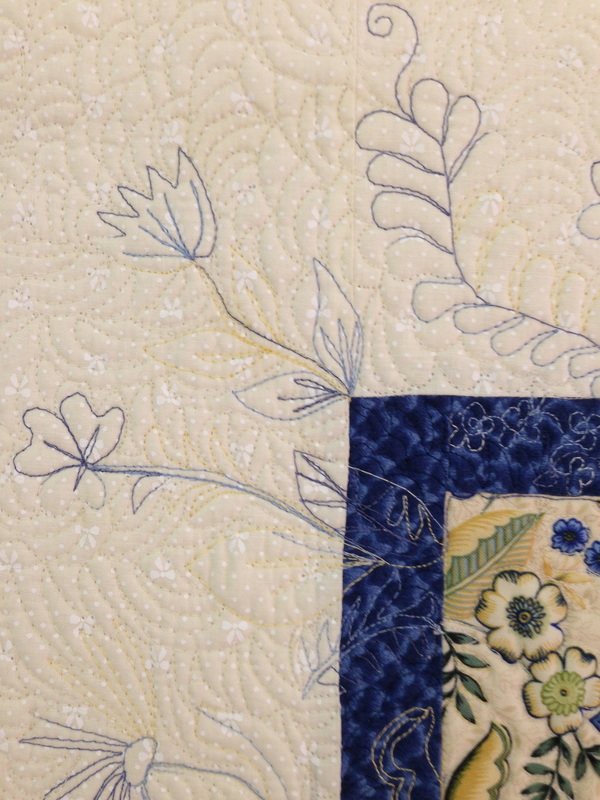 See the designs go onto the border and into the background 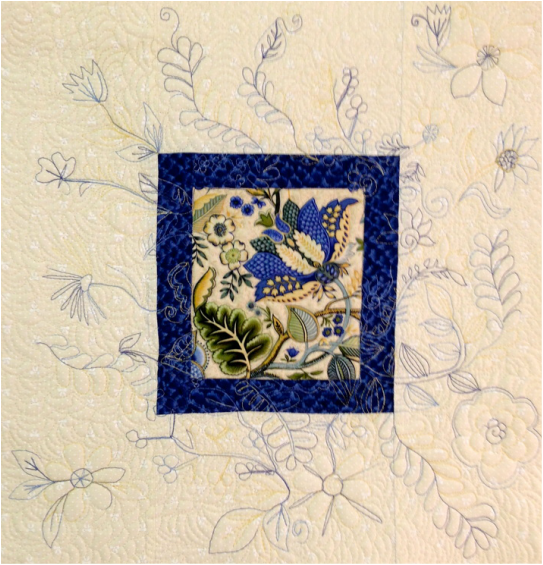 Admire your efforts and keep on practising! You could make many potholders, cushion covers, wall hangings, tote bags etc with these practise pieces.
Happy Tuesday! I hope I have inspired you today! 😊 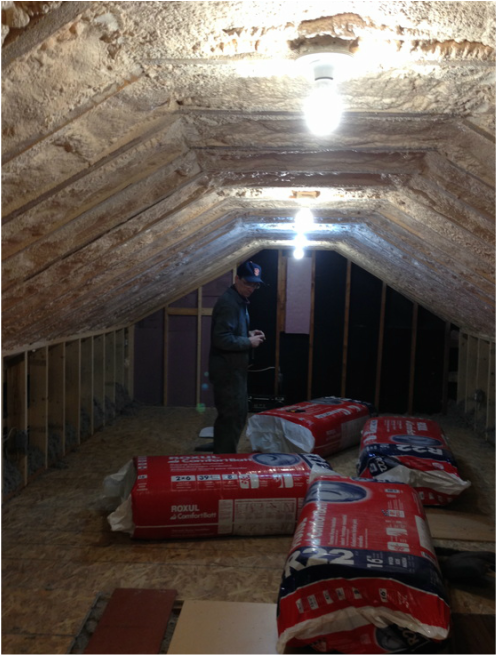 Where my husband is standing is where the end of my long arm machine will be I know this does not look anywhere near finished but this is my loft sewing studio. My husband has worked over the past winter months to replace all the knee walls, collar ties, level everything and install subfloor. Last week we had insulation guys in to blow in foam for the ceiling and cellulose under the eves and this weekend both my husband and I added Roxall insulation to the knee walls. We are almost ready for drywall. Yes, I am seeing a light at the end of the tunnel! 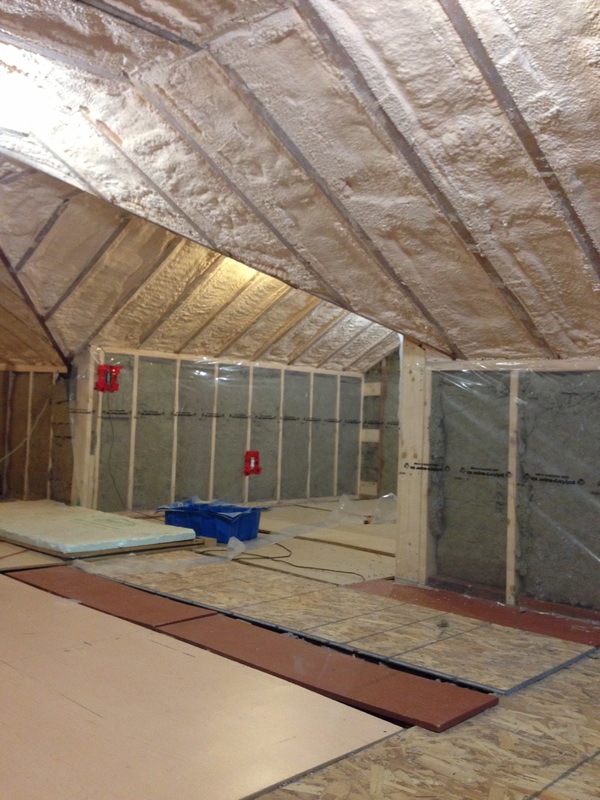 A view towards my domestic sewing area The next part of this renovation is a little tricky because we have to re-orient the stairs on the main level to make them more user friendly and to code to get up to my loft. I am positive our main level will be a disaster for a while.
See the insulation on the knee walls, thats my work, who knew a quilter could insulate..... but it is batting after all! It's going to be a toasty space in winter and cool in summer and there will be 3 windows eventually. So that's the before and I cannot wait to show you the after pictures because that will mean I have moved in! Happy Monday Everyone! 😊 |
Follow Me:
Welcome!Hi I'm Robin and I am a professional long arm quilter, pattern designer and teacher. I am passionate about all things quilty!  
  Categories
All

Sponsors
This blog contains affiliate links. This means that we endorse products.
We do receive rewards for these endorsements and this helps to keep this site alive and well. We support products which we believe are the best quality and to inspire your creativity! |
 RSS Feed