|
Today if the last day of the tutorial all about recovering a lampshade with Mont Marte fabric paints at www.quiltsocial.com. I'll be discussing how I outlined each of the designs on the lampshade with free motion stitching. The free motion stitching really makes the floral designs come to life. Check out the post and be sure to comment below & let me know what you think and/or leave me any questions you may have. Tomorrow, I am embellishing the easiest tote ever at QUILTsocial as well so check back often to see what I am up to with these amazing fabric paints. 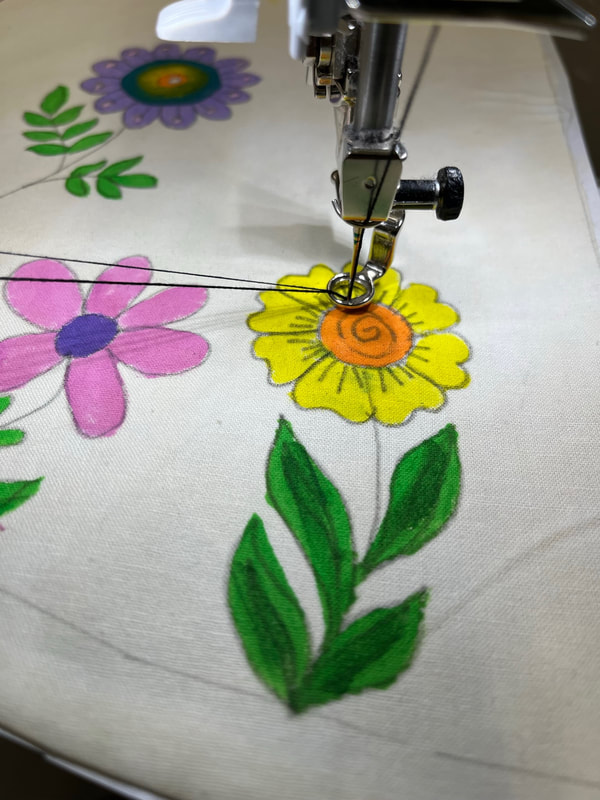 Starting the free motion stitching process 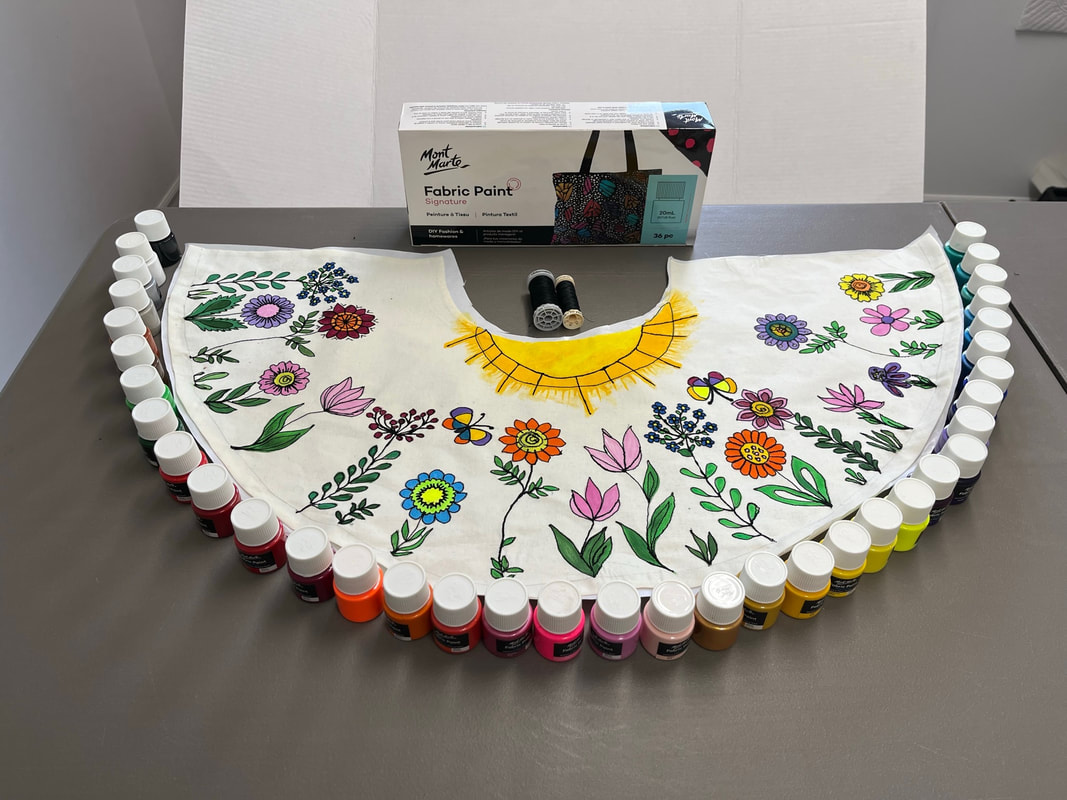 The outlines free motion stitches in black (Gütermann Thread) , really show off the designs & fabric paint Happy Wednesday!
0 Comments
Happy Tuesday, Do you have an old lampshade that screaming "recover me"? If so head on over to www.quiltsocial.com to look at my blog post Getting creative with Mont Marte fabric paints & a lampshade- Part 2. This is a creative look at how to recover a lampshade and it could be very customizable with any design or theme your creative mind can think of. It was so much fun to paint with these paints, they are bold, non bleeding, gorgeous colours and oh so easy to work with on fabric. Check this post out and don't forget to leave me a comment below the post. Have a great day! 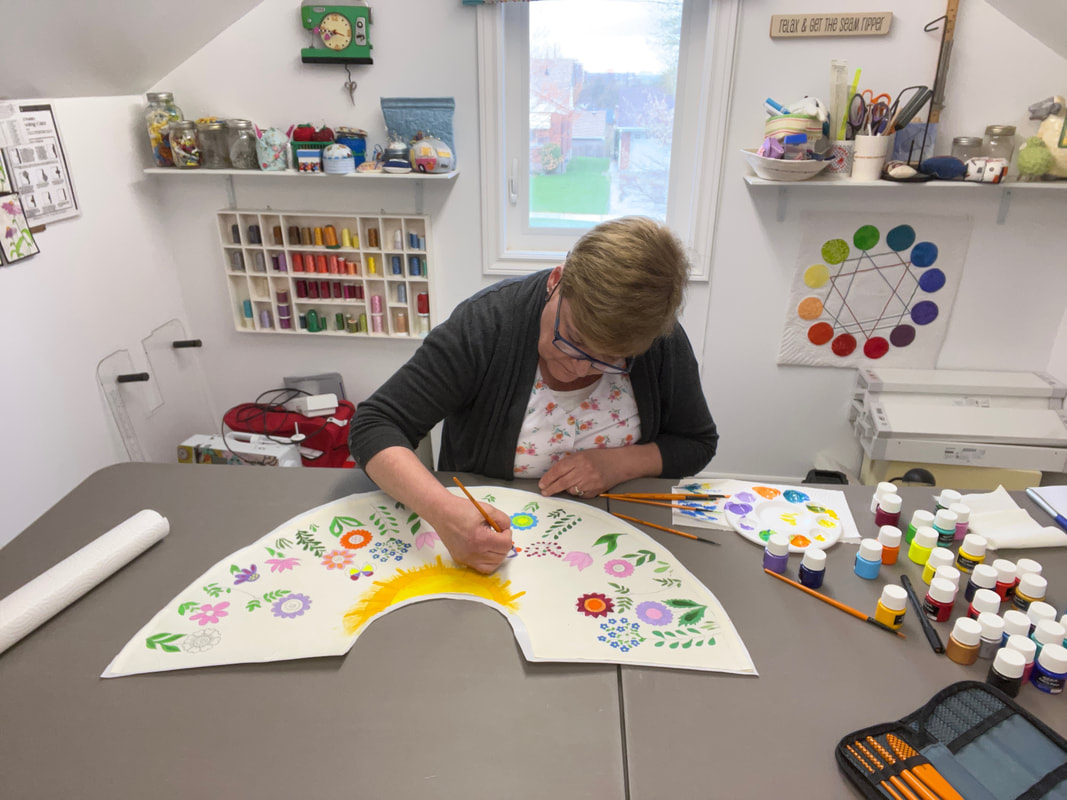 Painting the lampshade fabric with Monte Marte Fabric Paints This week at QUILTsocial , I am explaining how I used Mont Marte Fabric Paint and art supplies to recover a lampshade. The title is of the blog post is: Recovering a lampshade with Mont Mart art supplies- Part 1, Part 2 & 3 will take place on Tuesday and Wednesday. It is a technique I have never used before but the paint is really awesome and the recovering process worked! There is also a video tutorial showing you how to recover a lampshade with fabric included in this post. Be sure to watch so you can Reduce, Reuse Recycle. The post is here at www.quiltsocial.com 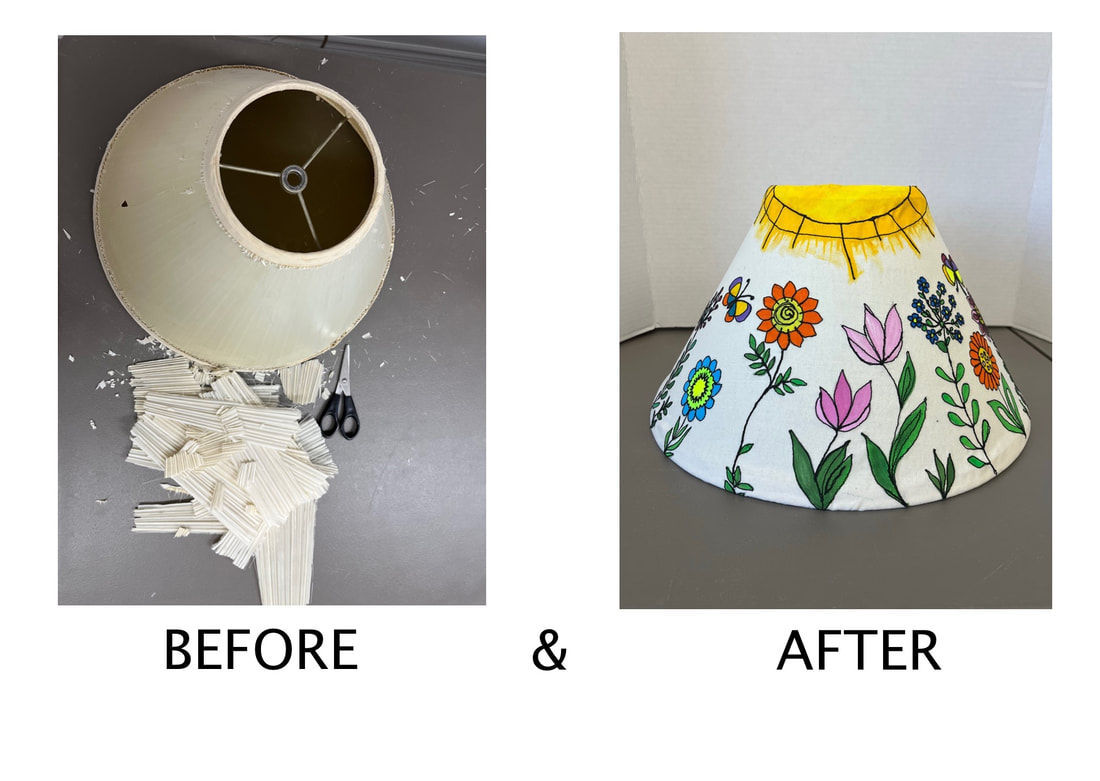 Happy Monday, Enjoy the blog post and I encourage you to comment or ask any questions you may have. 😊🌷
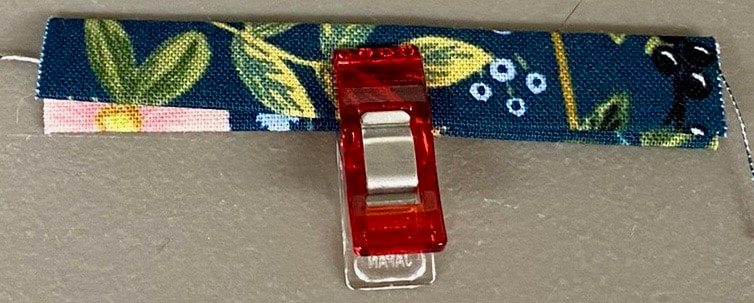
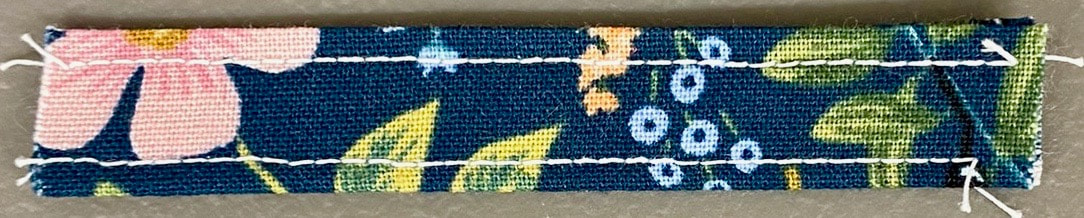
Today is all about fun & sewing with your sewing machine & finishing up the Valentines Ear Bud Pouch. The prep work is behind us! I’m using my Bernina 350 sewing machine, the #37- ¼” foot & the #4 zipper foot. Check out yesterday’s post below if you missed the cutting instructions. 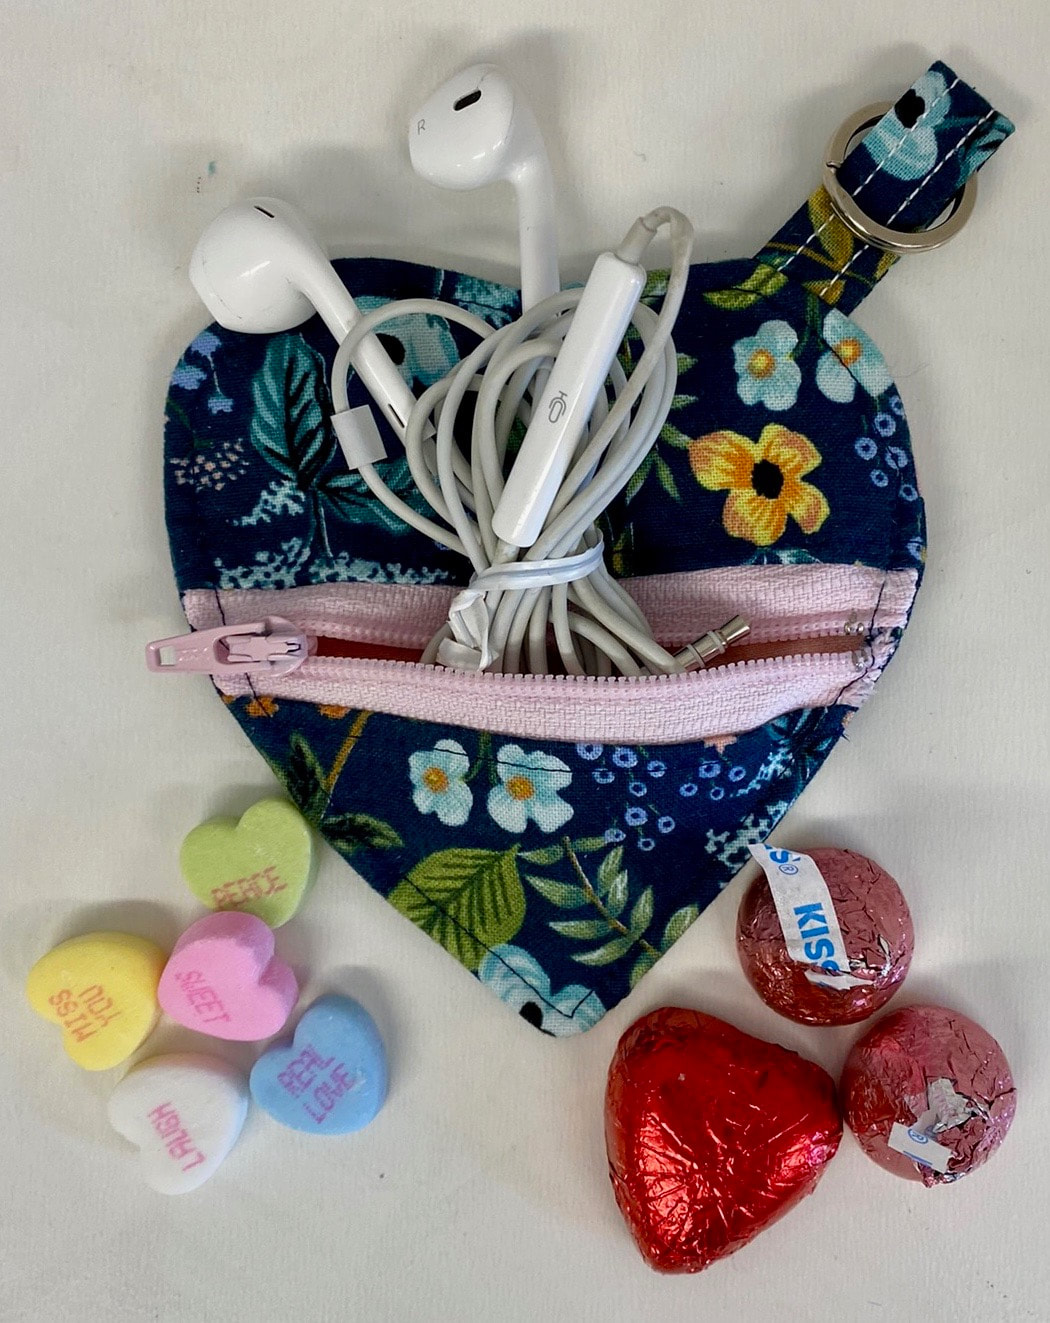 Sewing

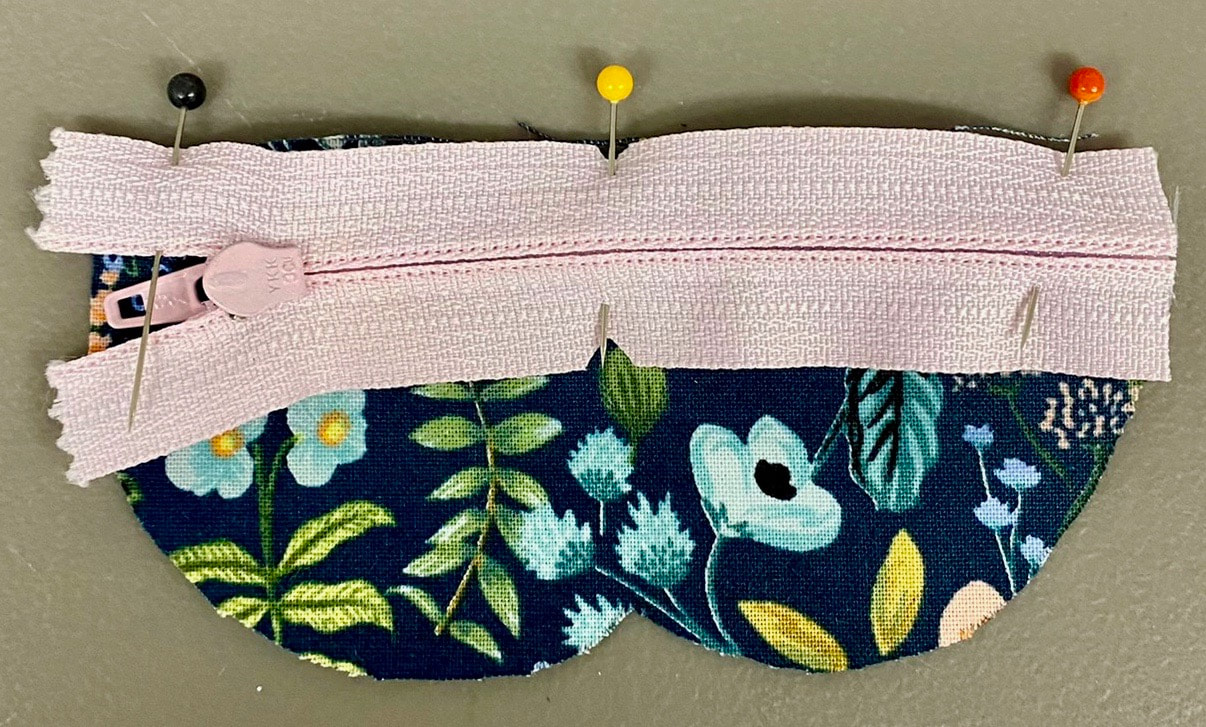
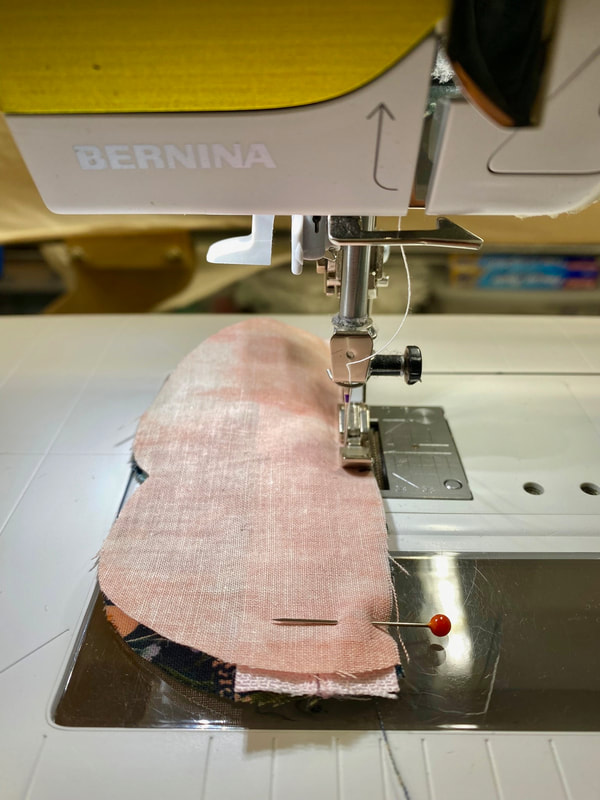 Tip: Remove pins, engage needle down function & move the zipper open as you go, this helps to allow for a straight line of sewing.
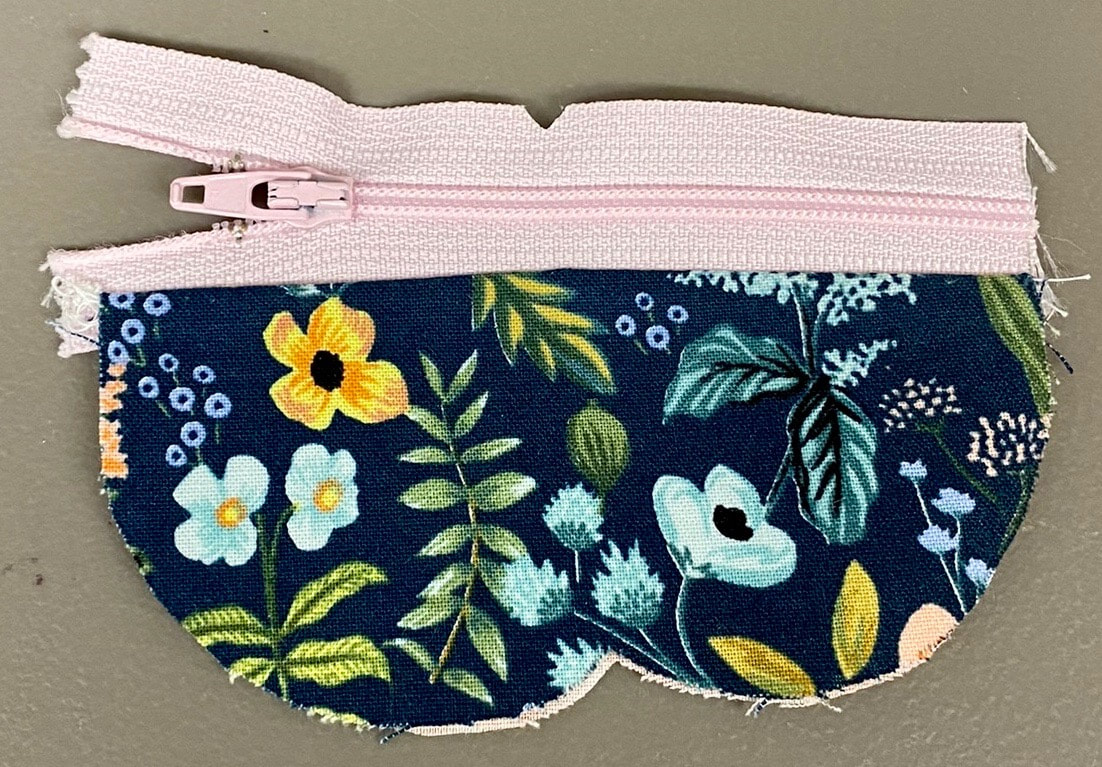
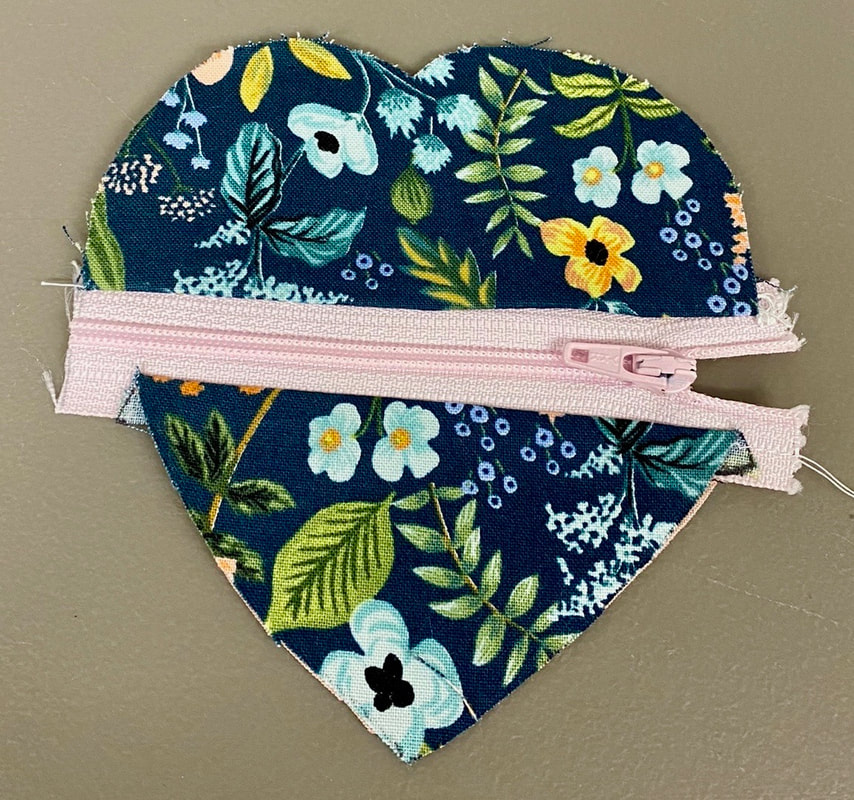

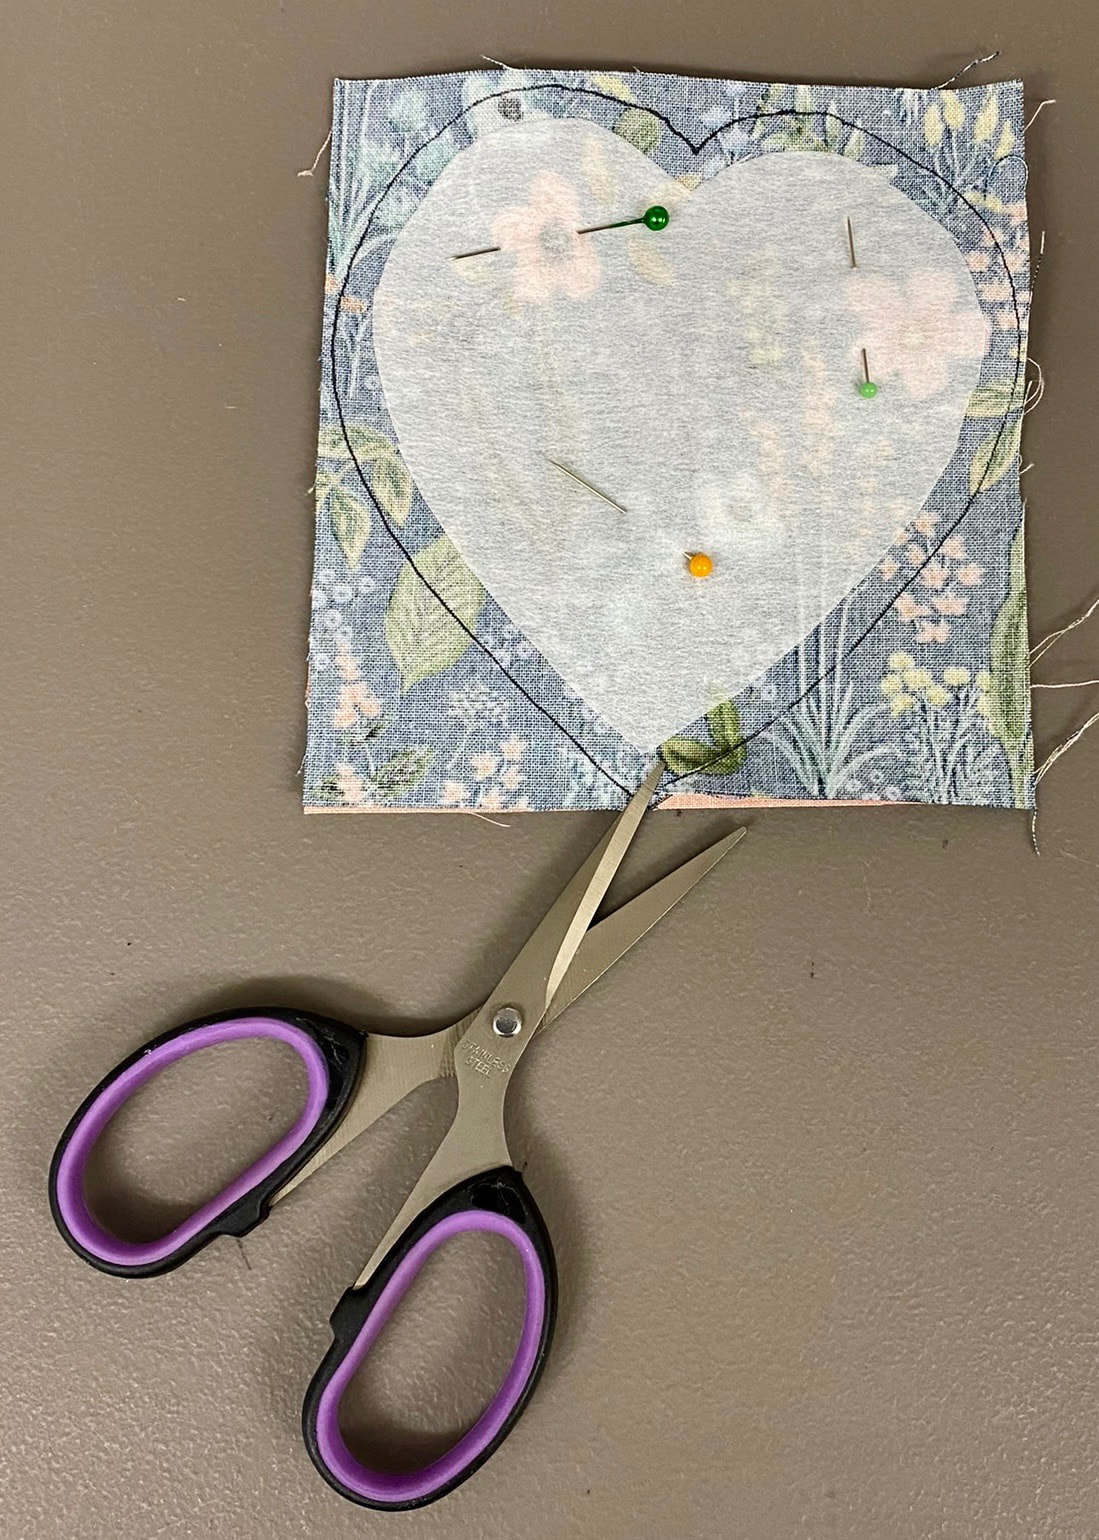
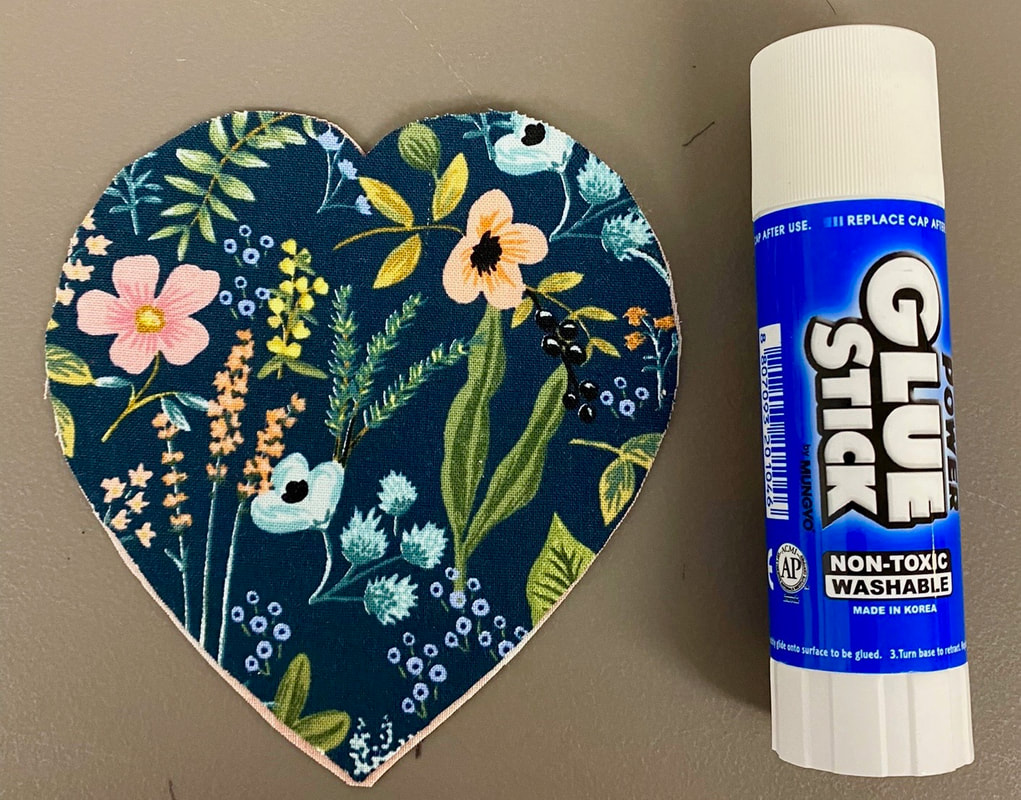
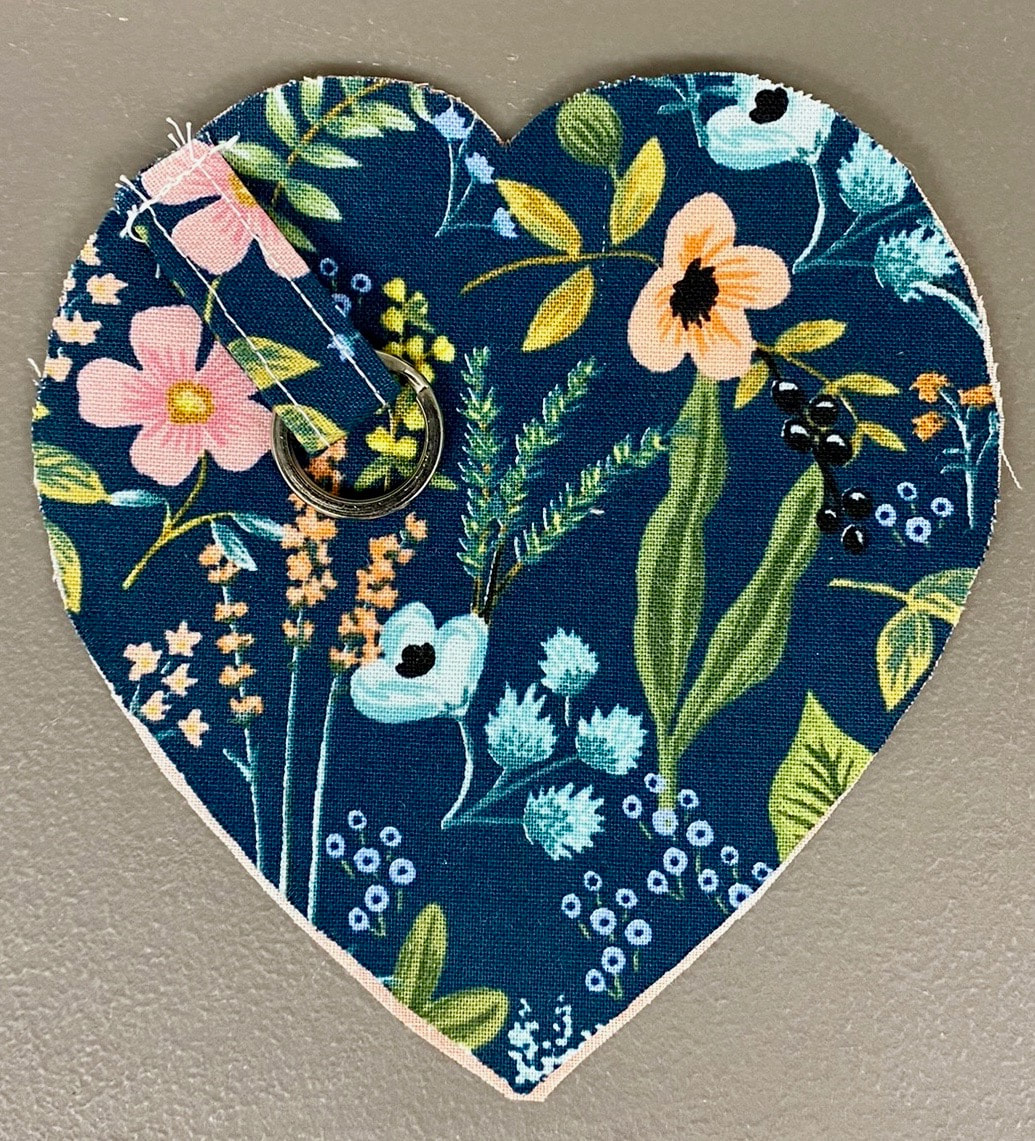

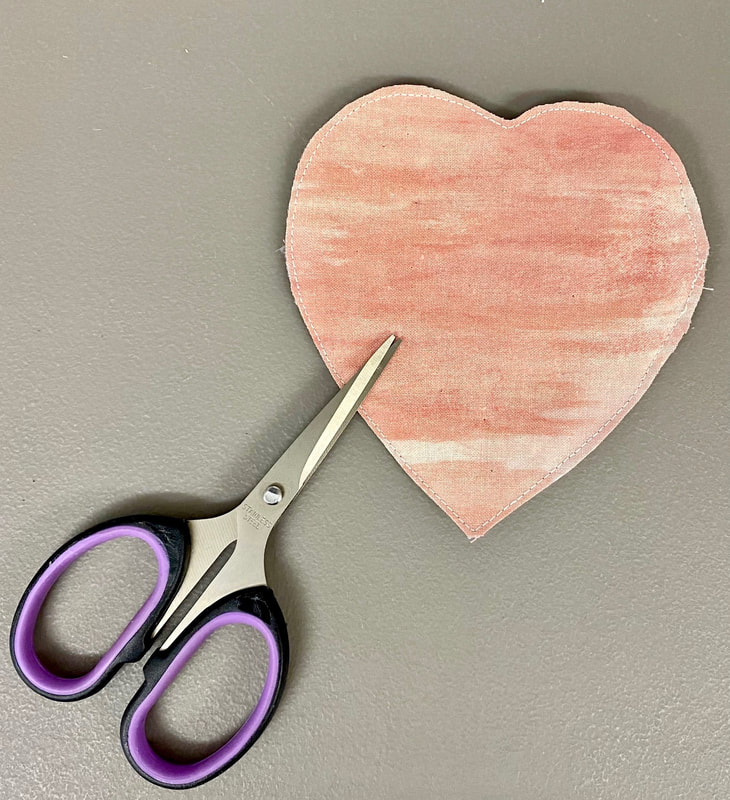
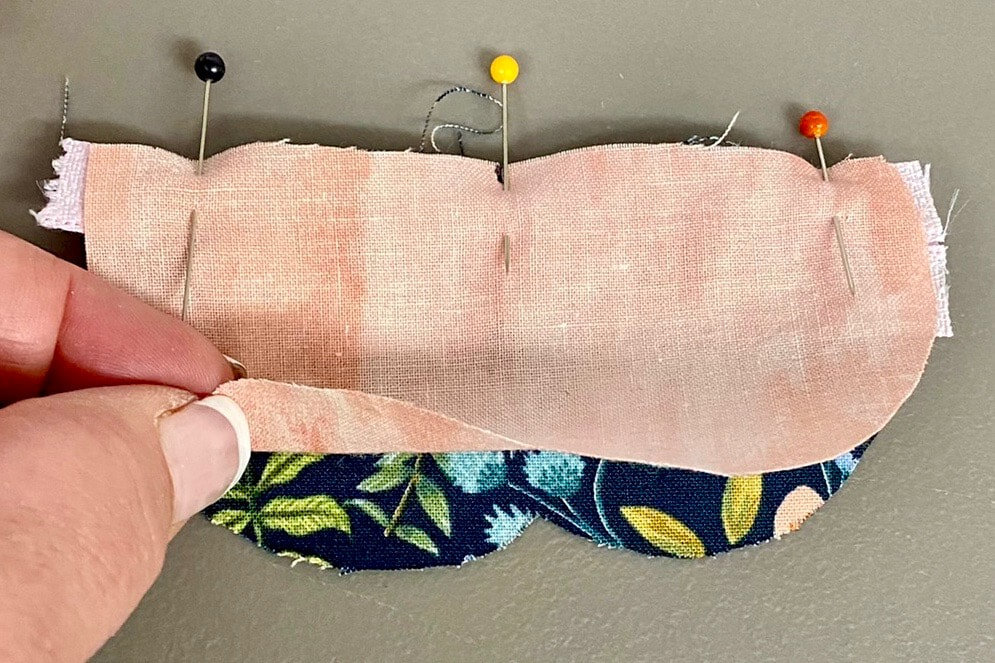
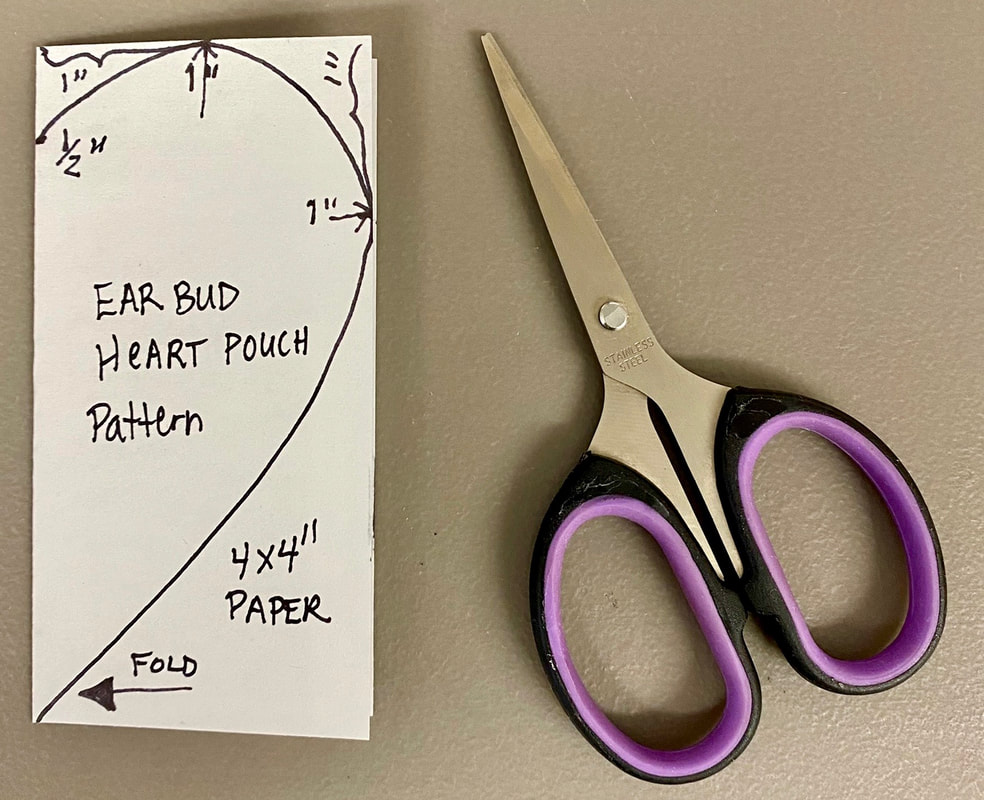
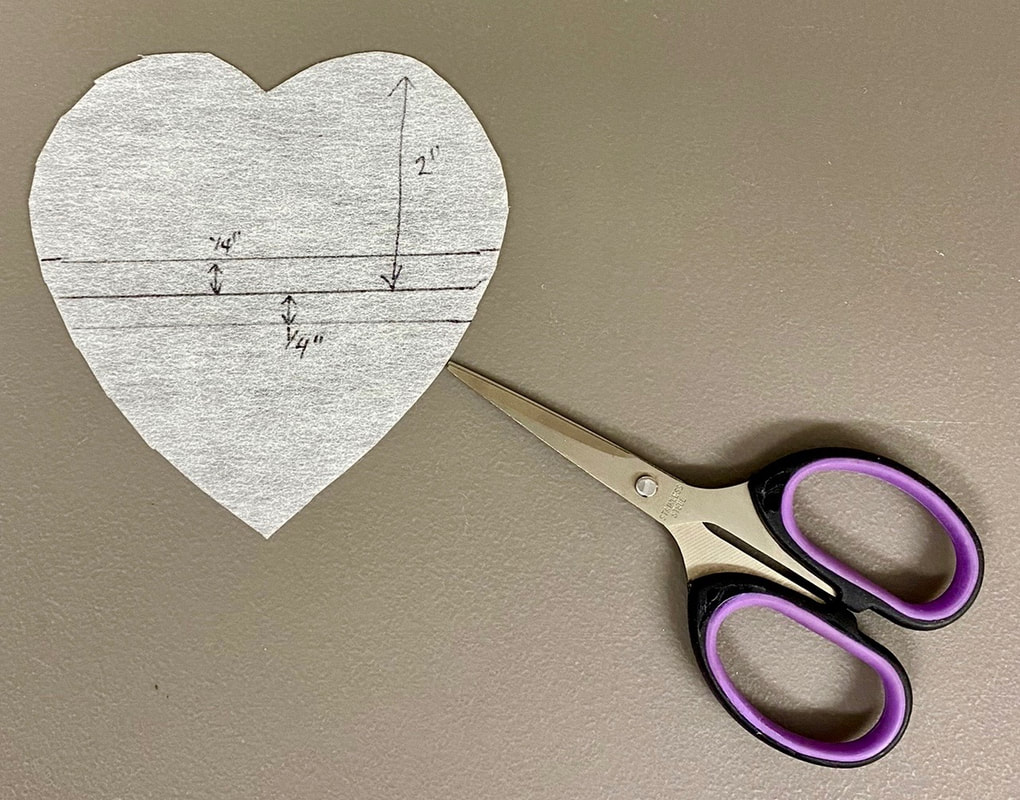
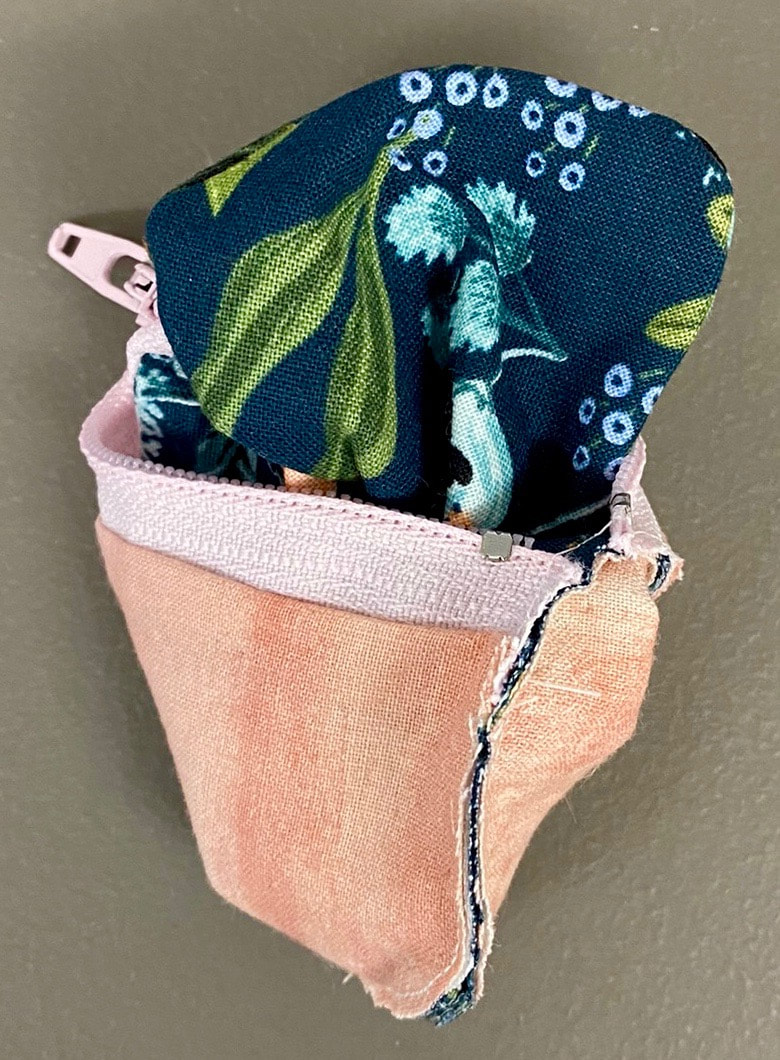 You're almost there! 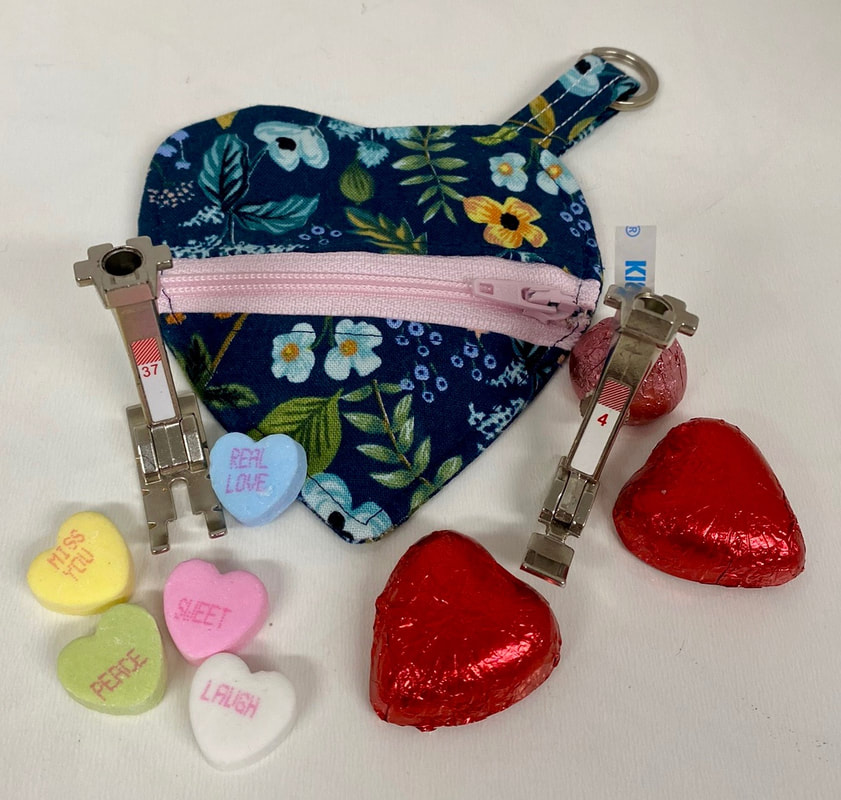 Your Valentines Ear Bud Pouch project is complete. Think about your fabric stash & what colours you have to make a Valentines gift for someone special. 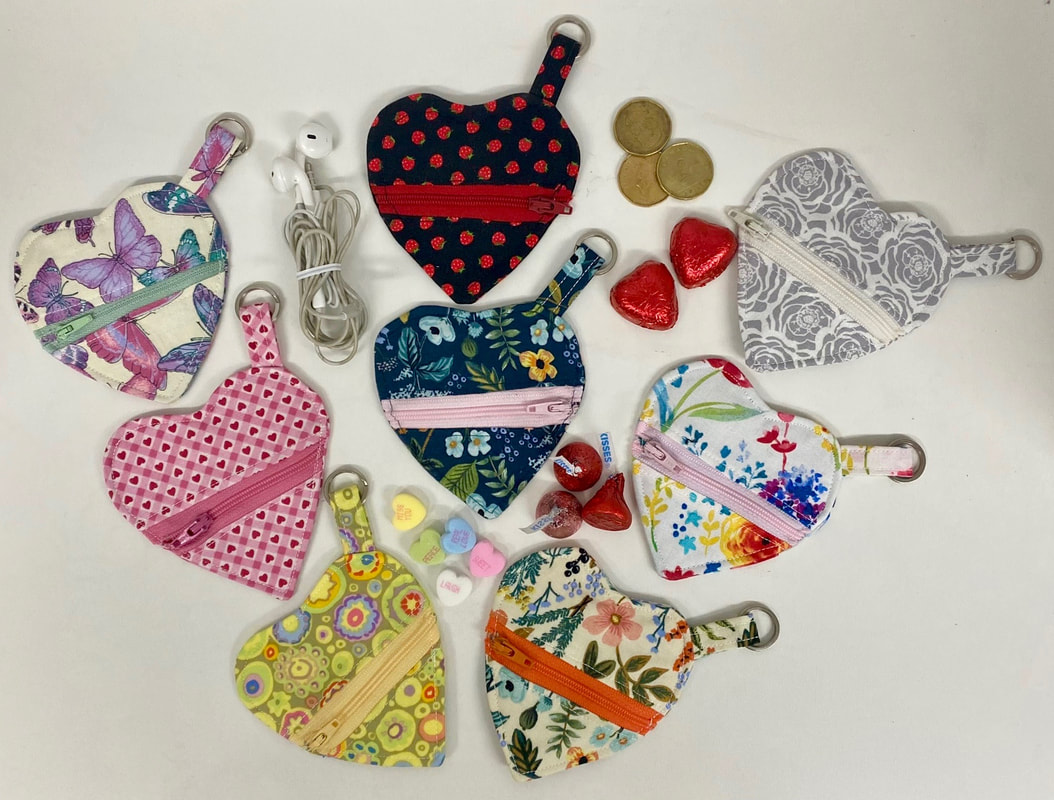 A ¼” foot, zipper foot & a Bernina sewing machine is all you need to make someone’s day. A little chocolate would'nt hurt either!❤️ Wishing you a Happy Valentines Day, I hope someone is sweet to you! Do you need a small Valentines Day gift suitable for young & young at heart? You can create one of these heart shaped mini pouches, they’re fast, easy & so useful. These pouches are fantastic for the storage of ear buds (earplugs), jewellery, lip balm, coins &/or pop some chocolates in it for treats on the go. I used my Bernina 350 sewing machine & found myself addicted to making these! Note: This is part 1 of a 2 part series of blog posts. Make sure you visit again tomorrow for part 2. 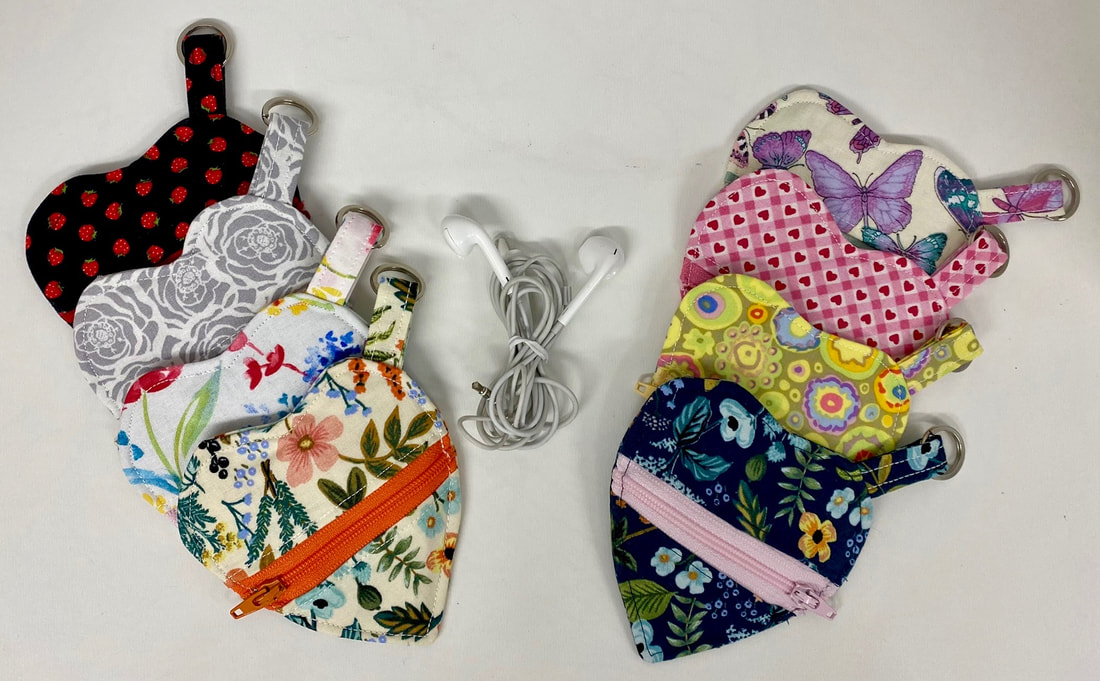 Make many for young & young at heart! For today’s post we will be making the dark green one as shown. ooh that chocolate! What Will Be Needed
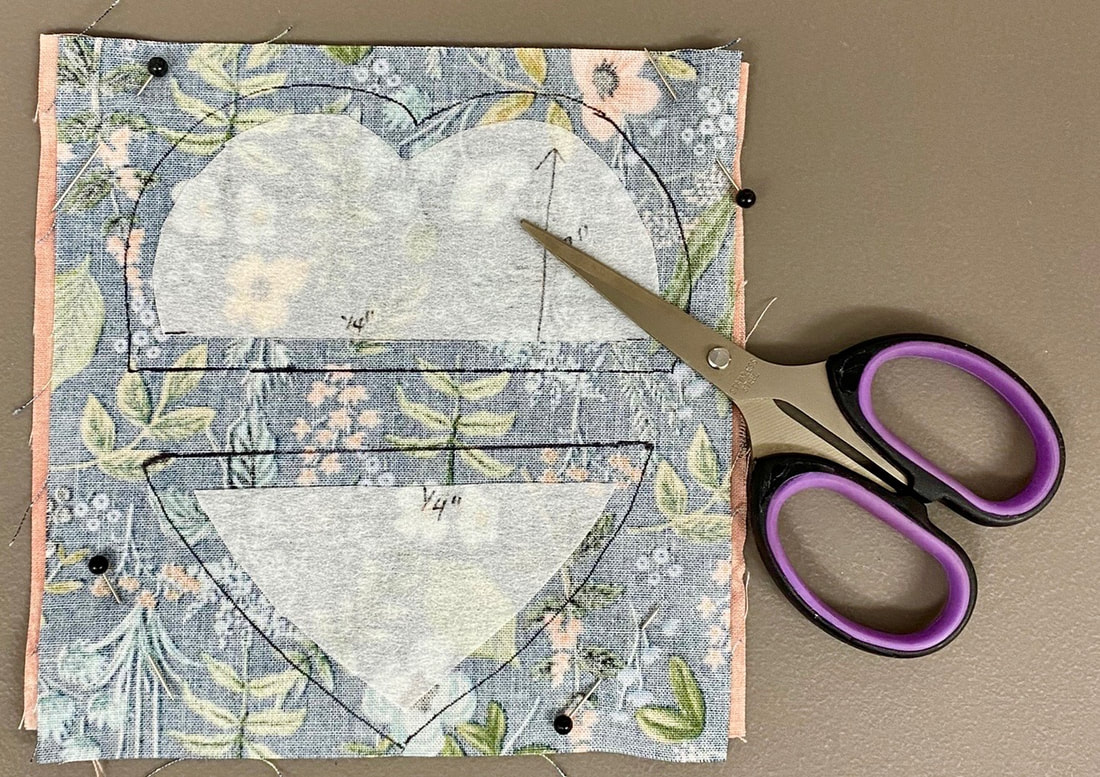
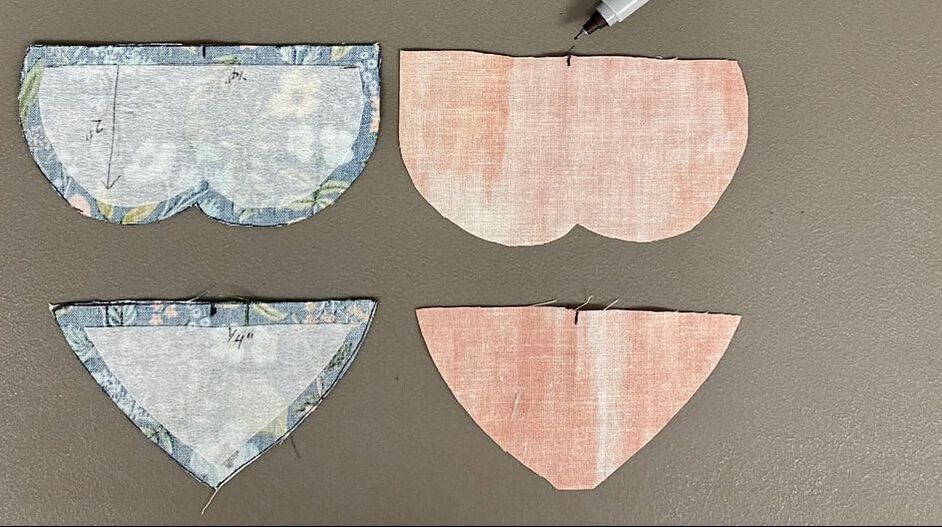
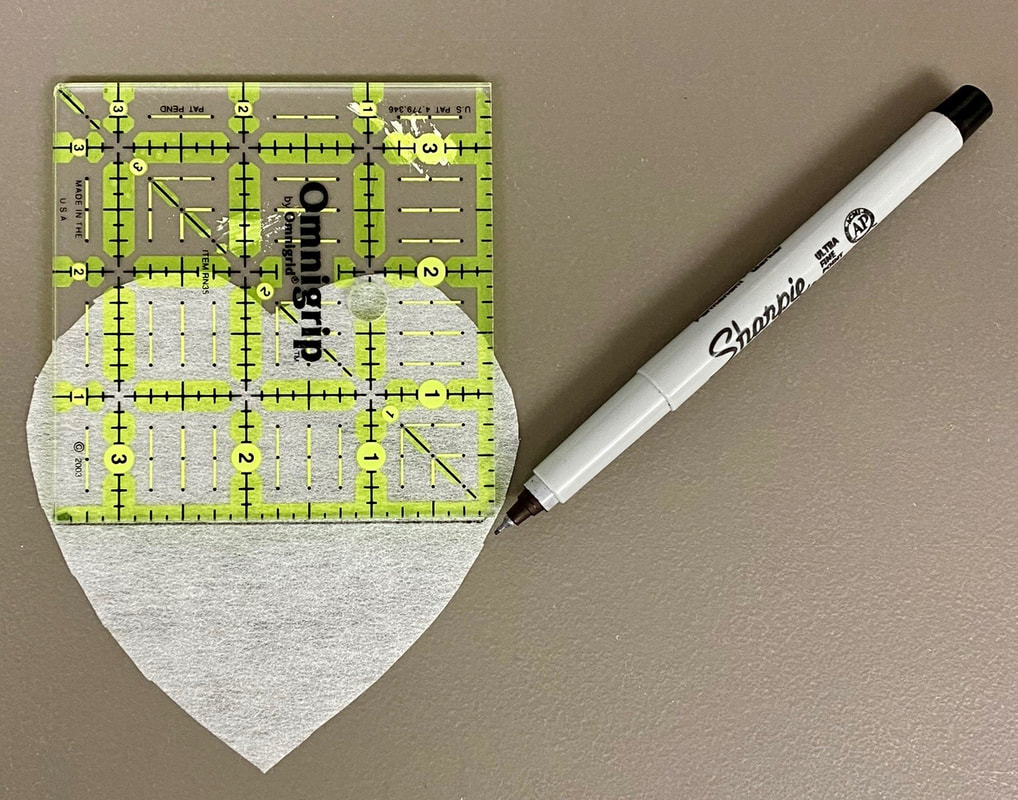
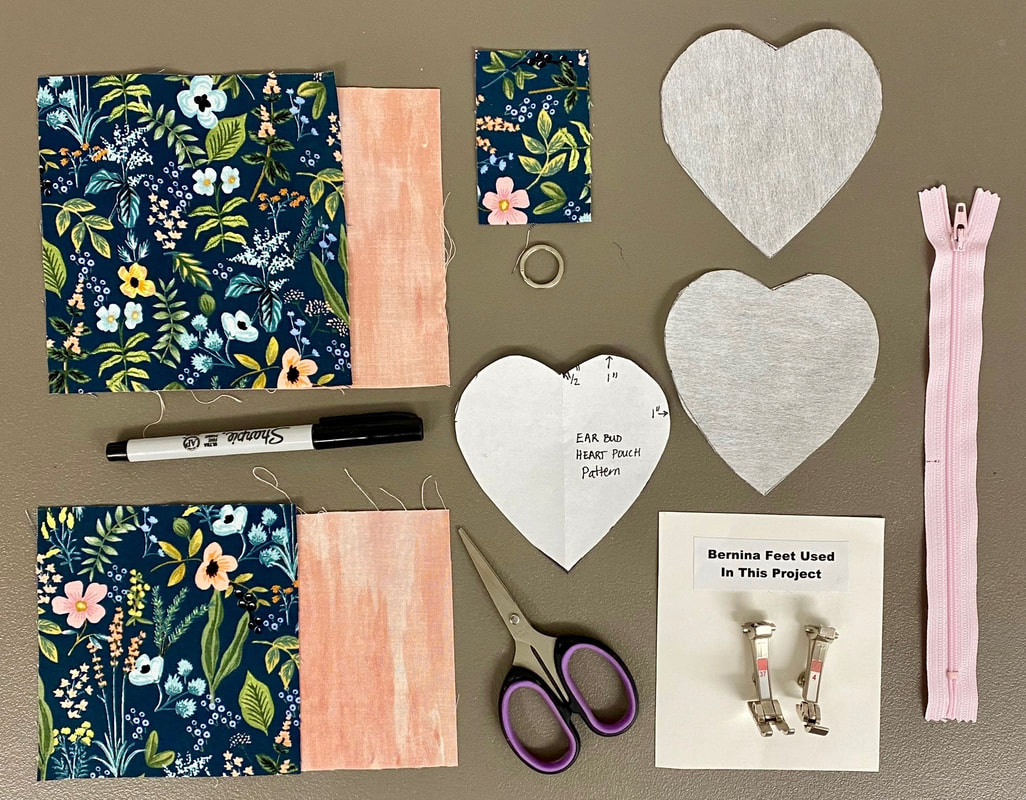 Supplies Needed Cutting
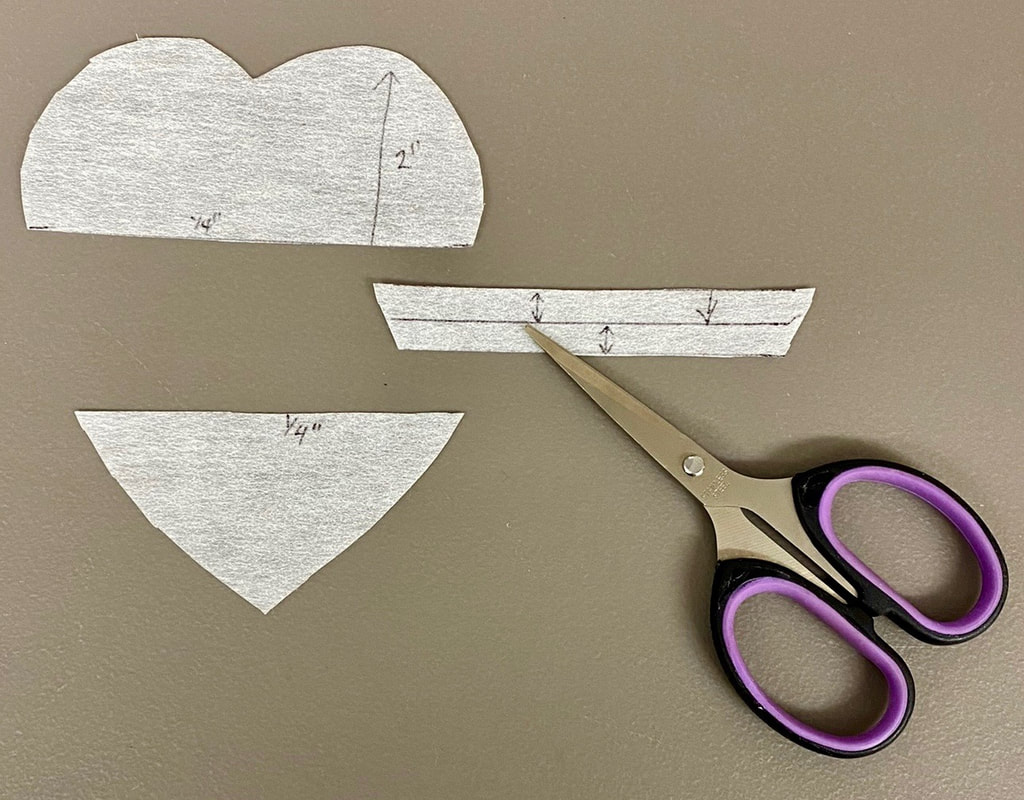 Dicarding the cut out interfacing  Cutting complete, prepped & ready for sewing. Getting excited! My cutting is complete! I’m ready & excited for tomorrows post when we get to the sewing with a #37- ¼” foot, #4 zipper foot & my Bernina 350 sewing machine. Hope you can set aside time to visit tomorrow.❤️ Hi yah, finally have this tutorial uploaded to you tube. A great project to ease into 2022 and so easy! Note book covers. Also works for MOLESKINS. We all need pretty & practical right? Have a look at my video, a great gift for all ages, men, women & children. Anybody working on Christmas gifts for 2022? Lol no pressure! 😋 Have a great day, enjoy, like & subscribe. Hi everyone, I hope you all are enjoying this gorgeous day today in Southern Ontario or wherever you are. I'm just announcing the posting of a new YouTube video tutorial entitled Easy Zipper Pulls. I also discuss in the video some of my upcoming Back to School Projects for www.quiltsocial.com. See the YouTube Video below and look me up on YouTube to see all my videos here. Don't forget to subscribe to my channel by clicking on the Sew Happy Quilt in the lower right hand side of all of my videos. Happy Wednesday!😊 Happy Wednesday ! Hope you are feeling great and staying hydrated this summer. Just letting you know my newest YouTube video is out along with a new pattern to encourage and assist with staying hydrated….. DIY Water Bottle Totes, my newest pattern was created because I cannot stand holding onto a perspiring water bottle while walking or on the go and needed this “ hands free” tote . The video is shown below and the pattern is available here . Enjoy and stay well and hydrated !💦🚰💧 Woo Hoo!! I'm excited to announce I dusted off my video/tech fears (they were growing dust elephants!) and I started a YouTube Channel with the assistance of my daughter Mallory. I have been asked many times over the last 12 months to provide video classes. I'm starting out in JK (not literally, but you get it) with YouTube video tutorials and working on classes! Hang in there for all those who have been asking. I'm hoping for the wait to be over soon. That being said there is a lot of work that goes into the videos/ demos so please add your comments (good or bad) and subscribe so I know you are interested and it's worth your time! The video below explains what I have happening for May and each month I will announce what is going on for video tutorials. Sometimes there will be free pattern downloads as well. My you tube channel is Quilting In The Loft. The first video comes out May 3 and the second May 17th. Have a look, I'll look forward to your comments and ANY suggestions you might have. Have a great weekend! Yes it's true you can make your own textiles with Sulky Ultra Solvy and the tiniest of fabric scraps you've been hanging on to! Check it out today at QUILTsocial.com with a free tutorial to show you how to do this.  Have a great weekend and I hope you have enjoyed my tutorials and discussions about Sulky Stabilizers this week at QUILTsocial.com.
|
Follow Me:
Welcome!Hi I'm Robin and I am a professional long arm quilter, pattern designer and teacher. I am passionate about all things quilty!  

Categories
All

Sponsors
This blog contains affiliate links. This means that we endorse products.
We do receive rewards for these endorsements and this helps to keep this site alive and well. We support products which we believe are the best quality and to inspire your creativity! |

 RSS Feed
