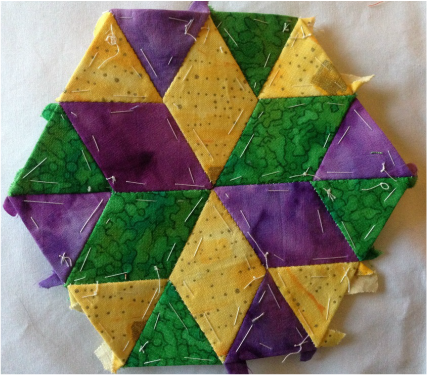
 #26 Linda Check out the book that allows us to make these blocks here  All four blocks for June are shown below: 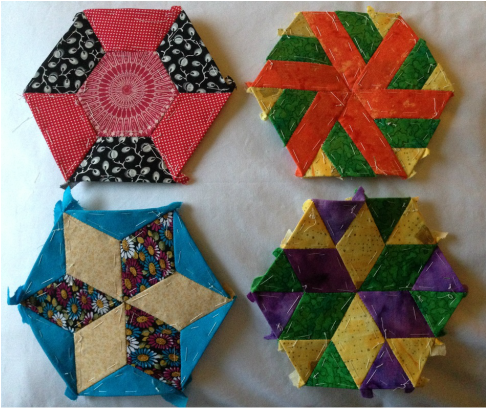 Only 26 more blocks to go, we have already completed 26! Whew!
Half of the year is complete, not that we want to wish our life away but 26 hand sewn EPP blocks is an accomplishment! Congratulations to all participants and keep up the great work!! Have a great Wednesday everyone!🍁
0 Comments
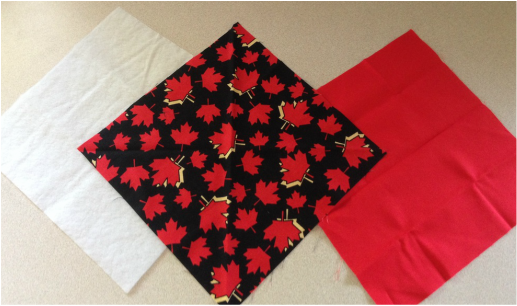 What can we make from the fabric above? A Canada Day Candy Dish! 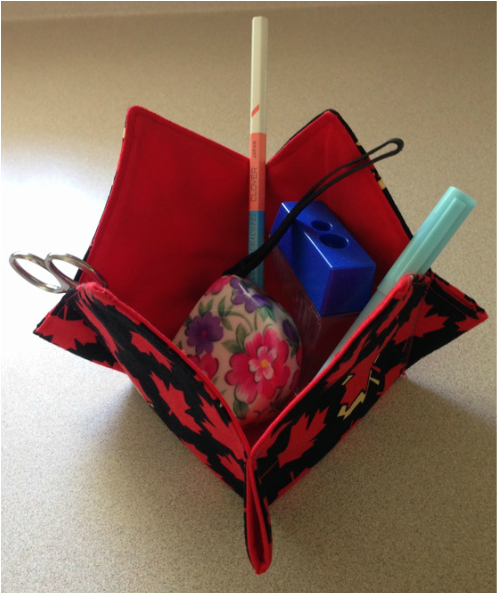 I'm showing it filled with gadgets but you could use it as a Candy Dish filled with "red" candies as well! You will need: 2 complimentary 9" squares of fabric 1-9' square of thermore or fusible fleece Thread to match How to make it: 1) Place both pieces of fabric right sides together on top of the fleece 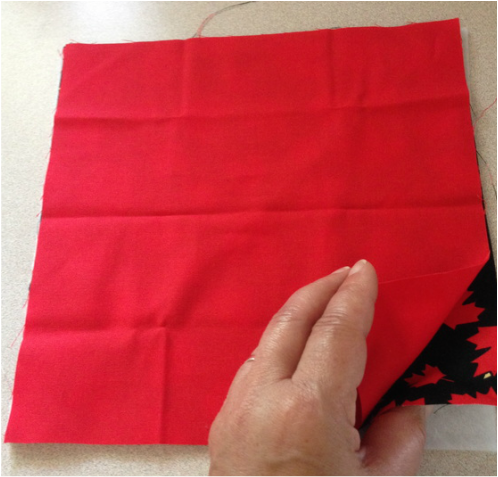 2) Pin if needed and sew all the way around leaving a 3" gap for turning. 3) Sew 1/4" around perimeter 4) Turn to the right side 5) Top stitch 1/8" from edge around the perimeter to & gap seam. 6) Lay fabric right side up in front of you, measure 2 3/4" from each corner of your fabric and place a chalk pencil mark at 2 3/4" away from each corner. 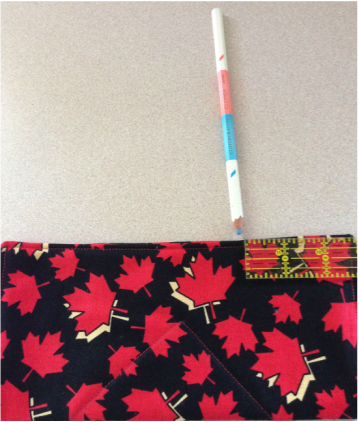 7) Fold the square wrong sides together matching the two marked spots on each side. Draw a line on the right side of the fabric from the matched & marked points to the corner of the sewn square in the centre. Sew on this line using a back tack stitch at the beginning and the end of this seam. This will create the side wall flaps that stick out. 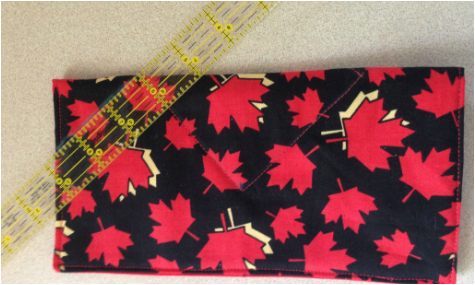 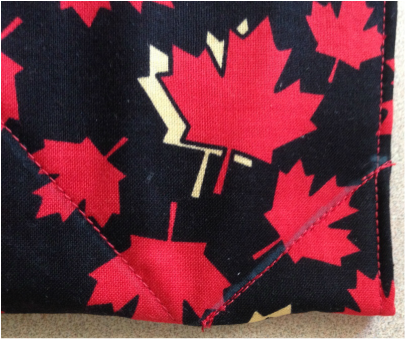 8) Repeat step 7- 3 times until your "Canada Day Candy Dish" looks like the picture below: 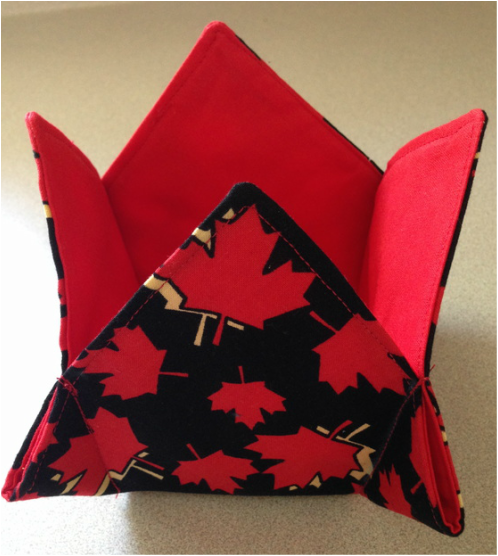 Fill 'er up! Happy Tuesday🍁
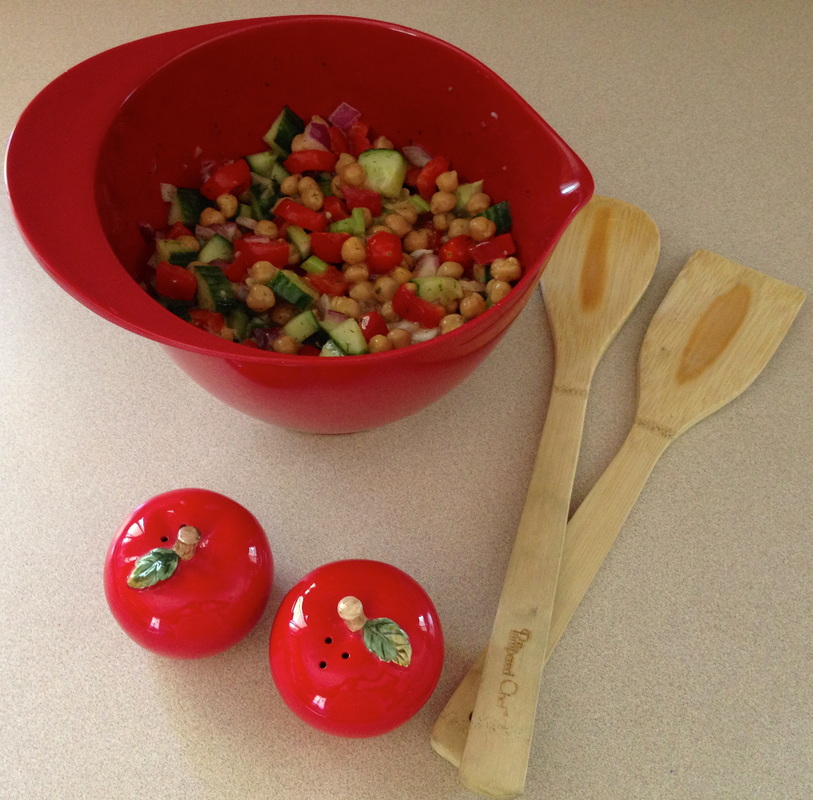 Fresh Chickpea and Veggie Salad, Healthy and Fresh! BBQ and family gathering season is in full swing! I love chickpeas and have adopted them as a great protein source. I love to add them to a lettuce salad and even better make them without lettuce in this recipe. This is also a great recipe to make the day before a potluck or BBQ and let it marinate overnight. What you will need: Serves 4-6 (you can double this recipe if you like) 540ml can or 2 cups of chickpeas (approximately) 1/2 of an cucumber, chopped 1/2 of a red pepper, chopped a handful of cherry tomatoes, chopped a stock of celery, chopped 1/4 cup of red onion chopped 1 tsp of dried dill (or seasoning of your choice) 1/2 tsp of salt and 1/2 tsp pepper 1 tsp of lemon juice 3/4 cup of Italian salad dressing (store bought or homemade) How to make it: Chop all veggies, drain and rinse your chickpeas. Combine veggies, chickpeas, seasoning and salad dressing and marinate overnight in the refrigerator. Stir it up a couple of times. Gluten free, dairy free and tasty! Bring it to your BBQ, potluck or in a container for a healthy and satisfying at work lunch. Fresh, crunchy and delicious! 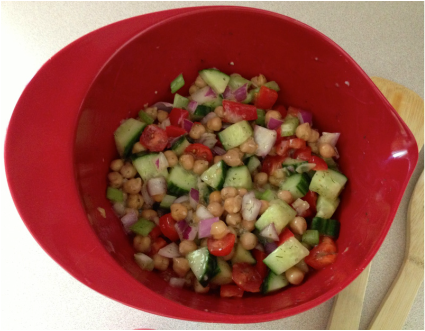 I hope you are enjoying a wonderful Sunday!🍁
 Need a project or decor? Check out this Canadiana Pattern Here or look in the shop section of this website!
Happy Friday Everyone! 🍁 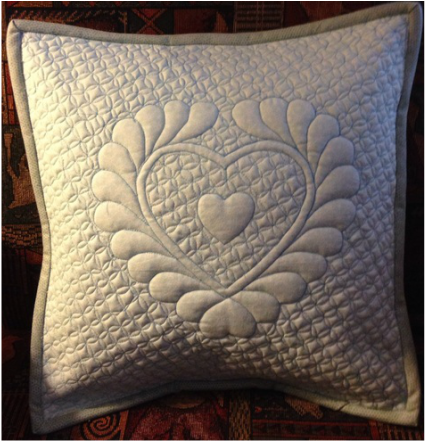 Pillow completed by Nicole This past Saturday, I taught a free motion quilting class at Hummingbird Sewing in Barrie and yesterday one of my students sent this picture of her "practise" of the free motion quilting. I believe "Natural Talent" is the phrase that comes to mind.
Nicole used a continuous machine quilting template for the centre and June Tailor Grid Marker to quilt the background. Doesn't the pattern in the background make the heart stand out? It's fantastic! I have talked about this grid marker before in this blog and it is wonderful. You can make 60 degree diamonds and 40 degree square patterns and the seed stitch along with lines in all directions without moving the template and no measuring. Congratulations Nicole on practising as recommended in the class and mastering what you have learned. Also, thanks so much for sharing your work! Have a great Thursday everyone.🍁 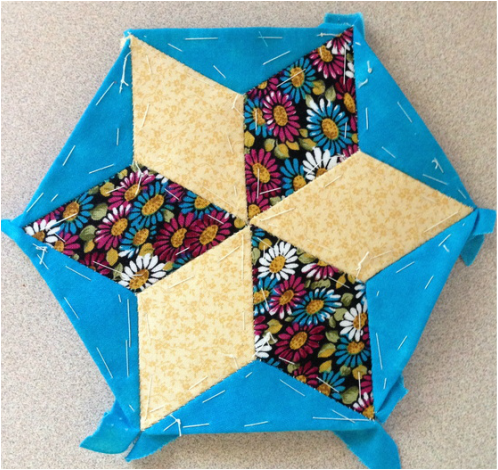 Block #25 Marjorie I just could not stay away from the blue, I love the turquoise flowers in the diamonds and just had to add the accent triangles! If you wish to find out more about our quilt along, check it out here or to look at/ purchase the book, click "The New Hexagon" below. 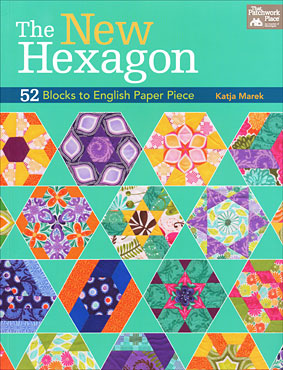 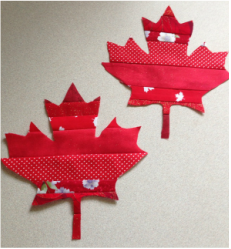 Canada Day is coming up fast and furious on July 1, 2016 and I will be vacationing at that time in a few Eastern Provinces. I cannot think of a better way to celebrate than by travelling and seeing other parts of our beautiful country. I made the placemats below to use at home and to pay homage to this special holiday. Canada Day has always been significant to me, not only from a historic perspective but also because my Wedding Anniversary is June 28th and many moons ago.... my husband and I celebrated Canada Day on our honeymoon. So it holds nostalgia and positive memories for me! I'm sharing with you a tutorial for some Canada Day placemats below 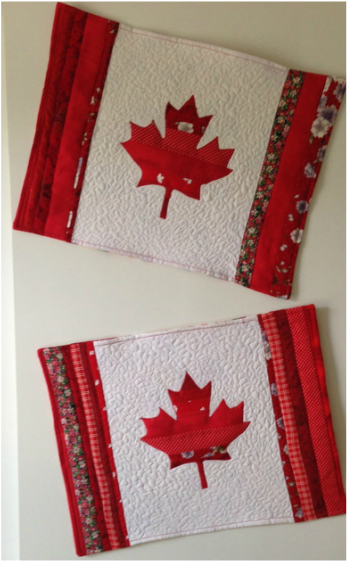 Strata constucted Canada Day Place Mats -Finished Size 14 x18" What you will need for 2 placemats: Strips of fabric to make a "strata" of red" fabric about 26 x 15" of fabric 2 -White fabric 11 x 14" 2-Backing fabric 14 x 18" 2-Batting 14 x 18" White thread to quilt around maple leaf Red thread for piecing and appliqué Fusible Web Parchment Paper Freezer Paper A sharpie permanent marker A "purple thang" or turning tool Pattern for Maple Leaf- Download it for free here How to make the placemats: 1. Sew together various strips of red/burgundy fabric in various widths ( 1", 1 3/4", 2", 1.25" etc ) they should all be at least 15" in length. Sew until you have approximately 26 x 15", use scraps for this with various patterns. 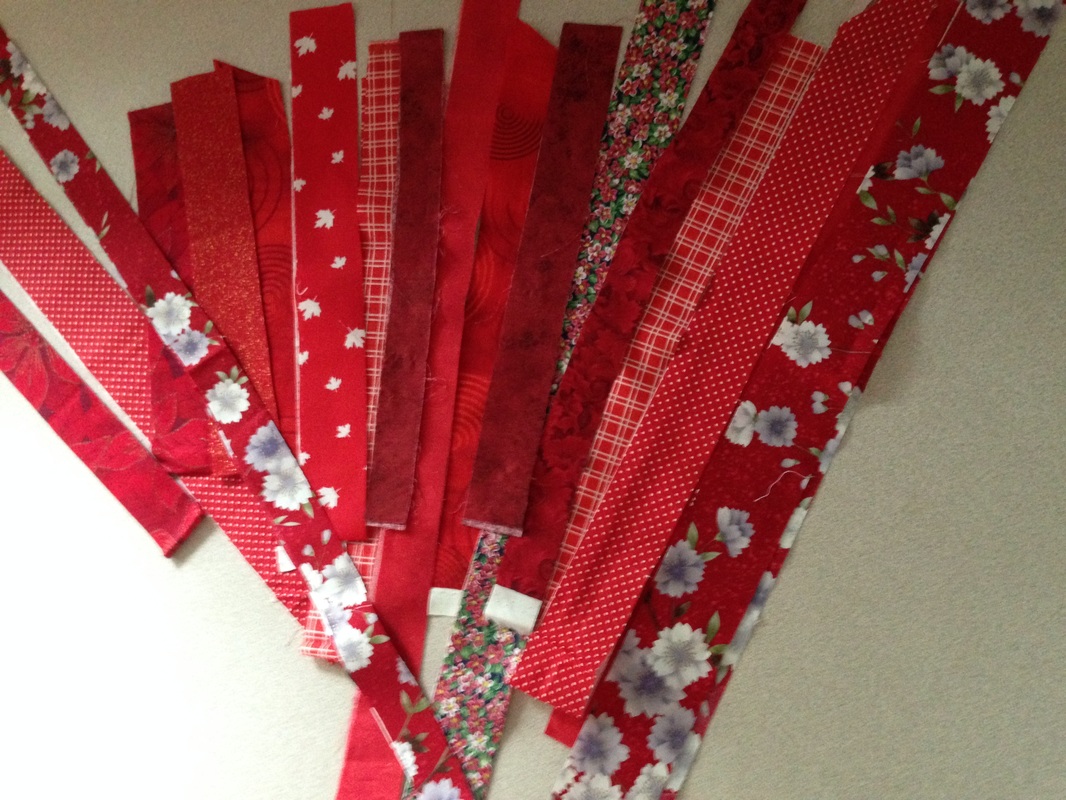 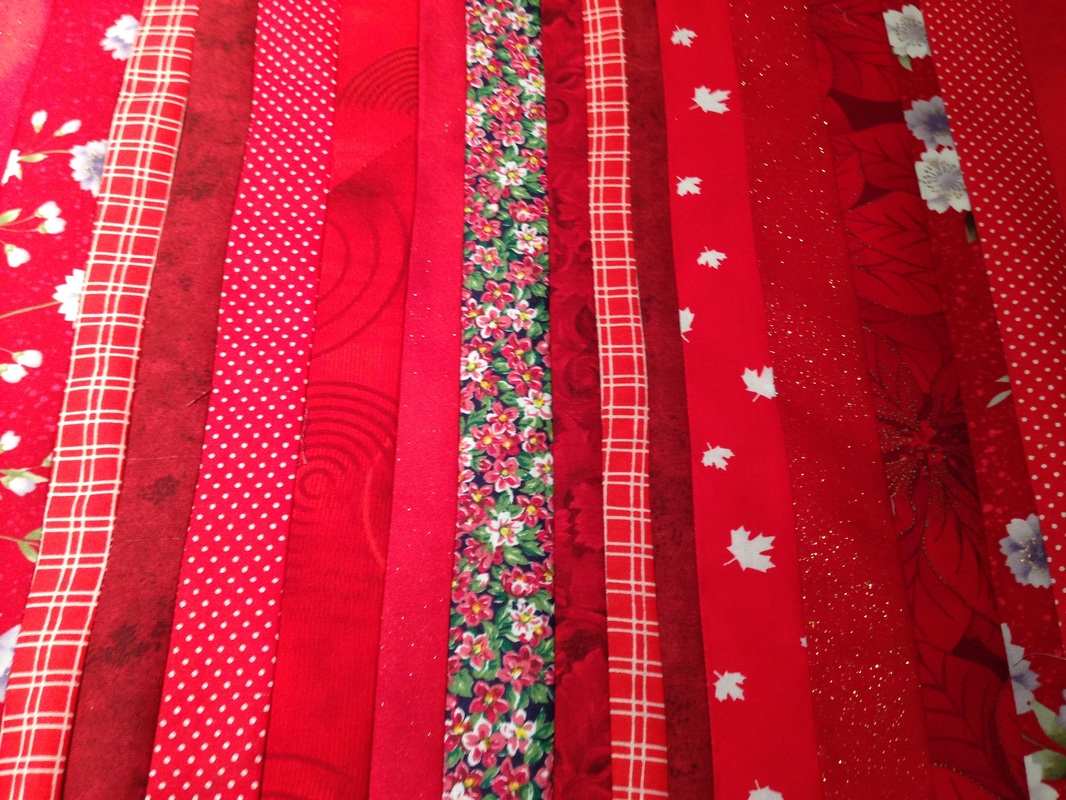 2. Square up your "strata" fabric and cut 4- 4" x 14" pieces and set them aside for the placemat borders. 3. Cut 2 pieces of fabric for the centre from white 11 x 14". 4. Sew 2 of the 4 x 14" strips to the sides of the white centre fabric. You should have enough fabric left to cut your leafs out. 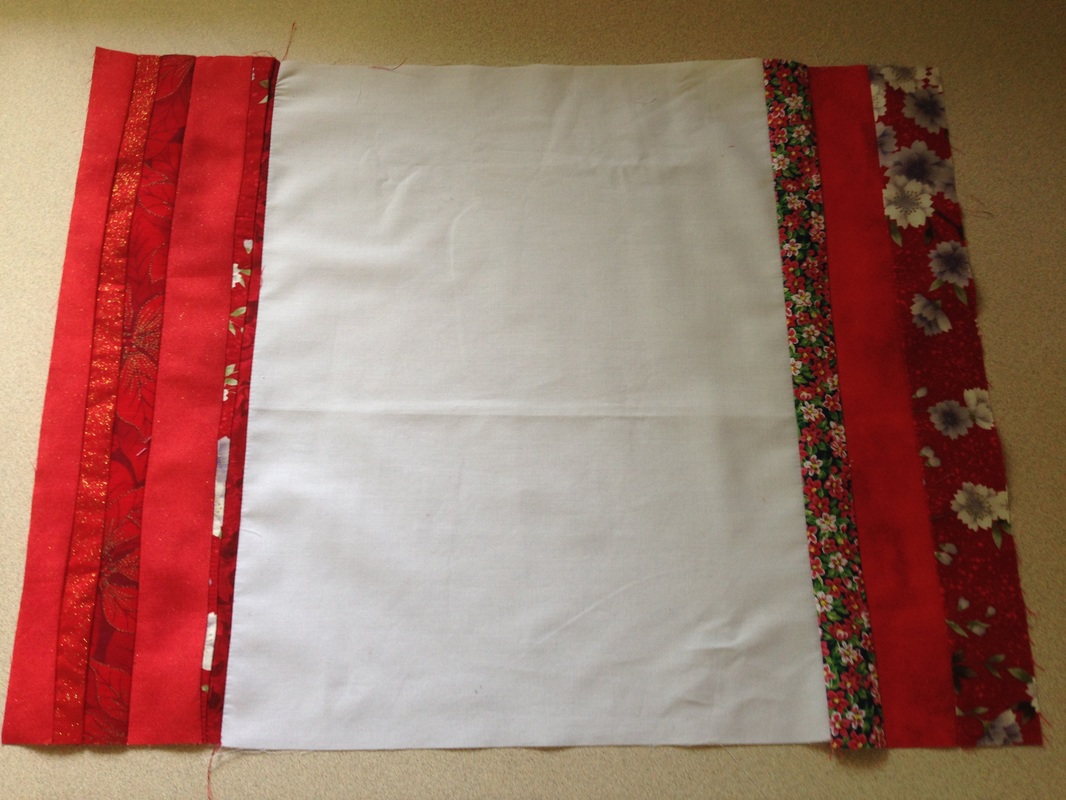 5. Using the pattern provided in the shop and free patterns section of this website, trace it onto the matte side of freezer paper with a sharpie marker. Cut it out roughly. 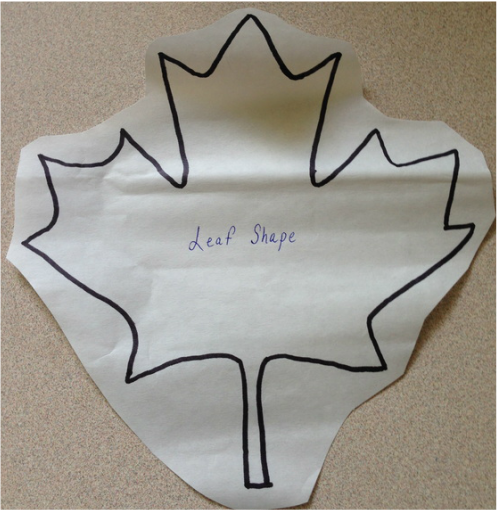 6. Iron the shiny side of the freezer paper to the right side of the strata fabric with the fabric widthwise on the leaf shape. 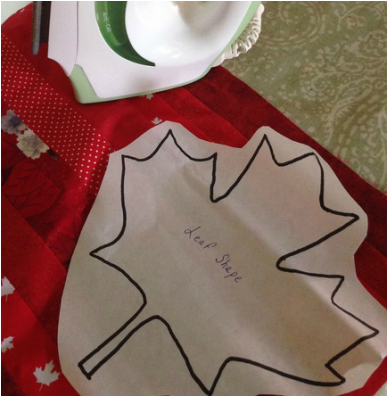 7. Cut your leaf out using the freezer paper as your guide. 8. Lay your leaf shape wrong side down to the glue side of fusible web, place parchment paper over the shape and iron the fusible web to the wrong side of your leaf 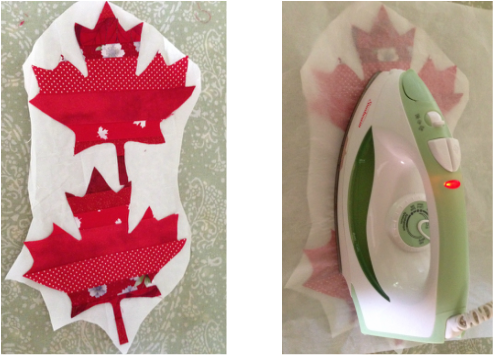 Fusible web on the wrong side of the leaves and parchment paper on the top to protect your iron 9. Find the centre of your placemats by measuring or folding your placemat centres and iron the leaves wrong side down to the right side of your white fabric. 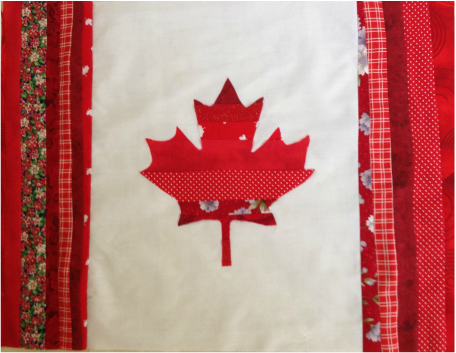 10. Lay your maple leaf placemat and backing fabric right sides together on top of your batting and sew 1/4 around the perimeter leaving a 3" gap for turning. Note: if you wish to bind your placemats, you would simply sandwich them as if they are quilts at this point, quilt and bind. 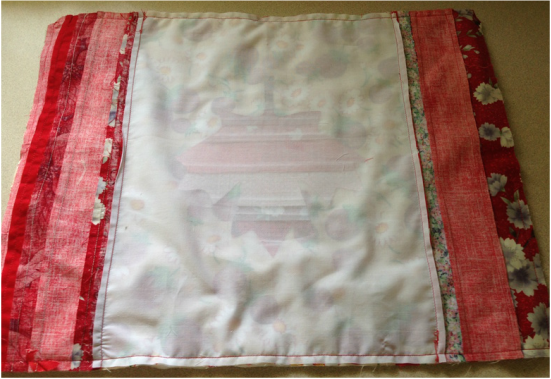 11. Clip your corners and turn the placemat to the right side (use a purple thang or turning tool to push out corners) and top stitch 1/4" around the perimeter. Satin stitch or zig zag your maple leaf through all layers and quilt as desired. 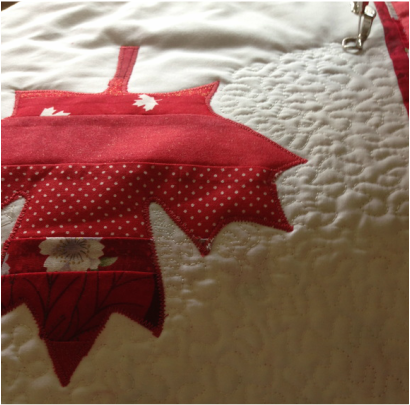 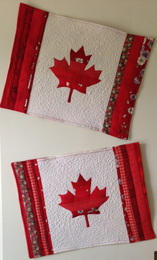 Your placemats are now ready for a Canada Day Celebrations. Enjoy!
Watch upcoming blog posts to see where these placemats travel to......🍁🍁 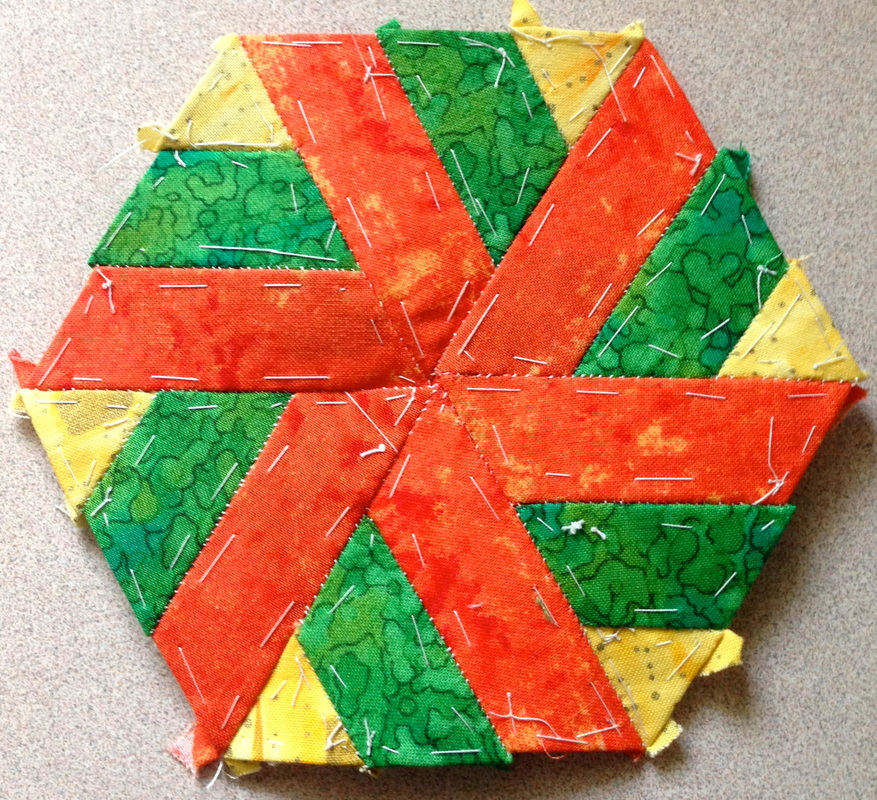 Block # 24 Evelyn I finally got around to getting #24 Evelyn finished. The colours are summer in honour of the first day of summer coming up this monday. If anyone out there in the net world is following along with us and you would like to share pics of your blocks, contact us and send in your pics so we can share! Find out about how all this got started here and purchase the book below if you are interested in this unique quilt along.  Click on the book to see where you can purchase this very affordable book! Have a great Wednesday everyone 😊
I think everyone loves bags to tote their stuff right? I find that I personally make totes for others and then find a shortfall for myself. So, I decided recently to make one with a gathering of friends. A fellow guild member, Heather from Elmira Needle Sisters told us all about this tutorial once we admired her beautiful bag. This bag is super easy to make with strip piecing and simple pin tucking. You can use a Jelly Roll for the strips. Check it out below: 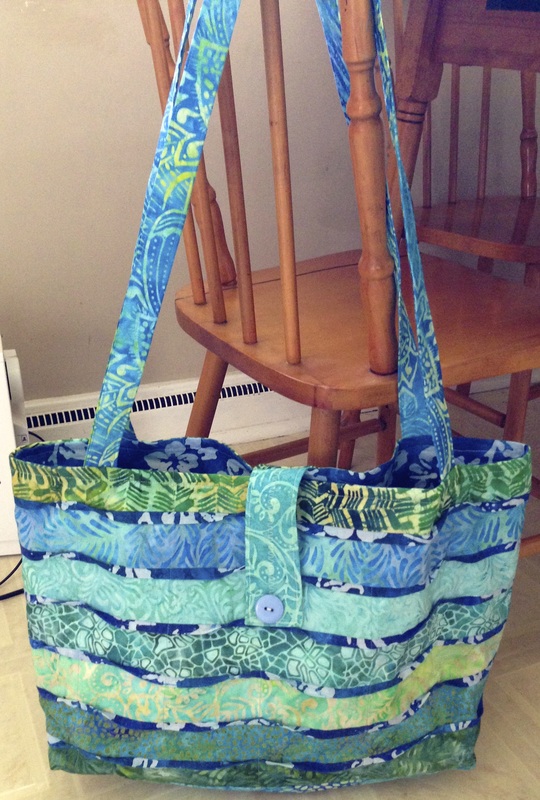 The Wave Goodbye Tote- modified By modified above I mean, I added the front tab and a zippered pocket inside. A pic of my sisters bag is also below: 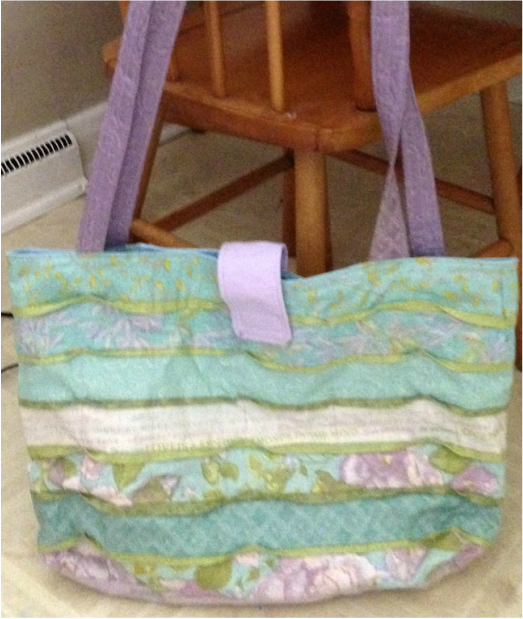 Alison's Wave Goodbye Tote 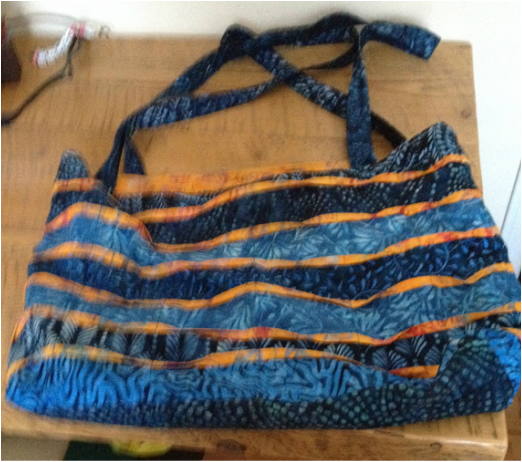 Linda's Wave Goodbye Tote If you would like to make this easy and fun bag click on the link for the tutorial here or go to weddingdressblue.wordpress.com and in the search box insert The Wave Goodbye Tote. This tutorial is fairly straight forward, no quilting required and fast and easy to sew together. Have a great Tuesday everyone! 😊 I have had some very busy days with my 2 quilts in Quilters Connection Magazine coming out last week, sending out magazines to the Give Away Winners, launching new patterns, fulfilling pattern orders and responding to long arm quilting inquiries. 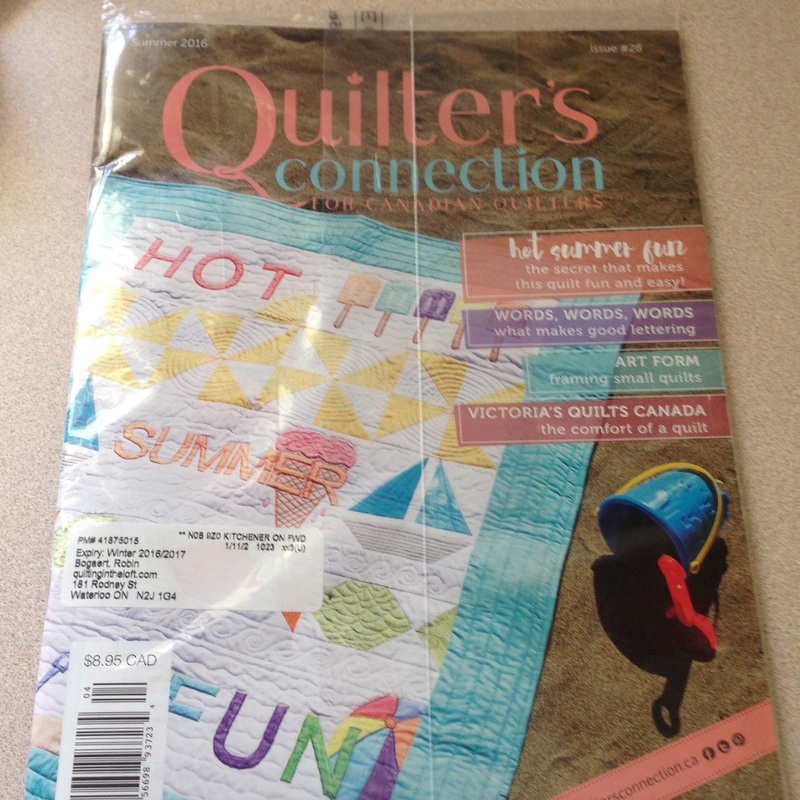 My oldest daughter just got engaged May 28th! I am so excited for Katie and Chad! 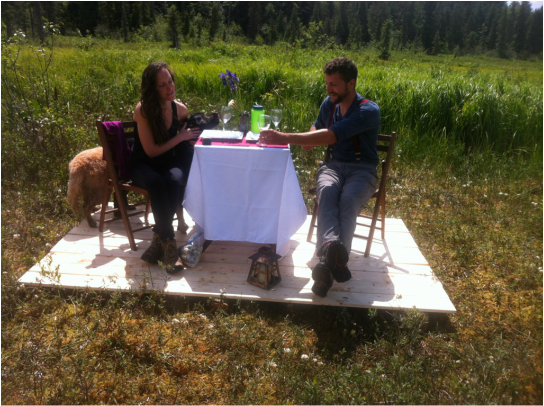 Katie & Chad at their engagement site! Congratulations to both of you! On Friday June 10th, my youngest graduated from OCAD University with a Bachelor of Fine Arts. Mallory has worked very hard and I am so proud of her! We celebrated with her Friday night and over the weekend.  Mallory at Roy Thompson Hall as a Graduate of the BFA Program at OCAD University Toronto I have many blessings! Which I never take for granted, but which do keep me busy.
I am trying to keep up with blogging because I love to do it and I enjoy sharing ideas with others, however if you don't see as much content as in past months, you will know why! Have a great Monday everyone and enjoy your blessings! ❤️ |
Follow Me:
Welcome!Hi I'm Robin and I am a professional long arm quilter, pattern designer and teacher. I am passionate about all things quilty!  
  Categories
All

Sponsors
This blog contains affiliate links. This means that we endorse products.
We do receive rewards for these endorsements and this helps to keep this site alive and well. We support products which we believe are the best quality and to inspire your creativity! |
 RSS Feed