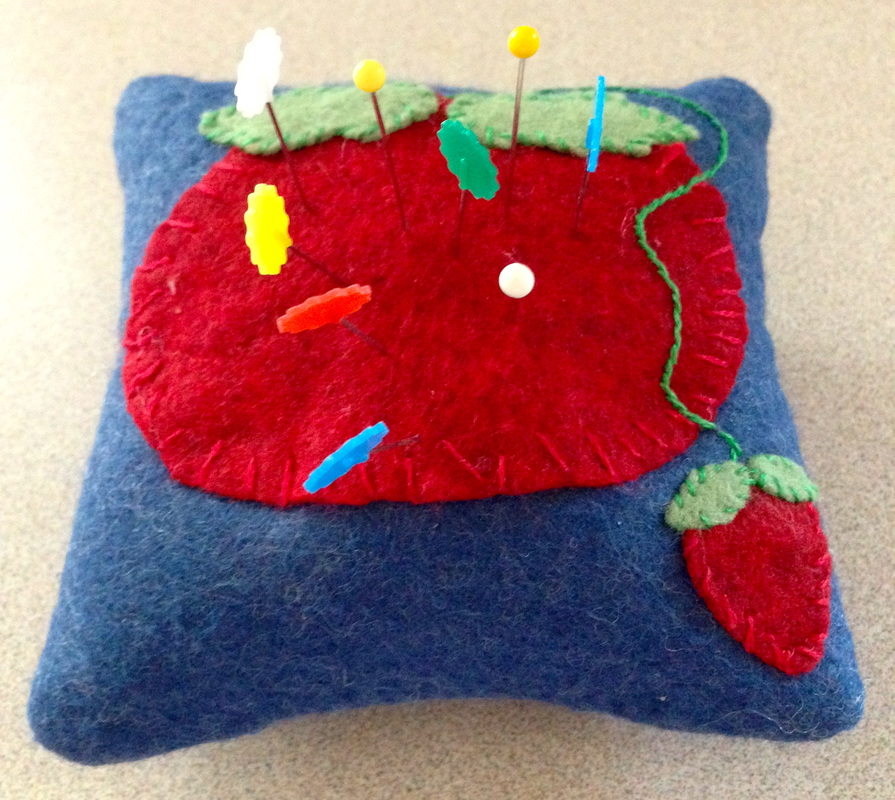
 There is a FREE PDF download of this pattern in the SHOP section of this website to get this free download please click here Basically you cut out scraps of red and green felt, blanket stitch appliqué the tomato, strawberry and leaf designs to the top of a 5.5 x 5.5 square of felt, add a vine, sew the front to the back right sides together, stuff and stitch closed. So easy, cute, whimsical and useful. 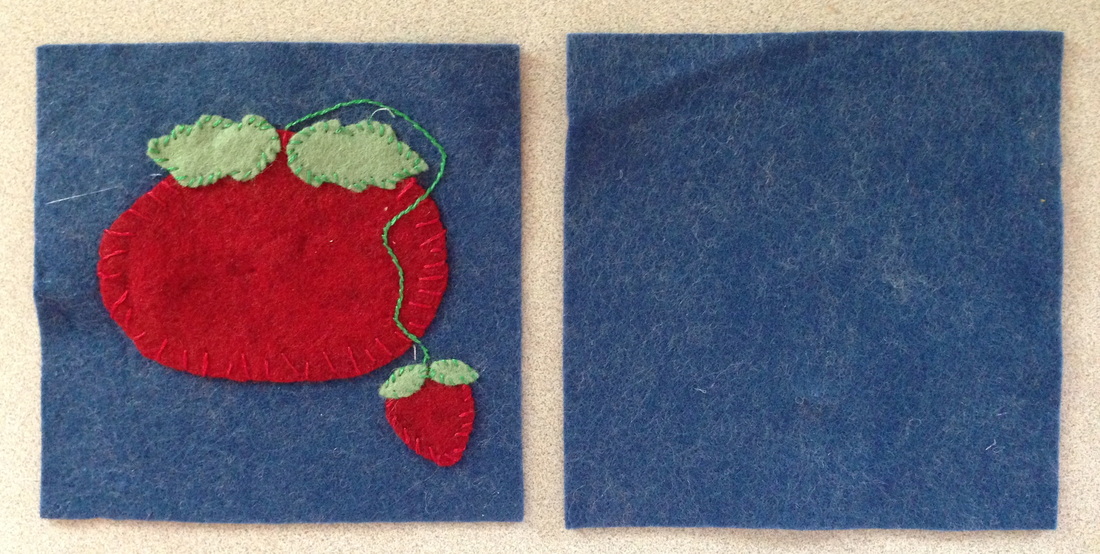 #1 Download the free design, cut out of felt and appliqué the design to the front piece of felt 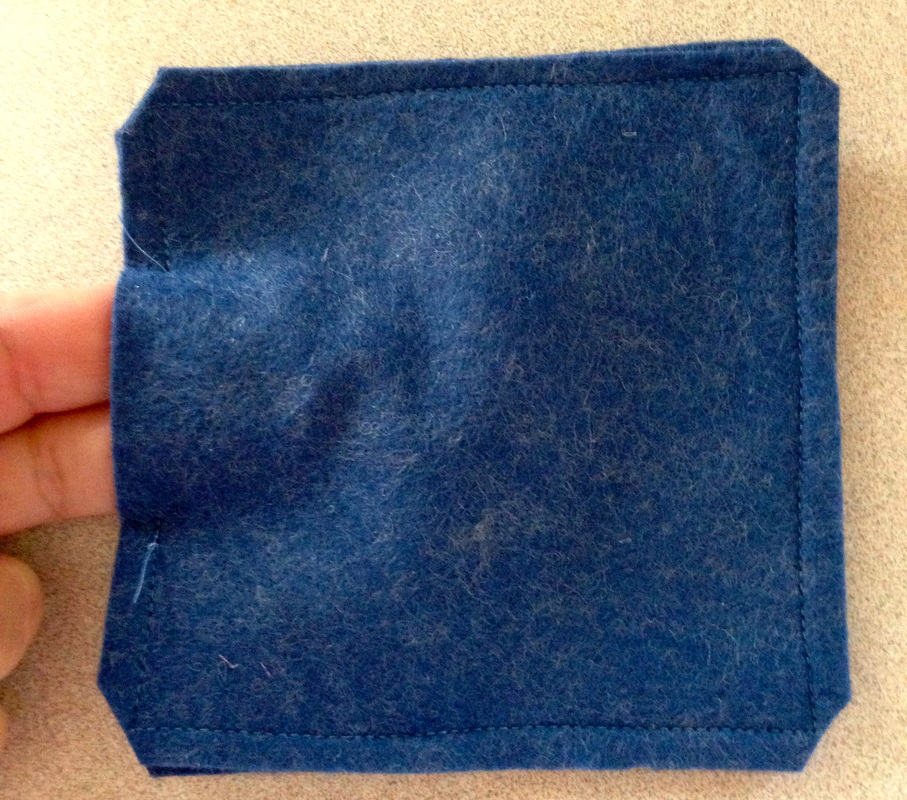 #2 Sew with right sides together and leave a 2" gap for stuffing 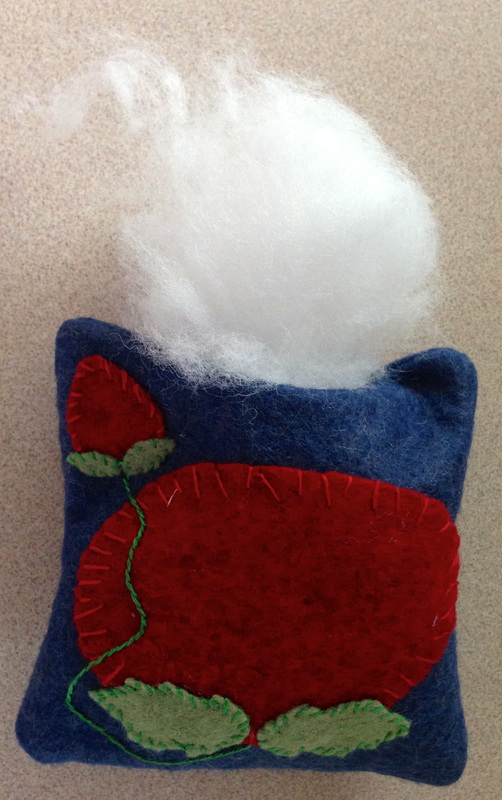 #3 Stuff with fiberfill or walnut shells 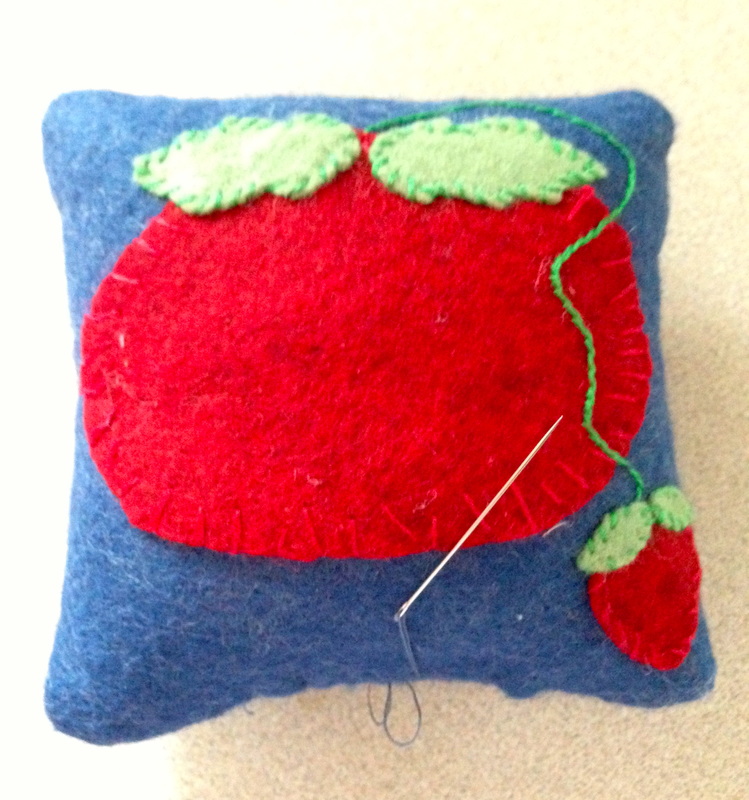 #4 Slip stitch your opening closed 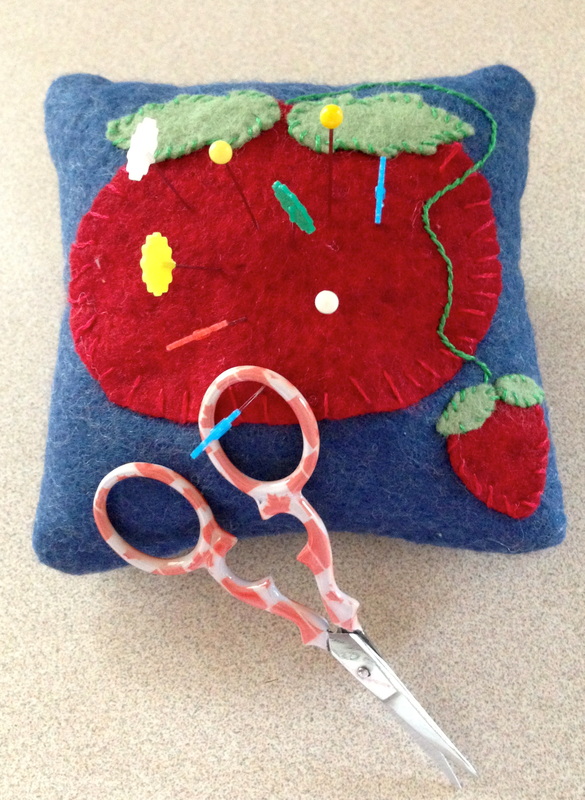 #5 done and ready to use I hope you are able to try this easy tutorial, you can download it for FREE here
Enjoy this one hour project! Happy Tuesday!
0 Comments
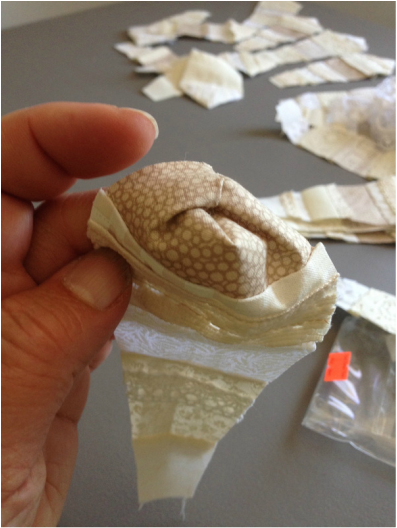
I decided recently that I wanted to do a dresden block project combining vintage flair and modern construction. This is what I came up with:
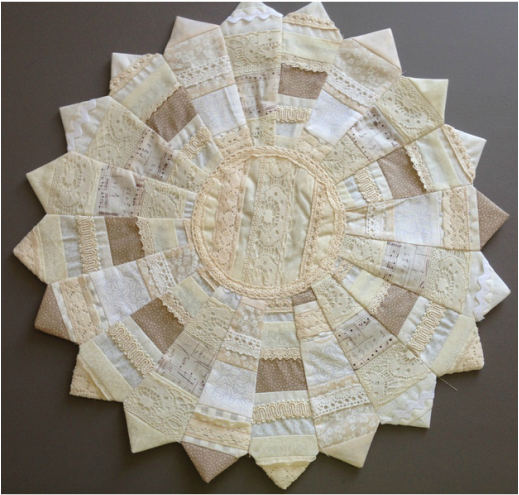
"Stratified Dresden"
How I made this?
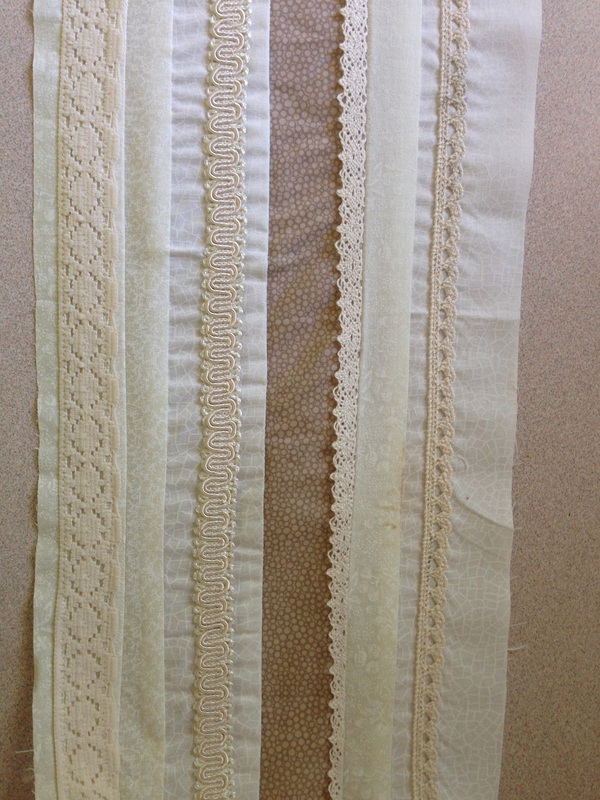
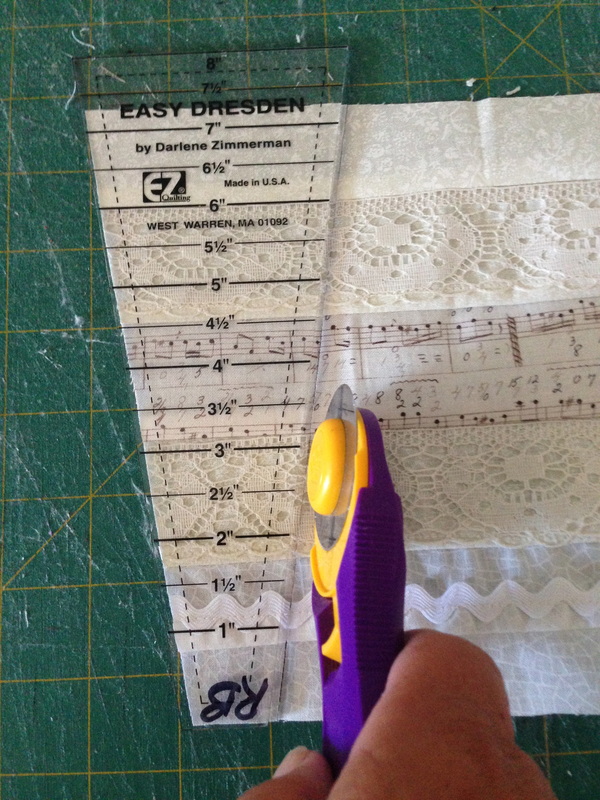
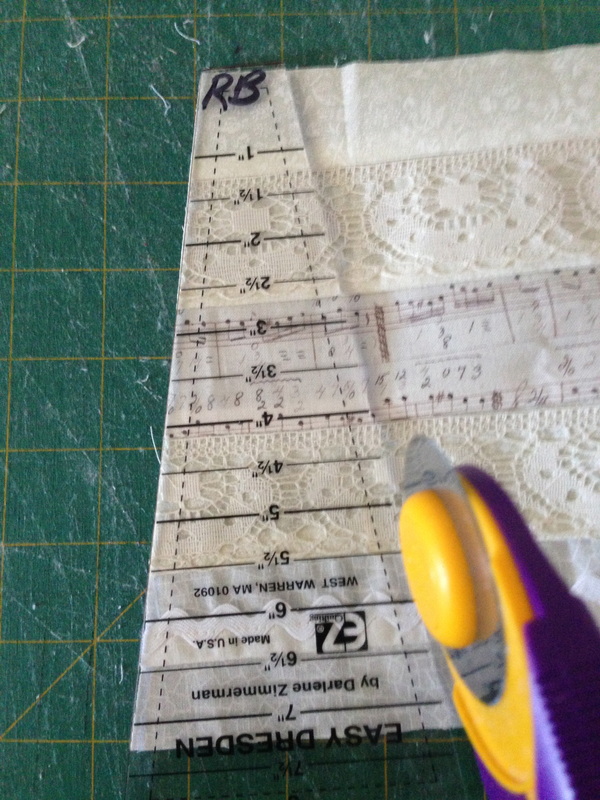
Lace top stitched to strips and strips sewn together to make a "Strata" of Fabric
and then cut out Dresden shapes from the strata above using:
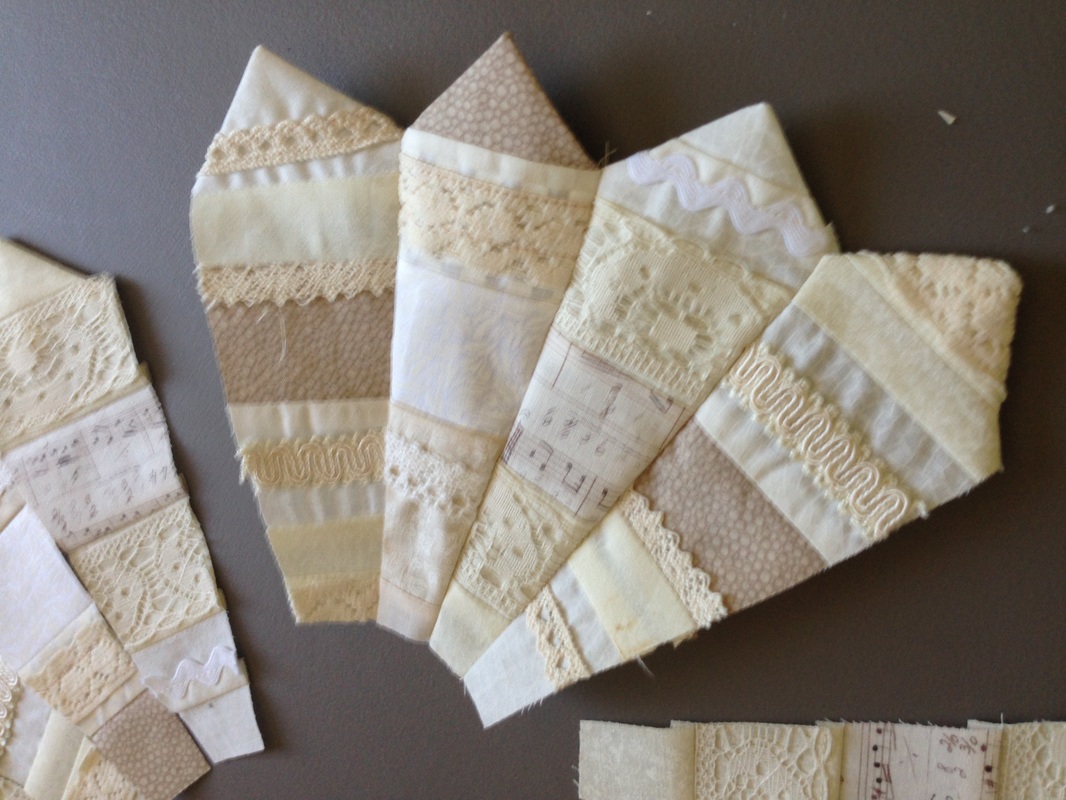
Like the images below:
This ruler, the (Wright EZ Quilting Easy Dresden Quilt Tool Set) is awesome and makes the job so easy!!
Fold the wedges right sides together at the wide top and sew 1/4" from the edge.
Turn all your Dresden points to the right side and clip the point to the stitches
Sew 20 of these Dresden shapes together to make a Dresden block/round/flower
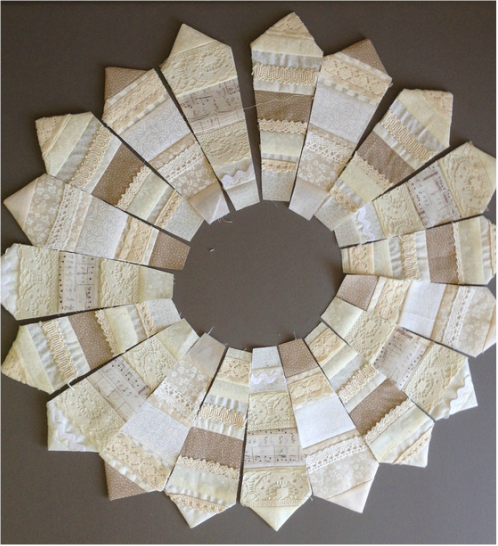
"Audition" them first
+
=
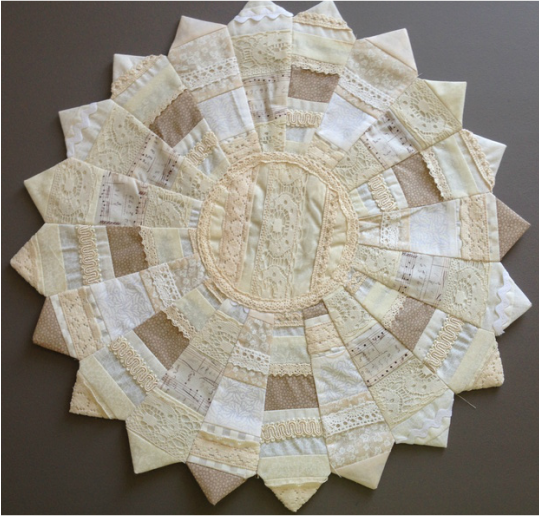
I covered the centre with a circle also covered with lace and top stitched to the middle of my block/round/flower.
Your Dresden is ready to appliqué to wool felt (for a candle mat or centre piece) or to background fabric. Vintage, Easy Dresden! I hope you are all having a great Tuesday!❤️ 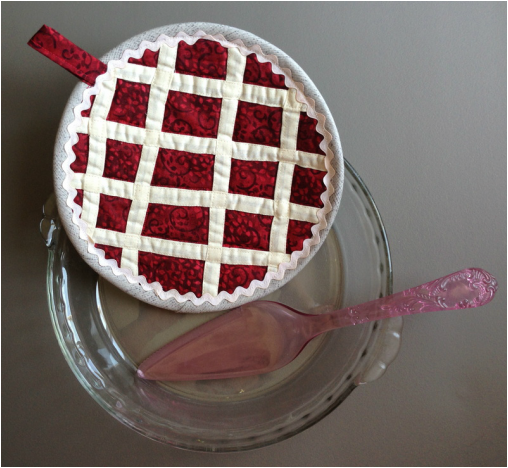
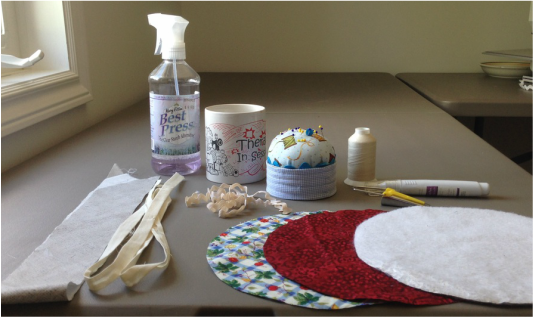
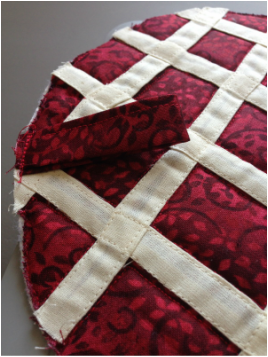
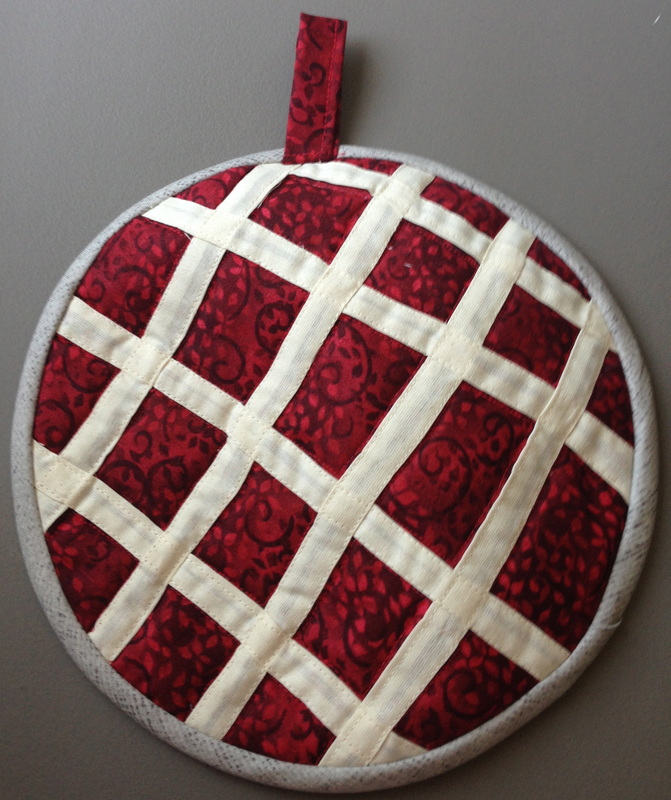
It's that time of the year, a time for fruit to ripen, markets to be open and plentiful sources of fruits and vegetables available. This very cute pot holder is inspired by the fruits of summer, picnics, potlucks and family get togethers. It's raspberry pie time! mmmm my favourite was the pie at Stone Crock in St Jacobs! What you will need make this "Raspberry Pie":
How to make it:
3. Audition your lattice by cutting 8- 10" lengths and weaving them on your pie fabric. Weave them under and over each other. Glue them in place with a dab of fabric glue.
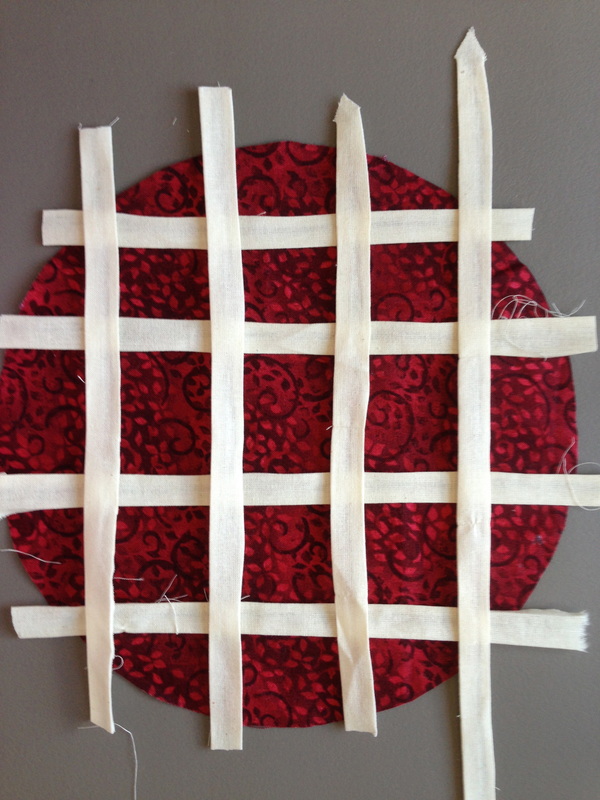
I know it doesn't look great yet!
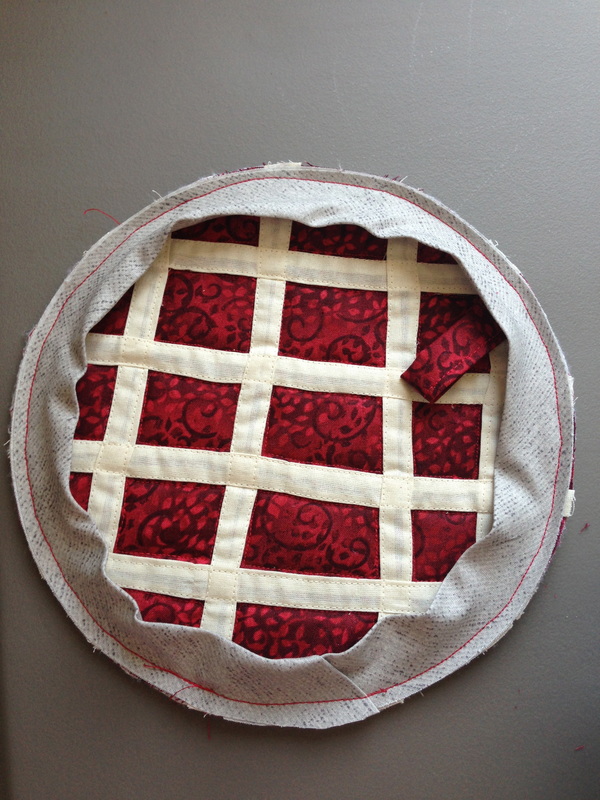
4. Lay all 3 layers of fabric, the top, Insul-Bright and Backing together as if its a quilt and pin to baste and hold together.
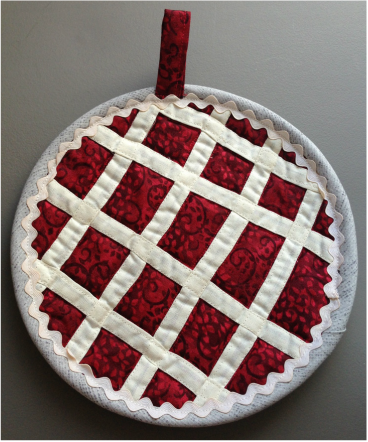
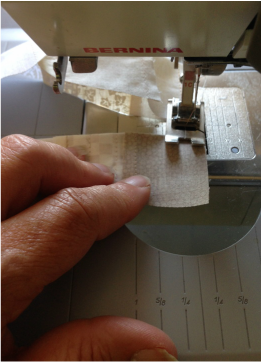
5. Top stitch about 1/8" in on all sides of the lattice with cream coloured threads through all layers. Trim around the edge of your pie. 6. Make a hanging tab by pressing your 5" x 2" piece of fabric in 1/4" on the long sides and then fold it in half encasing the raw edges. Top stitch this to close the finished edge.
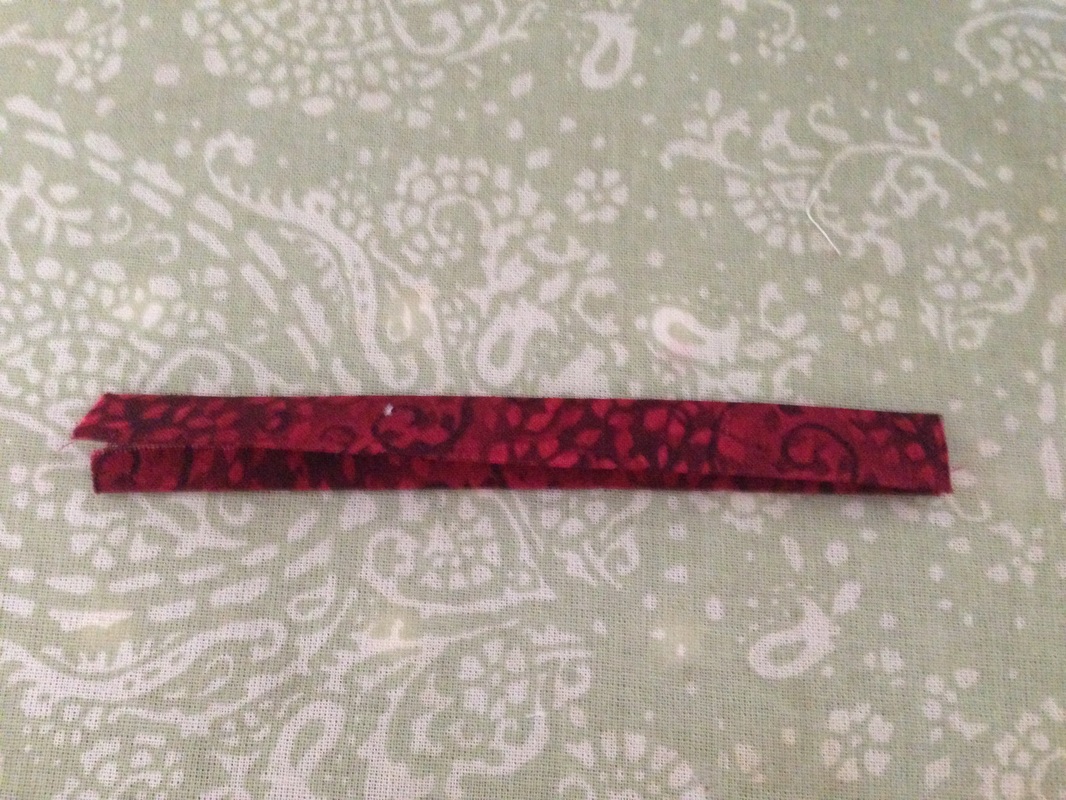
7. Press the hanging tab in half and place the raw edges against the edge of the front of your pie where you think it looks best, sew it 1/8" from the edge to secure through all layers. leave the loop laying against the pie top
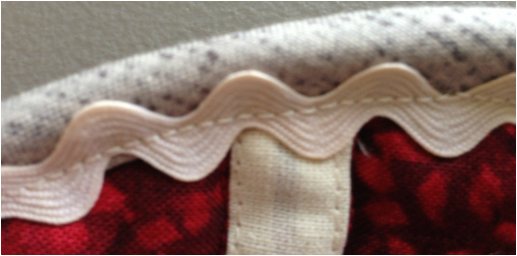
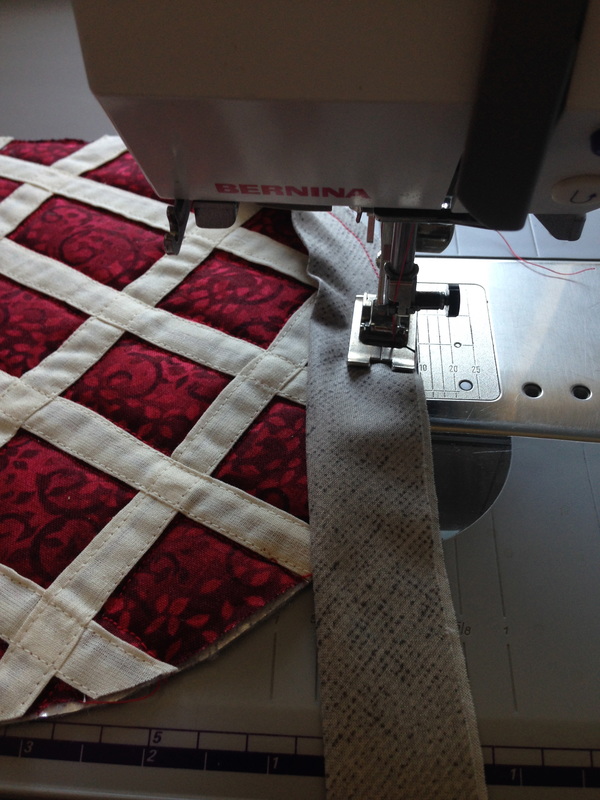
8. Press your grey binding/pie plate edge fabric in 1/2 to make binding as you would a quilt and sew it slowly to the front edge of your pie. Finger press to the back of your pie and hand stitch in place.
9. Sew on your rick rack by placing the valley of the rick rack just against the inside edge of the binding on the pie fabric and stitching down the centre. You will also need to tuck in the rick rack ends carefully so they look neat.
It's done! Almost good enough to eat and way less calories.
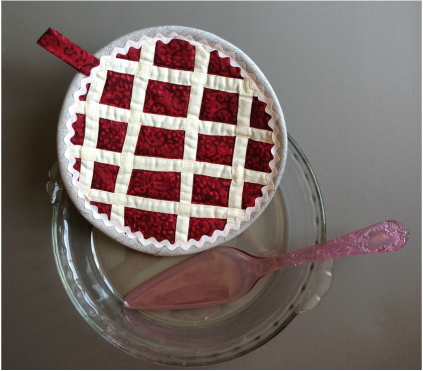
I hope you enjoyed this little project and that you make many "pies" this summer!
Please send us your photos so that we can share all of your productive efforts. Happy Tuesday! ❤️ 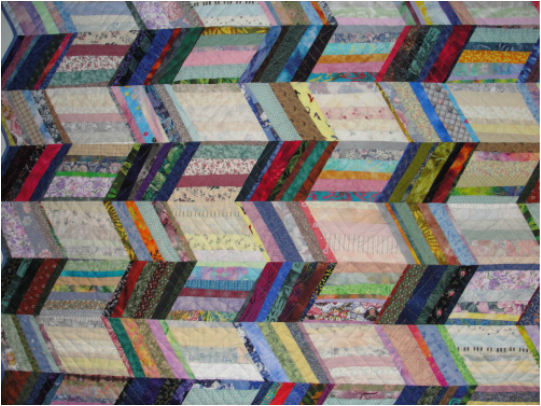 Scrappy quilt with effective use of colour value Value and Hue. Value is defined as the relative lightness or darkness of a color. It is an important tool for the designer/artist, in the way that it defines form and creates spatial illusions.
The quilt above looks like it is waving or creased and it's not. It creates a spacial illusion. When I first looked at this quilt I thought oh..... it just has an arrangement of light and dark strips. It's not that simple! It's an arrangement of 4 fabric values including: dark, medium, light and lightest light strips. The fabric is also placed horizontally and vertically creating the form or the creased look. What an effective use of scraps! Personally, I love scrappy quilts but the Type A part of me, wants them organized and the quilt above fulfils that requirement. Doing a scrap quilt like the one above takes the anxiety out of figuring out how to arrange your fabric. Lay your scraps in 4 piles :1. Lightest light, 2. Light 3. medium and 4. Dark. Cut strips from similar widths of fabric, sew them together to form aproximately 5" widths. and sub cut them into 5 x 7" rectangles. Medium and dark-5" width with strips going vertically & light and lightest light with strips horizontally. Sew the rectangles together as shown above. Light and dark together (alternating vertically and horizontal) and lightest light and medium together (alternating vertically and horizontally). Share with us your colour hue project be emailing it to us by using our contact us hover over "more" on the menu above to find "contact us" Also check out this great article on Craftsy.com Choosing a Color Palette for Quilting Projects here Happy Tuesday everyone, I hope you are having a great week.☀️  My fat quarter purchases from the Atlantic Provinces I purchased the above fat quarters while visiting Nova Scotia and PEI and now what to do with them? Fat Quarter FACTS ----From one (1) Fat quarter you can cut 99--2"squares 50--2 1/2" squares 42--3" squares 30--3 1/2" squares 20--4" squares 16--4 1/2" squares 12--5" squares 9----5 1/2" squares 9--- 6" squares 6----6 1/2" squares I recommend that you copy off the above little chart and put it in your sewing area. I will have to think on what I am going to do with my "Maritime fabric" Any suggestions are welcome! Hmmmm........ maybe a landscape incorporating the above fabric? Check out some pictures from my trip below, they inspire me! 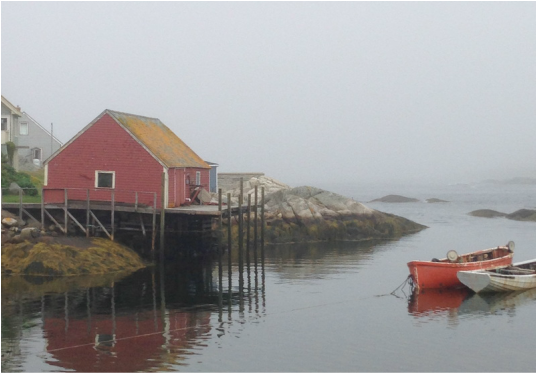 Peggy's Cove  Lunenburg 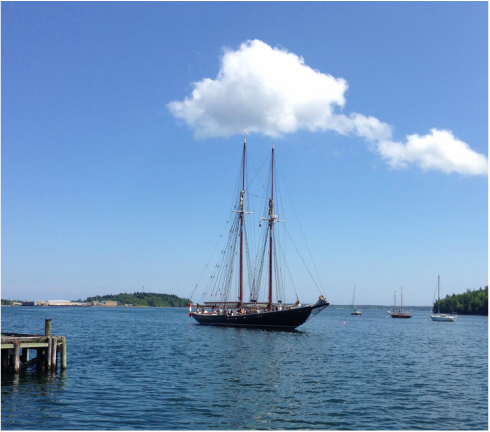 The Blue Nose "Coming Home to Lunenburg" 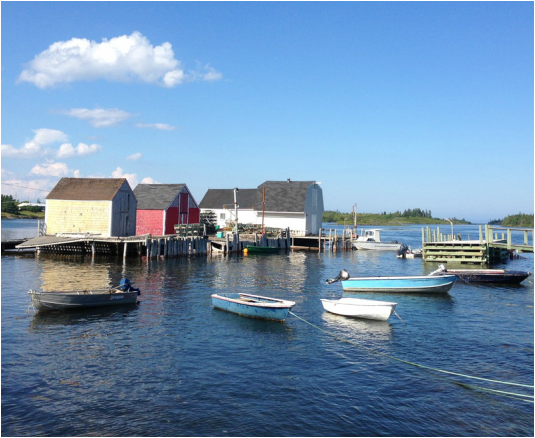 Blue Rocks I hope you are having a great Tuesday! Stay Cool!!
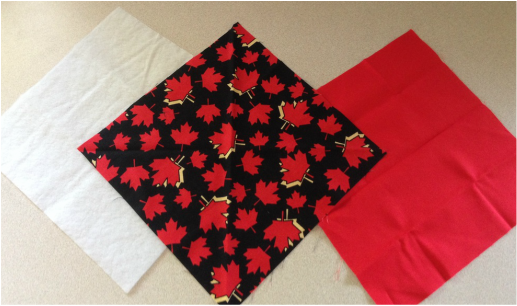 What can we make from the fabric above? A Canada Day Candy Dish! 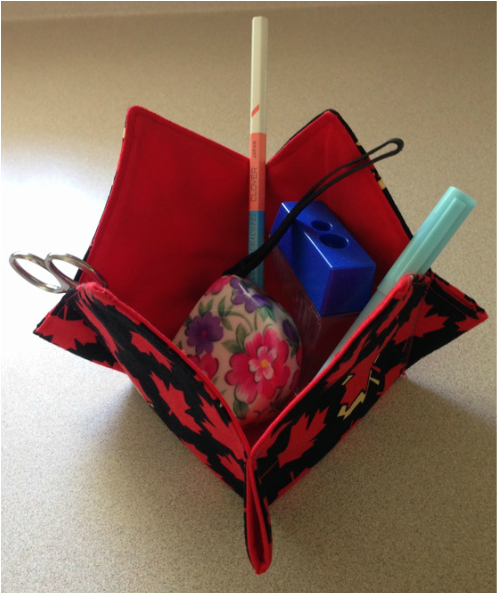 I'm showing it filled with gadgets but you could use it as a Candy Dish filled with "red" candies as well! You will need: 2 complimentary 9" squares of fabric 1-9' square of thermore or fusible fleece Thread to match How to make it: 1) Place both pieces of fabric right sides together on top of the fleece 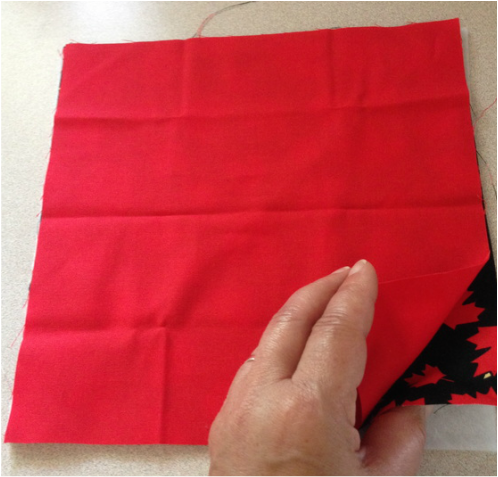 2) Pin if needed and sew all the way around leaving a 3" gap for turning. 3) Sew 1/4" around perimeter 4) Turn to the right side 5) Top stitch 1/8" from edge around the perimeter to & gap seam. 6) Lay fabric right side up in front of you, measure 2 3/4" from each corner of your fabric and place a chalk pencil mark at 2 3/4" away from each corner. 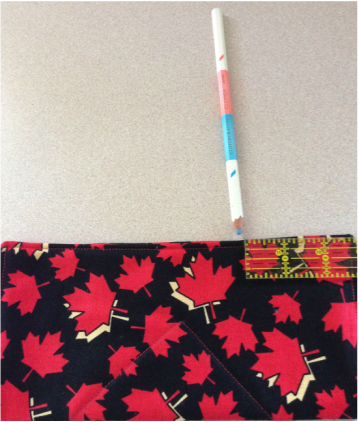 7) Fold the square wrong sides together matching the two marked spots on each side. Draw a line on the right side of the fabric from the matched & marked points to the corner of the sewn square in the centre. Sew on this line using a back tack stitch at the beginning and the end of this seam. This will create the side wall flaps that stick out. 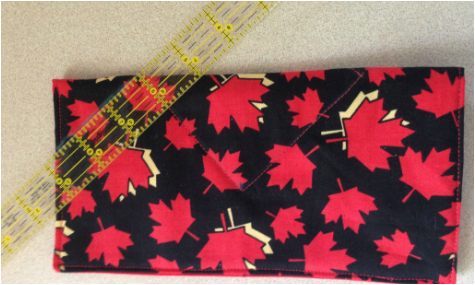 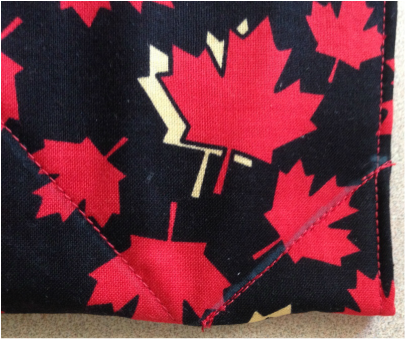 8) Repeat step 7- 3 times until your "Canada Day Candy Dish" looks like the picture below: 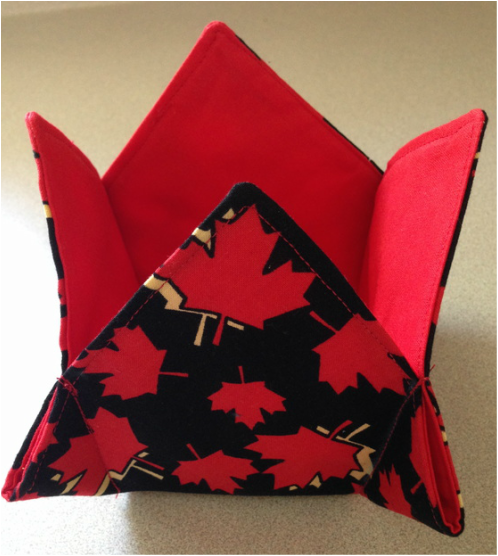 Fill 'er up! Happy Tuesday🍁
 A little while ago on this blog I talked about an upcoming pattern for sewing travel totes which I was working on. Well is is DONE, Yeah!! It is called "Sew N' Travel Totes" and available for shipping immediately! Sorry not a PDF pattern because there is a free embroidery appliqué included which I must ship to you. I am so excited because I think it's really an excellent pattern allowing you to pack up all your sewing tools, projects and supplies and take them with you on vacation this summer. There are 5 parts to the pattern itself:
It's tool and technique tuesday and totes are essential for sewing tools so it is appropriate to tell you all about my new pattern today! The pattern with all 4 totes, a pin cushion and a free embroidery appliqué is priced affordably at only $12.00. Sharing some close up pictures below of all the great components of this pattern: 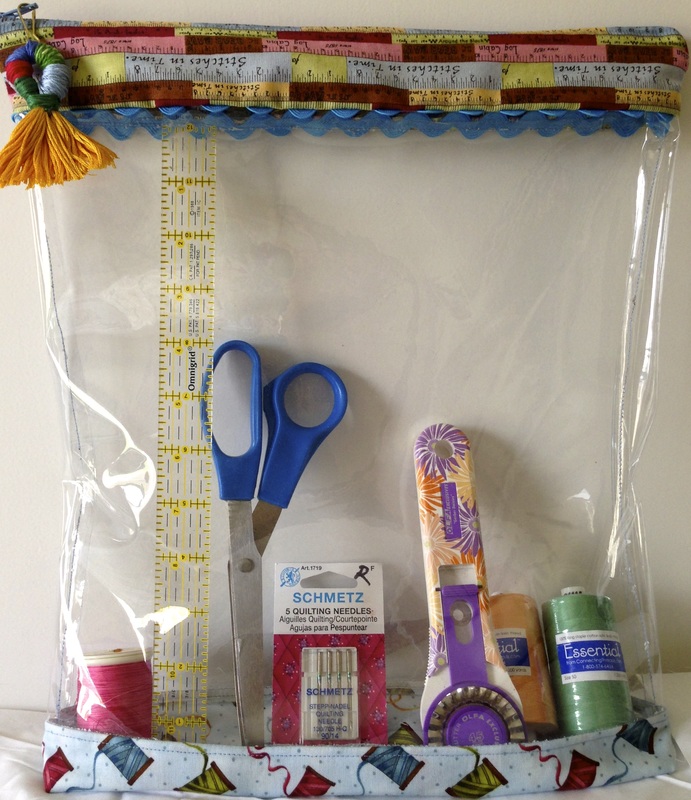 Large Clear Project Tote - Fits a 12" block and/or lots of supplies (sorry the supplies are not included) 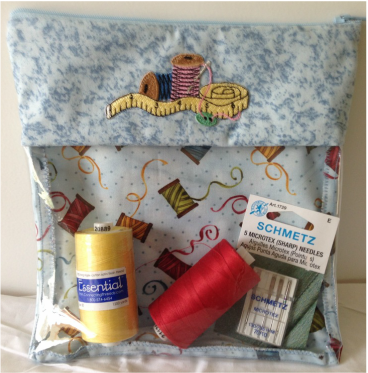 Small Clear Project Tote -see the Free Embroidery Applique? 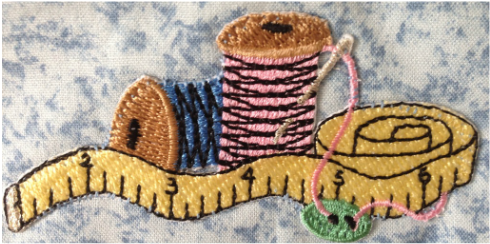 Embroidery Applique-close up 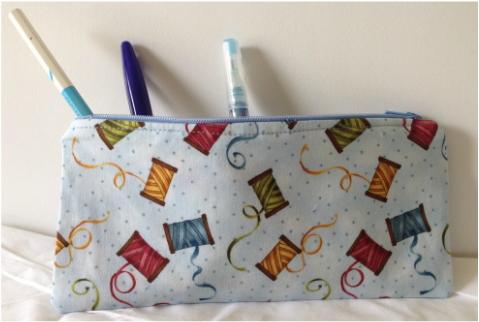 Pencil Case  Needle Case-for both machine & hand sewing needles  Fun Tomato Pin Cushion Included also are tips to work with vinyl, rick rack and easy zipper insertion! The fabric used to make the Sew N'Travel Totes? ... South Sea Imports, A Quilter's Home Fabric by Nancy's Cupboard. Please Note: There are limited numbers of the free embroidery appliqué so order it right away if you want this pattern,because once they are gone, the pattern will be sold without this appliqué. How to purchase this pattern? Go to our shop page on the menu above or get it here 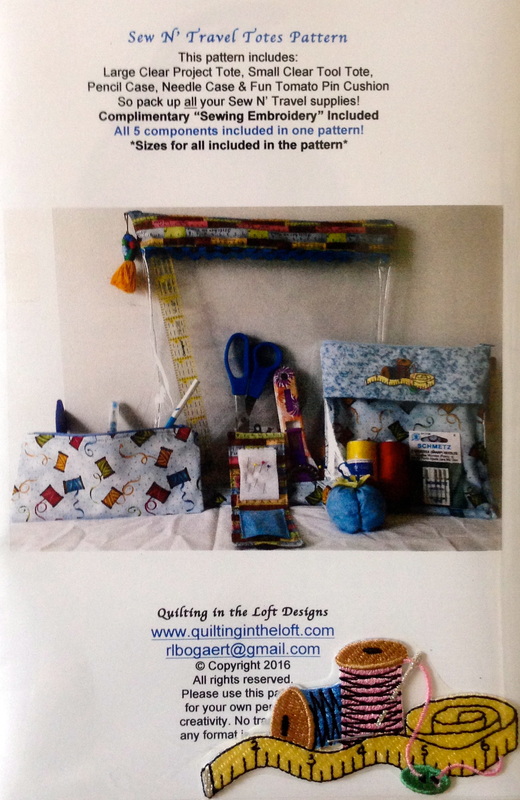 Close up of our newest pattern Have a great Tuesday!😊
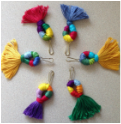
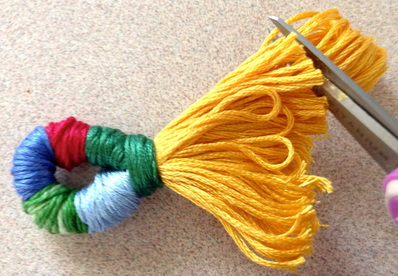
This is the last of my 3 part series on zipper pulls. These tassel like zipper pulls are super easy to make, so colourful and you can make them in 5 minutes!
The look awesome added to a new quilted bag or spring/summer purse because they add such vibrant colour and a big splash of happy. What you will need: 6 Skeins of different coloured embroidery floss Scissors Lanyard Hooks Source for these:
How to make it:
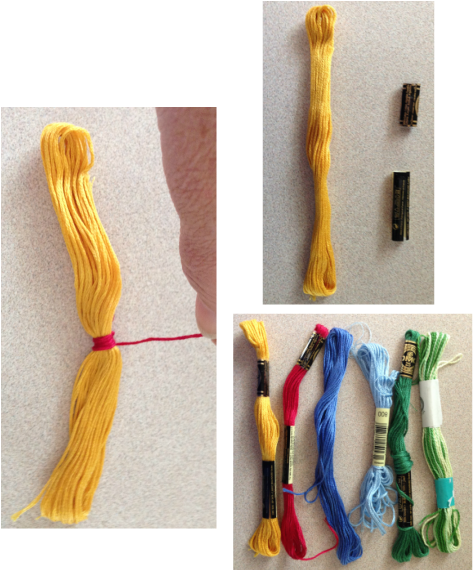
4. Continue to tie and wrap other colours evenly on each side of the center wrap incorporating your tied ends into the wrapping until it looks like the picture below

5. Bend your skein in half and using about 10” of the last colour of floss, tie your wrapped loop, split the floss in half and use these split ends to tie it tight.
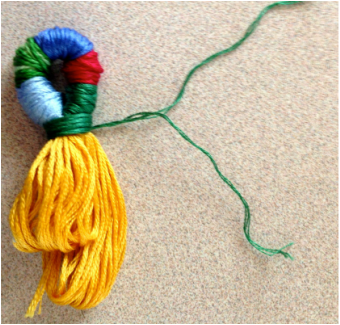
6. Cut the looped ends of your tassel so that they are even
7. Attach your lanyard hook onto the top of the wrapped loop and attach it to your zipper!
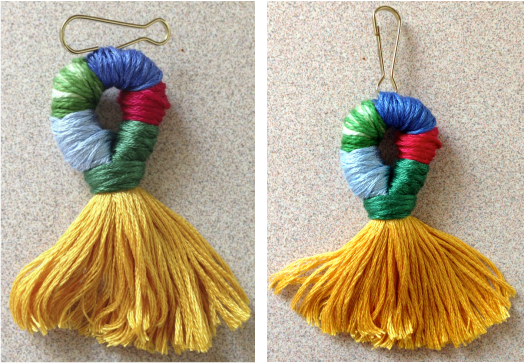
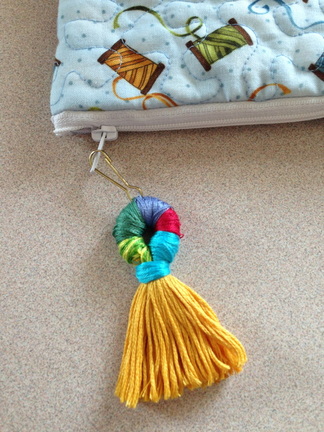
Bright pretty and practical!
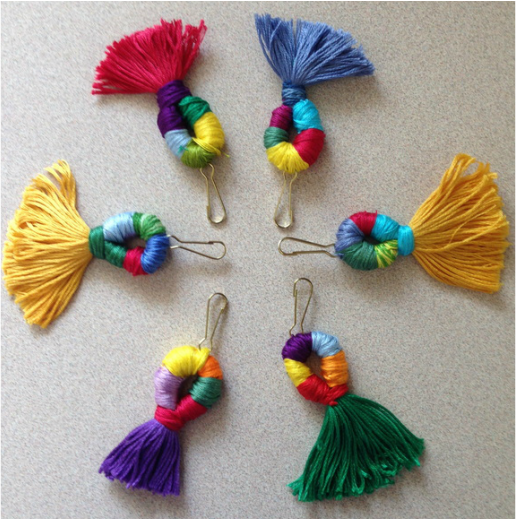
I had so much fun making them, I got a little carried away!
I hope you enjoyed this tutorial, that's the end of zipper pulls for now. Happy Tuesday! ?
 These are some easy zipper pulls made with dollar store letter beads, craft beads, wool and embroidery floss! Easy to make, effective and you could customize them with names. What you will need: Wool, embroidery floss (or cord), lanyard hooks, small separating rings, 1/4"wooden letter beads(from the $ store), crochet hook 1.75 mm (US 4) and craft beads (big enough to fit a small crochet hook into them) 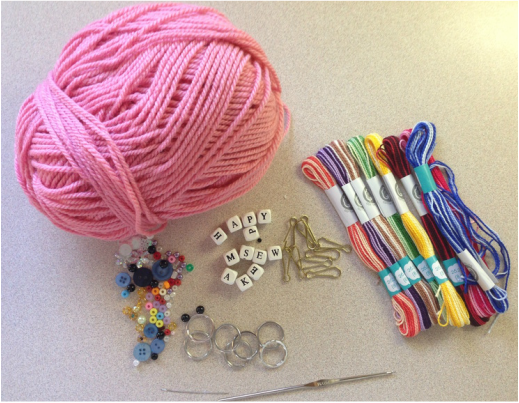 How to make them: 1) Cut out a 24" length of wool or embroidery floss and fold it in half  Variegated Blue Embroidery Floss 2) Tie the floss to a separating ring or a clasp using a slip knot. 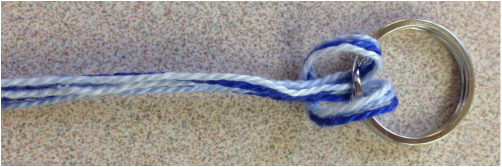 3) Add a bead using your crochet hook to thread the floss through it, hook through your bead first and then hook the floss to thread. 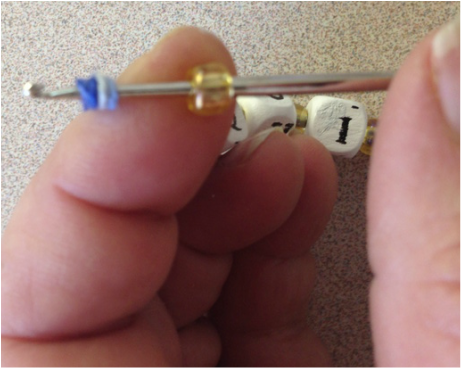 4) Alternate with small beads and then letter beads until the word you want to say is spelled out, tie off the end and let the floss fray a bit if you like the look of it.  It looks very nice on the pocket of my new computer bag! 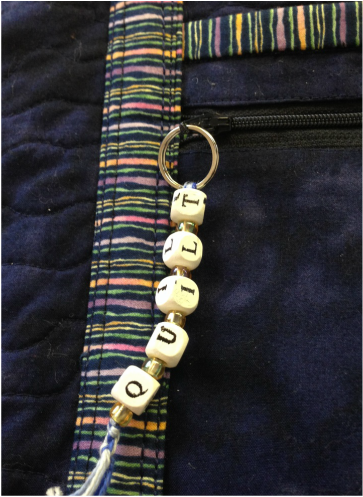 Add a zipper pull to a pencil case! 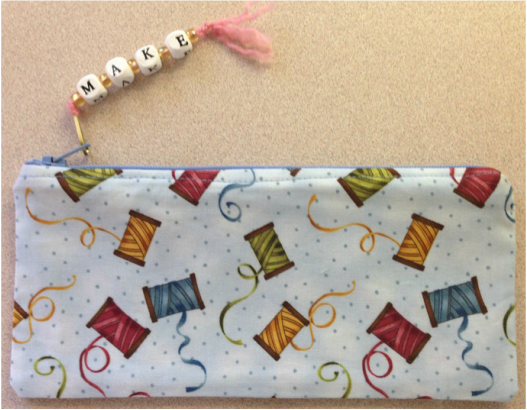 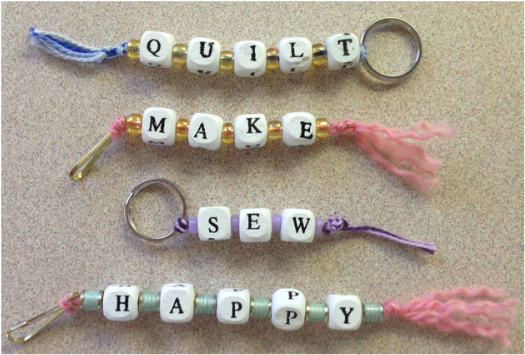 There appeared to be some vowels missing in the dollar store pack of letters, however I was able to make all of the above zipper pulls with one package.
Try this easy project and enjoy! Happy Tuesday!😛 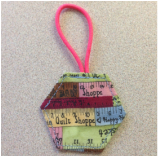 Last week I worked on my new pattern "Sew n'Travel Totes" and got to thinking about a DIY zipper pulls and of course I have hexies on my mind all the time! So I came up with this idea and they take about 20 minutes to complete and are super inexpensive. This is what you will need: Thread and needle, a thin hair elastic (cheap ones at the dollar store are ideal), 2 hexi patterns traced onto card stock -1" size, 2 pieces of fabric, an iron, a thin crochet hook, a sewing machine and a bag/tote with a zipper to put it on. 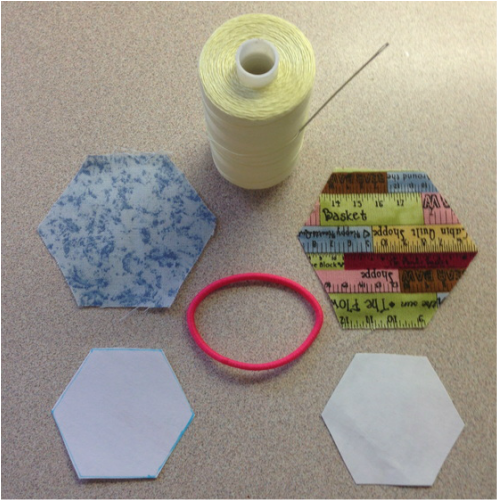 How to make it: 1) Cut hexi fabric out 1/4” bigger than card stock all the way around. 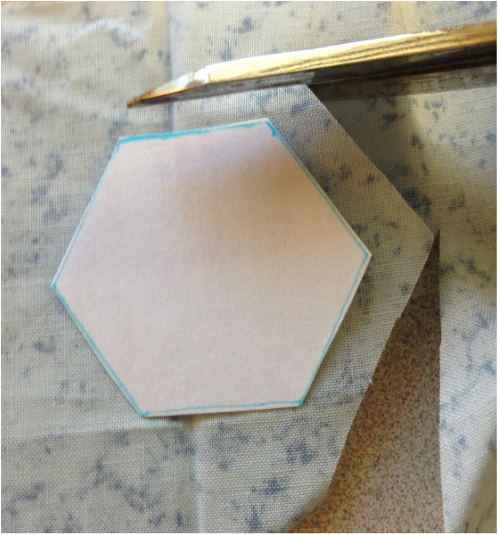 2. Fold the fabric around all edges of both fabrics and sew EPP (english paper piecing style), if you don’t know how to do this check out my recent blog post about EPP here 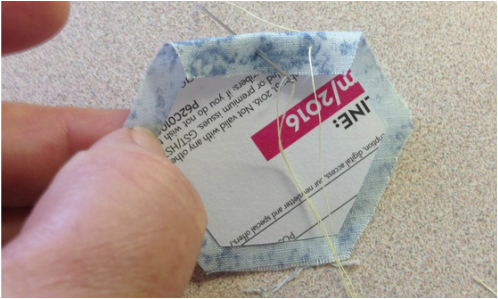 3. You should have 2 EPP hexies 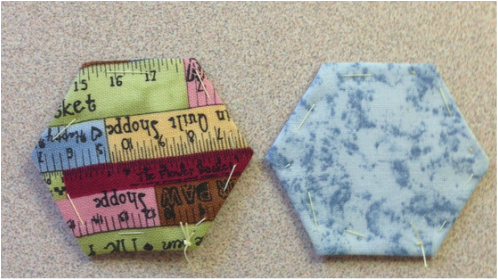 4. Press them but do not remove the paper 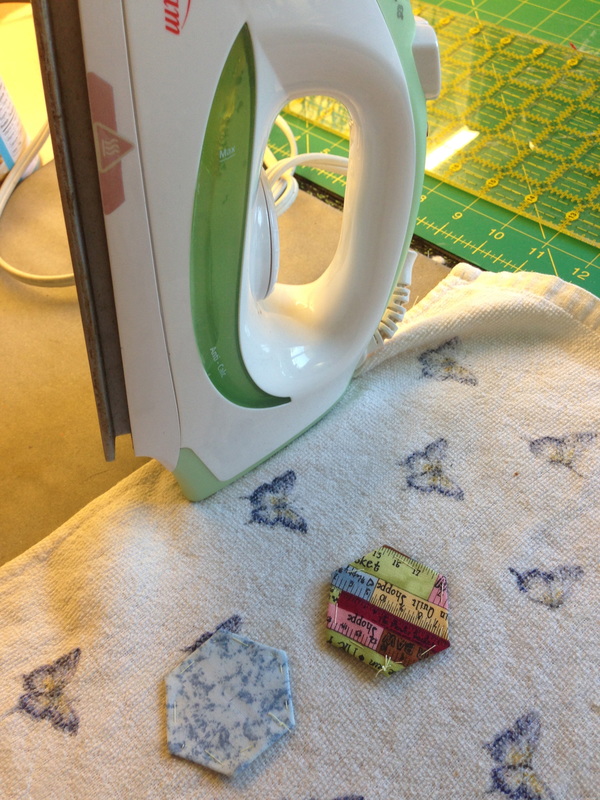 5. Remove the basting stitches and press once more 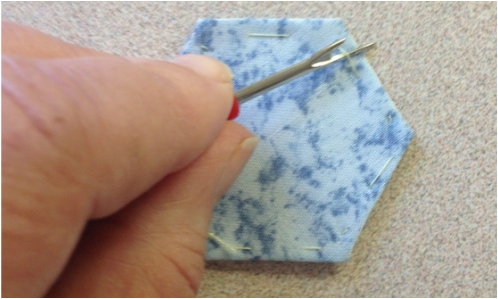 6. Place them wrong sides together with a hair elastic placed between both hexies centred on a flat side 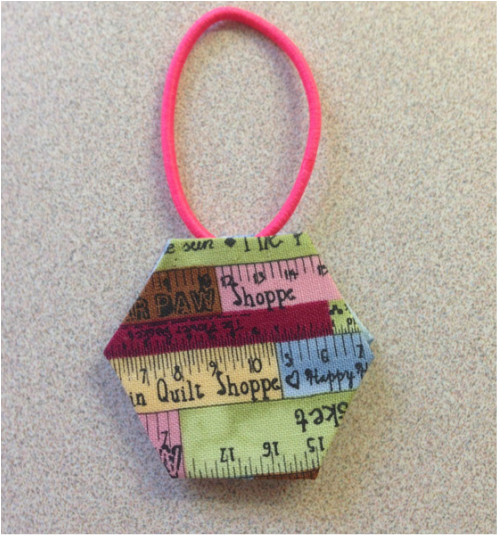 7. Hand slip stitch all around the edges to hold both hexies together and to sandwich the hair elastic in between both hexies.  8. Once all slip stitching is done, place your 1/4” foot on your sewing machine and sew 1/8" all around the hexi, starting before the elastic and ending after the elastic so that you have top stitched all the way around and gone over the elastic twice. 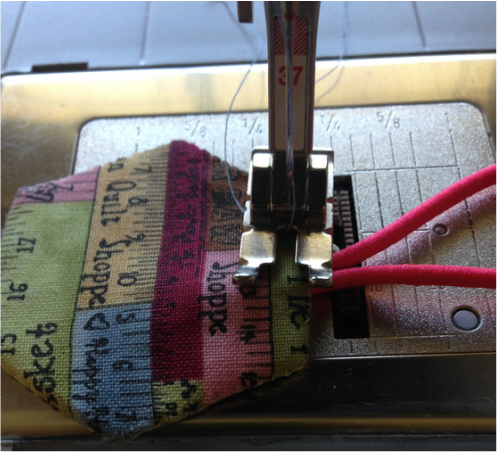 9. Use a thin crochet hook to pull the elastic through the hole in the zipper tab and loop it in place on the zipper tab. 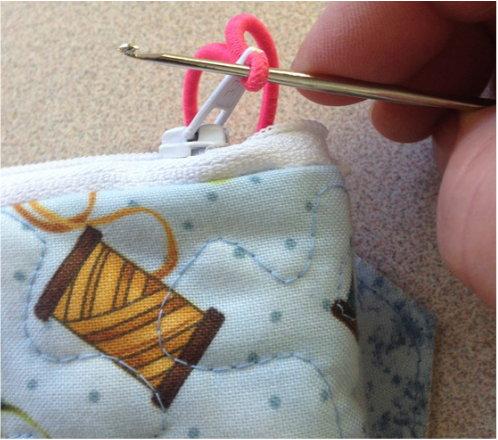 10. Admire your efforts! 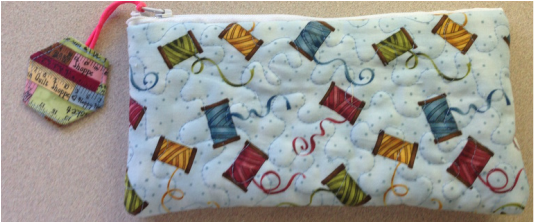 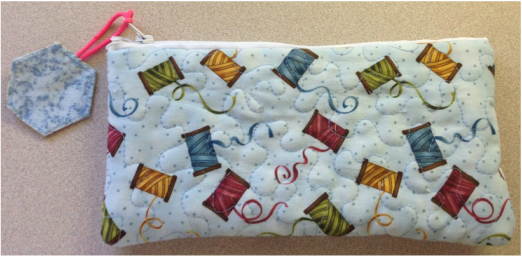 A reversible zipper pull made in minutes! Can you just imagine the other EPP shapes you could do this with? The possibilities are endless!
Note: This is part 1- there are 2 more easy DIY zipper pulls, come back and visit this blog the next 2 tuesdays. I'm having fun with zipper pulls! Have a great Tuesday!❤️☀️ |
Follow Me:
Welcome!Hi I'm Robin and I am a professional long arm quilter, pattern designer and teacher. I am passionate about all things quilty!  
  Categories
All

Sponsors
This blog contains affiliate links. This means that we endorse products.
We do receive rewards for these endorsements and this helps to keep this site alive and well. We support products which we believe are the best quality and to inspire your creativity! |


 RSS Feed